
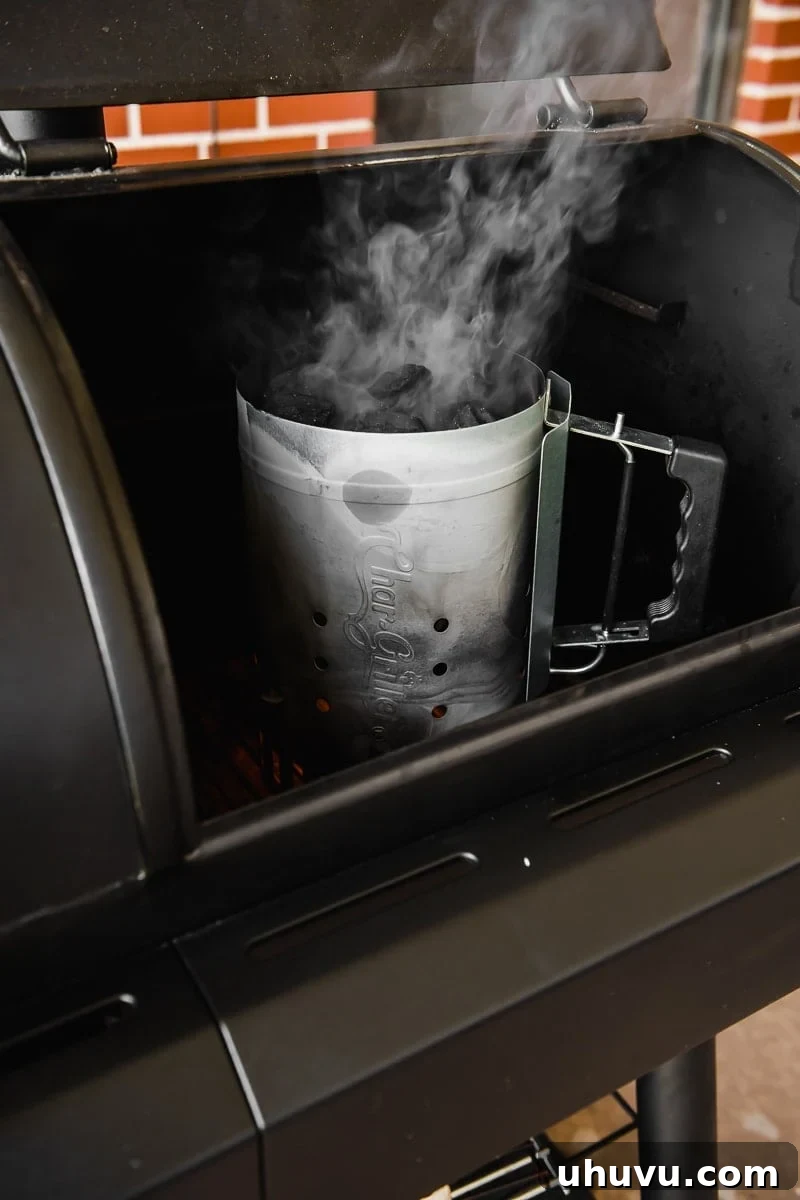
Unlocking the timeless art of charcoal grilling doesn’t have to be intimidating. With this comprehensive, step-by-step guide, you’ll master the process of lighting your charcoal grill effortlessly. Prepare to infuse your favorite foods with that irresistible smoky flavor and elevate your outdoor cooking experience!
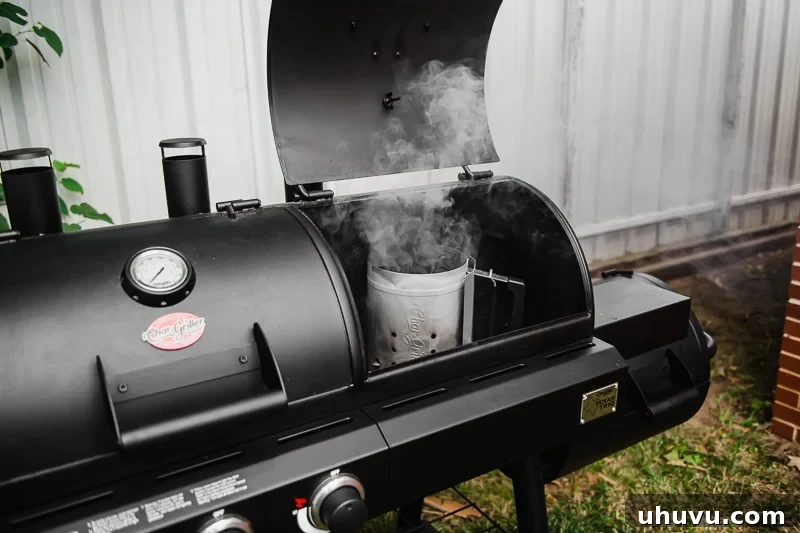
Are you the proud owner of a charcoal grill, but find yourself hesitating when it comes to the ignition process? Perhaps you’ve relied on gas grills in the past or are new to the world of outdoor cooking, and the thought of lighting charcoal seems daunting. You’re not alone! Many aspiring grill masters feel a bit intimidated by charcoal, envisioning messy lighter fluid, uneven heat, or endless waiting. But rest assured, lighting a charcoal grill, especially with the right technique, is remarkably straightforward and incredibly rewarding.
This guide will walk you through my preferred method for igniting charcoal – using a chimney starter. It’s a game-changer that ensures an even burn, eliminates the need for chemical lighter fluid, and gets you to grilling temperatures faster. Say goodbye to the chemical aftertaste and hello to pure, smoky goodness. By following these clear, concise instructions, you’ll have those coals glowing and ready for action in no time!
For a quick visual overview of just how simple this process is, take a moment to watch the video below. It’s a great way to build confidence before you dive into the steps yourself!
Essential Tools for a Perfect Charcoal Grill Start
Before you begin your charcoal grilling adventure, gathering the right tools will make the process smooth, safe, and efficient. While the list might seem extensive, each item plays a crucial role in ensuring a successful cookout. Here’s what you’ll need to get started:
- Chimney Starter: This is arguably the most important tool for charcoal grilling. A chimney starter is a metal cylinder with a grate at the bottom and a handle. It holds charcoal and concentrates heat, allowing for quick, even ignition without lighter fluid. It uses the “chimney effect” to draw air through the coals, fanning the flames naturally.
- Charcoal: Choose between briquettes or lump charcoal. Briquettes (processed charcoal with binders) offer a consistent burn and shape, ideal for beginners or longer cooks. Lump charcoal (natural wood charred into pieces) burns hotter and cleaner but has an irregular shape and varied burn times. Both work well with a chimney starter.
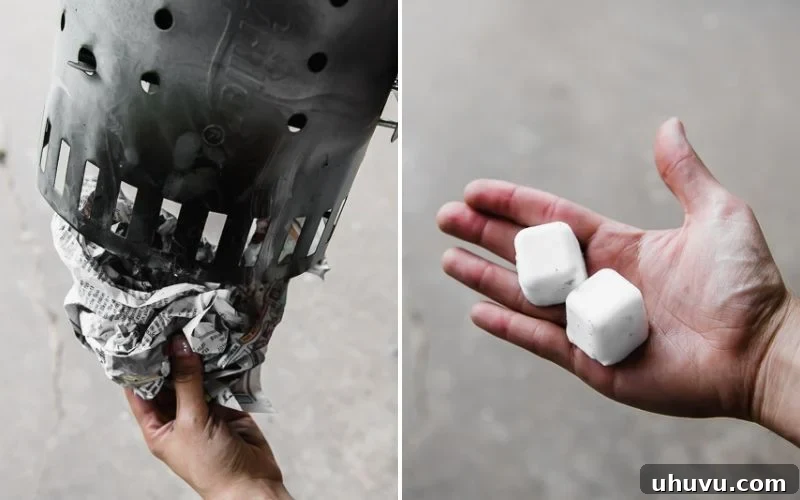
- Fire Starter Material: You’ll need something to ignite underneath the chimney starter. Options include wadded-up newspaper, dedicated fire starter cubes (odorless and clean-burning), or natural fire starters like wood shavings or chemical-free tumbleweeds. Avoid lighter fluid, as it can impart an unpleasant chemical taste to your food.
- Matches or a Stick Lighter: A long stick lighter or grill lighter is highly recommended for safety. It allows you to light your fire starter material from a safe distance, preventing singed fingers.
- Insulated Heat-Resistant Gloves: Essential for safely handling a hot chimney starter and moving glowing coals. Look for gloves that offer good heat protection and decent dexterity.
- Grill Tongs: Long-handled tongs are useful for arranging hot coals and placing food on the grates.
- Grill Brush: To clean your grill grates before and after cooking, ensuring a hygienic surface and preventing food from sticking.
- Ash Tool/Scoop: For safely removing ash from the bottom of your grill once it has completely cooled.
How to Start a Charcoal Grill: The Step-by-Step Guide
With your tools ready, let’s dive into the simple, six-step process that will transform you into a charcoal grilling pro. Follow these instructions carefully for a smooth and successful start every time.
Step 1: Prepare Your Grill for Ignition
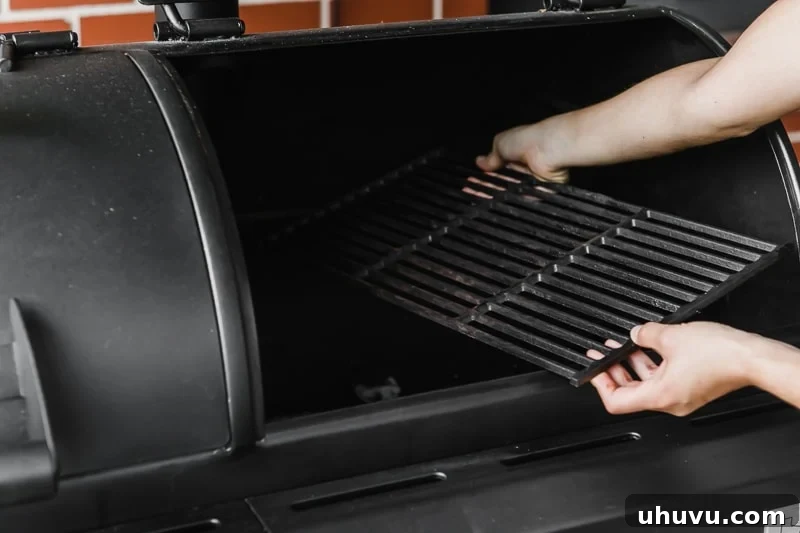
Begin by opening the lid of your charcoal grill and ensuring all vents are fully open. Most charcoal grills have at least two vents: a bottom vent (often a series of holes or a damper below the charcoal grate) and a top vent (located on the lid). Fully opening these vents is crucial, as they supply oxygen to the coals, which is necessary for proper ignition and burning. Think of it like giving your fire room to breathe! Next, carefully remove the cooking grates and set them aside. This provides clear access to the charcoal grate at the bottom of the grill, where your coals will eventually rest.
Step 2: Fill Your Chimney Starter with Charcoal
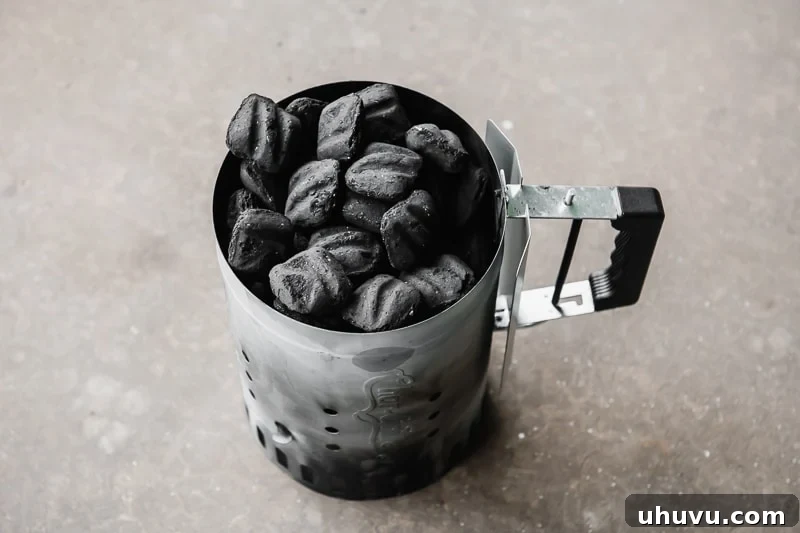
Now, take your chimney starter and fill it with your chosen charcoal. The amount of charcoal you use will depend on what you’re cooking and how hot you need your grill to be. For general grilling like burgers, steaks, or chicken pieces, filling the chimney to the brim is usually sufficient. For lower heat or shorter cooks, you might fill it two-thirds or halfway. Avoid packing the charcoal too tightly, as some airflow through the coals themselves is still beneficial. The chimney’s design naturally promotes efficient lighting, so trust the process!
Step 3: Prepare the Ignition Base
Place your chosen fire starter material – whether it’s wadded-up newspaper or one or two fire starter cubes – directly onto the charcoal grate at the bottom of your grill. Center it neatly. This material will be the initial flame source to ignite the charcoal in the chimney starter. Once the starter material is in place, carefully position the chimney starter directly on top of it. Ensure the newspaper or fire starter cubes are directly underneath the holes at the bottom of the chimney starter for optimal contact with the charcoal.
Step 4: Ignite and Let the Coals Heat Up
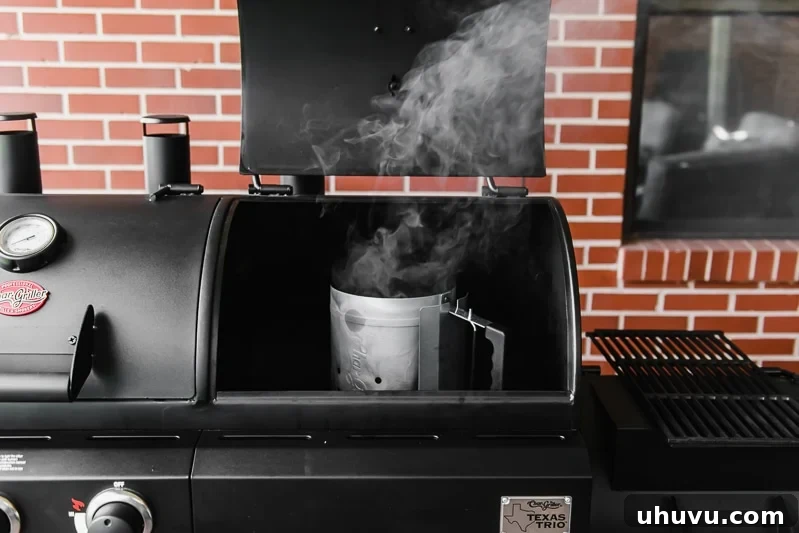
Using your long stick lighter or matches, carefully light the newspaper or fire starter cubes underneath the chimney starter. Light it in a couple of spots to encourage an even burn. You’ll soon see smoke begin to rise from the top of the chimney, followed by small flames as the lower coals catch fire. Allow the briquettes to heat up for approximately 12-15 minutes. During this crucial period, keep the grill lid open to provide ample airflow, which fuels the fire and prevents it from suffocating. You’ll know they’re ready when the top layer of charcoal is mostly covered with a light gray ash, and you might even see some orange glow through the vents of the chimney starter.
Step 5: Safely Transfer the Glowing Coals
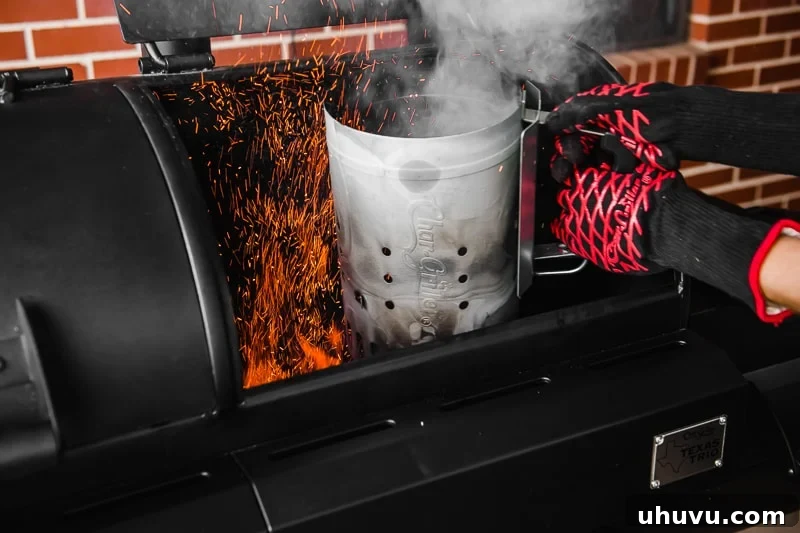
Once the charcoal is lightly covered with ash and glowing orange, it’s time for the transfer. This step requires caution and the proper safety equipment. Don your insulated, heat-resistant gloves. Grasp the handle of the chimney starter firmly. Many chimney starters have a secondary handle or latch on the side – use this to tilt and control the pour. Carefully and steadily press the latch (if applicable) or simply tilt the chimney starter to dump the hot, ash-covered coals directly onto the charcoal grate inside your grill. Avoid creating a large ash cloud, and try to keep the coals concentrated in the desired area.
Step 6: Arrange Coals and Preheat Your Grill
With the hot coals in your grill, it’s time to set up your cooking zones. For **direct heat grilling** (ideal for searing, burgers, hot dogs, and thinner cuts that cook quickly), use long-handled tongs to spread the hot coals into an even, single layer across the entire charcoal grate. For **indirect heat grilling** (perfect for larger roasts, delicate fish, or anything requiring slower cooking), push all the coals to one side of the grill, leaving the other side empty. This creates two distinct temperature zones. Carefully place the cooking grates back onto the grill. Close the lid and allow the entire grill to preheat to your desired temperature, typically 5-10 minutes. Use the top and bottom vents to regulate temperature – more open vents mean more oxygen and hotter temperatures, while closing them reduces airflow and heat.
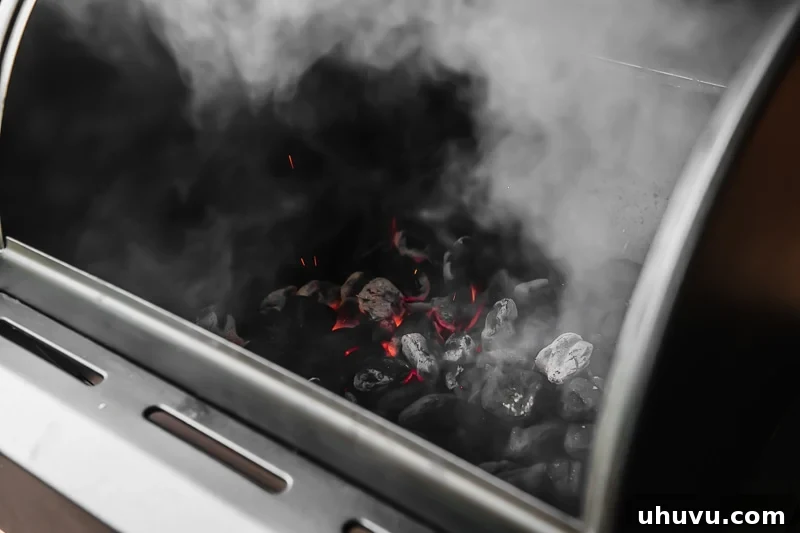
That’s it! You’ve successfully started your charcoal grill using the chimney starter method. It’s truly a super easy and efficient way to get your coals glowing. Now, all that’s left is the fun part – getting cooking and enjoying that incredible charcoal-grilled flavor!
Why Choose Charcoal Grilling? The Unbeatable Flavor
While gas grills offer convenience, charcoal grilling delivers a unique experience and an unparalleled flavor profile that many outdoor cooking enthusiasts swear by. The primary reason is the smoky essence that charcoal imparts to your food. As fats and juices drip onto the hot coals, they vaporize into flavorful smoke, which then infuses into your food. This process, known as the “Maillard reaction” combined with smoke penetration, creates a depth of flavor that is simply unmatched by gas. Charcoal also provides a more intense, radiant heat, perfect for achieving that desirable crispy crust and beautiful sear on meats.
Charcoal Grilling: Safety First!
While charcoal grilling is enjoyable, safety should always be your top priority. Here are some essential tips to keep in mind:
- Never Grill Indoors: Charcoal produces carbon monoxide, an odorless, colorless gas that can be fatal. Always grill in a well-ventilated outdoor area.
- Keep a Fire Extinguisher or Water Nearby: Have a bucket of sand, a garden hose, or a fire extinguisher accessible in case of flare-ups or accidental fires.
- Avoid Lighter Fluid: As demonstrated, a chimney starter eliminates the need for lighter fluid. If you must use it (though it’s not recommended), never add it to already burning coals, as this can cause dangerous flare-ups.
- Dispose of Coals Safely: Allow coals to cool completely (this can take up to 48 hours) before disposing of them in a metal container, not plastic, and away from combustible materials. Dousing with water can speed up cooling but creates a lot of ash.
- Keep Children and Pets Away: Ensure a safe perimeter around the grill, as hot surfaces and open flames can cause serious burns.
- Mind the Wind: On windy days, position your grill to minimize embers blowing around.
Troubleshooting Common Charcoal Grill Issues
Even with the best preparation, you might encounter minor hiccups. Here are quick fixes for common problems:
- Coals Won’t Light or Stay Lit:
- Check Airflow: Ensure all vents are fully open. Restricted airflow is the most common cause.
- More Starter Material: You might need more newspaper or fire starter cubes.
- Dry Charcoal: Ensure your charcoal hasn’t gotten damp, which makes it harder to light.
- Grill Temperature is Too High/Low:
- Adjust Vents: This is your primary temperature control. Opening vents increases oxygen and heat; closing them reduces heat.
- Add/Remove Coals: For more heat, add more pre-lit coals. For less, spread them out more or remove some (safely).
- Excessive Flare-Ups:
- Trim Fat: Excessive fat dripping onto coals is the main cause.
- Move Food: Temporarily move food away from the direct flames to the indirect heat zone.
- Close Lid: Briefly closing the lid can starve the flames of oxygen, but don’t leave it closed too long as it will extinguish the coals.
Maintaining Your Charcoal Grill for Longevity
Proper maintenance ensures your charcoal grill remains a reliable cooking companion for years to come. After each use, once the grill has completely cooled:
- Clean Grill Grates: Use a sturdy grill brush to remove any stuck-on food residue. A clean grate prevents food from sticking and ensures even cooking.
- Empty Ash: Regularly empty the ash catcher or the bottom of the grill. Excessive ash can restrict airflow and hinder future cooks. Ensure ashes are cold before disposal.
- Wipe Down Exterior: Periodically wipe the exterior of your grill with a damp cloth to remove grease and dirt, preventing rust and keeping it looking good.
- Cover Your Grill: Invest in a good quality grill cover to protect it from the elements when not in use. This extends its lifespan and keeps it clean.
Grilling Recipes You’ll Love
Now that you’re a master of starting your charcoal grill, it’s time to put your skills to the test with some mouth-watering recipes. Here are some fantastic options to get you started:
- Grilled Skirt Steak with Cilantro Pesto: A flavorful and tender steak, perfectly complemented by a vibrant, fresh pesto.
- Grilled Pork Tenderloin with Easy Herb Sauce: Juicy pork tenderloin with an aromatic herb sauce – a fantastic meal for any occasion.
- Grilled Shrimp Tacos: Light, fresh, and packed with flavor, these shrimp tacos are a crowd-pleaser.
- Grilled Garlic Parmesan Wings: Crispy, savory, and utterly delicious – a perfect appetizer or main dish.
- Grilled Corn Salsa: Smoky grilled corn transformed into a fresh and zesty salsa.
- Easy Mexican Street Corn (Elotes): A classic street food that’s creamy, spicy, and irresistible.
- Grilled Romaine Salad with Jalapeno Ranch: A surprisingly delicious and refreshing salad with a smoky twist.
- Carne Asada: The quintessential grilled steak for tacos, burritos, or just enjoying on its own.
- Grilled Garlic Herb Shrimp Skewers: Quick-cooking and bursting with garlic and herb flavors.
- Juicy Chicken Kabobs: Perfectly grilled chicken and veggies on a skewer, tender and flavorful.