
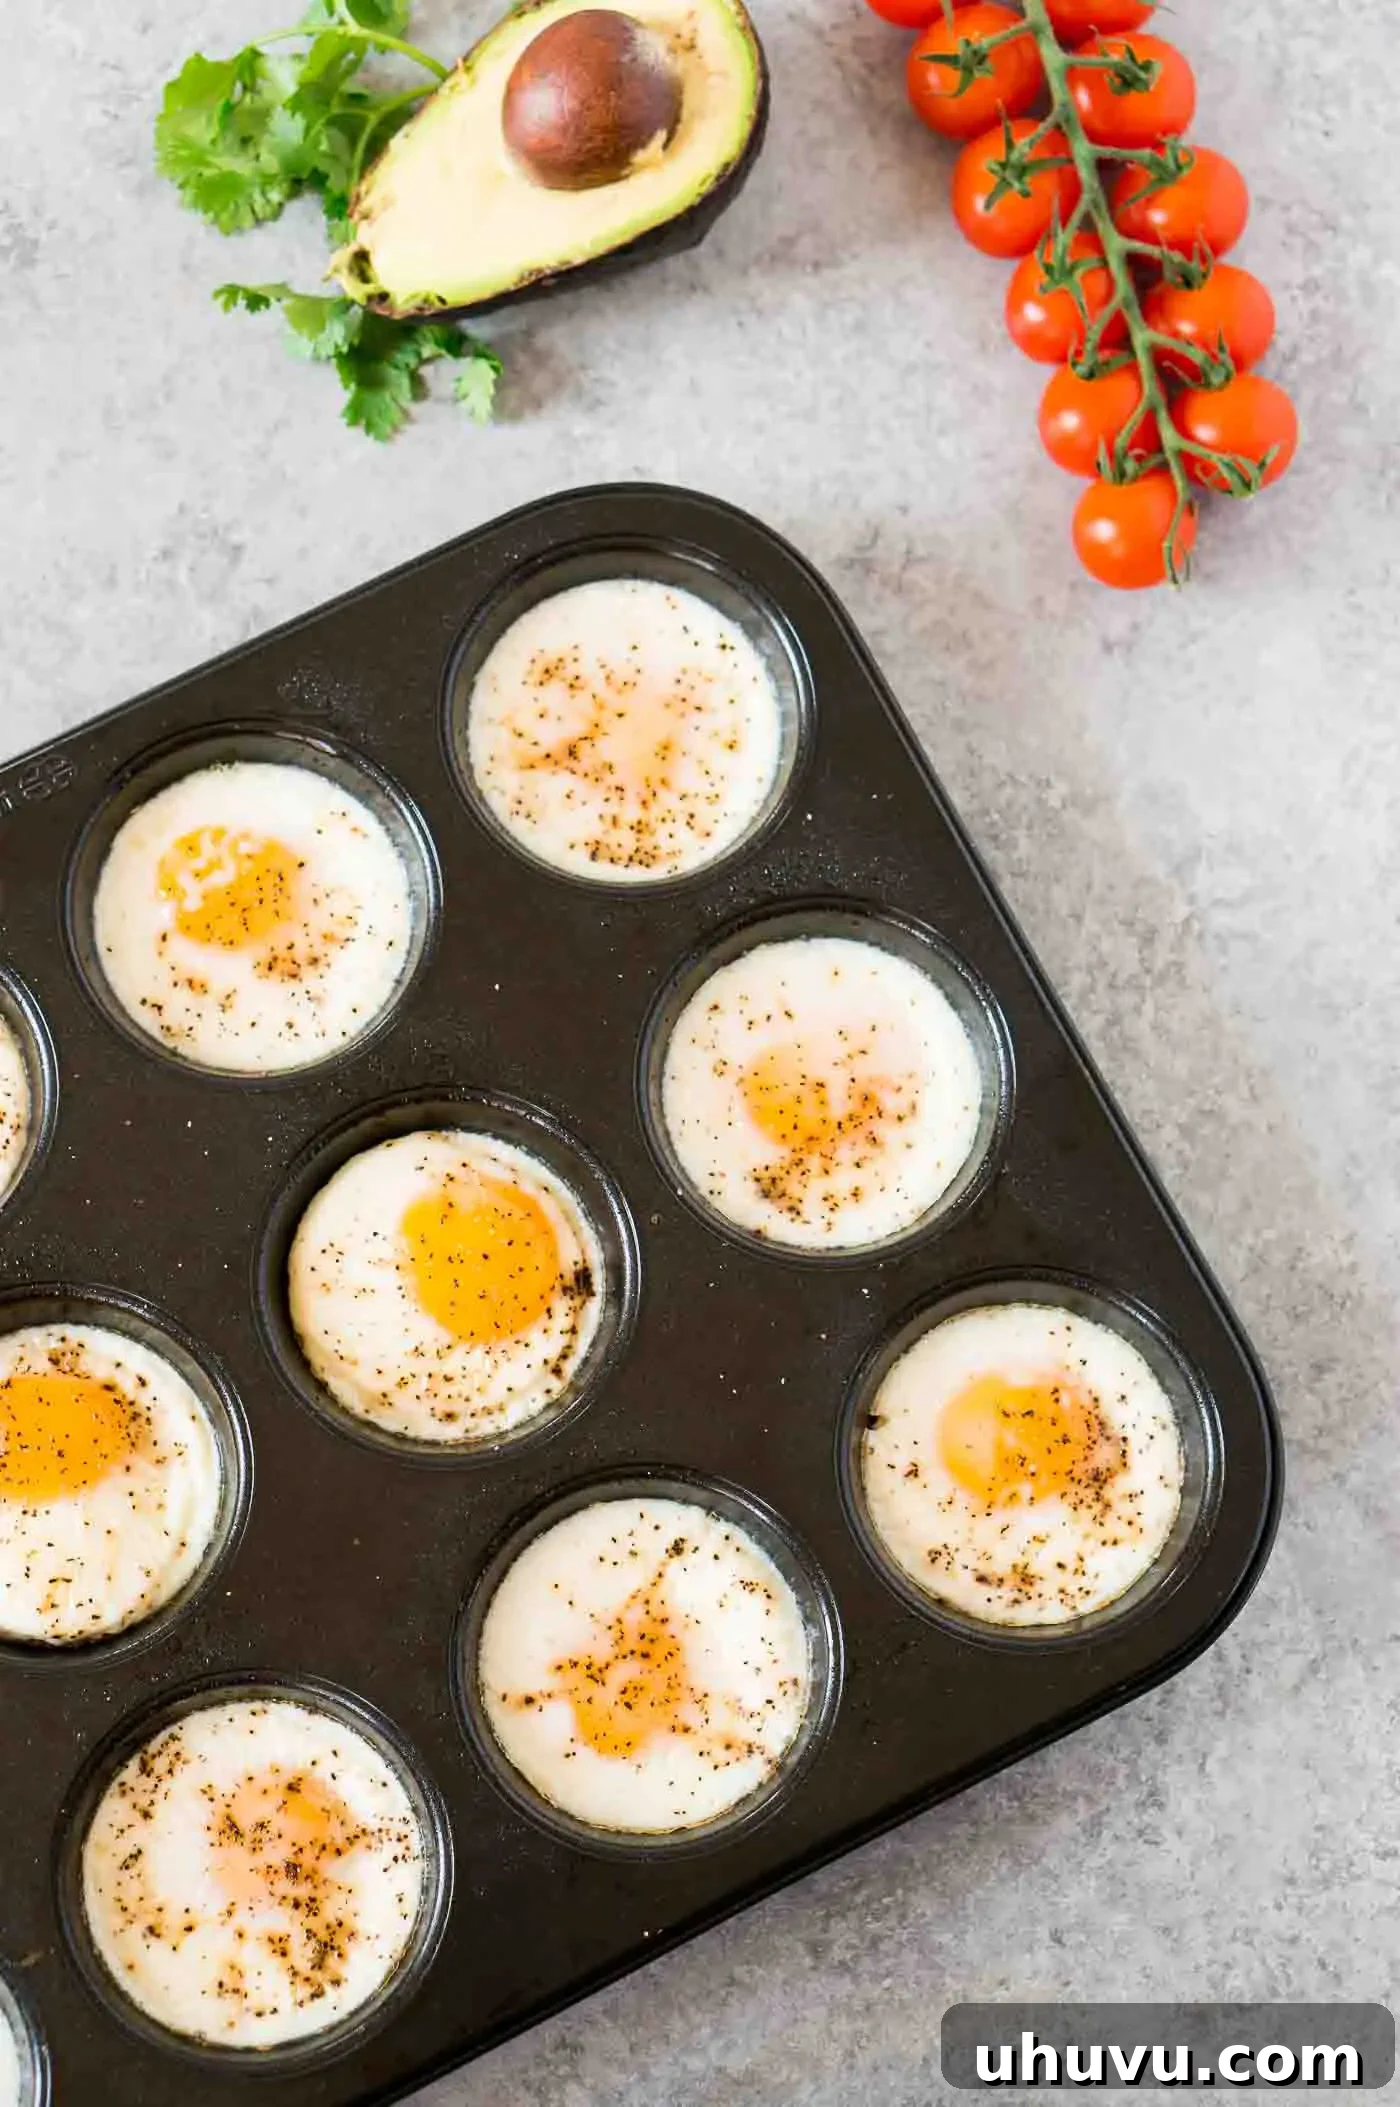
Start your day effortlessly with these incredible make-ahead baked eggs, truly a game-changer for your breakfast meal prep routine. Requiring just a few simple ingredients, these oven-baked egg cups are incredibly easy to prepare and pack a healthy, high-protein punch. Whether you’re planning a busy weekday breakfast or a leisurely weekend brunch, these versatile egg creations are perfect to serve alongside crispy hashbrowns, fresh fruits, or creamy avocado slices. Say goodbye to rushed mornings and hello to delicious, nutritious convenience!
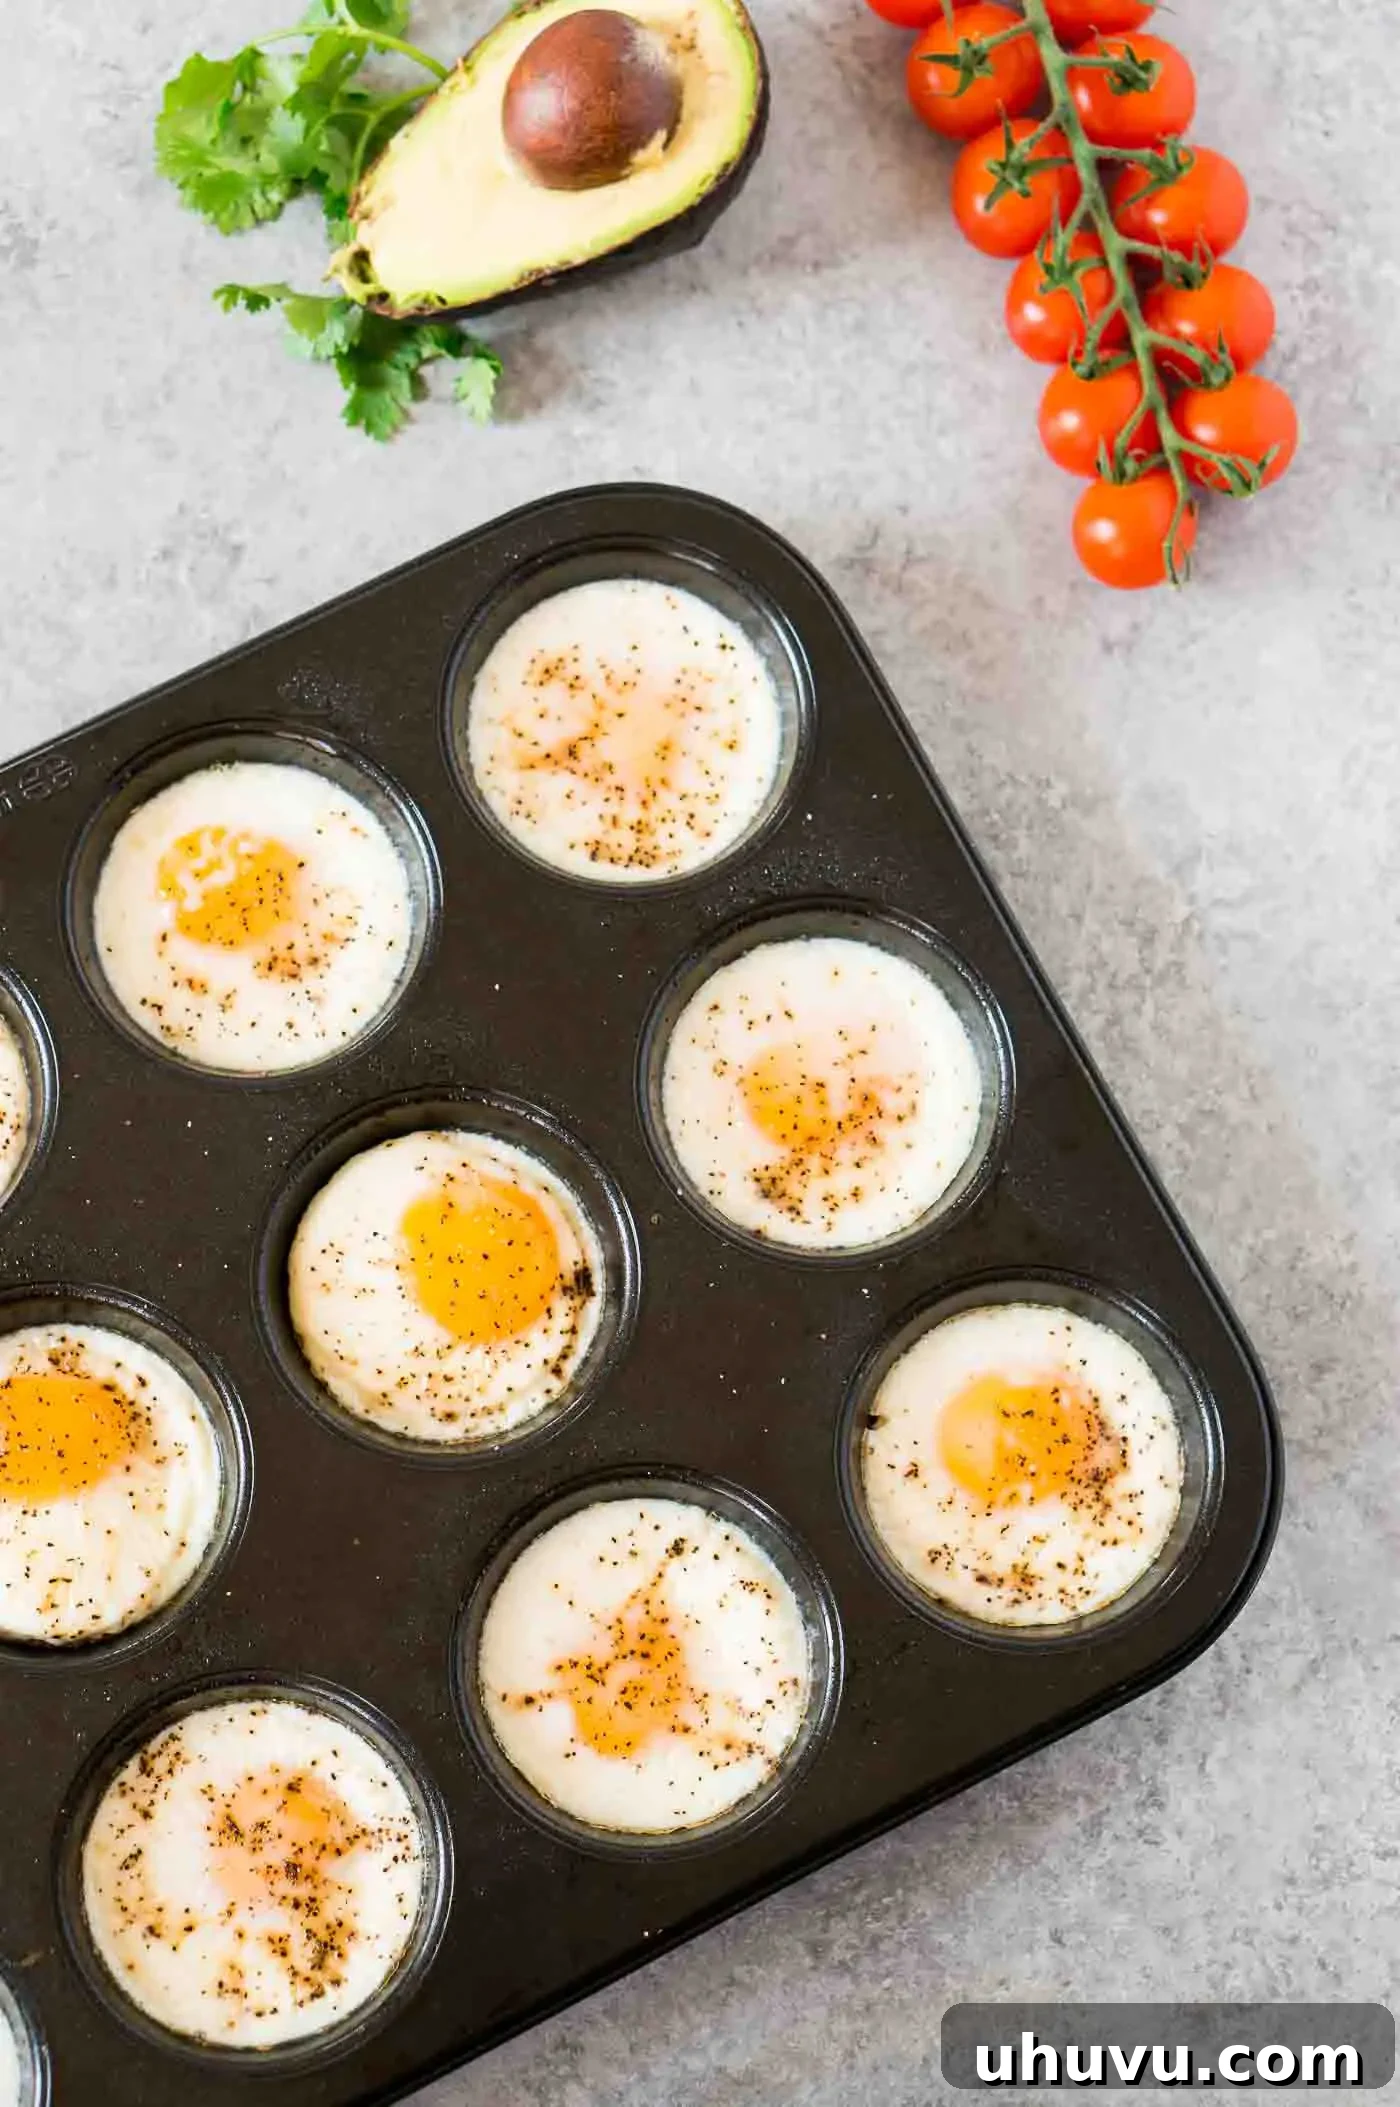
Saving time in the morning is invaluable, and having a ready-to-go breakfast allows for a smoother, less stressful start to the day. That’s precisely why I always keep a batch of these easy baked eggs on hand. They transform breakfast into a breeze, allowing me to grab a wholesome meal quickly and get straight to my daily tasks without compromising on nutrition or flavor.
Imagine the convenience of dedicating a small amount of time on Sunday to prepare these delicious egg cups, then enjoying them for the rest of the week. It’s a simple yet effective strategy for maintaining a healthy and nutritious diet, ensuring you kickstart each day with a satisfying and energy-boosting meal. These make-ahead wonders are not just convenient; they are a smart choice for anyone looking to eat better and save precious morning minutes.
If you’re looking for more fantastic breakfast meal prep ideas to simplify your mornings, be sure to explore some of my other favorite recipes. You’ll love my Easy Breakfast Egg Muffins, the versatile Make Ahead Breakfast Sandwich, and the comforting Sweet Potato Sausage and Egg Casserole. Each recipe is designed to bring ease and flavor to your breakfast routine!
Why You Will Absolutely Love This Baked Eggs Recipe
This baked eggs recipe is more than just a simple breakfast; it’s a culinary hack that delivers on convenience, flavor, and nutrition. Here’s why these muffin tin eggs will become a staple in your kitchen:
-
Effortlessly Simple to Make: Forget complicated steps or lengthy preparations. This recipe is designed for maximum ease. All you need to do is grease your muffin tin, crack an egg into each cup, season them to perfection, and pop them into the oven. It’s a truly fuss-free method, making it an ideal choice for meal prepping a delicious, wholesome breakfast that can last you the entire week. Minimal effort, maximum reward!
-
Perfect for Feeding a Crowd: Planning a weekend brunch or hosting guests? These muffin tin eggs are your secret weapon. With very little effort, you can prepare 12 servings (or more, if you use multiple pans!), making them an excellent option for entertaining. There’s no individual frying or scrambling, and best of all, absolutely no tedious egg peeling involved, unlike hard-boiled eggs. Serve a delightful and impressive breakfast without breaking a sweat.
-
A Healthy and High-Protein Start: Fuel your body right with these nutritious egg cups. Eggs are a powerhouse of protein, essential vitamins, and minerals, making these baked eggs an incredibly healthy way to begin your day. They keep you feeling full and energized, helping to prevent mid-morning cravings and support your overall well-being. It’s a smart, satisfying, and delicious choice for a balanced lifestyle.
-
Incredibly Versatile for Customization: While delicious on their own, these baked eggs are a blank canvas for your favorite additions. Easily incorporate cheese, cooked vegetables, or even a sprinkle of crumbled bacon before baking for endless flavor combinations. This adaptability ensures your breakfast never gets boring and always suits your current cravings.
-
Economical and Waste-Reducing: Eggs are a relatively inexpensive source of protein, making this recipe budget-friendly. Plus, by preparing a batch, you’re less likely to buy expensive, less healthy breakfast options on the go, further saving money and reducing food waste.
Essential Ingredients for Perfect Baked Eggs
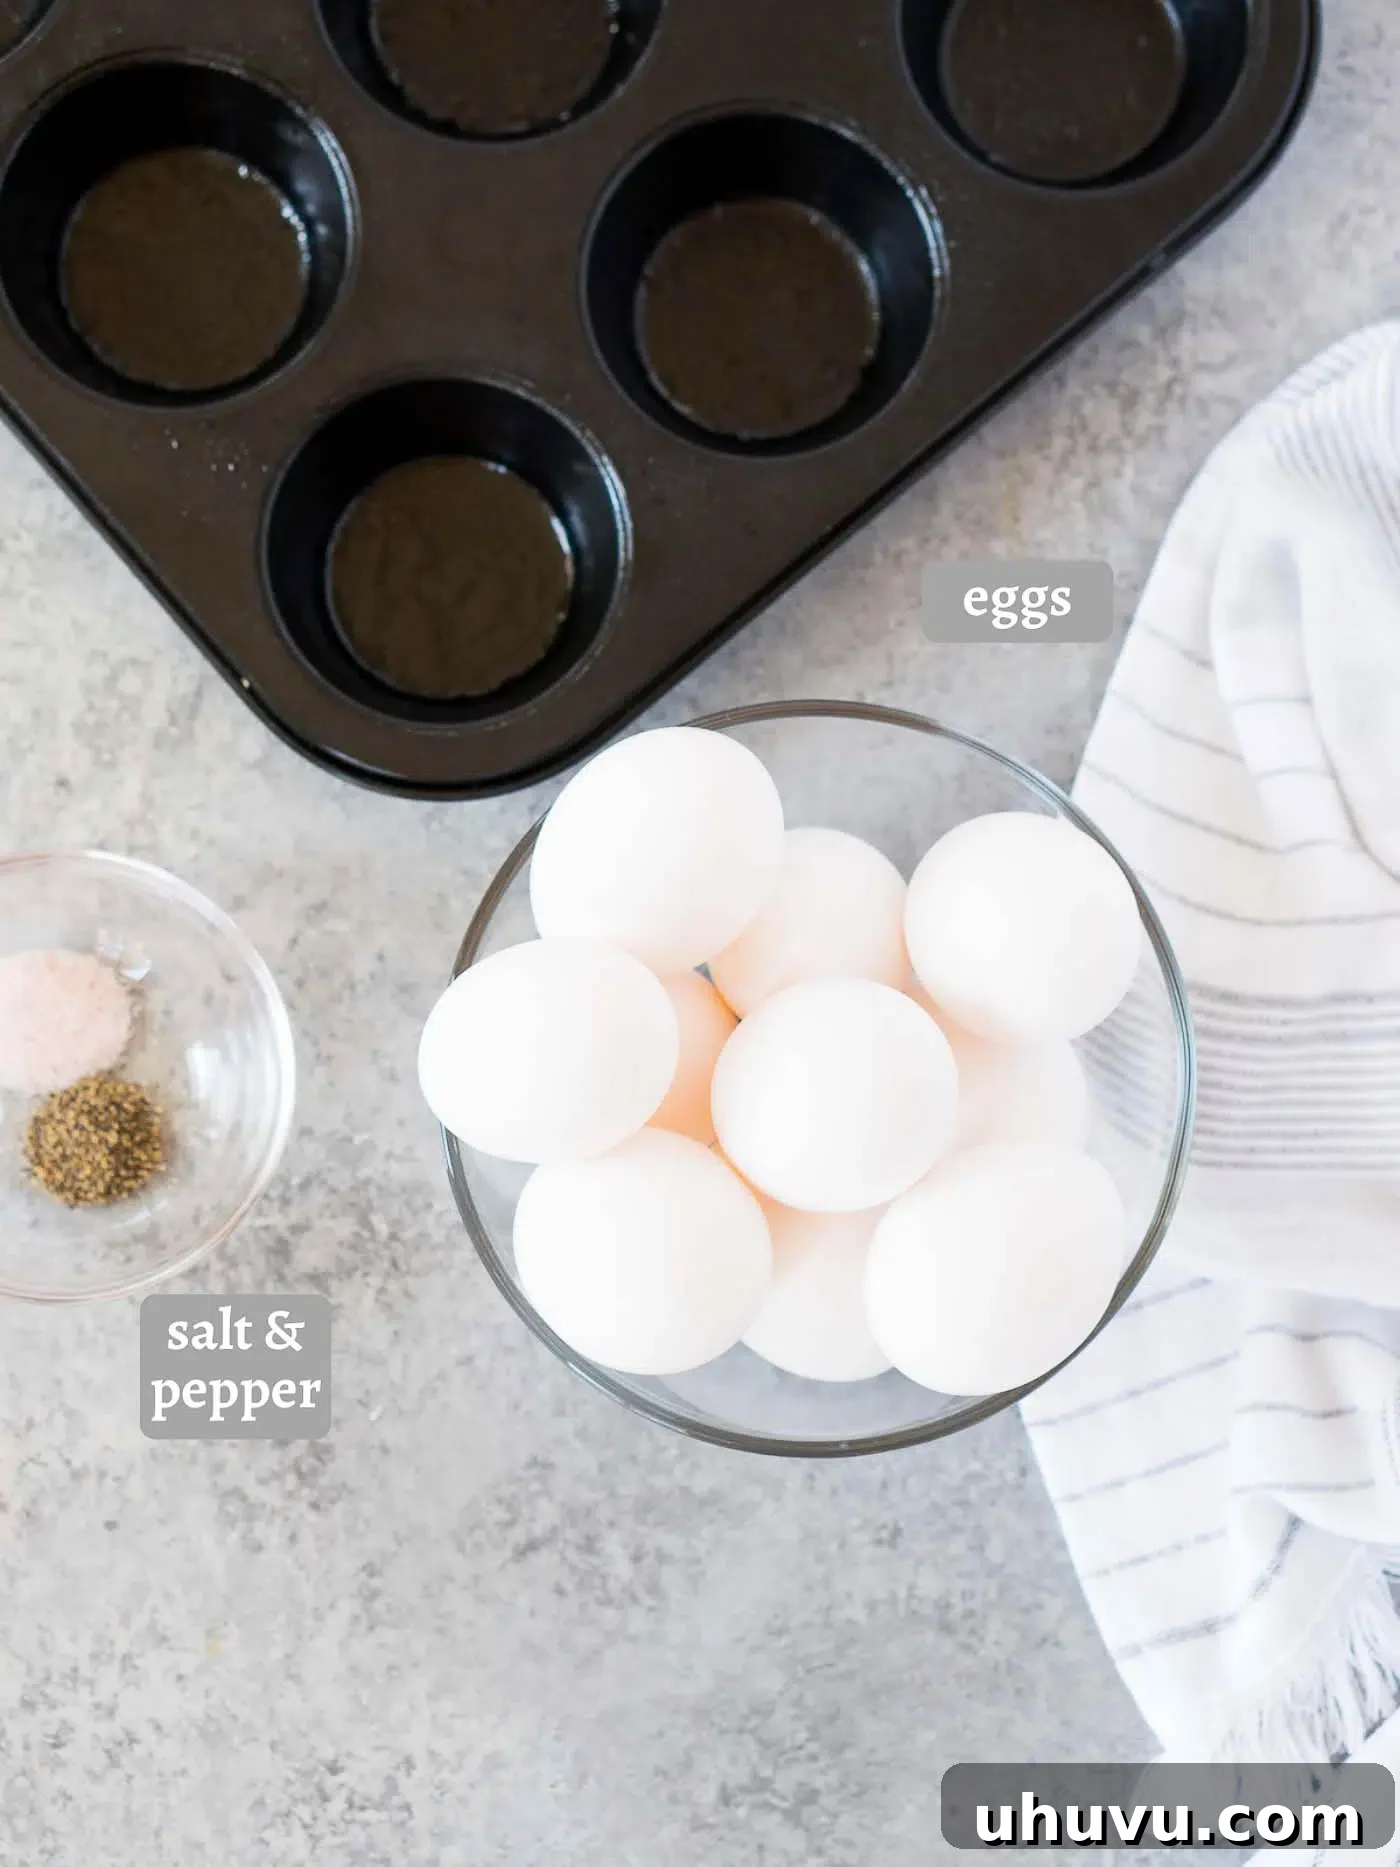
You’ll be amazed at how few ingredients are required to create such a delicious and satisfying breakfast. This recipe focuses on simplicity and quality to let the natural flavors shine.
-
Coconut Oil or Butter: This is crucial for greasing your muffin tin. A thin layer prevents the eggs from sticking, ensuring they pop out easily and perfectly intact. You can use either coconut oil for a subtle flavor or butter for a richer taste. Alternatively, consider using silicone muffin cups; they eliminate the need for greasing entirely and make removal even simpler.
-
Eggs: The star of our show! For the best flavor and nutritional value, I highly recommend using the freshest eggs you can find. Free-range or organic eggs often have richer yolks and superior taste, making a noticeable difference in the final product.
-
Salt and Pepper: These are your basic seasonings to enhance the natural flavor of the eggs. Don’t be shy with a good pinch of sea salt and freshly ground black pepper. These simple additions elevate the taste significantly.
-
Optional Garnishes: To add a touch of freshness and extra flavor just before serving, consider garnishing your baked eggs. Finely chopped fresh chives offer a delicate oniony note, while sliced green onions provide a slightly stronger, crisp taste. Other fresh herbs like parsley or dill can also add a wonderful aromatic touch. These garnishes are not just for taste but also add beautiful color to your plate.
-
Optional Add-ins for Flavor (Highly Recommended!): Don’t limit yourself to just salt and pepper! Enhance your baked eggs with a variety of delicious additions. Consider a sprinkle of shredded cheese (cheddar, mozzarella, feta), a pinch of red chili flakes for a kick, a dash of paprika for warmth, or a mix of Italian seasoning for an aromatic twist. Pre-cooked vegetables like spinach, diced bell peppers, or sautéed mushrooms, and even cooked crumbled bacon or sausage, can be added to the muffin cups before baking for a more substantial and flavorful egg cup.
Step-by-Step Guide: How to Make Perfect Oven-Baked Eggs
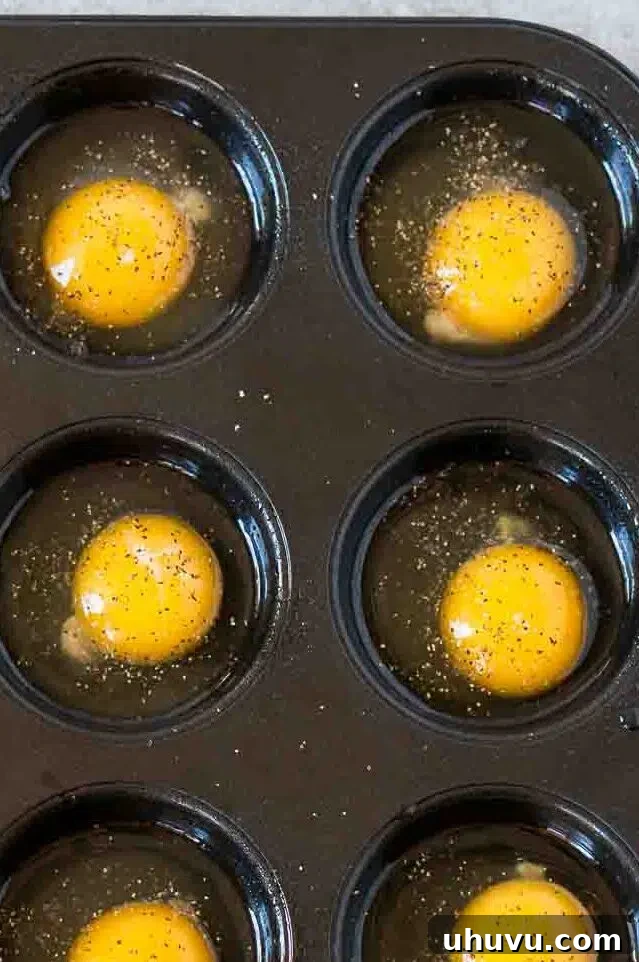
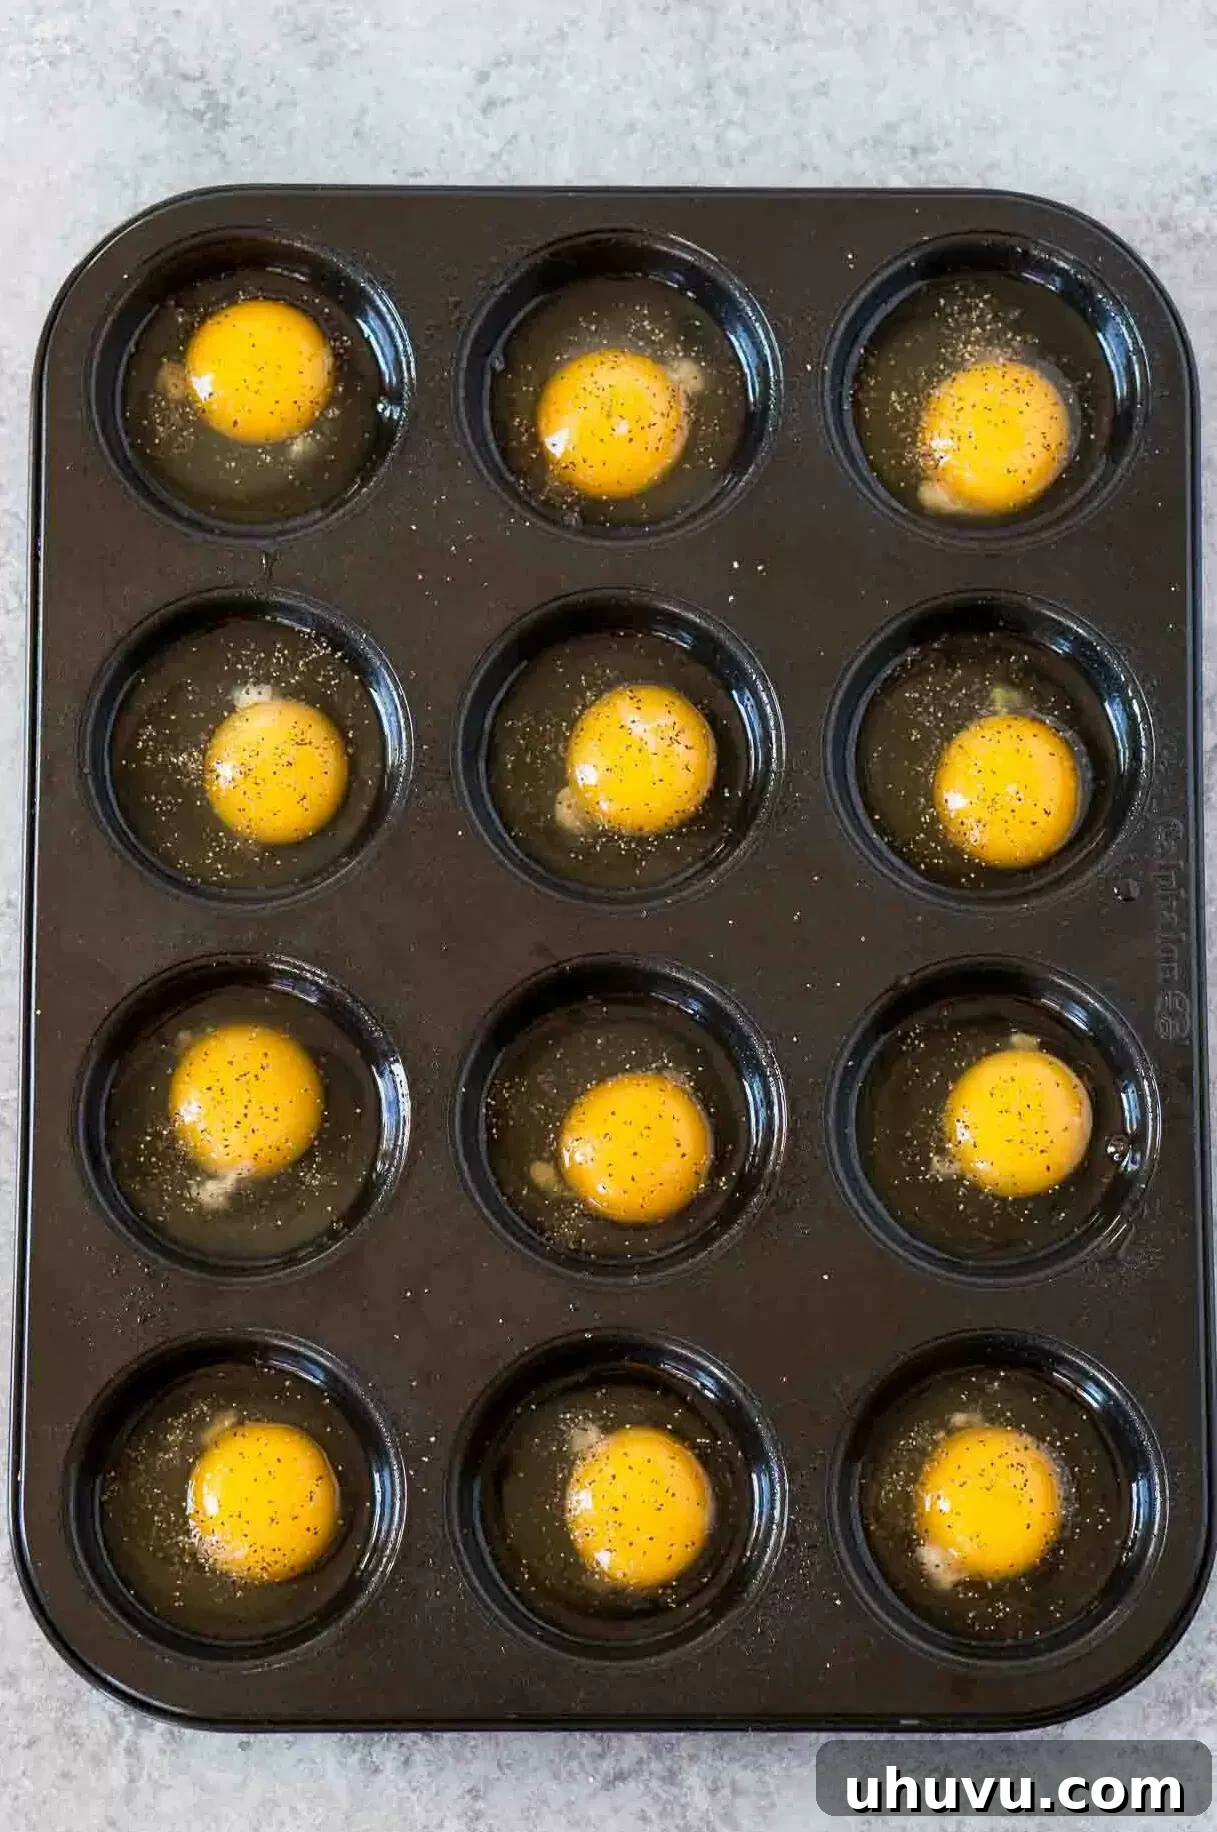
Step 1: Prepare Your Muffin Pan. Begin by preheating your oven to a precise 375°F (190°C). This ensures the oven is at the correct temperature for even cooking. While the oven heats up, generously grease the sides and bottoms of each cup in your muffin pan with either coconut oil or butter. This step is crucial to prevent the eggs from sticking and to ensure easy removal once baked. As an alternative, you can use silicone muffin cups or individual ramekins, which often require less greasing due to their non-stick properties. Once greased, carefully crack one egg into each muffin cup. Ensure the yolks remain intact for a perfect presentation.
Next, season each egg liberally with salt and freshly ground black pepper. This basic seasoning is key to enhancing the natural flavor of the eggs. If you’re experimenting with additions like shredded cheese, cooked veggies, or a sprinkle of herbs, now is the time to add them to each cup, ensuring they are evenly distributed over the egg.
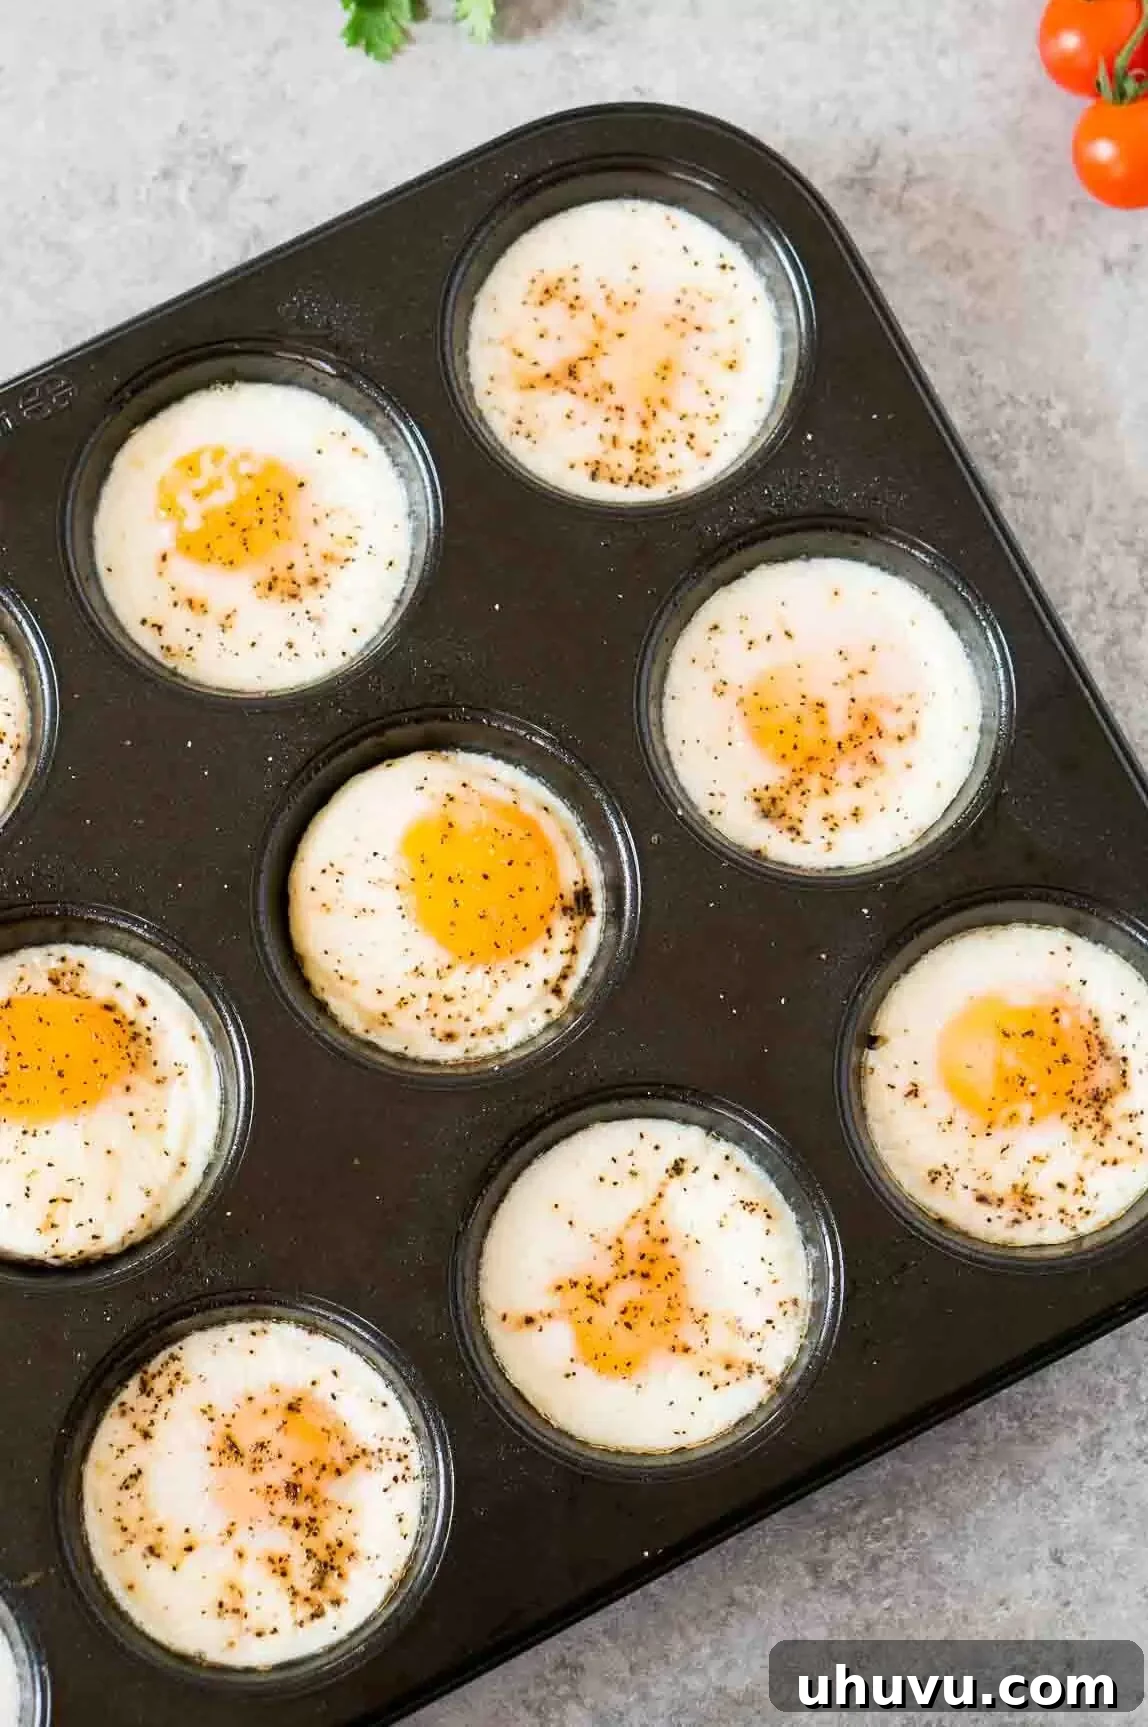
Step 2: Bake Until Perfectly Set. Carefully place the prepared muffin tin into your preheated oven. Bake for approximately 10 to 12 minutes. The exact baking time may vary slightly depending on your oven and your preferred egg yolk consistency. For a runny yolk, aim for the shorter end of the cooking time (around 10 minutes), ensuring the whites are fully set. If you prefer a firmer, more set yolk, cook for the full 12 minutes or a minute or two longer. Keep a close eye on them towards the end of the baking process to achieve your desired doneness.
The eggs are considered “set” when the whites are opaque and firm to the touch, and the yolks have reached your desired consistency. Avoid overbaking, as this can lead to rubbery eggs. The beauty of baking eggs is the even heat distribution, resulting in beautifully cooked individual portions.
Step 3: Easy Removal from the Pan. Once the eggs are baked to your liking, carefully remove the muffin tin from the oven. Allow them to cool for a minute or two within the pan. While still warm, take a thin butter knife or a small spatula and gently run it along the sides of each baked egg. This action helps to loosen any edges that might have stuck to the pan, making them incredibly easy to remove without tearing or breaking. If you used silicone cups, you can often just pop them out with a gentle push from the bottom.
Ensuring the pan was properly greased in Step 1 will make this removal process a breeze. You’ll find the eggs slide out smoothly, ready for serving or storing. This easy release is one of the many advantages of using a muffin tin for baking eggs.
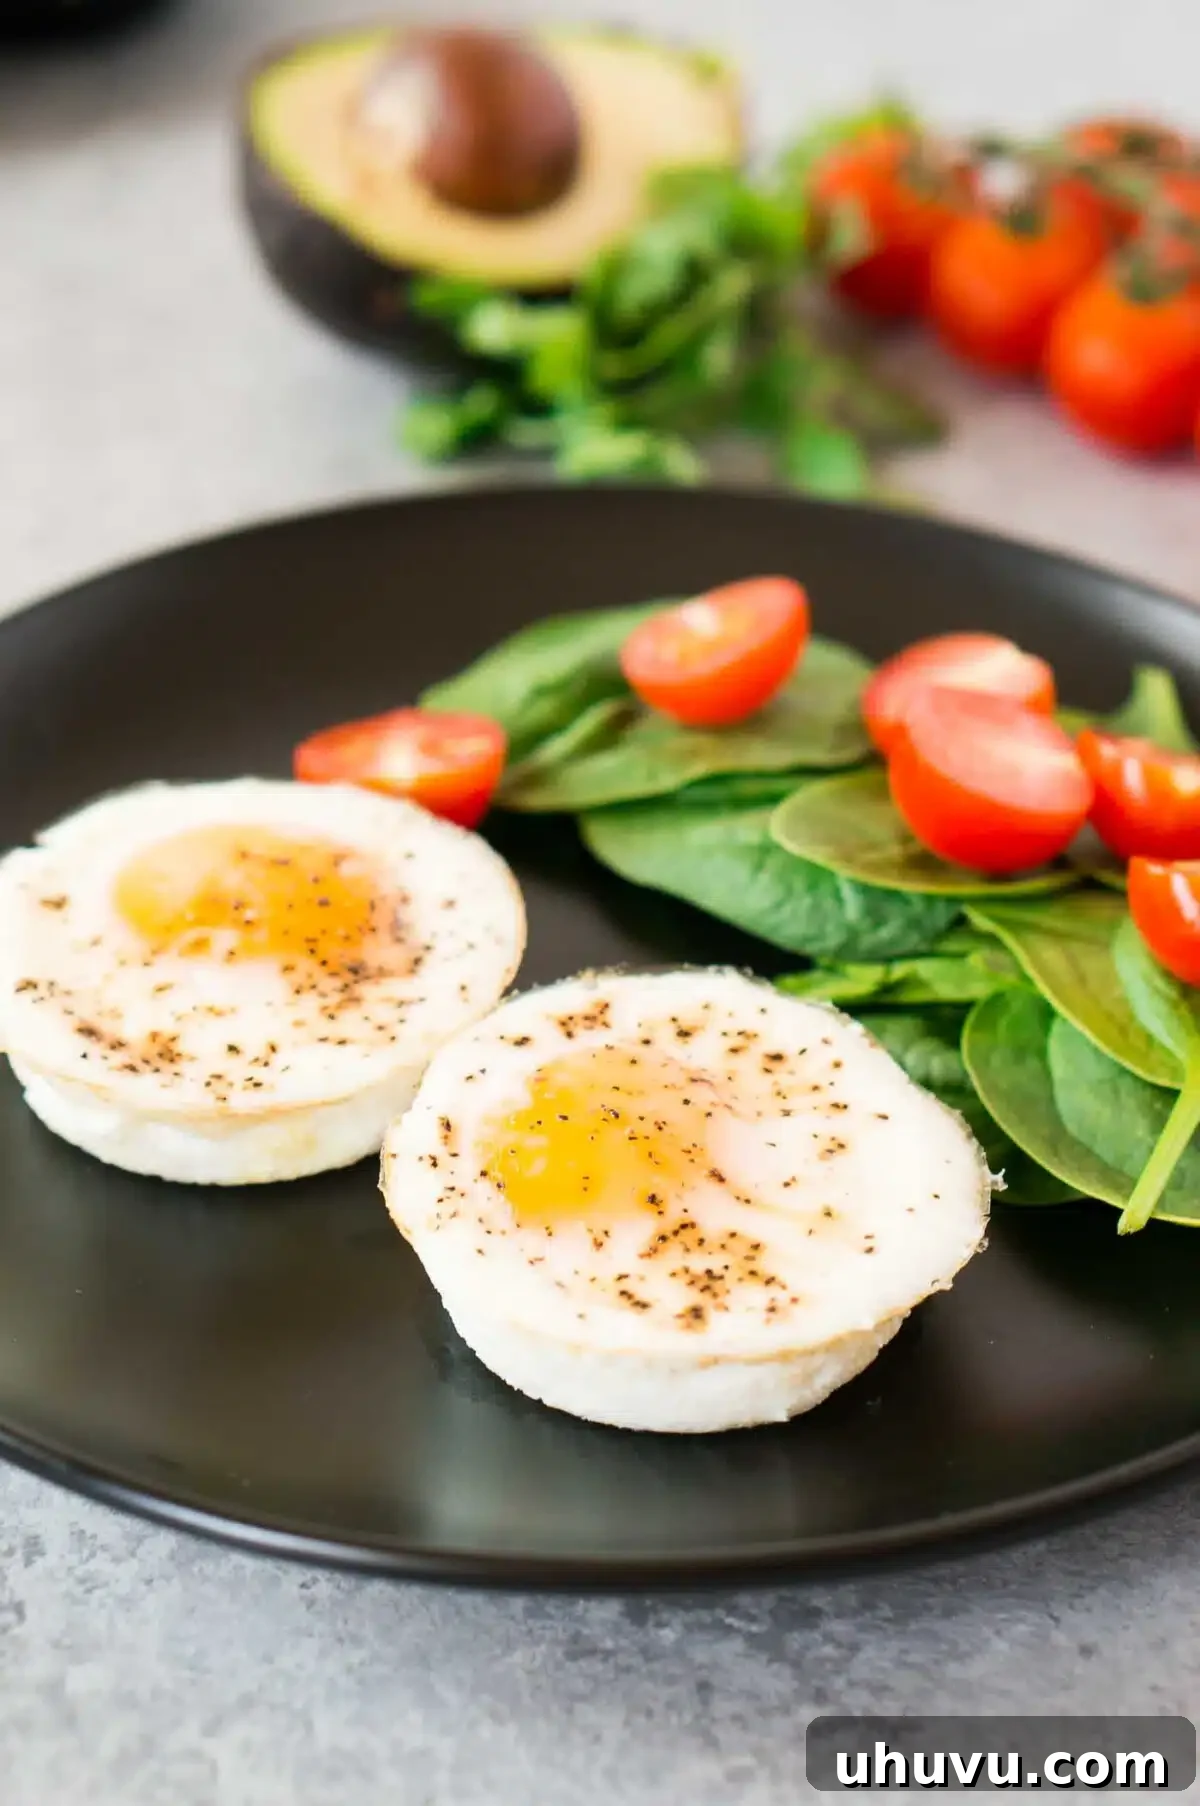
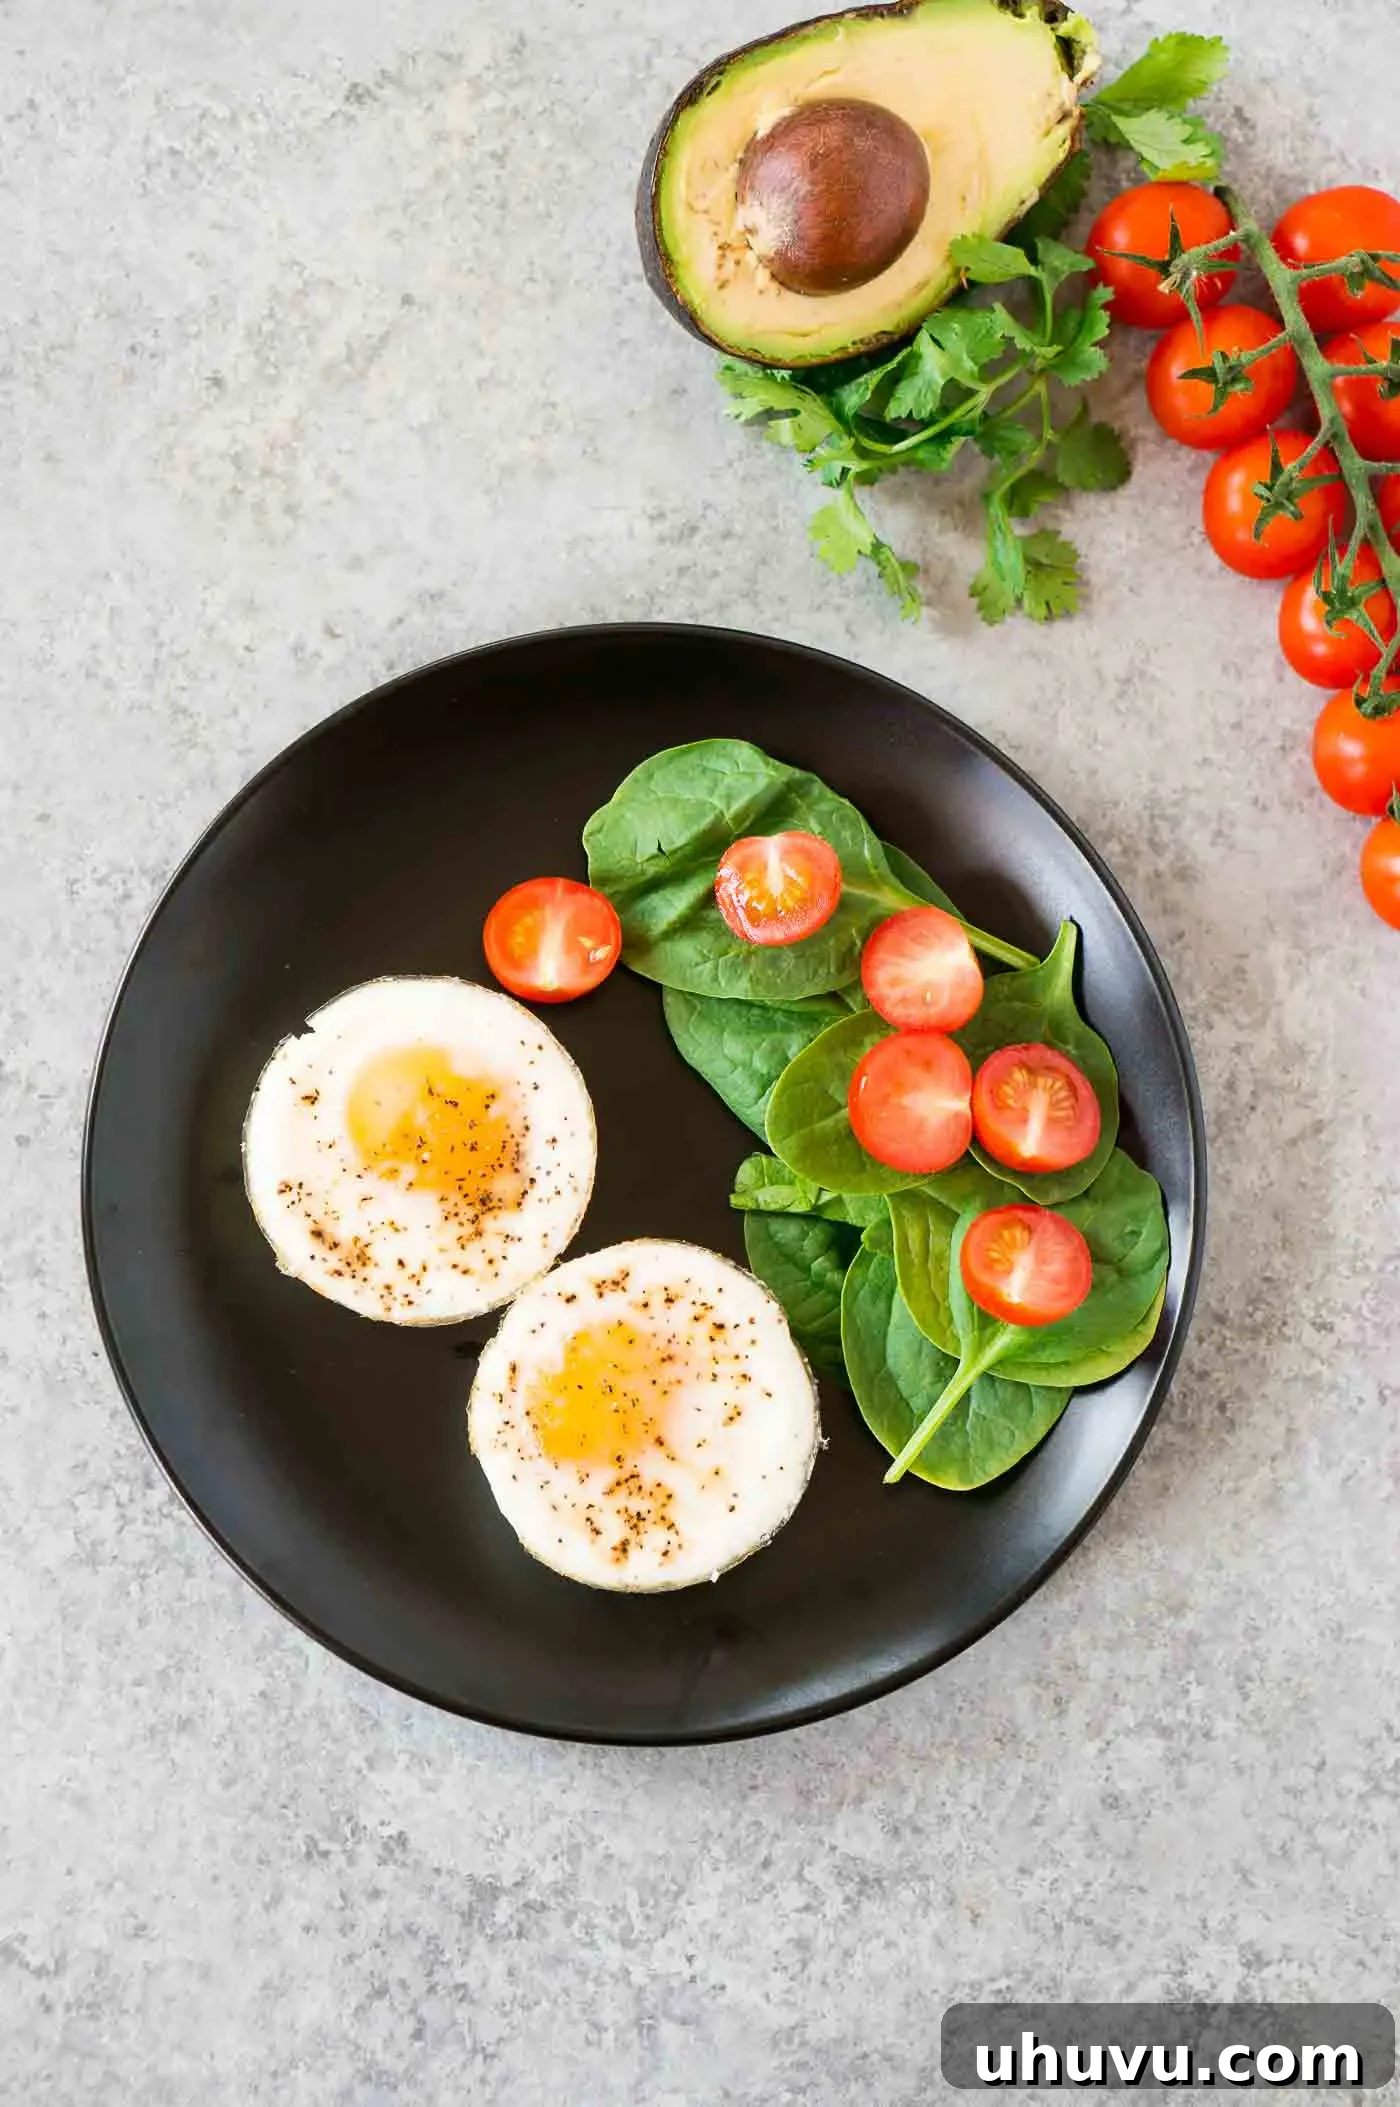
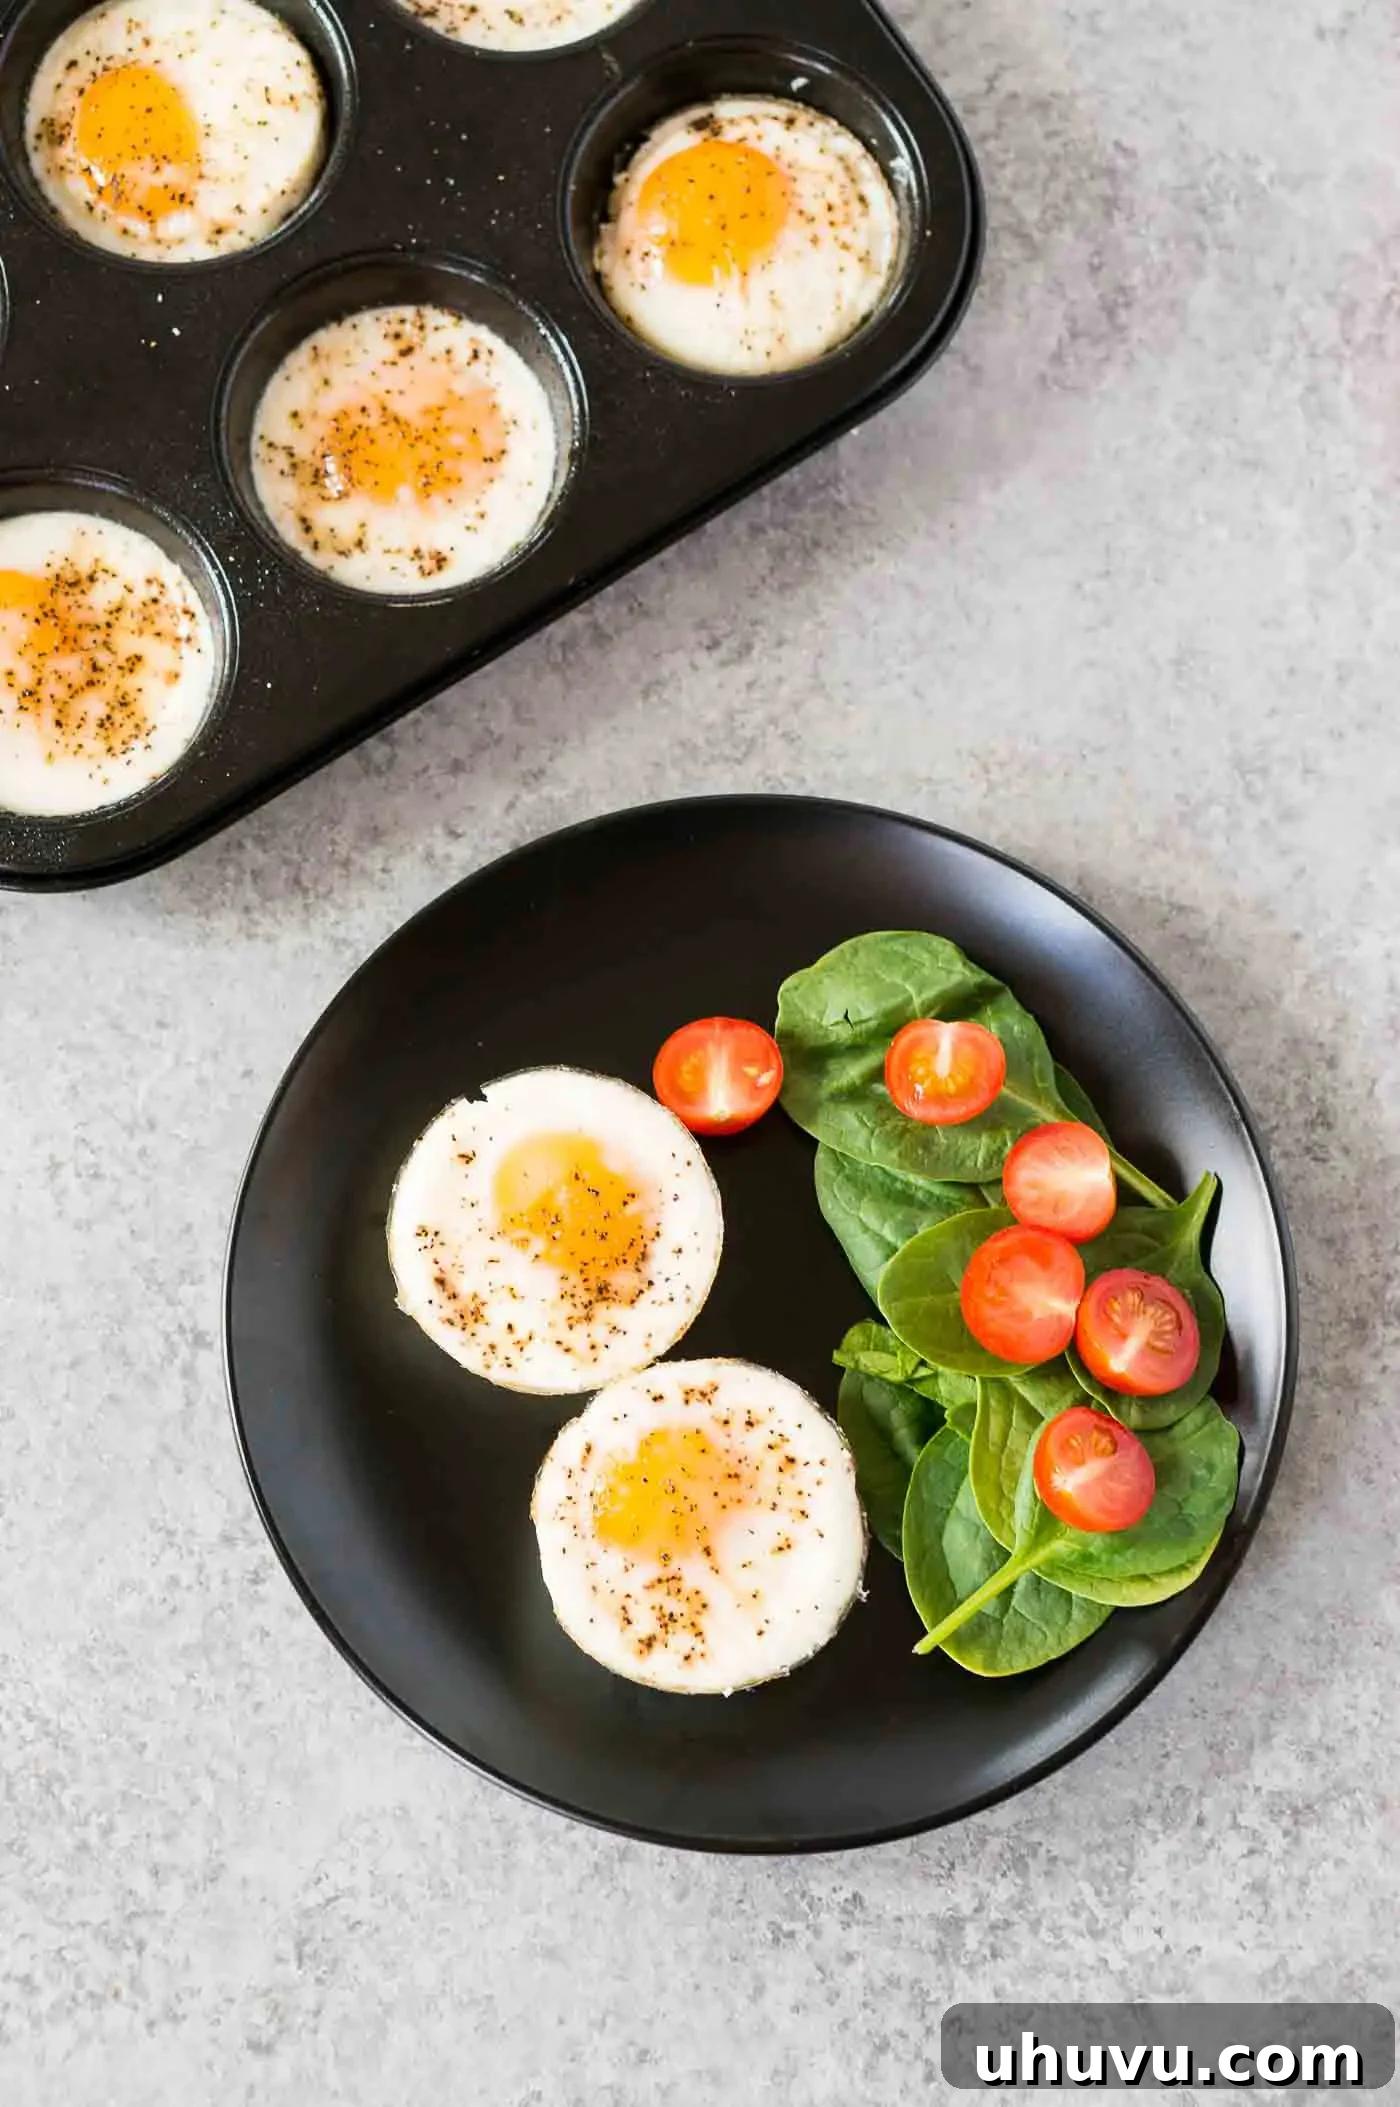
Step 4: Serve and Enjoy. Once removed from the muffin pan, transfer your perfectly baked eggs to a plate. They are best served warm, allowing their rich flavors and tender texture to be fully appreciated. These versatile egg cups pair wonderfully with a variety of breakfast sides. Consider serving them with a vibrant assortment of fresh fruits, creamy slices of avocado, and a side of crispy hashbrowns for a complete and satisfying meal. For an extra touch of flavor and visual appeal, sprinkle with your chosen fresh garnishes like chopped chives or green onions.
These baked eggs are not just for breakfast; they make an excellent light lunch or a quick, protein-packed snack any time of the day. Their make-ahead nature means a healthy meal is always just a reheat away.
EXPERT KITCHEN TIPS
Recipe Notes and Expert Tips for Success
Achieve consistently perfect baked eggs every time with these helpful insights and suggestions:
-
Proper Greasing is Key: Always ensure your muffin tin is thoroughly greased before adding the eggs. This is paramount for easy removal and to keep your baked eggs looking picture-perfect. If you’re tired of greasing, investing in silicone muffin cups is a fantastic alternative, as they naturally offer a non-stick surface.
-
Cool Before Storing: For optimal freshness and to prevent condensation that can lead to soggy eggs, always allow your baked eggs to cool completely to room temperature before transferring them to an airtight container for storage in the refrigerator.
-
Experiment with Seasonings: Elevate the flavor profile of your baked eggs beyond simple salt and pepper. Get creative by incorporating other seasonings such as smoked paprika for a hint of warmth, red chili flakes for a gentle kick, garlic powder, onion powder, or a blend of Italian seasoning for an aromatic touch. A pinch of fresh or dried herbs also works wonders.
-
Versatile for Other Recipes: These baked eggs aren’t just for eating whole! Once cooked and cooled, they can be a convenient substitute for hard-boiled eggs in various recipes. For instance, chop them up to make a delightful egg salad sandwich or add them to green salads for an extra protein boost.
-
Shirred Eggs in Ramekins: For an elevated presentation or a richer flavor, try making “shirred eggs.” Use individual ramekins instead of a muffin tin. Before cracking the egg, add a teaspoon of heavy cream or a sprinkle of your favorite cheese, such as sharp cheddar or tangy feta, to the bottom of each ramekin. This method creates a luxurious, creamy baked egg often served right in its baking dish.
-
Don’t Overcrowd the Oven: If baking multiple trays, ensure there’s enough space between them for proper air circulation. This ensures even cooking and consistent results across all your baked eggs.
-
Achieving Different Yolk Consistencies: The cooking time is key to your desired yolk. For soft, slightly runny yolks, bake for 10-11 minutes. For perfectly set but still tender yolks, aim for 12-13 minutes. For completely firm yolks, closer to a hard-boiled texture, extend to 14-15 minutes.
Storage and Longevity: How Long Do Baked Eggs Last?
One of the greatest advantages of these baked eggs is their impressive shelf life, making them ideal for efficient meal prepping. Once the baked eggs are out of the oven, it’s crucial to let them cool completely to room temperature. This step prevents condensation from forming inside your storage container, which can lead to soggy eggs and promote bacterial growth. After cooling, transfer them to an airtight container. When stored properly in the refrigerator, these delicious egg cups will keep fresh for up to 5 days. This makes them a perfect solution for having a healthy, protein-packed breakfast ready to go throughout your busy week.
Can You Freeze These Muffin Tin Eggs for Longer Storage?
Absolutely! Freezing baked eggs is an excellent way to extend their shelf life even further, especially if you find yourself with an abundance of eggs that need to be used up. To freeze, first bake the eggs according to the recipe instructions and then allow them to cool completely. You have a couple of options for freezing:
-
Tray Freezing Method: Place the cooled baked eggs on a baking sheet, ensuring they don’t touch. Freeze them solid for a couple of hours. Once firm, transfer the frozen egg cups to a freezer-safe bag or container. This method prevents them from sticking together, allowing you to grab just one or two at a time.
-
Individual Wrapping Method: For maximum freshness and to prevent freezer burn, wrap each cooled baked egg individually in plastic wrap or aluminum foil. Then, place the wrapped eggs into a larger freezer bag or an airtight container. This provides an extra layer of protection.
When you’re ready to enjoy them, thaw the frozen eggs in the refrigerator overnight. This gentle thawing process helps maintain their texture and flavor.
Effortless Reheating: How to Warm Up Baked Eggs
Reheating your make-ahead baked eggs is quick and simple, ensuring a warm and satisfying meal in minutes. The most convenient method is using a microwave:
-
From the Fridge: Place one or two baked eggs on a microwave-safe plate and heat for about 30-45 seconds. Check if they are heated through; if not, continue in 10-second intervals.
-
From Frozen: If reheating straight from the freezer, microwave for approximately 60-90 seconds. The exact time may vary based on your microwave’s wattage and the number of eggs you’re reheating. Again, check for even heating.
-
Oven Reheating: For a slightly crispier exterior, you can reheat them in a preheated oven at 300°F (150°C) for about 5-10 minutes (longer if frozen). This method is great if you’re reheating a larger batch.
Always ensure the eggs are thoroughly heated to a safe internal temperature before consuming.
Creative Serving Suggestions for Baked Eggs
While these delicious shirred eggs are perfectly satisfying on their own, their versatility shines when paired with complementary sides. You can truly customize your meal based on your time and preference:
-
Quick Weekday Breakfast: When you’re in a hurry, simply serve them alongside a slice of Avocado Toast, a toasted English Muffin, or a piece of whole-grain toast. A sprinkle of Everything Bagel seasoning on top adds extra flavor and crunch.
-
Hearty Weekend Brunch: For a more substantial and leisurely meal, pair them with classic breakfast favorites. Think crispy hashbrowns, a couple of slices of perfectly cooked bacon or savory breakfast sausage, and a generous portion of roasted breakfast potatoes. A side of fresh fruit or a simple green salad can balance out the richness.
-
Healthy & Light Options: For a lighter meal, serve your baked eggs with a vibrant fruit salad, a dollop of Greek yogurt, or a side of steamed asparagus. They also make an excellent addition to a power bowl with quinoa, spinach, and cherry tomatoes.
-
As a Sandwich or Wrap: These baked egg cups fit perfectly into breakfast sandwiches or wraps. Just add them to a bun or tortilla with some cheese, a slice of ham or turkey, and a bit of hot sauce for a portable and satisfying meal.
-
Customizable Toppings: Don’t forget the power of toppings! Beyond fresh chives and green onions, consider a dash of your favorite hot sauce, a sprinkle of grated Parmesan cheese, a dollop of sour cream or Greek yogurt, or even a spoonful of salsa or pico de gallo for a zesty kick.
Explore More Delicious Egg Recipes
If you’ve fallen in love with the simplicity and versatility of these muffin tin eggs, you’ll be thrilled to discover other fantastic ways to prepare eggs. Eggs are a culinary marvel, offering endless possibilities for breakfast, lunch, or dinner. Here are some of my other favorite egg recipes that are sure to become staples in your kitchen:
- Perfect Hard Boiled Eggs: Learn the secrets to consistently peelable and perfectly cooked hard-boiled eggs.
- Poached Eggs: How To Poach an Egg Perfectly: Master the art of poaching for delicate, runny-yolk eggs.
- Sheet Pan Eggs: A fantastic option for feeding a crowd with minimal cleanup, perfect for breakfast burritos or sandwiches.
- How to Make Perfect Fluffy Scrambled Eggs: Achieve restaurant-quality fluffy scrambled eggs every time.
- Sweet Potato Sausage and Egg Breakfast Casserole (Paleo): A hearty and flavorful casserole that’s great for meal prep and dietary restrictions.
- Instant Pot Hard Boiled Eggs: The easiest way to get perfect hard-boiled eggs with your pressure cooker.
- Sweet Potato and Sausage Frittata: A beautiful and satisfying one-pan dish, ideal for any meal of the day.
If you enjoyed this Oven Baked Eggs recipe or any other recipe on my blog, please take a moment to leave a ⭐ star rating and let me know how it went in the 📝 comments below. Your feedback is greatly appreciated and helps others discover these delicious recipes. Thanks for visiting!
Pin this now to find it later
Pin It

☝ This recipe has a 5-star rating from 1 vote
Baked Eggs
Neli Howard
5 minutes
10 minutes
15 minutes
12
eggs
Ingredients
- Coconut oil or butter (for greasing the muffin tin)
- 12 eggs (fresh, free-range or organic preferred)
- Salt and pepper (to taste)
- Chopped fresh chives or green onions (optional garnish)
- Optional add-ins: shredded cheese, cooked spinach, diced bell peppers, crumbled bacon, red chili flakes, paprika.
Instructions
-
Preheat your oven to 375°F (190°C). Thoroughly grease the sides and bottoms of each cup in a standard 12-cup muffin pan with coconut oil or butter. Alternatively, use silicone muffin cups or individual ramekins.
-
Carefully crack one egg into each prepared muffin cup. Season each egg generously with salt and freshly ground black pepper. If using any optional add-ins like cheese or pre-cooked vegetables, sprinkle them over the eggs now.
-
Place the muffin tin in the preheated oven and bake for about 10–12 minutes, or until the egg whites are fully set and the yolks have reached your desired consistency (10 minutes for slightly runny yolks, 12+ minutes for firmer yolks).
-
Remove the muffin tin from the oven. Allow the eggs to cool for a minute or two in the pan. Then, run a thin butter knife or small spatula along the sides of each egg to easily loosen and remove them from the cups.
-
Transfer the baked eggs to a serving plate. Serve warm with your favorite breakfast sides and optional garnishes like fresh chives or green onions.
Notes
- Be sure to grease the muffin tin well before adding the eggs so that they are easy to remove. Alternatively, you can also use silicone muffin cups or paper liners.
- Allow the baked eggs to cool completely to room temperature before storing them in an airtight container in the refrigerator to prevent condensation.
- Experiment with additional seasonings such as paprika, garlic powder, red chili flakes, or Italian seasoning for varied flavors.
- These eggs can be used as a convenient substitute for hard-boiled eggs in recipes like egg salad or chopped and added to salads.
- For “shirred eggs,” use individual ramekins and add a splash of heavy cream and a sprinkle of cheese (Cheddar or feta) at the bottom of each before cracking the egg.
Nutrition
Calories: 65kcal
|
Carbohydrates: 0.3g
|
Protein: 6g
|
Fat: 4g
|
Saturated Fat: 2g
|
Polyunsaturated Fat: 1g
|
Monounsaturated Fat: 2g
|
Trans Fat: 0.02g
|
Cholesterol: 164mg
|
Sodium: 62mg
|
Potassium: 61mg
|
Fiber: 0.01g
|
Sugar: 0.2g
|
Vitamin A: 248IU
|
Vitamin C: 0.1mg
|
Calcium: 25mg
|
Iron: 1mg
Nutrition Disclaimer: Nutritional values are estimates and may vary with ingredients, brands, and portion sizes. For accuracy, use your preferred nutrition calculator.