
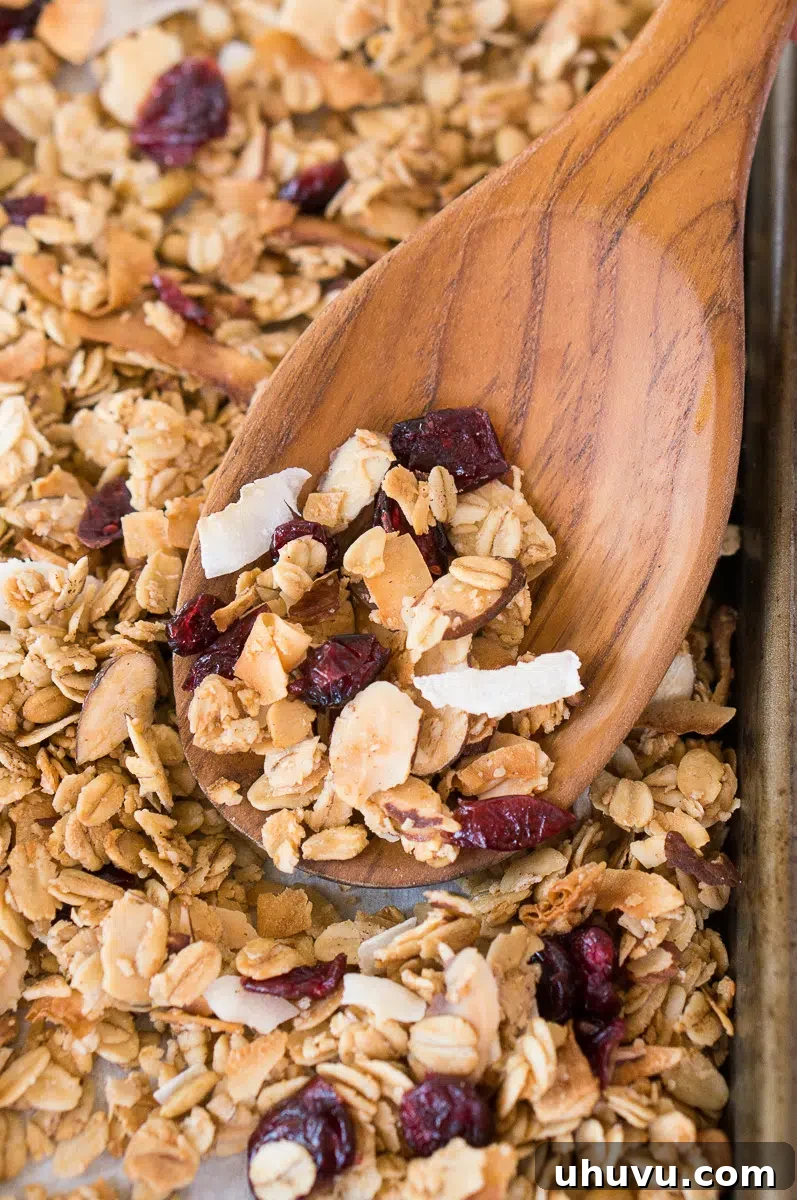
Embark on a culinary adventure to create the perfect batch of homemade granola right in your kitchen. This exceptional recipe is designed to be healthy, incredibly wholesome, and wonderfully filling, making it an ideal choice for a quick, nutritious breakfast or a satisfying snack any time of day. Crafted with a blend of hearty oats, crunchy nuts, flavorful seeds, and naturally sweetened with pure maple syrup, this granola is a pantry staple you’ll find yourself reaching for constantly. Say goodbye to store-bought varieties loaded with artificial ingredients and hello to a customizable, delicious, and easy-to-make alternative that truly elevates your mornings.
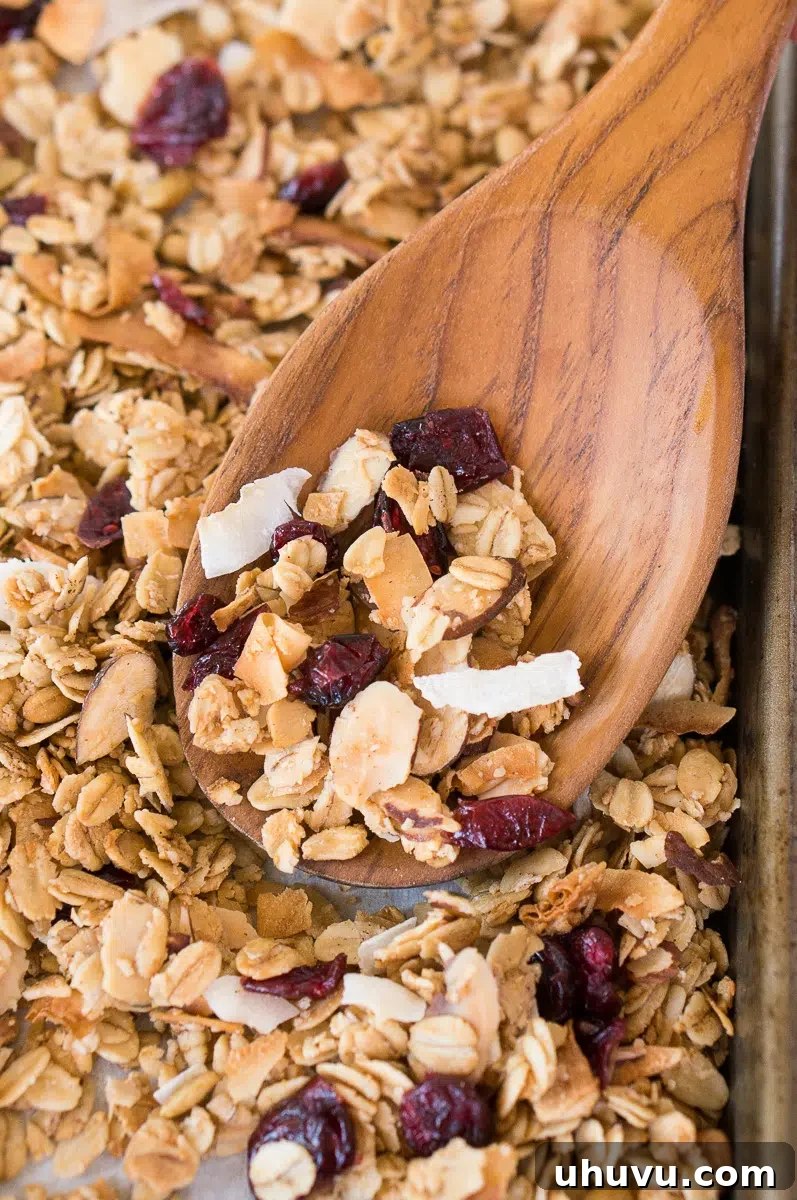
Kickstart your day with the irresistible aroma and delightful crunch of this delightful homemade granola. Whether you’re enjoying a leisurely breakfast at home or grabbing a quick bite on your way out the door, this versatile oat-based granola is your perfect companion. It’s brimming with premium ingredients like slivered almonds, vibrant pepitas, and chewy dried cranberries, all beautifully balanced by the natural sweetness of maple syrup and the subtle richness of coconut. Preparing a large batch is incredibly straightforward, promising a fuss-free breakfast solution for busy weeks.
For more delicious and healthy options, be sure to explore our Healthy Homemade Granola Bars and our indulgent Cranberry Dark Chocolate Granola Bars!
Why You’ll Adore This Healthy Homemade Granola Recipe!
- Achieve the Perfect Crunchy, Clumpy Granola: Our meticulously balanced ratio of wet to dry ingredients is the secret to creating those coveted, satisfyingly crunchy clusters. Each bite delivers an explosion of texture and flavor, just like your favorite store-bought brand, but even better!
- Effortless Meal Prep Solution: This recipe yields a generous 16 servings, making it an excellent candidate for meal prepping. With its impressive shelf life, you can easily prepare a batch at the start of the week and have a wholesome, hearty breakfast or snack ready to go on even the busiest mornings.
- Surprisingly Simple to Make: Don’t be intimidated by the idea of making granola from scratch. This recipe is incredibly straightforward, involving minimal fuss. Simply combine your ingredients, spread them on a baking sheet, and let your oven do the rest. It’s an effortlessly tasty recipe that even novice bakers can master with confidence.
- Customizable to Your Liking: The beauty of homemade granola lies in its adaptability. You have full control over the ingredients, allowing you to tailor it to your dietary needs, taste preferences, or whatever ingredients you have on hand. Swap out nuts, add different seeds, or experiment with various dried fruits for endless flavor combinations.
- Budget-Friendly and Nutrient-Rich: Making granola at home is often far more economical than purchasing specialty varieties. Plus, you get to select high-quality, fresh ingredients, ensuring a product that’s not only delicious but also packed with essential nutrients, fiber, and healthy fats to fuel your day.
Pin this now to find it later!
Pin It
Essential Ingredients for Your Perfect Granola
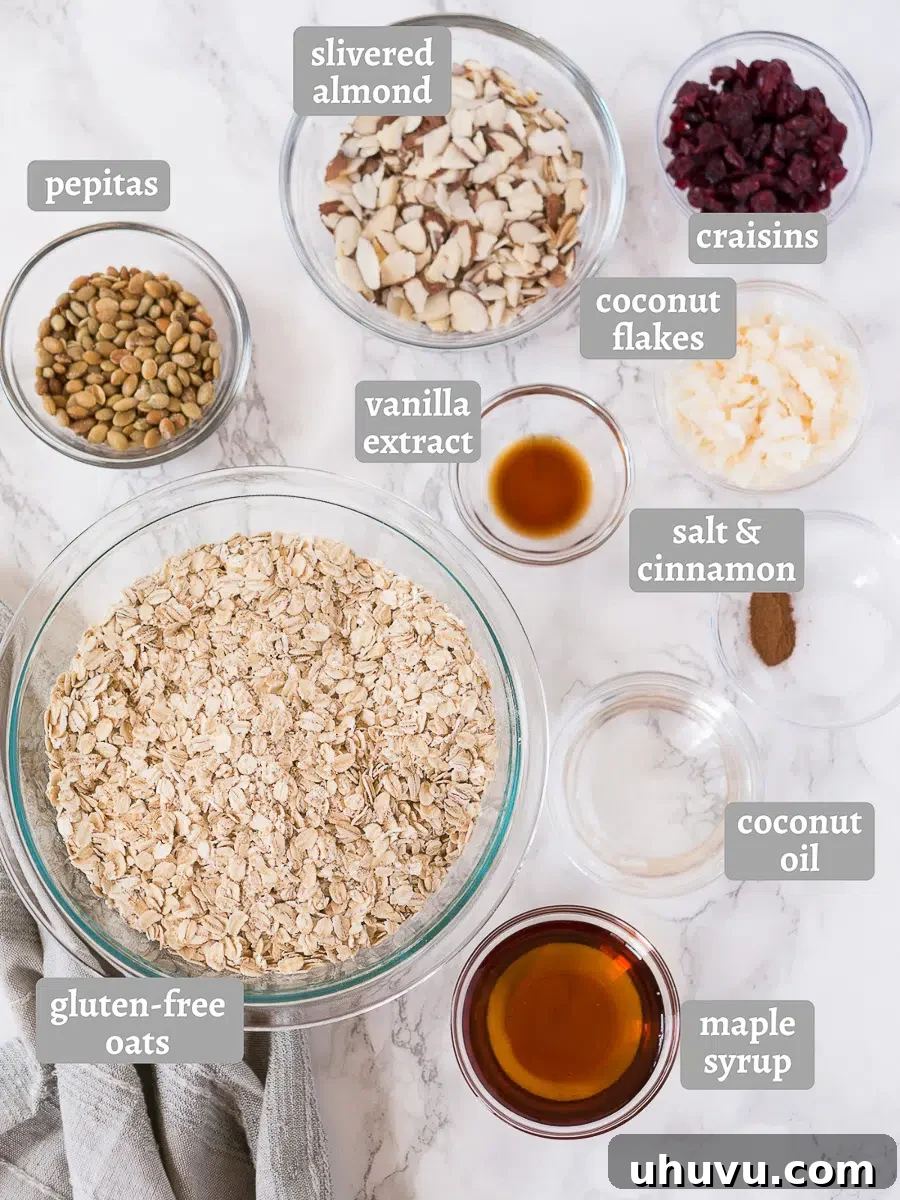
Crafting the ultimate homemade granola begins with selecting high-quality, fresh ingredients. Each component plays a crucial role in achieving the perfect balance of flavor, texture, and nutritional value. Here’s a detailed look at what you’ll need:
- Oats: For the best texture and clumping, always opt for whole rolled oats (often labeled as old-fashioned oats). Quick oats tend to get too soft, and steel-cut oats won’t clump as well. If you have a gluten intolerance or allergy, ensure you purchase oats that are certified gluten-free to avoid cross-contamination.
- Slivered Almonds and Pepitas: These add a delightful crunch and a wealth of nutrients. Slivered almonds provide a delicate nutty flavor and healthy fats, while pepitas (shelled pumpkin seeds) offer an earthy taste and a boost of protein and zinc. Feel free to swap these for other nuts or seeds you enjoy.
- Coconut Flakes: Unsweetened coconut flakes contribute a tropical sweetness and an extra layer of chewy texture that complements the crunchy oats and nuts beautifully. When toasted, they become golden and intensely flavorful.
- Flavor Enhancers: A pinch of cinnamon adds warmth and spice, while a touch of sea salt balances the sweetness and brings out all the individual flavors. Vanilla extract infuses the entire mixture with a comforting, aromatic note.
- Coconut Oil: Melted coconut oil serves as the primary fat in this recipe, helping to bind the ingredients together, creating those desirable clumps, and adding a rich, subtle coconut flavor. It also aids in achieving that perfectly golden-brown, crispy finish. If you prefer, you can use other healthy fat alternatives like melted butter, avocado oil, or even incorporate unsweetened applesauce or a nut butter (like peanut or almond butter) for binding, though these may alter the flavor and texture slightly.
- Maple Syrup: To naturally sweeten the granola, we use pure maple syrup. Its distinct flavor and natural caramel notes pair perfectly with the other ingredients. Other excellent natural sweeteners include honey, agave nectar, or even brown rice syrup for a slightly different profile.
- Dried Cranberries: Added at the very end after baking, dried cranberries provide a wonderful burst of sweet-tart flavor and a pleasant chewy texture that contrasts beautifully with the crispy granola.
Step-by-Step Guide: How to Make Irresistible Homemade Granola
Follow these simple steps to create a batch of granola that’s perfectly crunchy, beautifully golden, and bursting with flavor:
- Step 1: Prepare Your Oven and Baking Sheet
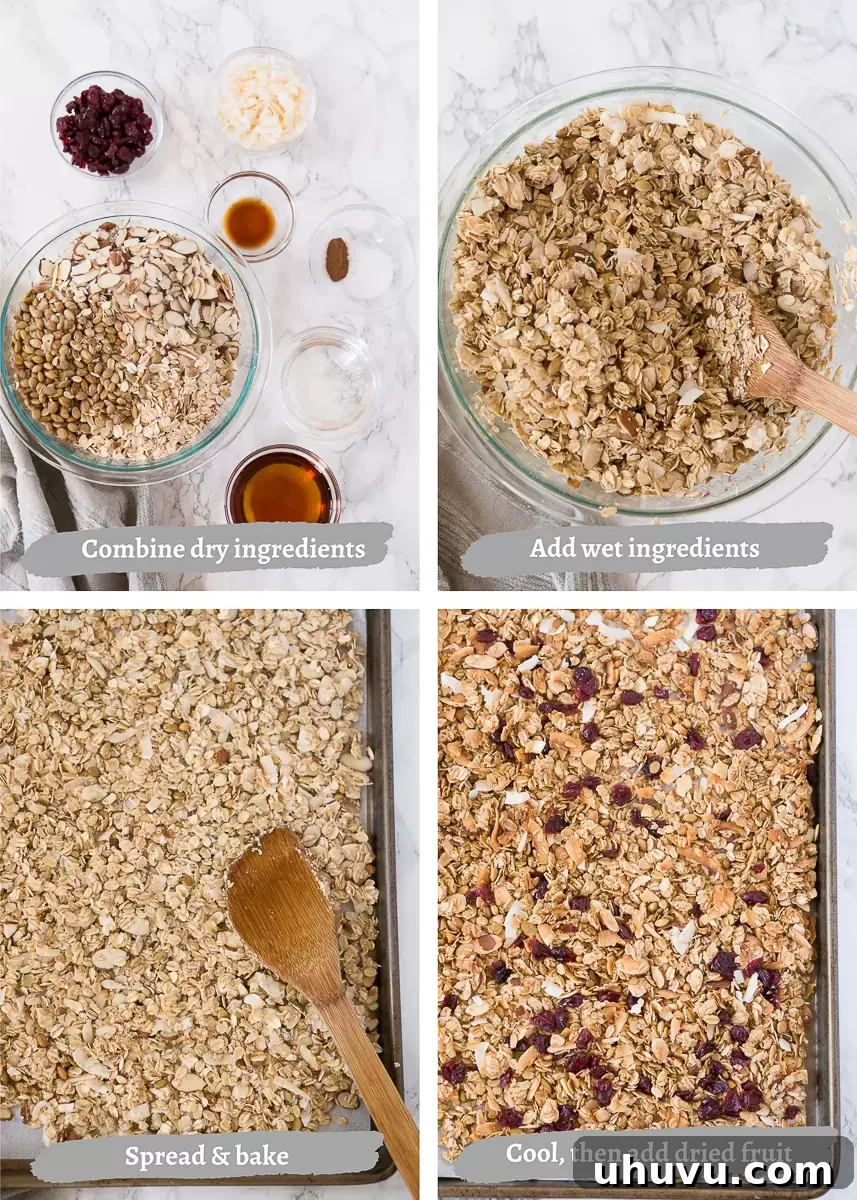
Begin by preheating your oven to 300°F (150°C). This low and slow temperature is crucial for even toasting and preventing your granola from burning. Line a large baking sheet with parchment paper. This non-stick surface ensures easy removal of the baked granola and simplifies cleanup, while also encouraging those delicious clumps to form.
- Step 2: Combine the Dry Ingredients
In a spacious mixing bowl, combine the whole rolled oats, slivered almonds, pepitas, coconut flakes, cinnamon, and sea salt. Use a large spoon or your hands to thoroughly stir and distribute these dry ingredients evenly. This ensures that every component is coated with the wet mixture later, leading to a consistent flavor and texture throughout your granola.
- Step 3: Whisk Together the Wet Ingredients
In a separate, smaller bowl, whisk together the maple syrup, melted coconut oil, and vanilla extract until well combined. This liquid mixture is the binder and primary flavor base, ensuring that every bite of granola is perfectly sweet and rich with warm vanilla notes.
- Step 4: Combine Wet and Dry Mixtures
Pour the prepared wet ingredients over the dry mixture in the large bowl. Stir diligently, making sure every oat, nut, and seed is thoroughly coated. This step is vital for creating cohesive clumps and ensuring uniform browning during baking. The mixture should appear moist and well-integrated.
- Step 5: Bake to Golden Perfection
Spread the coated granola mixture onto the prepared baking sheet in an even layer. For extra-clumpy granola, use the back of a spatula or your hands to gently press the mixture down firmly across the sheet. Bake in the preheated oven for 25-30 minutes. Be sure to rotate the baking sheet halfway through the baking time to promote even toasting and prevent burning on one side. About halfway through the second baking phase, use a fork to gently break apart any overly large clumps to ensure consistent crispiness.
- Step 6: Cool Completely and Add Dried Fruits
Once the granola is beautifully golden brown and fragrant, remove it from the oven. This is a critical step: allow the granola to cool completely on the baking sheet without disturbing it. As it cools, the sugars will harden, and the granola will become wonderfully crisp and clumpy. Once fully cooled, gently break it into desired clusters and stir in the dried cranberries. Adding dried fruits after baking prevents them from becoming too hard or burnt.
EXPERT TIPS FROM NELI’S KITCHEN
Mastering Crunchy, Clumpy Granola: Essential Tips and Tricks
- Ensure Even Coating: Mix your ingredients thoroughly. Every single oat flake must be coated with the oil and maple syrup mixture. Dry spots will result in powdery or less flavorful granola. Take your time with this step, stirring from the bottom up to ensure everything is perfectly moist.
- Don’t Overcrowd Your Baking Sheet: If you’re doubling the recipe or making a large batch, use an additional baking sheet. A single, overcrowded sheet will steam the granola instead of baking it, leading to a softer, less crunchy result. Give your granola room to breathe and crisp up!
- Rotate for Uniform Browning: Halfway through the cooking time, be sure to rotate your baking sheet 180 degrees. Ovens often have hot spots, and rotating ensures that your granola browns evenly across the entire sheet, preventing some parts from burning while others remain pale.
- Cool Completely for Clumps: Patience is a virtue, especially when making granola. Resist the urge to break apart your granola as soon as it comes out of the oven. Letting it cool fully and undisturbed on the baking sheet is key to forming those desirable, crunchy clusters. As it cools, the sticky syrup hardens, binding the oats and nuts together.
- Naturally Vegan and Gluten-Free: This recipe is inherently kind to various dietary needs! By using certified gluten-free rolled oats and maple syrup (instead of honey), this granola is both vegan and gluten-free, making it a wonderful option for many different eaters. Always double-check labels on your ingredients, especially oats, to ensure they meet your specific dietary requirements.
- Press for More Clumps: For ultimate granola clusters, after spreading the mixture onto the parchment-lined baking sheet, use a spatula or the back of a spoon to press it down firmly. This compression helps the ingredients stick together as they bake and cool.
Exciting Flavor Variations to Elevate Your Granola
The beauty of homemade granola lies in its endless customization possibilities! You can effortlessly adjust this base recipe to suit your preferences, creating unique flavor profiles every time. Feel free to swap out the almonds for other nuts or introduce new dried fruits. Once cooled, even a sprinkle of chocolate chips can transform your granola into a decadent treat. Here are some of our favorite creative combinations:
- Classic Honey Almond: A timeless and comforting combination. Substitute maple syrup with an equal amount of honey for a distinct floral sweetness. Pair with toasted sliced almonds for a simple yet deeply satisfying flavor. You might also add a touch of almond extract for an intensified nutty aroma.
- Tropical Paradise: Escape to an island getaway with this vibrant variation. Keep the coconut flakes and introduce dried pineapple and mango chunks. A hint of fresh lime zest, added after baking, will brighten the flavors beautifully, bringing a zesty counterpoint to the sweetness.
- Chocolate Lovers’ Delight: For an indulgent treat, incorporate 2-3 tablespoons of unsweetened cocoa powder into the dry ingredients. After the granola has cooled completely, stir in your favorite chocolate chips (dark, milk, or white) or cacao nibs for a rich, irresistible chocolatey crunch.
- Berry Bliss: A vibrant and fruity explosion awaits! Mix in a generous amount of assorted dried berries such as blueberries, strawberries, raspberries, and cherries after baking. A touch of extra vanilla extract or a tiny pinch of ginger can enhance the berry notes.
- Spiced Apple Harvest: Perfect for autumn! Add an extra teaspoon of apple pie spice (or a mix of cinnamon, nutmeg, and cloves) to the dry ingredients. After baking and cooling, stir in finely diced dried apples. A sprinkle of chopped walnuts would also be a lovely addition here.
- Pumpkin Spice Latte Granola: Infuse your granola with the cozy flavors of fall. Add 1-2 teaspoons of pumpkin pie spice and a few tablespoons of pumpkin puree (reduce liquid sweetener slightly) to the wet ingredients. Mix in chopped pecans or walnuts and dried cranberries or chopped dates after baking.
- Nut Butter Swirl: For an extra boost of protein and creamy texture, melt 1/4 cup of your favorite nut butter (peanut, almond, or cashew) and swirl it into the wet ingredients before combining with the dry. This creates delicious pockets of nutty flavor throughout the granola.
Boost Your Bowl: Healthy Add-Ins for Extra Nutrition
Transform your delicious granola into a true powerhouse of nutrition by incorporating these beneficial add-ins. Each option contributes unique vitamins, minerals, and macronutrients, making your breakfast or snack even more impactful:
- Superfoods: Elevate the nutritional profile with tiny but mighty additions. Chia seeds are packed with omega-3 fatty acids and fiber, helping to keep you full. Flaxseeds offer lignans, fiber, and more omega-3s, while hemp hearts are an excellent source of plant-based protein and healthy fats. These can be added to the dry ingredients before baking.
- Protein Powders: To make your granola a more robust post-workout snack or a truly sustaining breakfast, stir in a scoop of your favorite protein powder (whey, casein, or plant-based). For best results and to prevent the powder from drying out the granola, mix it into the wet ingredients thoroughly, or gently fold it into the cooled granola just before storage.
- Vegetable Powders: For a subtle, undetectable health kick, consider sneaking in small amounts of dried beet or spinach powder. These finely ground powders can add a spectrum of vitamins and antioxidants without significantly altering the taste, especially when mixed into the wet ingredients. Start with a small amount and adjust to your preference.
- Nutritional Yeast: While perhaps unconventional for granola, a tablespoon or two of nutritional yeast can add a savory, cheesy depth and a significant boost of B vitamins, without overpowering the sweetness. Experiment cautiously!
- Matcha Powder: For an energy boost and a dose of antioxidants, whisk a teaspoon of ceremonial-grade matcha powder into your wet ingredients. This will give your granola a beautiful green hue and a unique, earthy flavor.
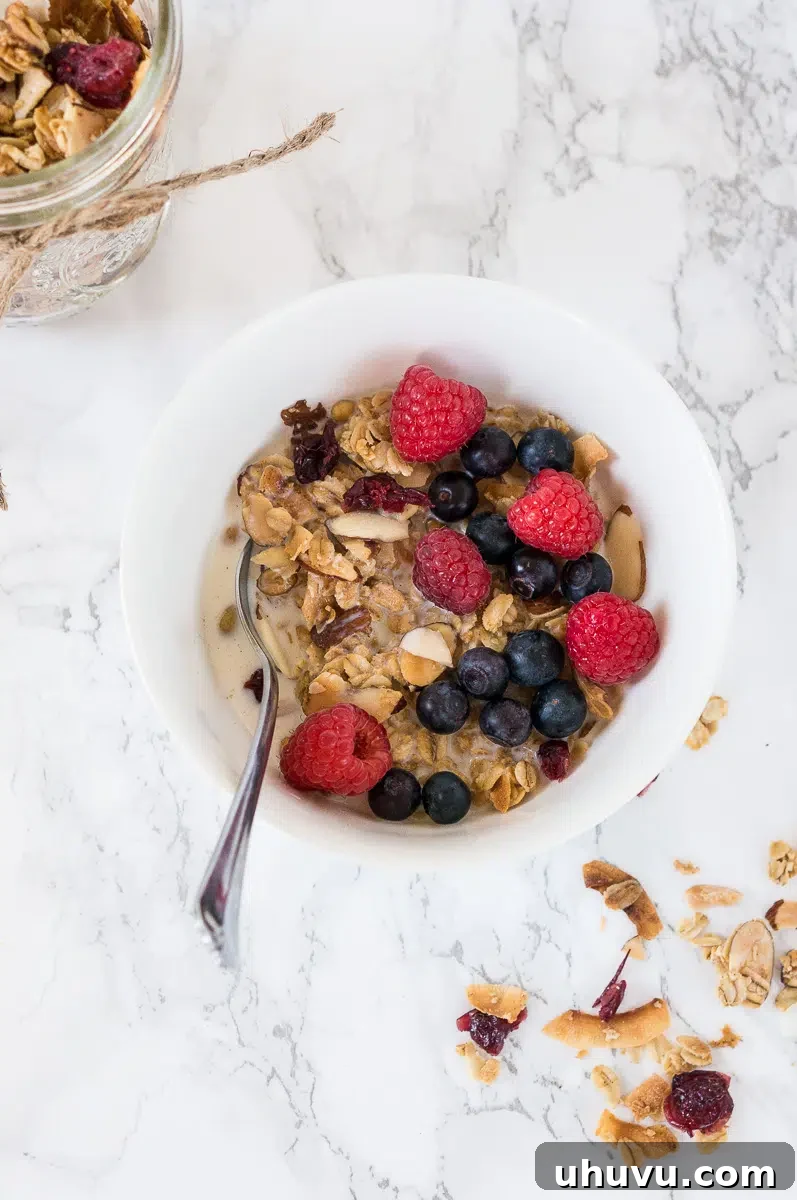
Beyond the Bowl: Creative Ways to Savor Your Homemade Granola
While a simple bowl with milk or yogurt is always a winner, homemade granola is incredibly versatile and can be incorporated into countless delicious dishes. I personally love having a fresh batch on hand for a healthy mid-afternoon energy boost, but its uses extend far beyond a typical breakfast. Honestly, there’s truly no bad time for it!
- Elevated Breakfast Bowls: Beyond traditional milk, sprinkle your crunchy granola over creamy homemade yogurt, vibrant smoothie bowls, or hearty oatmeal for an essential textural contrast and a boost of flavor. It adds a gourmet touch to any morning meal.
- Smart and Satisfying Snacks: Pack it plain as a quick, energizing snack for work or school. Mix it with additional nuts, seeds, and even a few chocolate pieces to create your very own custom trail mix, perfect for hiking or road trips.
- Delightful Desserts: Use granola as a delicious, crunchy topping for ice cream, baked apples, or fruit crisps and crumbles. It can also form the base of no-bake cheesecakes or serve as a unique crust for pies, offering a healthier, more flavorful alternative to traditional pastry.
- Granola Bark: Melt some dark chocolate, spread it thinly on parchment paper, sprinkle generously with cooled granola, and chill until firm. Break into pieces for an addictive, wholesome candy bar.
- Parfait Layers: Create stunning and delicious parfaits by layering granola with yogurt, fresh fruit, and a drizzle of honey or maple syrup. It’s a visually appealing and incredibly satisfying treat.
- Salad Topping: For an unexpected crunch and a hint of sweetness, sprinkle a small amount of savory-spiced granola (perhaps with rosemary or a touch of chili powder) over fresh green salads, especially those featuring fruit like apples or pears.
Storage Tips for Maximum Freshness and Crunch
One of the many advantages of making your own granola is its excellent shelf life, allowing you to prepare a large batch and enjoy it for weeks. Proper storage is key to maintaining its crispness and flavor:
Storing at Room Temperature
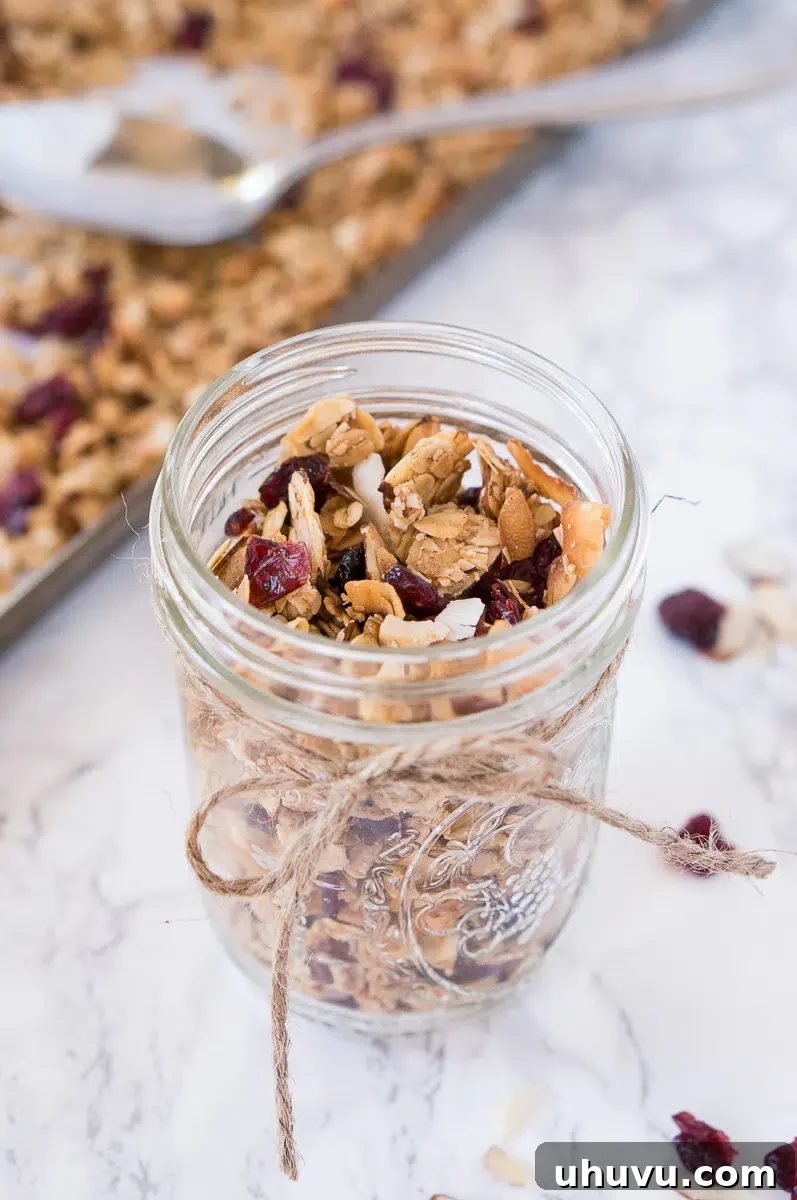
To keep your homemade granola perfectly fresh and crunchy, ensure it is completely cooled before transferring it to an airtight container. Moisture is the enemy of crispy granola, so sealing it properly is crucial. I prefer using a wide-mouth mason jar or a sturdy resealable container. When stored correctly at room temperature, away from direct sunlight and humidity, your granola will remain delicious for up to two weeks. Avoid plastic bags if possible, as they can sometimes trap moisture.
Freezing for Extended Freshness
For an even longer shelf life, consider freezing your granola. This method allows you to enjoy freshly-tasting granola for an impressive 4 to 6 months. Just like with room temperature storage, make absolutely certain the granola is entirely cooled before packing. Transfer it to a freezer-safe, airtight container or a heavy-duty freezer bag, removing as much air as possible to prevent freezer burn. When you’re ready to enjoy it, simply thaw it overnight at room temperature. It will retain its delightful crunch and flavor beautifully.
Common Granola-Making Mistakes and How to Avoid Them
Even seasoned home cooks can encounter hiccups when making granola from scratch. Before I mastered the art of consistently perfect granola, I had my share of occasional mishaps. Understanding these common pitfalls and how to avoid them will ensure your granola turns out fantastic every single time:
- Mistake 1: Burnt Granola
Cause: Too high oven temperature, uneven baking, or baking for too long without rotation. Granola can go from golden to burnt very quickly due to its sugar content.
How to Avoid: Always preheat your oven to the recommended temperature (300°F / 150°C) and use an oven thermometer to verify accuracy. Rotate the baking sheet halfway through the baking time to ensure even exposure to heat. Keep a close eye on your granola during the last 10 minutes of baking; it should be golden brown, not dark brown. - Mistake 2: Soggy or Chewy Granola
Cause: Not baking long enough, too much liquid, or overcrowding the baking sheet. If the granola steams rather than bakes, it won’t get crispy.
How to Avoid: Ensure your granola mixture is spread in a thin, even layer on the baking sheet. If making a double batch, use two separate sheets. Bake until the granola is uniformly golden brown and feels dry to the touch. It will crisp up further as it cools. Also, make sure your wet ingredients are measured precisely. - Mistake 3: Unbalanced Flavor (Too Sweet, Too Salty, Bland)
Cause: Inaccurate measurements of sweeteners, spices, or salt, or simply not tasting the raw mixture (if safe) to adjust.
How to Avoid: Stick to the recipe’s measurements for sweeteners, spices, and salt. A small amount of salt is crucial for balancing the sweetness. You can taste the wet mixture before adding it to the oats to adjust sweetness, but always be cautious with raw oats. For spices, start with the recommended amount and increase slightly if you prefer a bolder flavor. - Mistake 4: Granola Doesn’t Clump
Cause: Not enough binder (oil/syrup), too much stirring during baking, or not pressing the mixture down.
How to Avoid: Ensure the ratio of wet to dry ingredients is correct. After spreading the granola on the baking sheet, press it down firmly with a spatula to encourage contact and bonding. Avoid stirring excessively during baking; only gently break apart large clumps once or twice during the process. Most importantly, let it cool completely undisturbed on the baking sheet to allow the sugars to harden and create those delightful clusters. - Mistake 5: Dried Fruit is Hard or Burnt
Cause: Adding dried fruit before baking.
How to Avoid: Always add dried fruits (like cranberries, raisins, apricots) *after* the granola has finished baking and has cooled for at least 15-20 minutes. This prevents them from becoming overly dry, hard, or burnt during the baking process, ensuring they remain soft and chewy.
Homemade Granola Recipe: Frequently Asked Questions
To achieve maximum crunch, ensure you bake your granola at a low temperature (around 300°F/150°C) for a longer duration, rotating the sheet halfway through for even browning. Spreading the mixture thinly and evenly, and firmly pressing it down on the baking sheet before baking, also encourages better clumping and crispiness. Finally, allow it to cool completely and undisturbed on the baking sheet.
Soggy granola typically results from not baking it long enough, using too much liquid (wet ingredients), or overcrowding the baking sheet. Ensure the granola is spread in a single, thin layer so it bakes evenly and moisture can escape. Bake until it’s golden brown and feels dry. It will crisp up significantly as it cools.
Yes, you can substitute oil with certain alternatives, though the texture and flavor might vary. Unsweetened applesauce, mashed banana, or various nut butters (like peanut or almond butter) can act as binders. An egg white, whisked until frothy, can also help create clumps and a crispy texture with less fat.
It is generally not recommended to use fresh fruit or berries in granola during the baking process. Fresh fruit contains high moisture content, which can prevent the granola from crisping up and may even lead to mold. For best results and shelf life, stick to dried fruits, which should be added after the granola has fully baked and cooled.
If you adapt this recipe to make granola bars, ensure they are completely cooled and firm before cutting. Wrap each bar individually in parchment paper or plastic wrap, then store them in an airtight container at room temperature for up to a week. For longer storage, they can be frozen for several months.
Yes, this recipe is naturally vegan and gluten-free! It uses maple syrup as a sweetener and coconut oil for fat, making it suitable for a vegan diet. As long as you use certified gluten-free rolled oats, the recipe is also perfect for those following a gluten-free lifestyle. Always check ingredient labels to confirm.
Absolutely! If you have a nut allergy or prefer nut-free granola, simply omit the almonds. You can replace them with an equal quantity of additional oats, more seeds (like sunflower or pumpkin seeds), or even shredded coconut to maintain the texture and volume.
More Delightful Breakfast Recipes
Breakfast Recipes
Healthy Apple Muffins
Breakfast Recipes
Ham and Cheese Breakfast Muffins
Desserts
Banana Chocolate Chip Muffins
Breakfast Recipes
Hearty Breakfast Sandwich
If you enjoyed this recipe or any other recipe on my blog, please consider leaving a ⭐ star rating and let me know how it went in the 📝 comments below. Your feedback is greatly appreciated, and it helps other readers discover delicious and healthy meals. Thanks for visiting Delicious Meets Healthy!
Don’t forget to Pin this recipe for later!
Pin It
The Best Homemade Granola
Neli Howard
10 minutes
30 minutes
40 minutes
16 servings
Save This Recipe
Enter your email and we’ll send the recipe directly to you!
By submitting this form, you consent to receive emails from Delicious Meets Healthy.
Ingredients
- 4 cups whole rolled oats
- 1 ½ cup sliced almonds & pepitas
- ½ cup coconut flakes
- ½ tsp cinnamon
- ½ teaspoon sea salt
- ½ cup melted coconut oil
- ½ cup maple syrup
- 1 tsp vanilla extract
- ½ cup dried cranberries
Instructions
-
Preheat the oven to 300°F (150°C) and line a large baking sheet with parchment paper.
-
In a medium bowl, combine the oats, almonds, pepitas, coconut flakes, cinnamon, and salt. In a separate bowl, whisk together the melted coconut oil, maple syrup, and vanilla extract. Pour the wet ingredients over the dry mixture and stir until everything is well combined and coated. Spread the granola mixture evenly onto the prepared baking sheet and press it down gently with a spatula to encourage clumping.
-
Bake for 15 minutes in the preheated oven. After 15 minutes, rotate the baking sheet 180 degrees and use a fork to gently break apart any larger clumps, allowing more surface area to crisp. Continue to bake for another 15 minutes, or until the granola is uniformly golden brown. Remove from the oven and immediately sprinkle with dried cranberries. Allow the granola to cool completely on the baking sheet for at least 30-45 minutes before serving or storing. This crucial cooling period allows the granola to crisp up and form firm clusters.
Recipe Notes
- Ensure all dry ingredients are thoroughly coated with the wet mixture for the best flavor and texture.
- If doubling the recipe, use two separate baking sheets to avoid overcrowding, which can lead to soggy granola.
- Rotating the baking sheet halfway through baking promotes even browning across the entire batch.
- Allow the granola to cool completely on the baking sheet before breaking it apart and storing it. This is essential for achieving crunchy clusters.
- This recipe is naturally vegan and gluten-free, provided you use certified gluten-free rolled oats.
- Feel free to experiment with different nuts, seeds, and dried fruits to customize your granola.
Nutrition Information
- Calories: 319 kcal
- Carbohydrates: 29g
- Protein: 8g
- Fat: 21g
- Saturated Fat: 8g
- Polyunsaturated Fat: 3g
- Monounsaturated Fat: 8g
- Trans Fat: 1g
- Sodium: 76mg
- Potassium: 275mg
- Fiber: 5g
- Sugar: 10g
- Vitamin A: 1IU
- Vitamin C: 1mg
- Calcium: 83mg
- Iron: 2mg
Nutrition Disclaimer: Nutritional values are estimates and may vary with ingredients, brands, and portion sizes. For accuracy, use your preferred nutrition calculator.
Enjoyed this recipe? Share your thoughts below!