
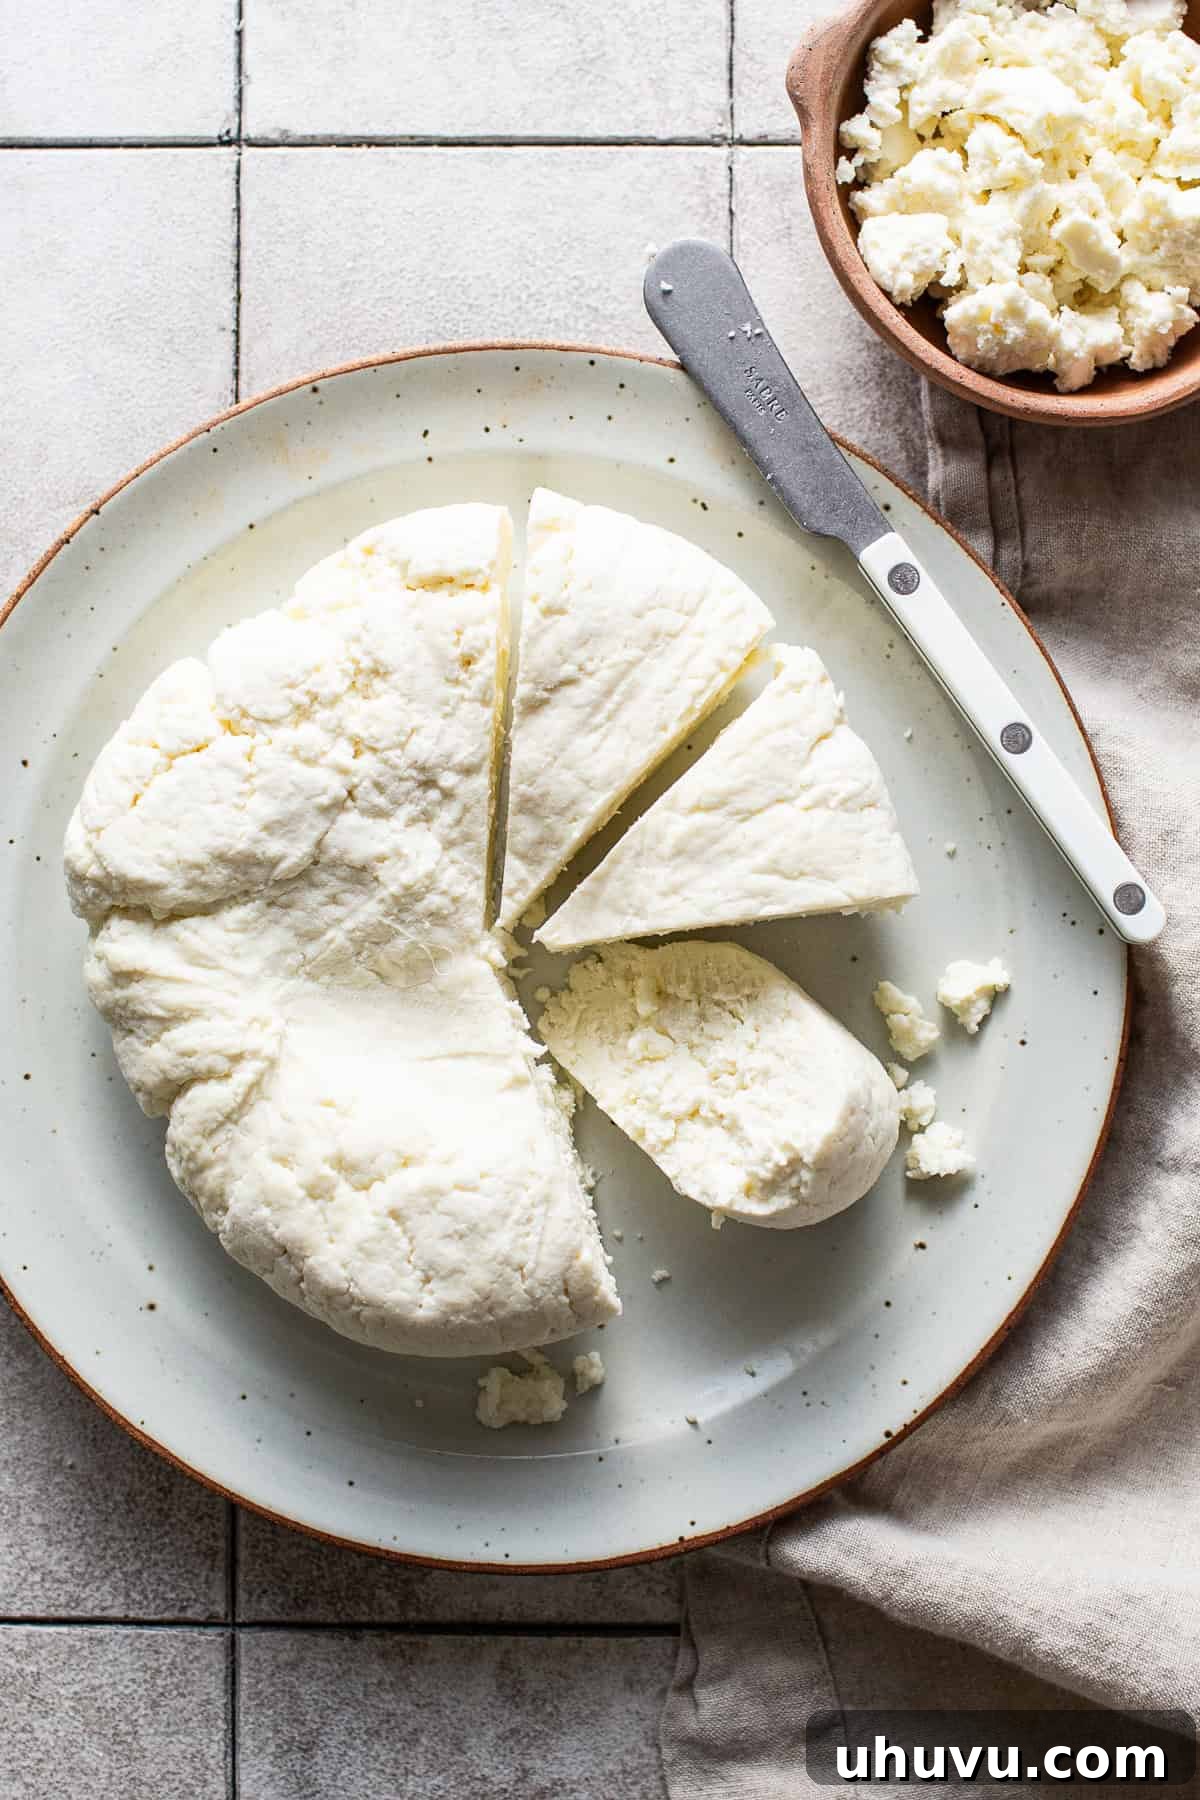
There’s an undeniable magic in creating something delicious from scratch, and this homemade Queso Fresco recipe exemplifies just that. This light, crumbly, and wonderfully fresh Mexican cheese is surprisingly easy to make right in your kitchen, requiring just a handful of simple ingredients and a little patience. While store-bought versions offer convenience, they often fall short of the rich, pure flavor and creamy texture achieved with a homemade batch. Prepare to elevate your Mexican dishes with a cheese that embodies authentic taste and freshness.
If you’re passionate about crafting your favorite Mexican ingredients at home, consider also making your own Mexican crema, homemade chili powder, and homemade taco seasoning for an authentic culinary experience!
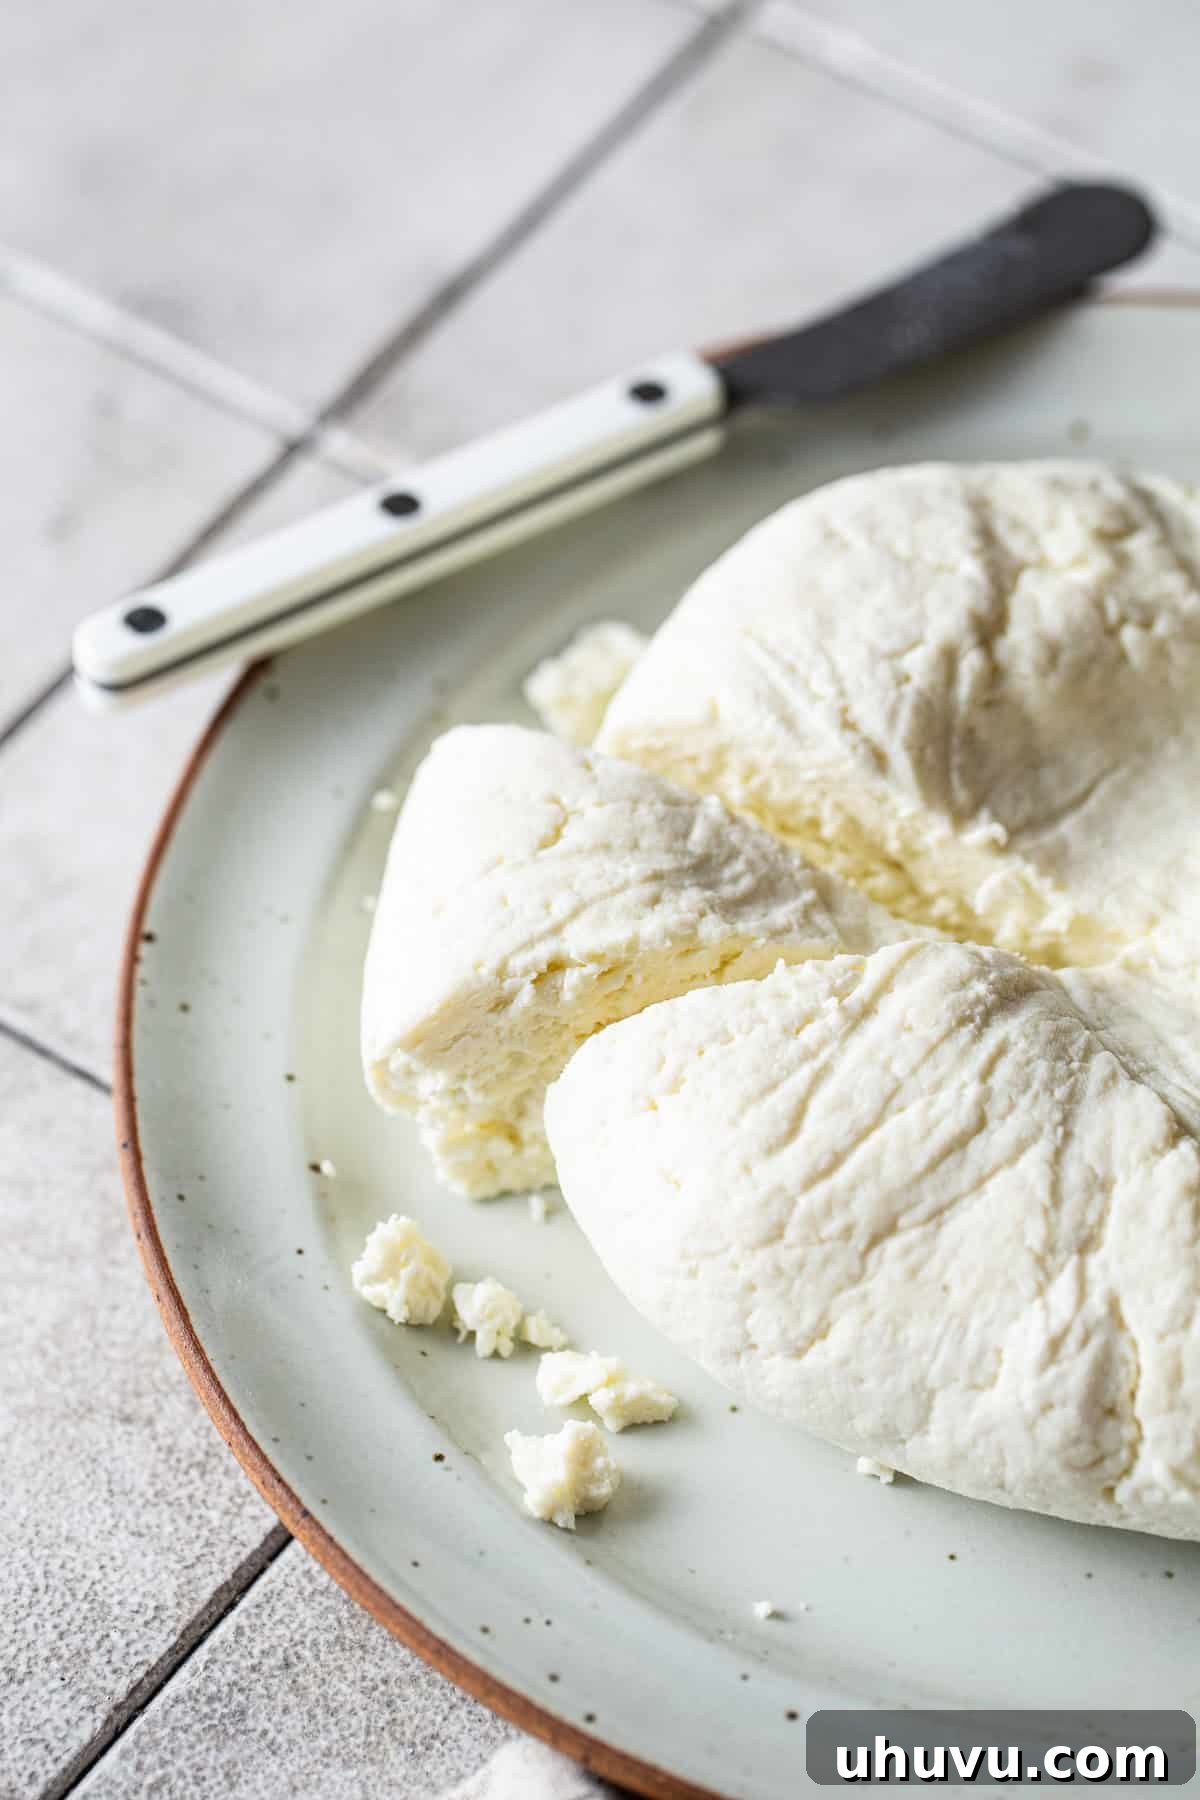
Queso Fresco has always been a staple in my Mexican kitchen, a cherished ingredient I grew up with and continue to keep stocked in my fridge. Its versatility is truly remarkable; I love crumbling it generously over almost every dish imaginable. From the vibrant flavors of tacos and savory enchiladas to comforting chilaquiles and the delightful street food esquites, a sprinkle of Queso Fresco adds a burst of freshness and a subtle tang. It’s even perfect simply rolled up in a warm homemade corn tortilla with a drizzle of spicy salsa mexicana.
The idea of making cheese from scratch might seem daunting at first, a culinary challenge reserved for expert cheesemongers. However, I was genuinely surprised by how straightforward and accessible this process turned out to be. With a little patience and attention to detail, you too can effortlessly create your own authentic Queso Fresco at home. Here’s why this recipe will quickly become a favorite:
- Unmatched Freshness and Creaminess: While Queso Fresco is known for its signature creamy and slightly tangy taste, the homemade version amplifies these beloved flavors to an entirely new level. You’ll truly taste the difference.
- Pure, Simple Ingredients: This recipe calls for just three core ingredients, free from the fillers, stabilizers, and preservatives often found in commercial cheeses. It’s clean eating at its finest.
- A Rewarding Culinary Experience: There’s immense satisfaction in knowing exactly what goes into your food. Making your own cheese is not only empowering but also deeply gratifying, transforming basic milk into a delicious artisanal product.
- Economic & Accessible: Crafting your own cheese can be more cost-effective than purchasing high-quality artisanal versions, making this fresh Mexican delicacy accessible to everyone.
What Is Queso Fresco? A Dive into This Mexican Dairy Delight
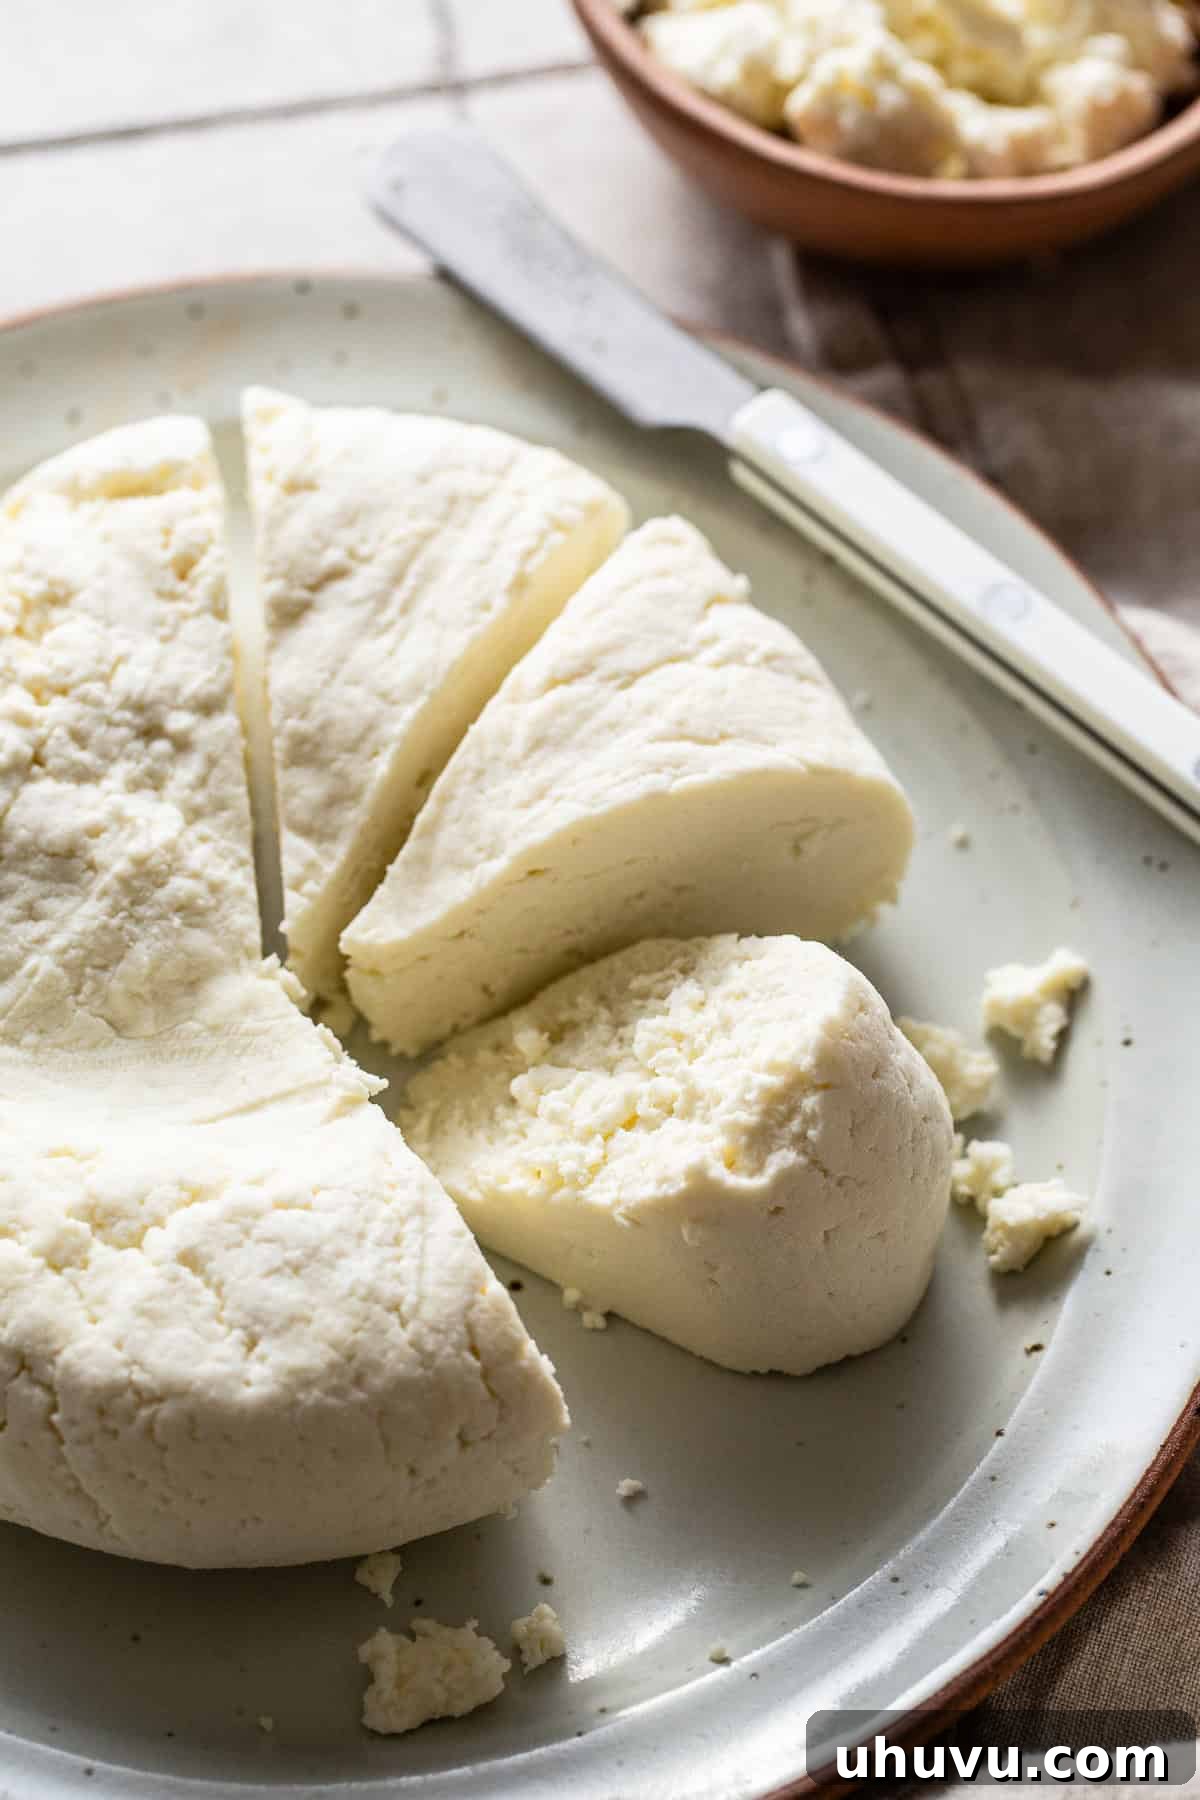
Queso Fresco, which translates to “fresh cheese” in Spanish, is a quintessential Mexican crumbling cheese that forms the backbone of countless traditional dishes. Traditionally, it’s crafted using raw cow’s milk or sometimes a blend of cow and goat milk. This unique composition contributes to its distinctive slightly salty yet mildly tangy flavor profile and its characteristically fresh taste.
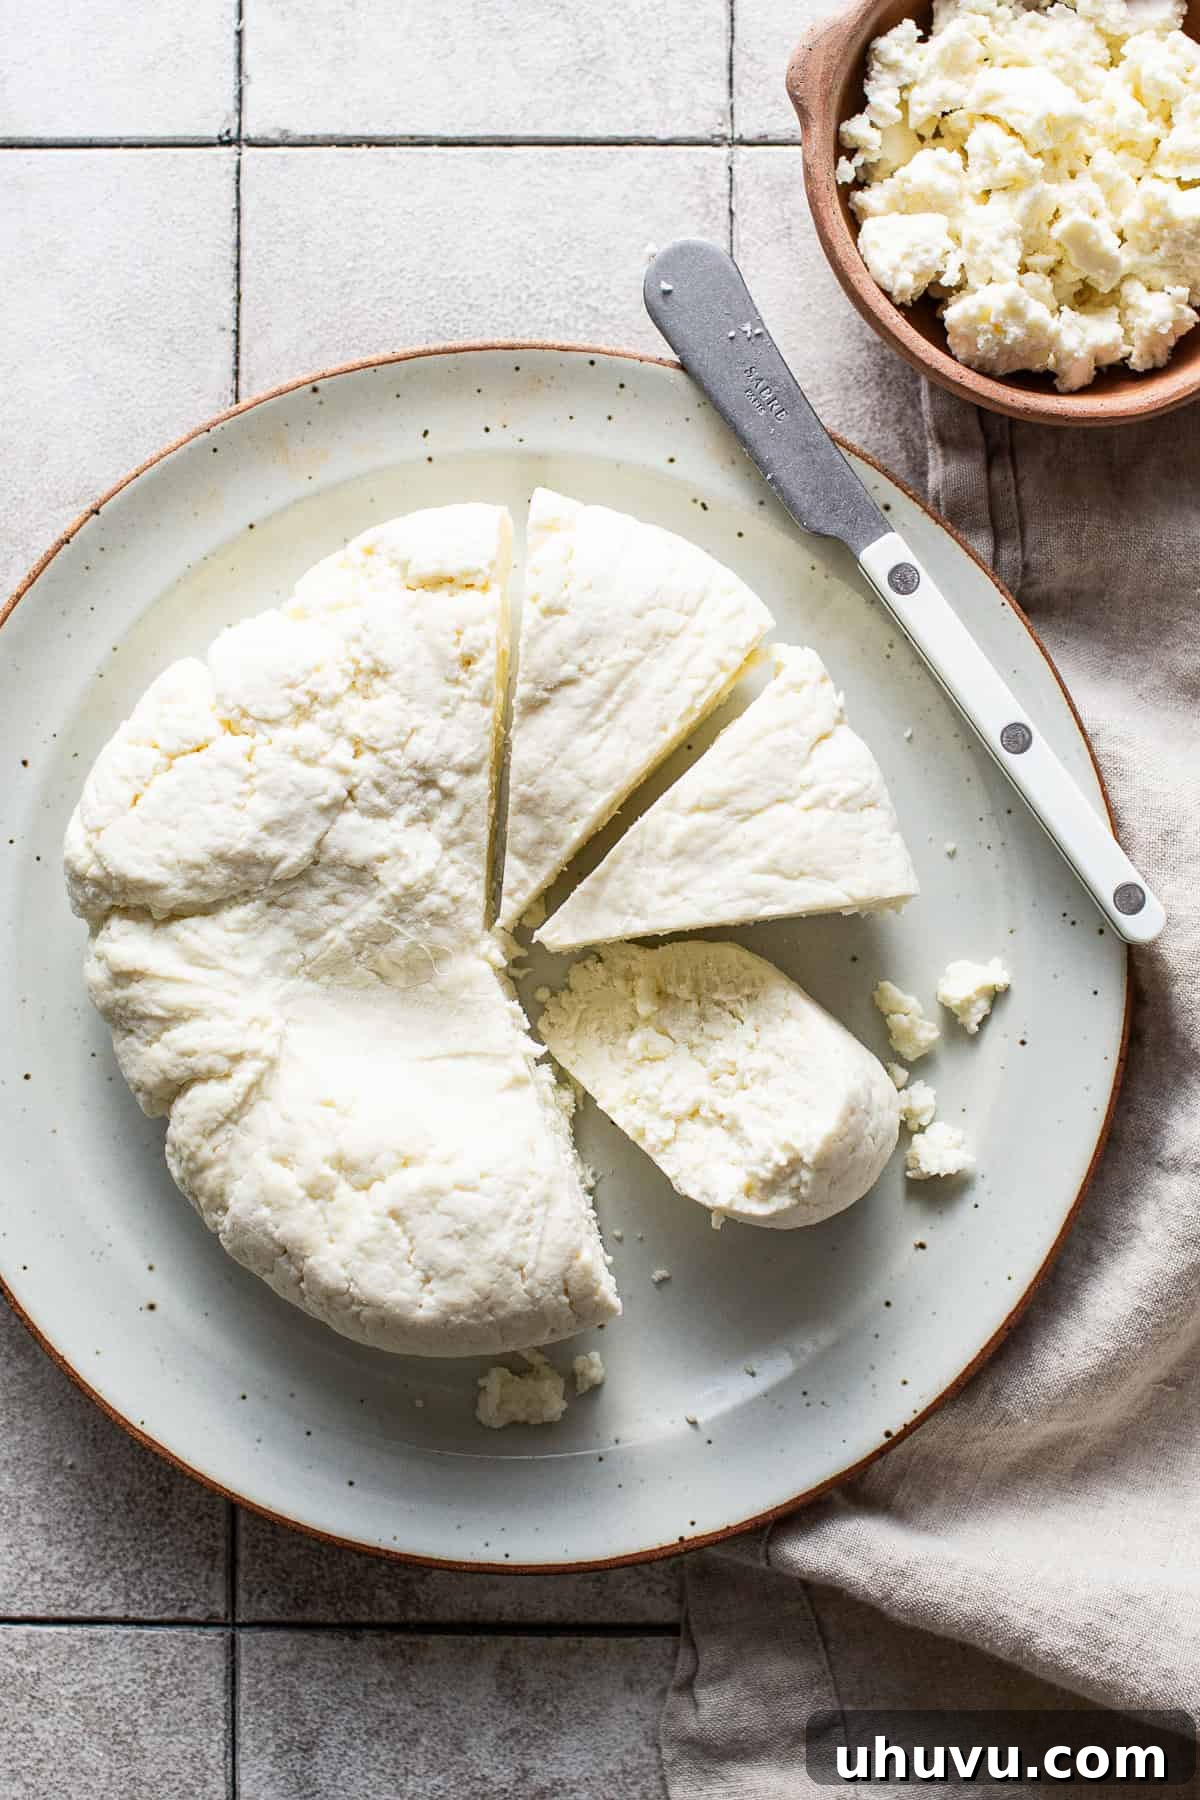
Unlike aged or hard cheeses, Queso Fresco is enjoyed young, without any extensive aging process. Its texture is soft, moist, and wonderfully crumbly, making it ideal for sprinkling over hot dishes where it can gently soften without fully melting into a gooey mess. It serves as an excellent counterpoint to spicy foods, offering a cooling and refreshing balance when used as a topping or incorporated as a stuffing to brighten any meal. To explore more about this versatile ingredient, you can delve deeper into the world of Queso Fresco.
While you can generally find Queso Fresco in the dairy section of most grocery stores, the experience of making your own elevates the flavor and texture to a new standard. Crafting it at home guarantees the ultimate fresh taste and allows you to enjoy a clean, unadulterated product made with simple, wholesome ingredients.
The Essential Ingredients for Authentic Homemade Queso Fresco
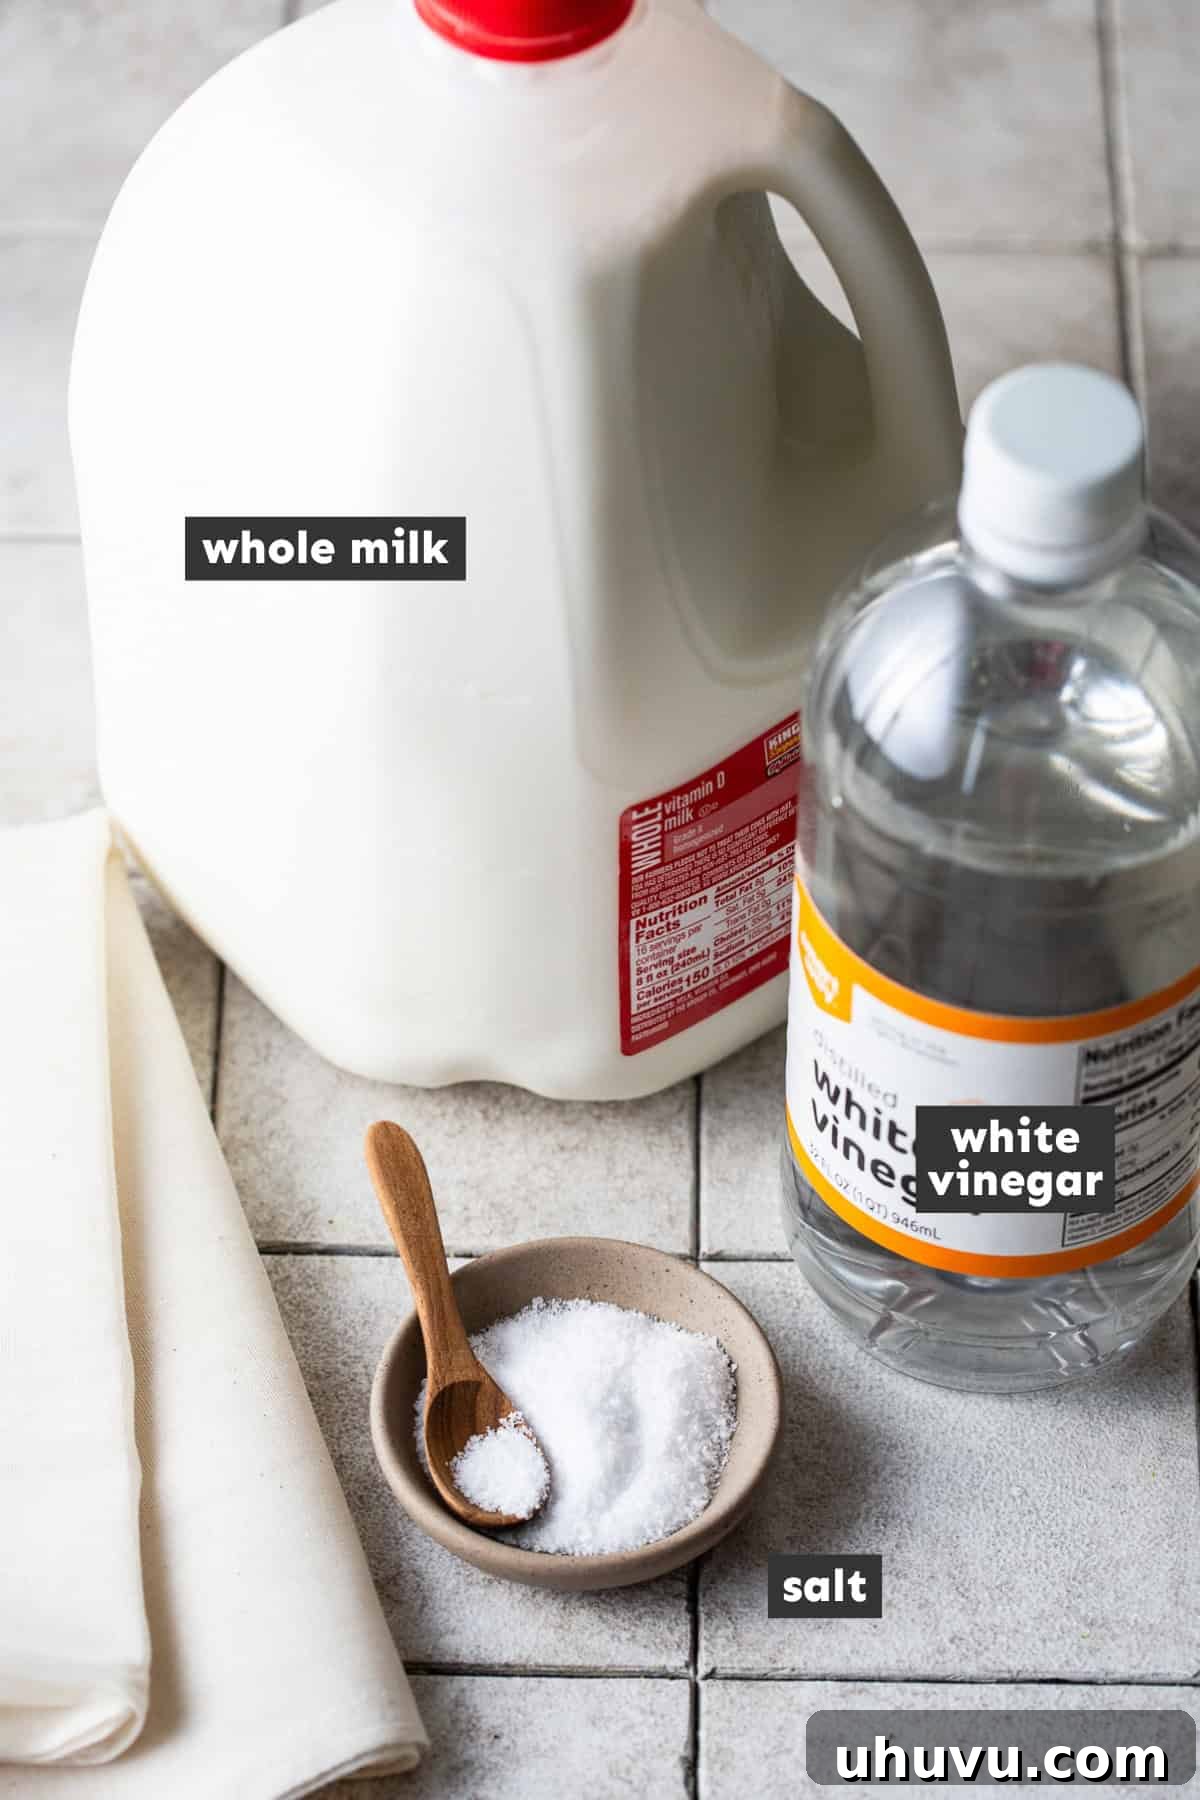
This section provides a detailed overview of the core ingredients required for this remarkably simple yet rewarding Queso Fresco recipe, explaining the role each plays in achieving the perfect texture and flavor. For the precise measurements and complete instructions, please refer to the comprehensive recipe card at the conclusion of this post.
- Whole Milk: This is unequivocally the best choice for making Queso Fresco. The high fat content in whole milk is crucial for developing that characteristic rich, creamy texture and full-bodied flavor. While it’s technically possible to use lower-fat milk like 2% or 1%, the resulting cheese will be notably softer and less flavorful. For optimal results, stick with whole milk.
- Distilled White Vinegar: This common pantry staple acts as the essential acidifier in our recipe, playing a critical role in separating the milk into curds and whey. The vinegar’s acidity coagulates the milk proteins, initiating the cheesemaking process. It’s important to note that substituting with other types of vinegar might impart different flavors to your cheese. Some recipes suggest lemon juice, but in my experience, lemon juice tends to produce a Queso Fresco with a much softer, almost ricotta-like consistency, which deviates from the desired crumbly texture.
- Kosher Salt: Salt is vital not only for enhancing the flavor of your Queso Fresco but also for its mild preservative qualities. Kosher salt is my preferred choice due to its flakey texture, which dissolves evenly and offers a clean taste. However, feel free to use fine table salt if that’s what you have on hand. If using table salt, remember that it is denser than kosher salt, so you will need to use approximately half the amount specified in the recipe to avoid over-salting. You can always adjust the salt content to your personal taste after the curds have formed.
Essential Equipment for Homemade Queso Fresco
While the ingredients are minimal, having the right tools makes the cheesemaking process smooth and successful. You likely have most of these items already:
- Large, Heavy-Bottomed Pot or Dutch Oven: Essential for heating the milk evenly and preventing scorching. A 6-8 quart pot is ideal for a gallon of milk.
- Instant-Read Thermometer: Absolutely crucial for precise temperature control. Milk temperature is key to successful curdling.
- Long-Handled Spoon or Spatula: For stirring the milk to prevent it from sticking to the bottom of the pot.
- Large Colander or Strainer: To hold the cheesecloth and curds during the draining process.
- Cheesecloth: You’ll need several layers of good quality, unbleached cheesecloth to effectively strain the curds from the whey.
- Large Bowl: To place the colander over, catching the whey as it drains.
- Plastic Wrap: To cover the curds during draining, helping to retain moisture and warmth.
- Heavy Object: A heavy can of food, a clean brick, or a small pot filled with water works perfectly for pressing the cheese.
The Simple Process: How to Make Queso Fresco Step-by-Step
Making Queso Fresco is a straightforward process that transforms milk into delicious cheese with just a few key steps. Follow these detailed instructions for a perfect batch every time:
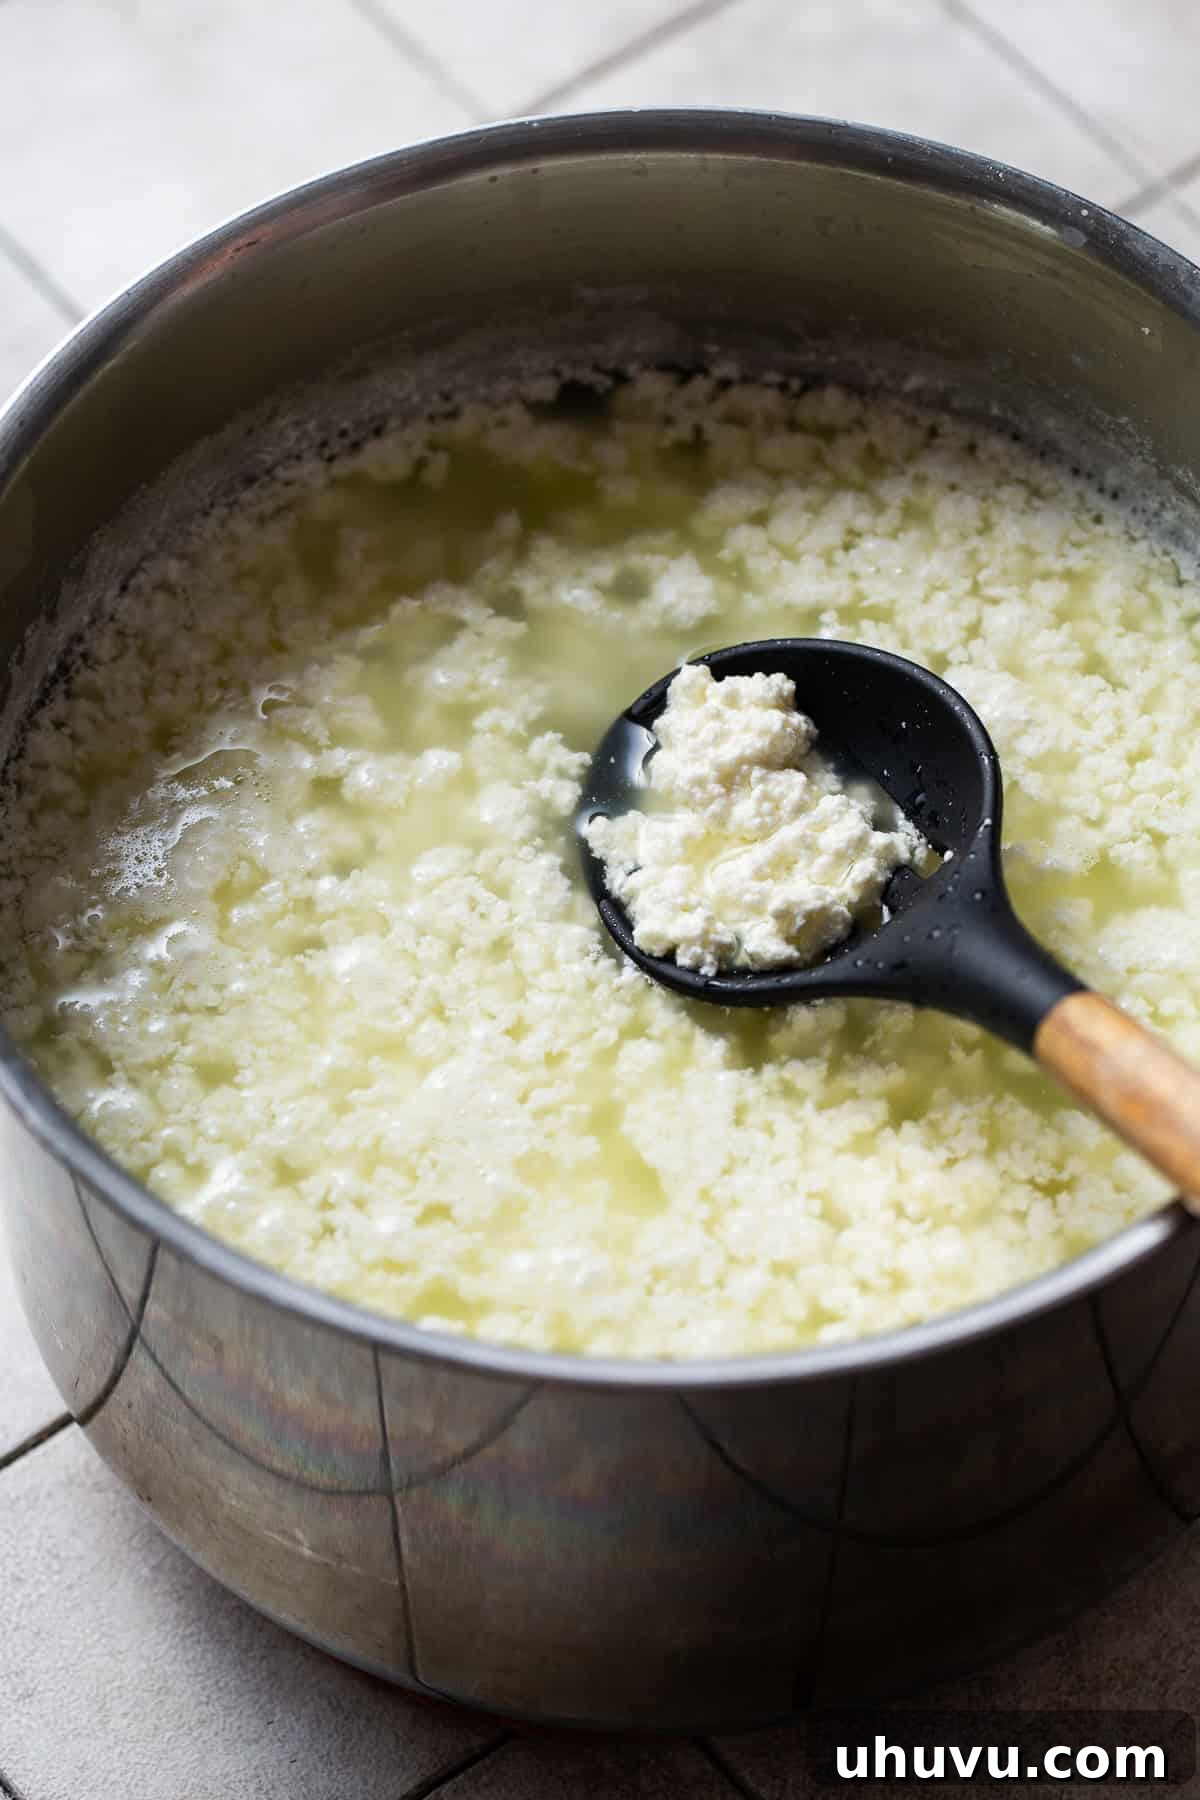
1. Heat the Milk: Pour the whole milk into a large, heavy-bottomed pot or Dutch oven. Place the pot over medium-low heat. Heat the milk gradually until it reaches a temperature of 170℉ (approximately 77°C). It is crucial to stir the milk frequently and gently throughout this process to prevent it from scorching or sticking to the bottom of the pot. Using an instant-read thermometer will help you monitor the temperature accurately. This step typically takes about 1 hour for a gallon of milk.
2. Initiate Curdling: Once the milk reaches the target temperature, immediately remove the pot from the heat. Carefully pour in the distilled white vinegar. Gently stir the mixture for about 30 seconds. You will notice the milk beginning to separate, forming soft, white curds and a yellowish, translucent liquid known as whey.
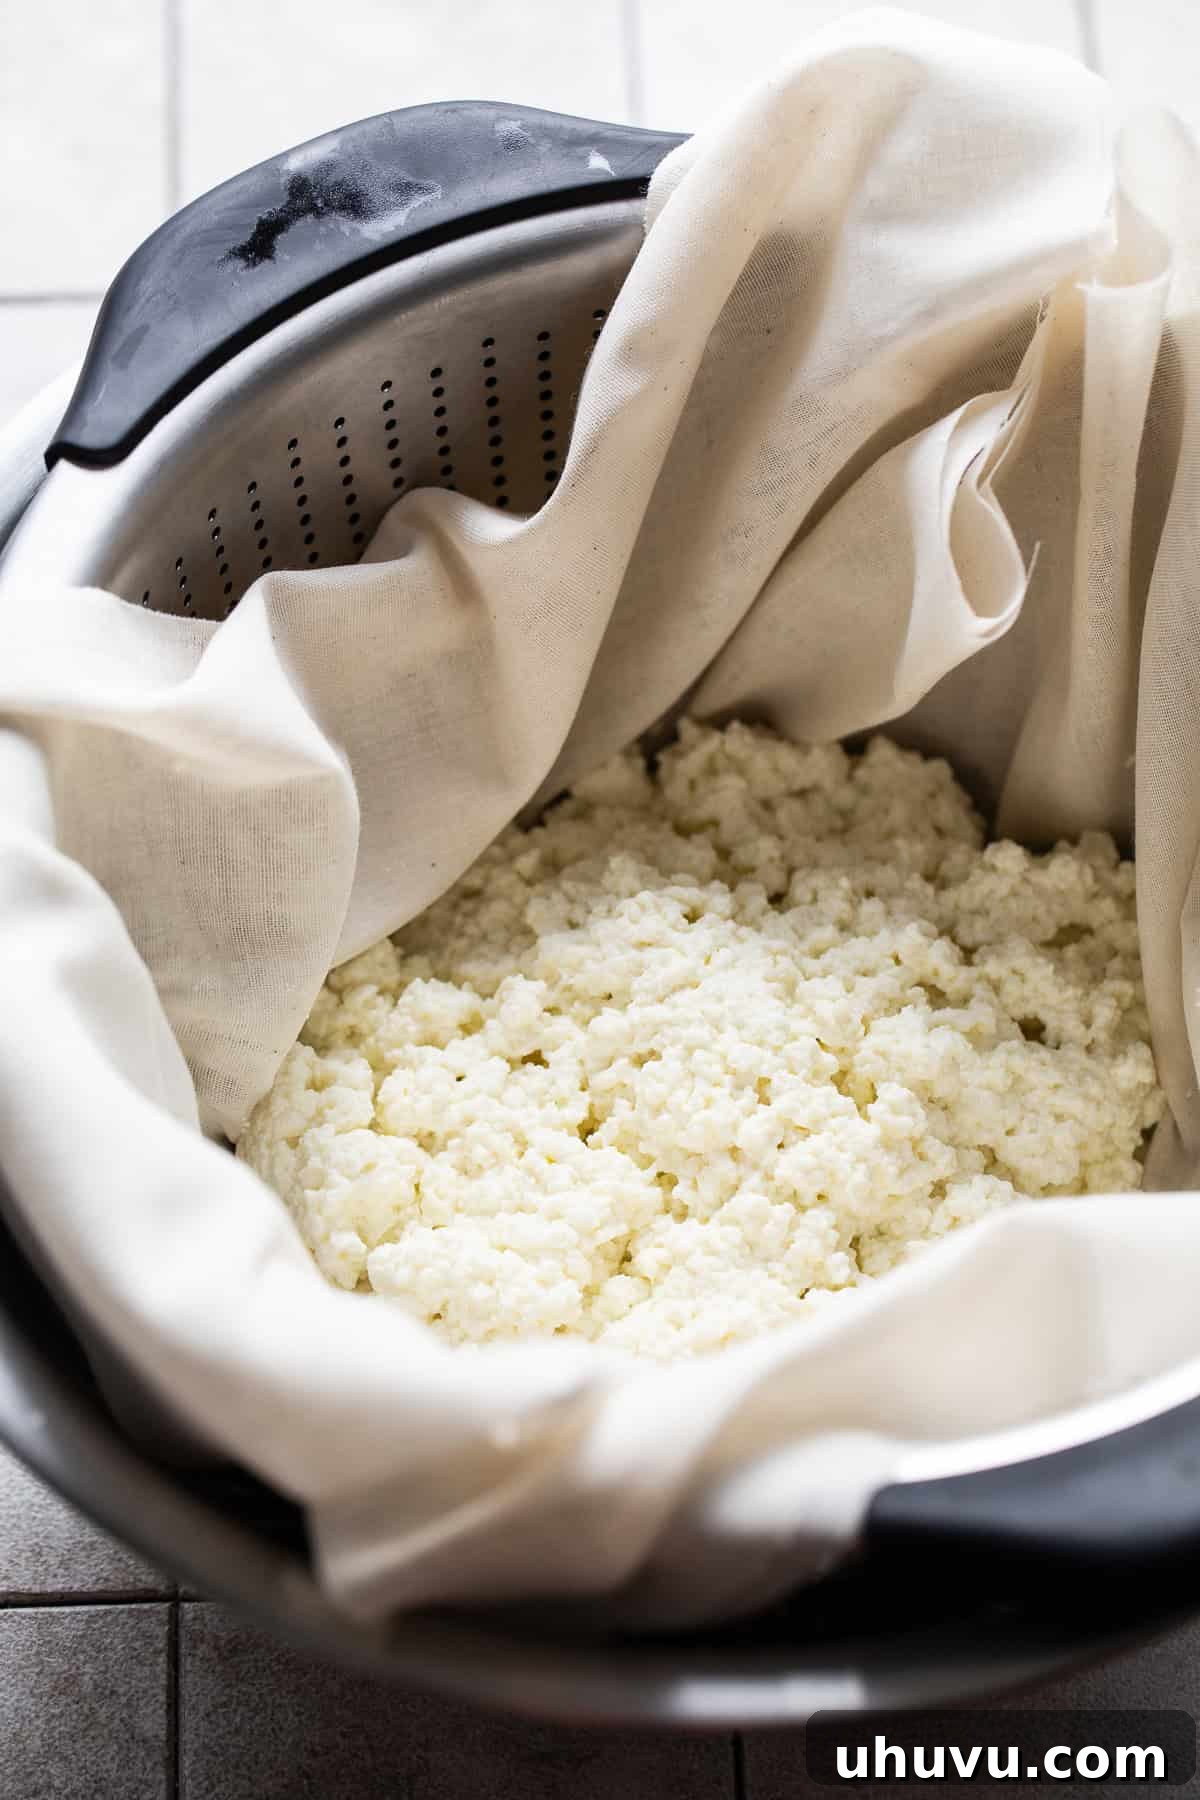
3. Rest and Separate: After stirring in the vinegar, leave the pot uncovered and allow the milk mixture to rest undisturbed for 30 minutes. During this time, the curds will continue to firm up and fully separate from the whey. Resist the urge to stir during this resting period, as it allows for optimal curd formation.
4. Prepare for Draining: Line a large colander or strainer with several layers of good quality cheesecloth. Place the prepared colander over a large bowl to collect the draining whey.
5. Strain the Curds: Using a slotted spoon or a spider strainer, carefully transfer the curds from the pot into the cheesecloth-lined colander. Avoid pouring the entire mixture at once, as this can cause the cheesecloth to collapse or become overwhelmed.
6. Initial Drain: Once all the curds are in the colander, cover the exposed curds with plastic wrap. This helps to retain moisture and warmth, facilitating a more even drain. Allow the curds to drain for approximately 20 minutes. This initial draining removes a significant amount of whey, but the cheese will still be quite soft.
7. Season the Cheese: After the initial drain, gently stir in the kosher salt until it is well combined with the curds. This is your opportunity to adjust the saltiness to your personal preference.
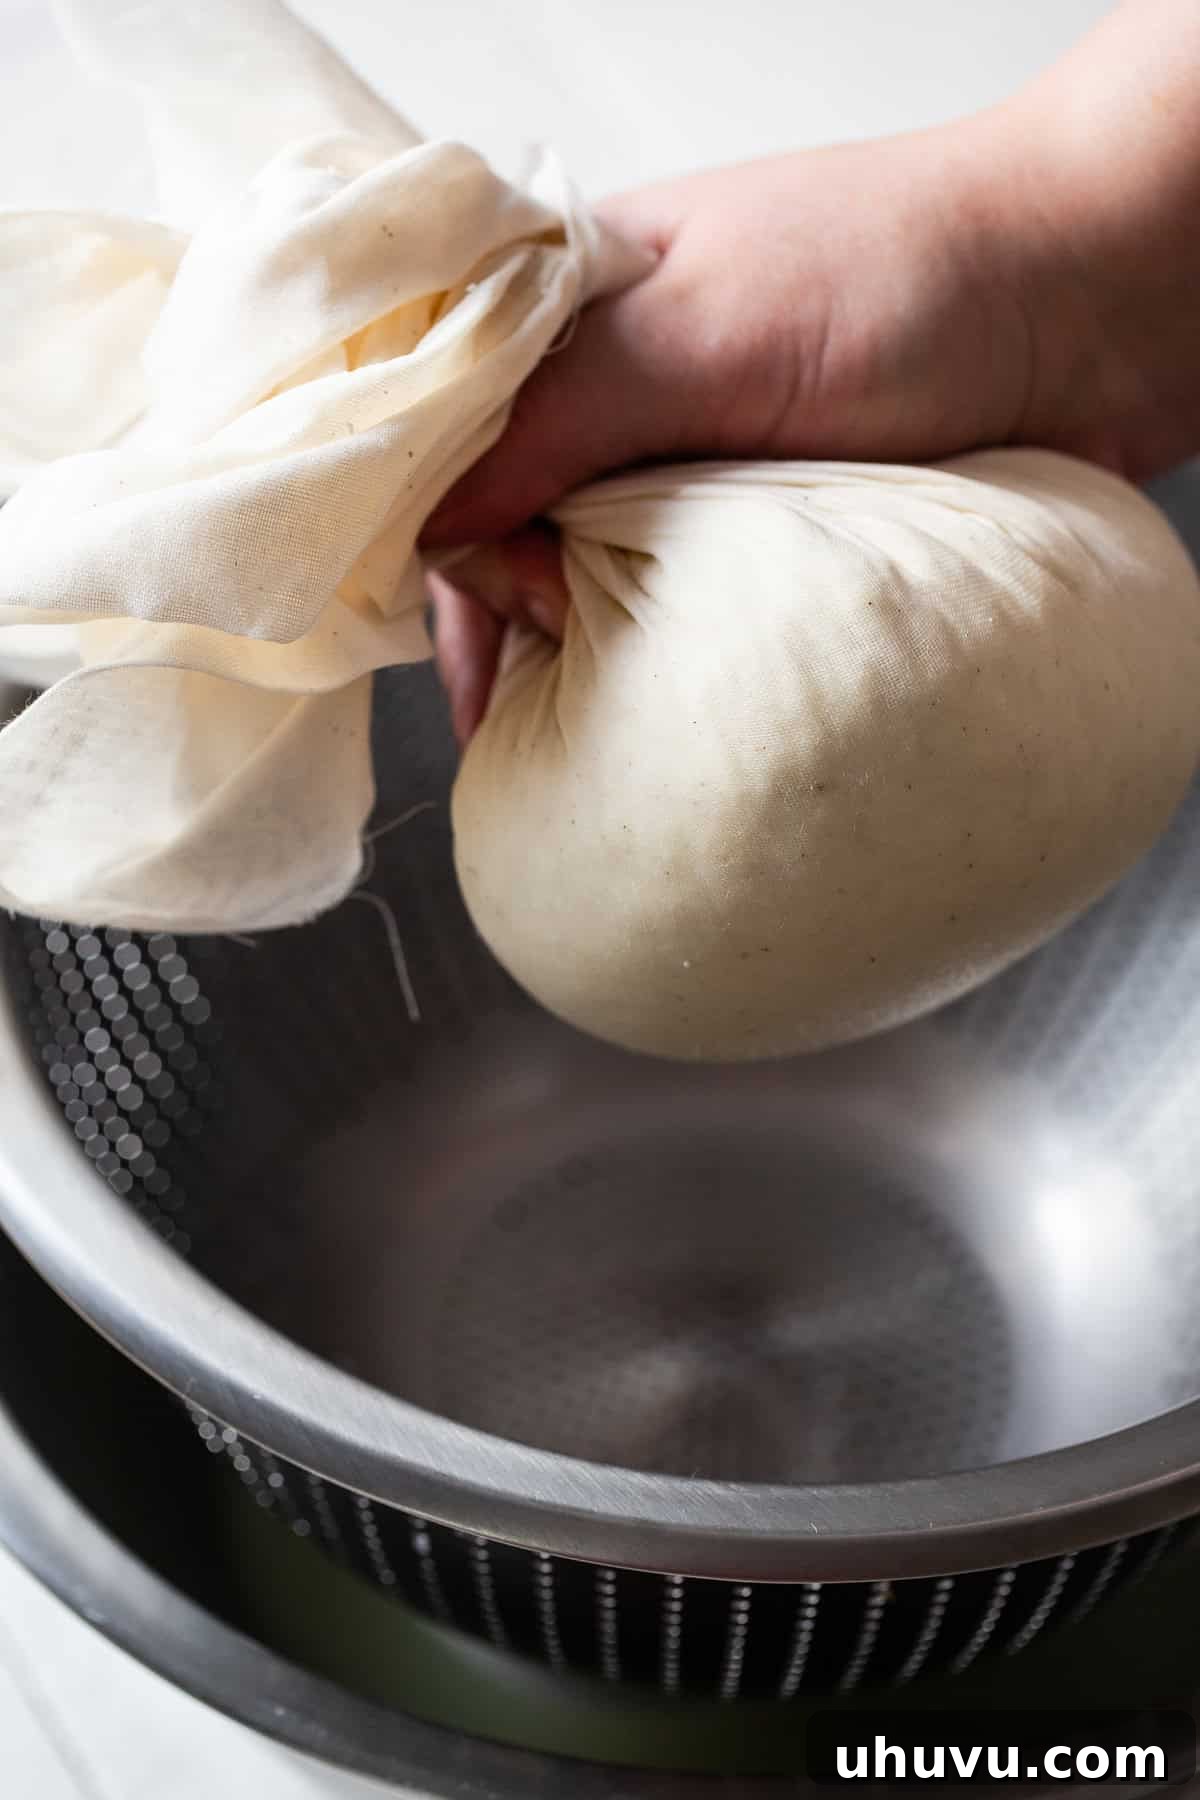
8. Shape the Cheese: Gather the corners of the cheesecloth together, bringing the curds into a compact ball in the center. Gently press the curds to form them into a round, hockey puck-like shape. This helps to remove more whey and gives the Queso Fresco its traditional form.
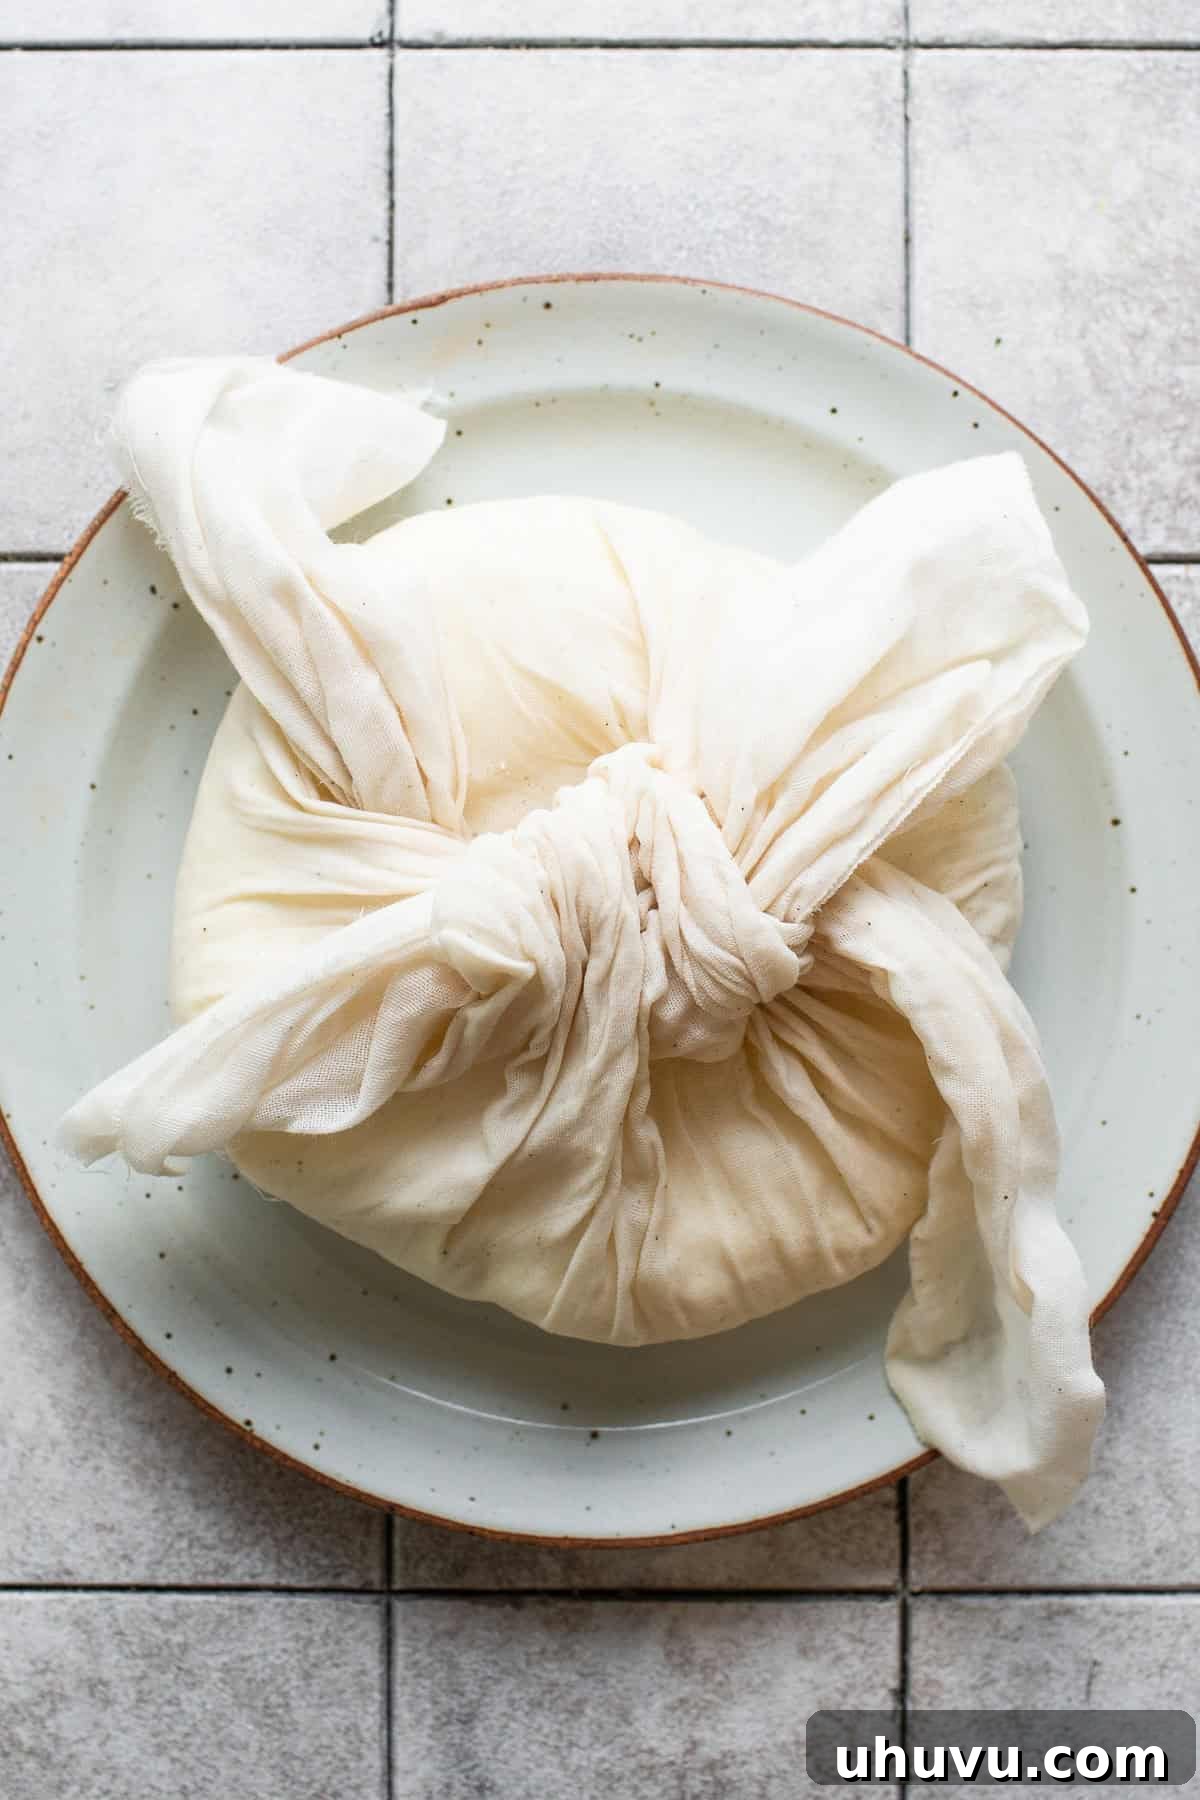
9. Press the Cheese: Tie the cheesecloth securely closed around the shaped cheese ball. Place the bound cheese back into the colander or strainer. Position a heavy can or a small pan filled with weights (like other cans or water) on top of the cheese bundle. Allow it to sit and press for approximately 1 ½ hours. This final pressing step is crucial for achieving the desired firm, crumbly texture of Queso Fresco.
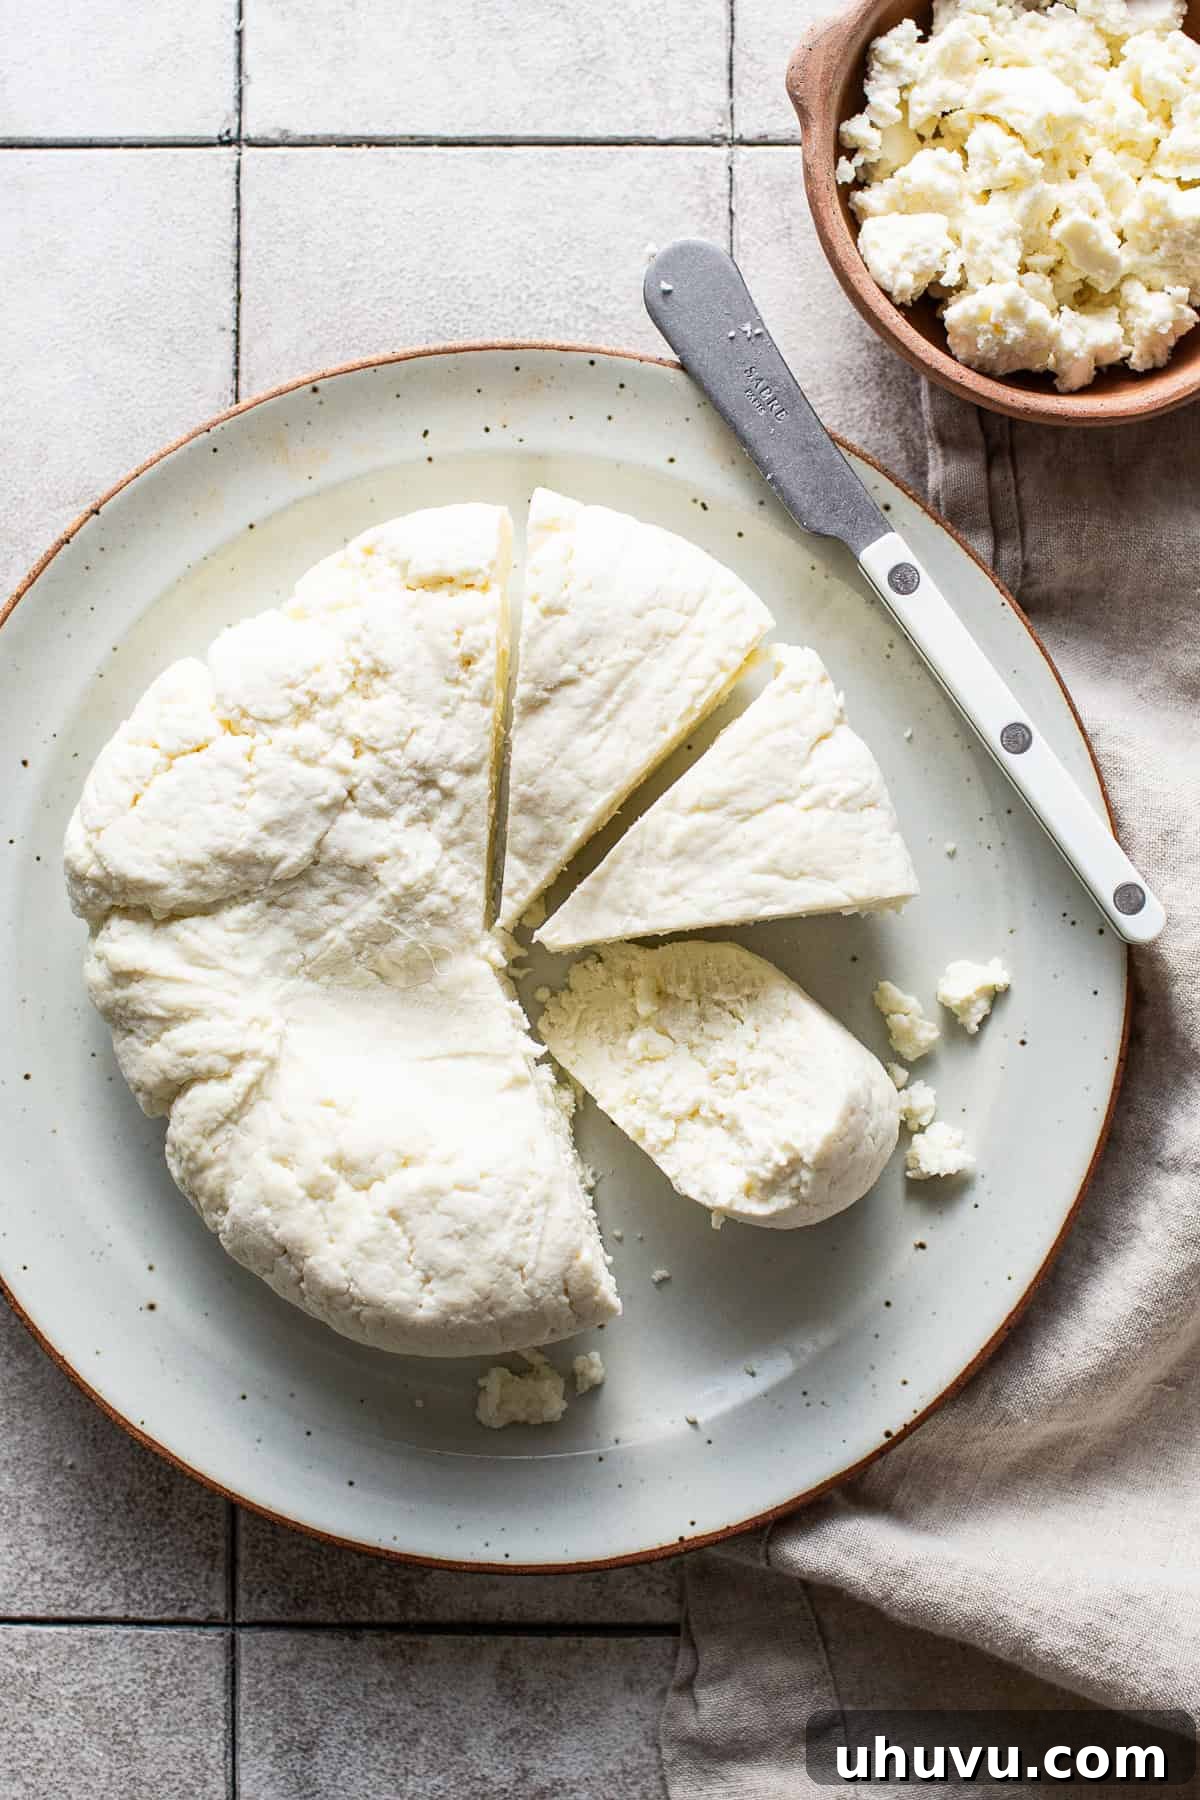
10. Uncover and Serve: After the pressing time, uncover the cheese and carefully unwrap it from the cheesecloth. Your homemade Queso Fresco is now ready! You can transfer it to an airtight container for storage in the refrigerator or use it immediately to enhance your favorite Mexican dishes.
Expert Tips for Perfect Homemade Queso Fresco
Achieving consistently excellent homemade Queso Fresco is easy with these helpful tips and considerations:
- Monitor Milk Temperature Closely. As the milk heats to 170℉ (77°C), constant stirring and careful temperature monitoring are essential. If left unattended, milk can easily scorch, imparting an unpleasant flavor. I highly recommend using an instant-read thermometer to ensure accuracy and prevent any mishaps.
- Understand Your Acid Choice: Queso Fresco is a fairly simple and straightforward recipe. While distilled white vinegar is preferred for its neutral flavor and consistent curdling, some variations include using lemon juice. However, I’ve found that lemon juice tends to give the Queso Fresco a much softer, more delicate consistency, akin to ricotta cheese. If a softer cheese is your preference, you can certainly use ¾ cup of fresh lemon juice (which is typically the juice of about 5-6 lemons) as a substitute.
- Achieving a More Crumbly Texture: If your ideal Queso Fresco is extra crumbly, you can adjust the final pressing step. Instead of pressing the cheese with a heavy object, gather and tie the cheesecloth containing the curds over your kitchen faucet. Allow it to drip naturally for a longer period (perhaps 2-3 hours) until it reaches your desired dryness and crumbly consistency.
- Salt to Taste: The amount of salt specified in the recipe is a guideline. After the initial draining and before pressing, taste a small piece of the curd. You can easily adjust the salt content as needed, adding more in small increments until it perfectly suits your palate. Remember, it’s easier to add salt than to remove it.
- Don’t Waste the Whey: The greenish-yellow liquid that drains from the curds, known as whey, is a nutrient-rich byproduct. Don’t discard it! It can be used in various ways: as a liquid in baking (breads, pancakes), to cook grains like rice or quinoa, as a base for soups, or even as a fertilizer for plants.
Delicious Ways to Serve Your Homemade Queso Fresco
Queso Fresco is renowned for its incredible versatility in Mexican cuisine, serving as the perfect finishing touch for nearly every savory dish you can imagine. Its mild, tangy flavor and crumbly texture make it an ideal complement without overpowering other ingredients. Here are even more ideas to inspire your culinary creations:
- As a Classic Topping: Generously crumble it on top of vibrant chilaquiles verdes, savory esquites (Mexican street corn salad), creamy refried beans, rich cheese enchiladas, or hearty migas for an added layer of freshness and flavor.
- Versatile Filling: Use it as a delightful filling for soft enfrijoladas or tangy entomatadas, providing a mild, creamy counterpoint to the rich sauces. It’s also excellent in simple quesadillas for a light cheese flavor.
- Layered in Sandwiches: Slice it thinly and layer it inside a classic torta (Mexican sandwich) or a robust torta de milanesa, adding a fresh, milky note that balances the other bold components.
- Salads and Soups: Sprinkle crumbled Queso Fresco over a fresh green salad with avocado and corn, or stir it into a warm bowl of tortilla soup just before serving.
- Simple Appetizer: Serve slices or chunks of Queso Fresco with fresh fruit like watermelon or guava, a drizzle of honey, or alongside your favorite crackers and a glass of wine.
- Tostadas & Sopes: A generous topping of Queso Fresco is a must for crispy tostadas and fluffy sopes, bringing a cool contrast to savory meats and vegetables.
Frequently Asked Questions About Queso Fresco
To make authentic homemade Queso Fresco, you only need three fundamental ingredients: whole milk, an acidifier like distilled white vinegar, and salt (kosher salt is recommended).
Absolutely! This recipe specifically outlines how to make Queso Fresco without rennet. You only need milk and a food-grade acid, such as distilled white vinegar, to achieve the desired curdling. Lemon juice can also be used as an alternative acid.
Whole cow’s milk is the ideal choice for making Queso Fresco. Its higher fat content contributes significantly to the creamy texture and rich flavor that defines this cheese. While you can technically use lower-fat milk varieties like 2% or 1%, be aware that the resulting cheese will likely have a less desirable, softer texture and a less pronounced flavor compared to using whole milk.
Homemade Queso Fresco, when stored properly in an airtight container in the refrigerator, will maintain its freshness and quality for up to 1 week. Always check for any signs of spoilage, such as off-smells or discoloration, before consuming.
If your milk isn’t curdling, it’s usually due to two main reasons: either the milk wasn’t hot enough, or not enough acid was added. Ensure the milk reaches 170°F (77°C) with an accurate thermometer. If it’s at temperature but still not curdling, you can add another tablespoon of vinegar, stir gently, and let it rest for a few more minutes until curds clearly separate from the whey.
Yes, absolutely! Once the curds have drained and you’re ready to add salt, you can also gently mix in finely chopped fresh herbs like cilantro or chives, or a pinch of spices such as cumin or chili powder. This is a fantastic way to customize your homemade Queso Fresco and add an extra layer of flavor.
Proper Storage for Homemade Queso Fresco
To ensure your delicious homemade Queso Fresco remains fresh and flavorful, proper storage is key. Place the cheese inside an airtight container immediately after making it. Store this container in the refrigerator, where the Queso Fresco will remain fresh and ready to enjoy for up to 1 week. I do not recommend freezing homemade Queso Fresco, as the freezing and thawing process can significantly alter its delicate texture, making it grainy or watery.
Explore More Authentic Mexican Recipes
Delve deeper into the rich tapestry of Mexican flavors with these other fantastic homemade recipes:
- Homemade Chorizo Recipe
- Crispy Homemade Tostada Shells
If you tried this homemade Queso Fresco recipe or any other recipe on Isabel Eats, don’t forget to give it a rating and let me know how it went in the comments below! I love hearing about your experience making it and your creative ways of enjoying this fresh Mexican cheese.
Homemade Queso Fresco Recipe
Ingredients
- 1 gallon whole milk
- ⅔ cup distilled white vinegar
- 1 tablespoon kosher salt
Instructions
- Add the whole milk to a large, heavy-bottomed pot or Dutch oven. Heat the milk over medium-low heat until it reaches 170℉ (77°C), stirring frequently with a long-handled spoon to prevent scorching. Use an instant-read thermometer for accurate temperature readings. This step should take approximately 1 hour.
- Once the milk reaches the target temperature, remove the pot from the heat. Pour in the distilled white vinegar and gently stir the mixture until the milk visibly begins to curdle and separate into curds and whey.
- Leave the pot uncovered and allow the curds to form and fully separate from the whey. This resting period should last for 30 minutes.
- Prepare a colander or strainer by lining it with several layers of cheesecloth. Set the lined colander over a large bowl to collect the whey. Using a slotted spoon, carefully transfer all the curds into the prepared colander.
- Cover the exposed curds with plastic wrap to help retain moisture and facilitate even draining. Allow the curds to drain for 20 minutes.
- After the initial drain, remove the plastic wrap and gently stir in the kosher salt until it is well combined with the curds. You may taste a small amount and adjust salt to your preference.
- To press the cheese, gather the curds into a compact ball in the middle of the cheesecloth. Press them firmly to form a hockey puck shape. Securely tie the cheesecloth closed around the cheese. Place the bound cheese back into the colander or strainer and place a heavy can or pan on top to weigh it down. Let it sit and press for about 1 ½ hours.
- Once the pressing is complete, uncover the cheese and carefully remove it from the cheesecloth. Your fresh Queso Fresco is ready to be transferred to an airtight container for storage in the refrigerator, or you can enjoy it immediately.
Notes
- Storage: Homemade Queso Fresco should be stored in an airtight container in the refrigerator and is best enjoyed within 1 week. Freezing is not recommended as it can negatively affect the texture.
- Vinegar Alternatives: While distilled white vinegar yields the best texture for classic Queso Fresco, you can use ¾ cup of fresh lemon juice (from about 5-6 lemons) if you prefer a softer, ricotta-like consistency.
- For a more crumbly texture: Instead of pressing with a heavy object, gather and tie the cheesecloth bundle over your kitchen faucet and allow it to drip for 2-3 hours for a firmer, more crumbly cheese.
- Salt Adjustment: The amount of salt in the recipe is a recommendation. Always taste the curds after initial draining and before final pressing, then adjust the salt to your personal preference.
Nutrition
Nutrition information is automatically calculated, so should only be used as an approximation and can vary based on specific ingredients and preparation methods.
Photography by Ashley McLaughlin.