
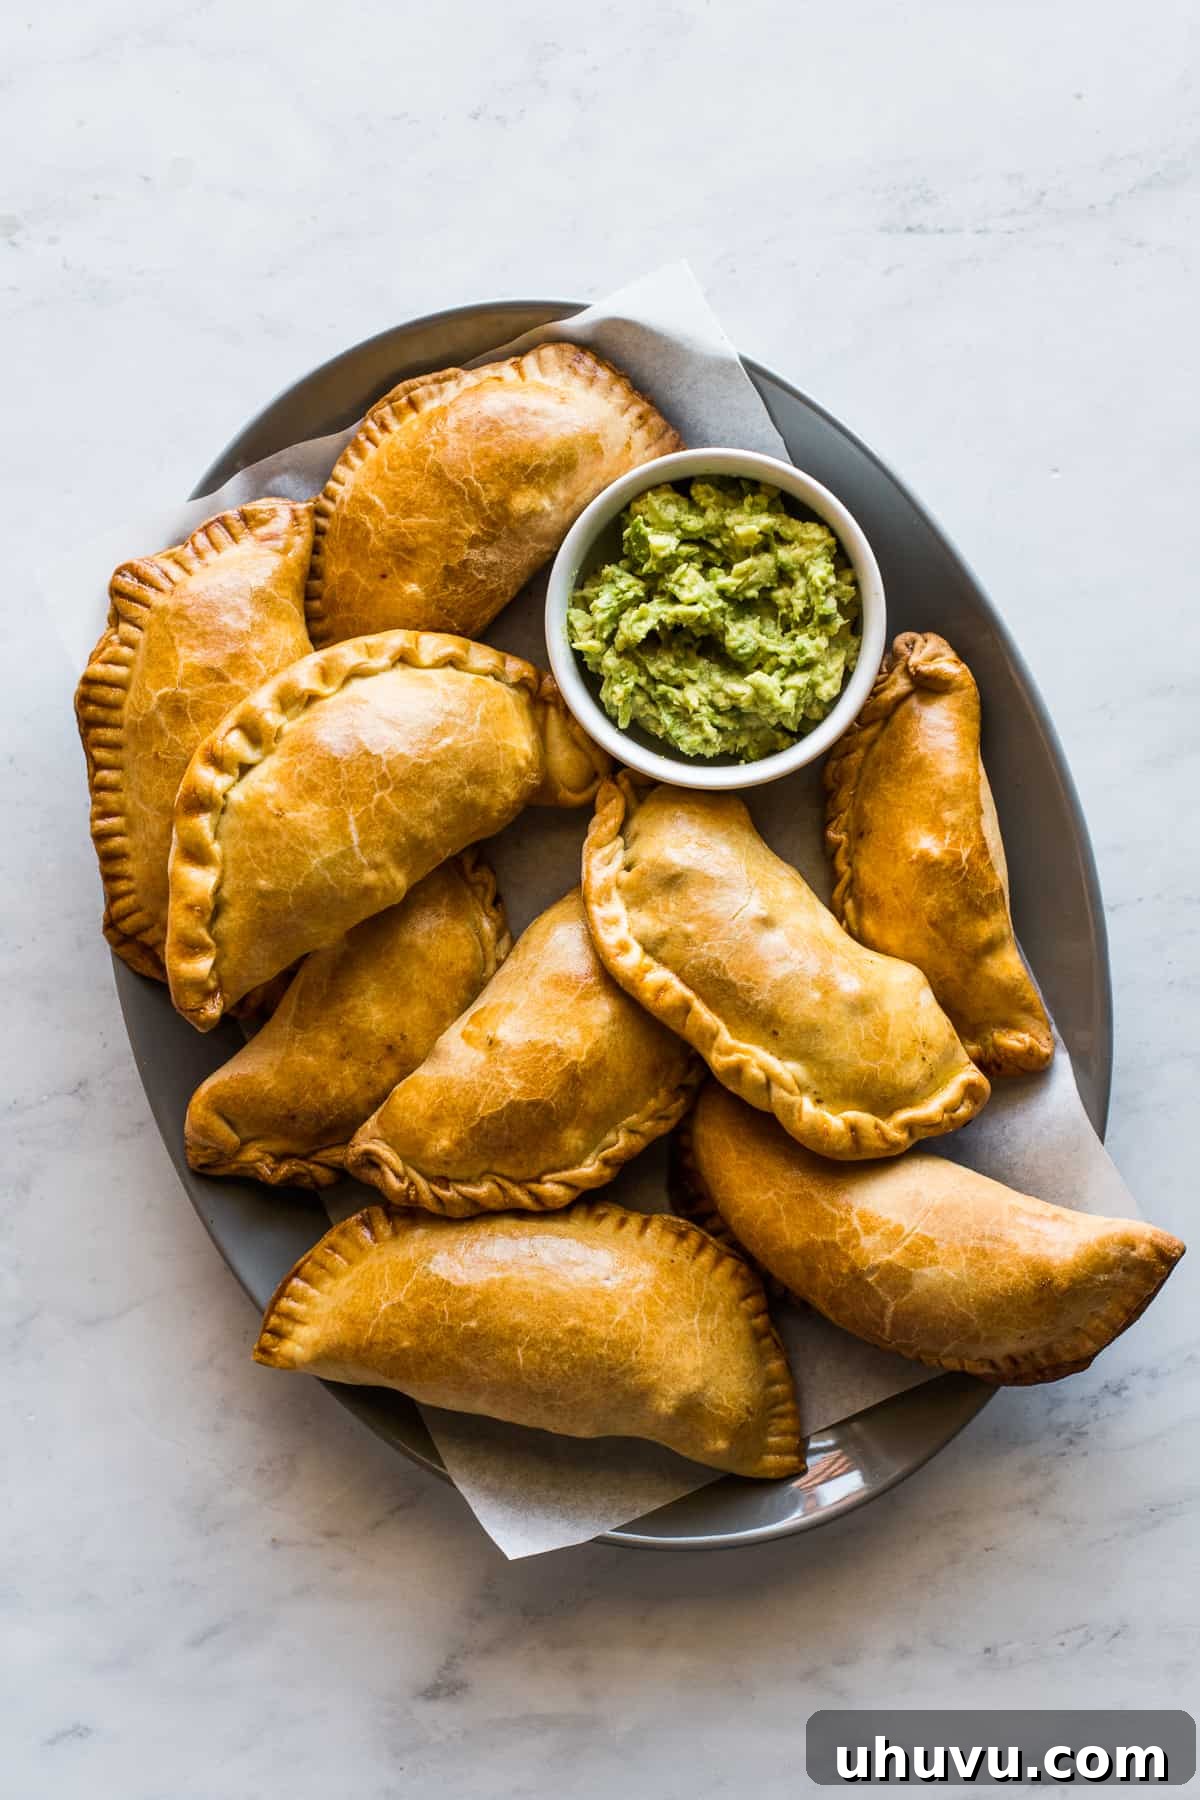
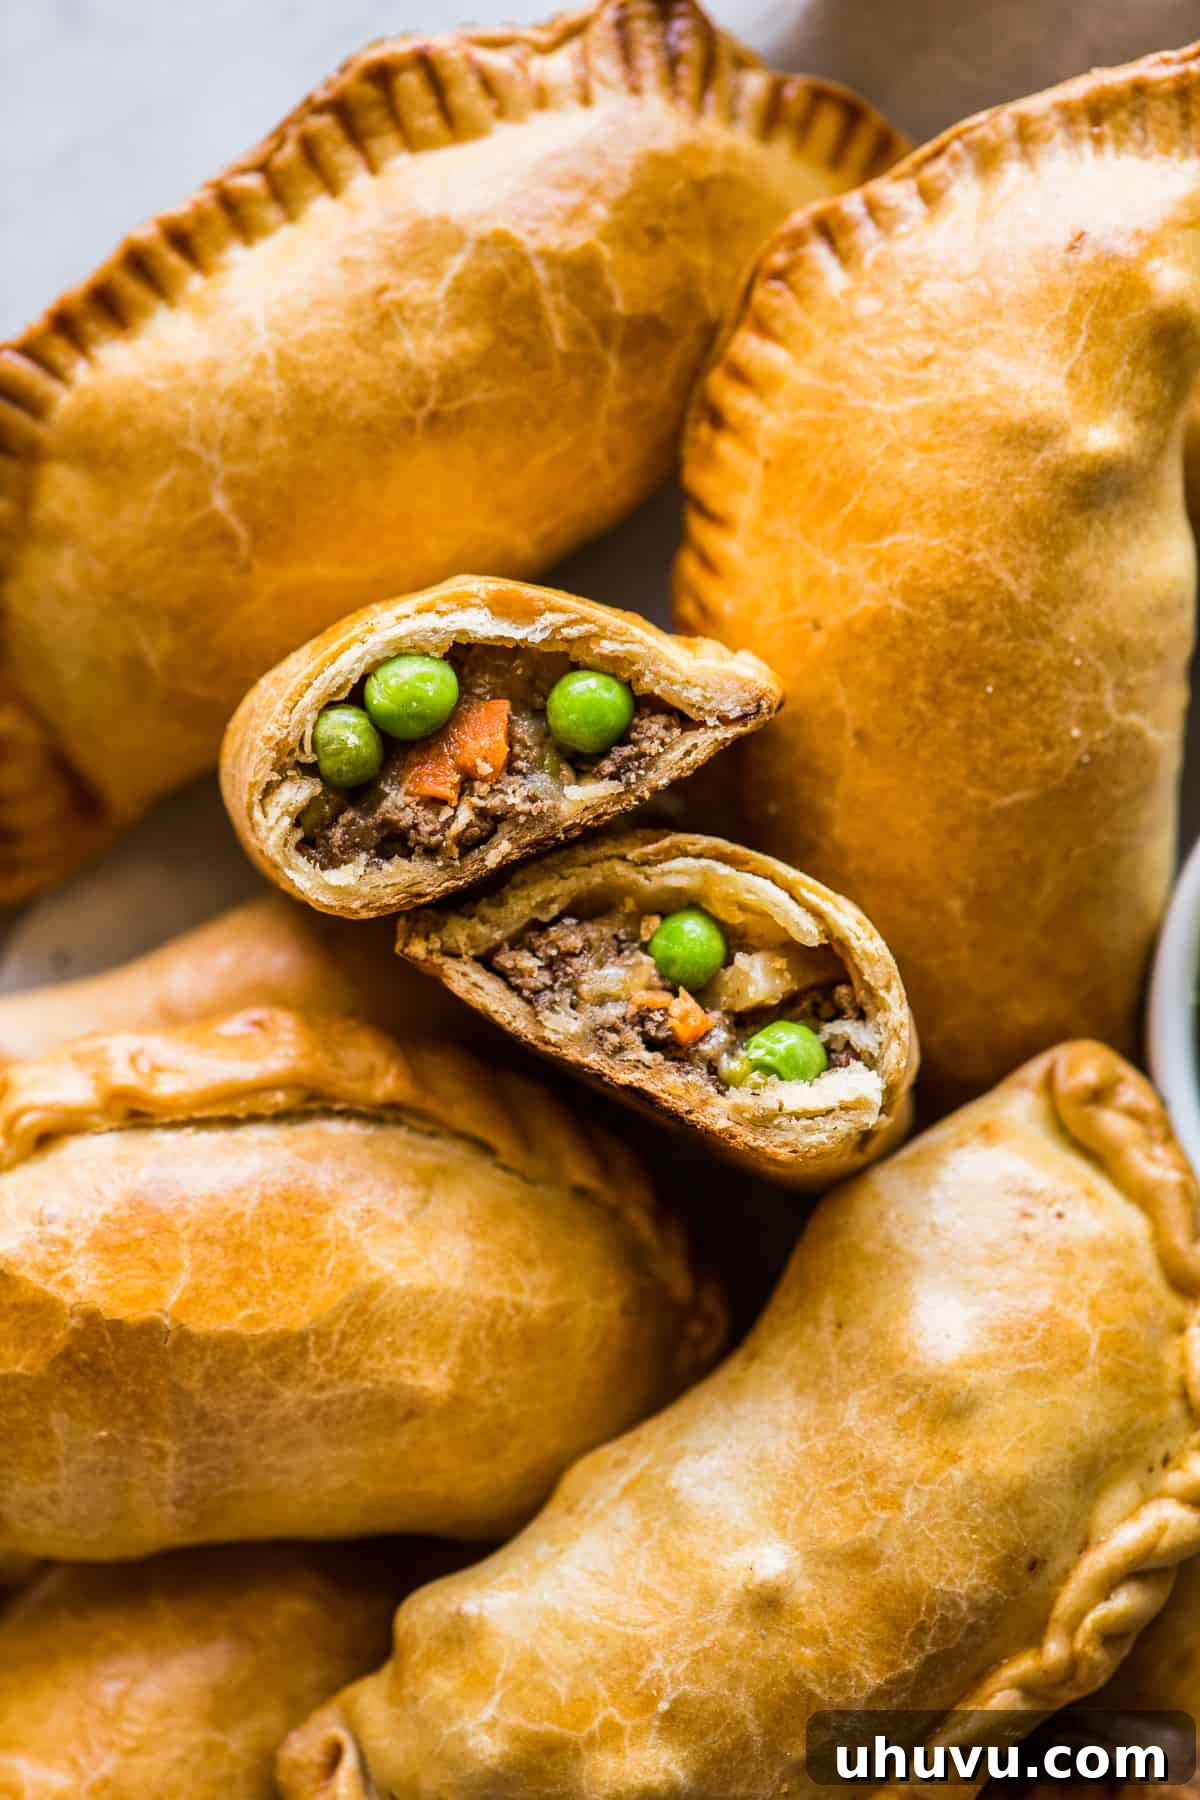
Indulge in the ultimate handheld delight: savory beef empanadas. These culinary treasures boast a perfectly crisp and flaky pastry crust, lovingly filled with a rich, flavorful ground beef picadillo, complemented by gooey melted cheese. They’re an irresistible treat that requires no knife or fork – just pure, delicious enjoyment!
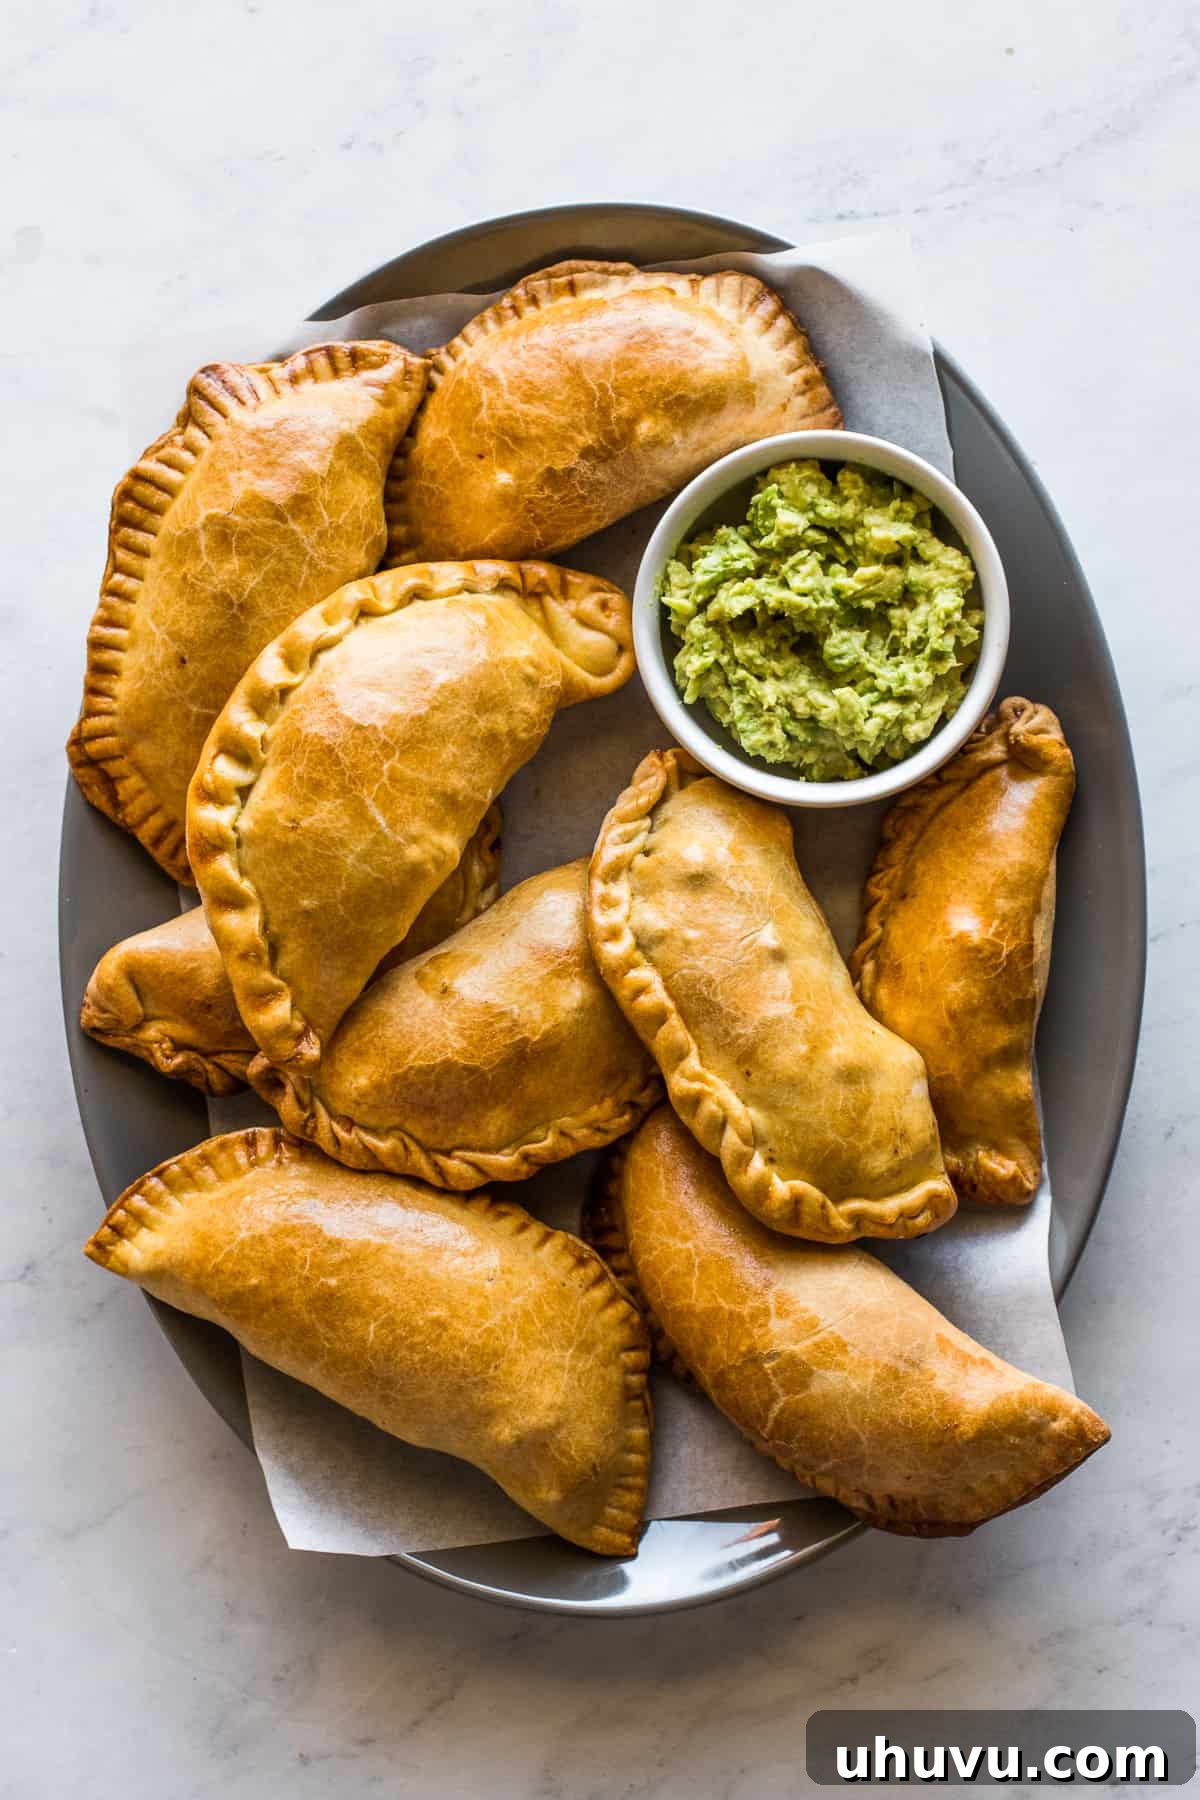
Empanadas are incredibly versatile, embracing a myriad of fillings, from sweet to savory. Over the years, I’ve delighted in crafting a variety of these delectable pockets, including pumpkin empanadas, comforting baked apple empanadas, convenient air fryer empanadas, and even my family’s treasured sweet and savory empanadas. Each variation offers a unique culinary journey, showcasing the incredible adaptability of this beloved dish.
Among all these delightful creations, these homemade ground beef empanadas hold a special place as one of my all-time favorites. They are remarkably simple to prepare, yet bursting with deep, savory flavors, making them an ideal, fuss-free meal or snack. The combination of a tender, flaky crust and a hearty, well-seasoned filling makes them an absolute crowd-pleaser that’s hard to resist.
What is an Empanada? A Culinary Journey
At its heart, an empanada is a popular Latin American dish with roots stretching back to Spain. The word “empanada” itself comes from the Spanish verb “empanar,” meaning “to wrap in bread.” Essentially, it’s a baked or fried dough pastry that is generously stuffed with a sweet or savory filling, then folded and sealed before cooking. These crescent-shaped pockets are cherished across many cultures and go by various names, sometimes referred to as turnovers, pasties, or individual meat pies.
The beauty of empanadas lies in their incredible diversity. While the basic concept remains the same – a delicious filling encased in dough – the ingredients for both the dough and the filling can vary dramatically depending on the region and cultural traditions. For example, Argentinian empanadas often feature beef, olives, and hard-boiled eggs, while Chilean versions might include pino (a mixture of ground beef, onions, and spices) and raisins. Colombian empanadas typically have a crisp, cornmeal-based crust and are deep-fried, often filled with potato and meat. In the Philippines, they might contain ground pork or chicken with potatoes and carrots, sometimes with a slightly sweeter crust. This rich tapestry of flavors and textures makes the empanada a truly global comfort food, celebrated for its portability, hearty nature, and delicious taste.
Crafting the Perfect Homemade Empanada Dough
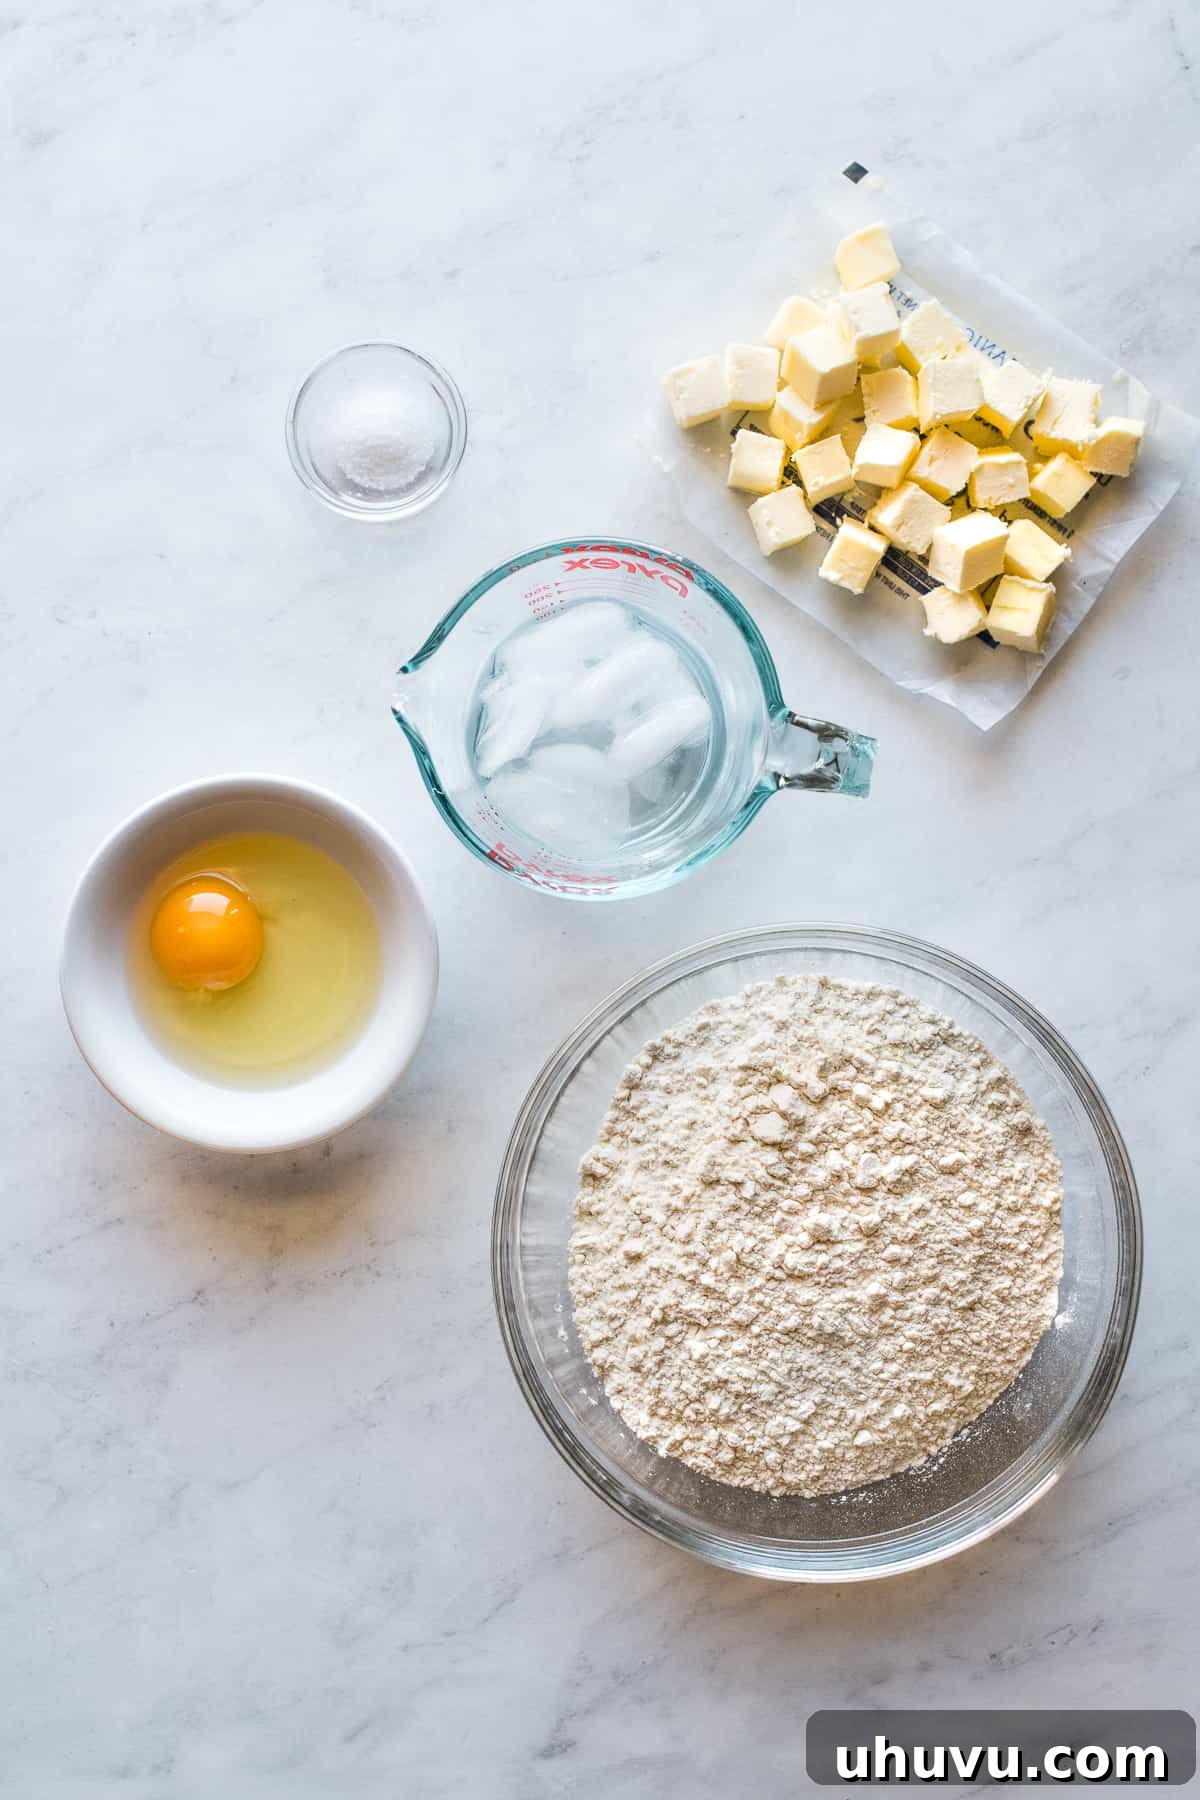
While store-bought pastry dough can be a convenient shortcut, there’s nothing quite like the taste and texture of homemade empanada dough. This recipe features a dough that is not only quick and simple to make but also yields a wonderfully crisp, tender, and flaky crust that perfectly complements the savory filling. You’ll only need five fundamental ingredients to create this fantastic foundation:
- **All-purpose flour:** The structural base of our dough, providing the necessary gluten for elasticity.
- **Fine salt:** Essential for seasoning the dough itself, enhancing the overall flavor of the empanada.
- **Large eggs:** Eggs add richness, help with binding, and contribute to the beautiful golden color when baked.
- **Cold water:** Keeping the water ice-cold is crucial for achieving a flaky crust. It prevents the butter from melting prematurely and inhibits excessive gluten development, resulting in a tender texture.
- **Cold unsalted butter:** The secret to that coveted flakiness! Cold butter, cut into small cubes, creates pockets of steam during baking, separating the layers of dough and giving us that delightful flaky texture. Using unsalted butter allows you to control the salt content precisely.
For ease and speed, I recommend using a food processor to bring the dough together. Its pulsing action quickly incorporates the butter into the flour without overworking the dough, which is key for tenderness. However, if you don’t have a food processor, fret not! You can absolutely make this dough by hand. Simply use your fingertips to cut the cold butter into the flour mixture until it resembles coarse crumbs, or employ a pastry cutter for an equally effective result. The key is to work quickly to keep the butter as cold as possible.
Beef Empanada Filling: A Savory Picadillo
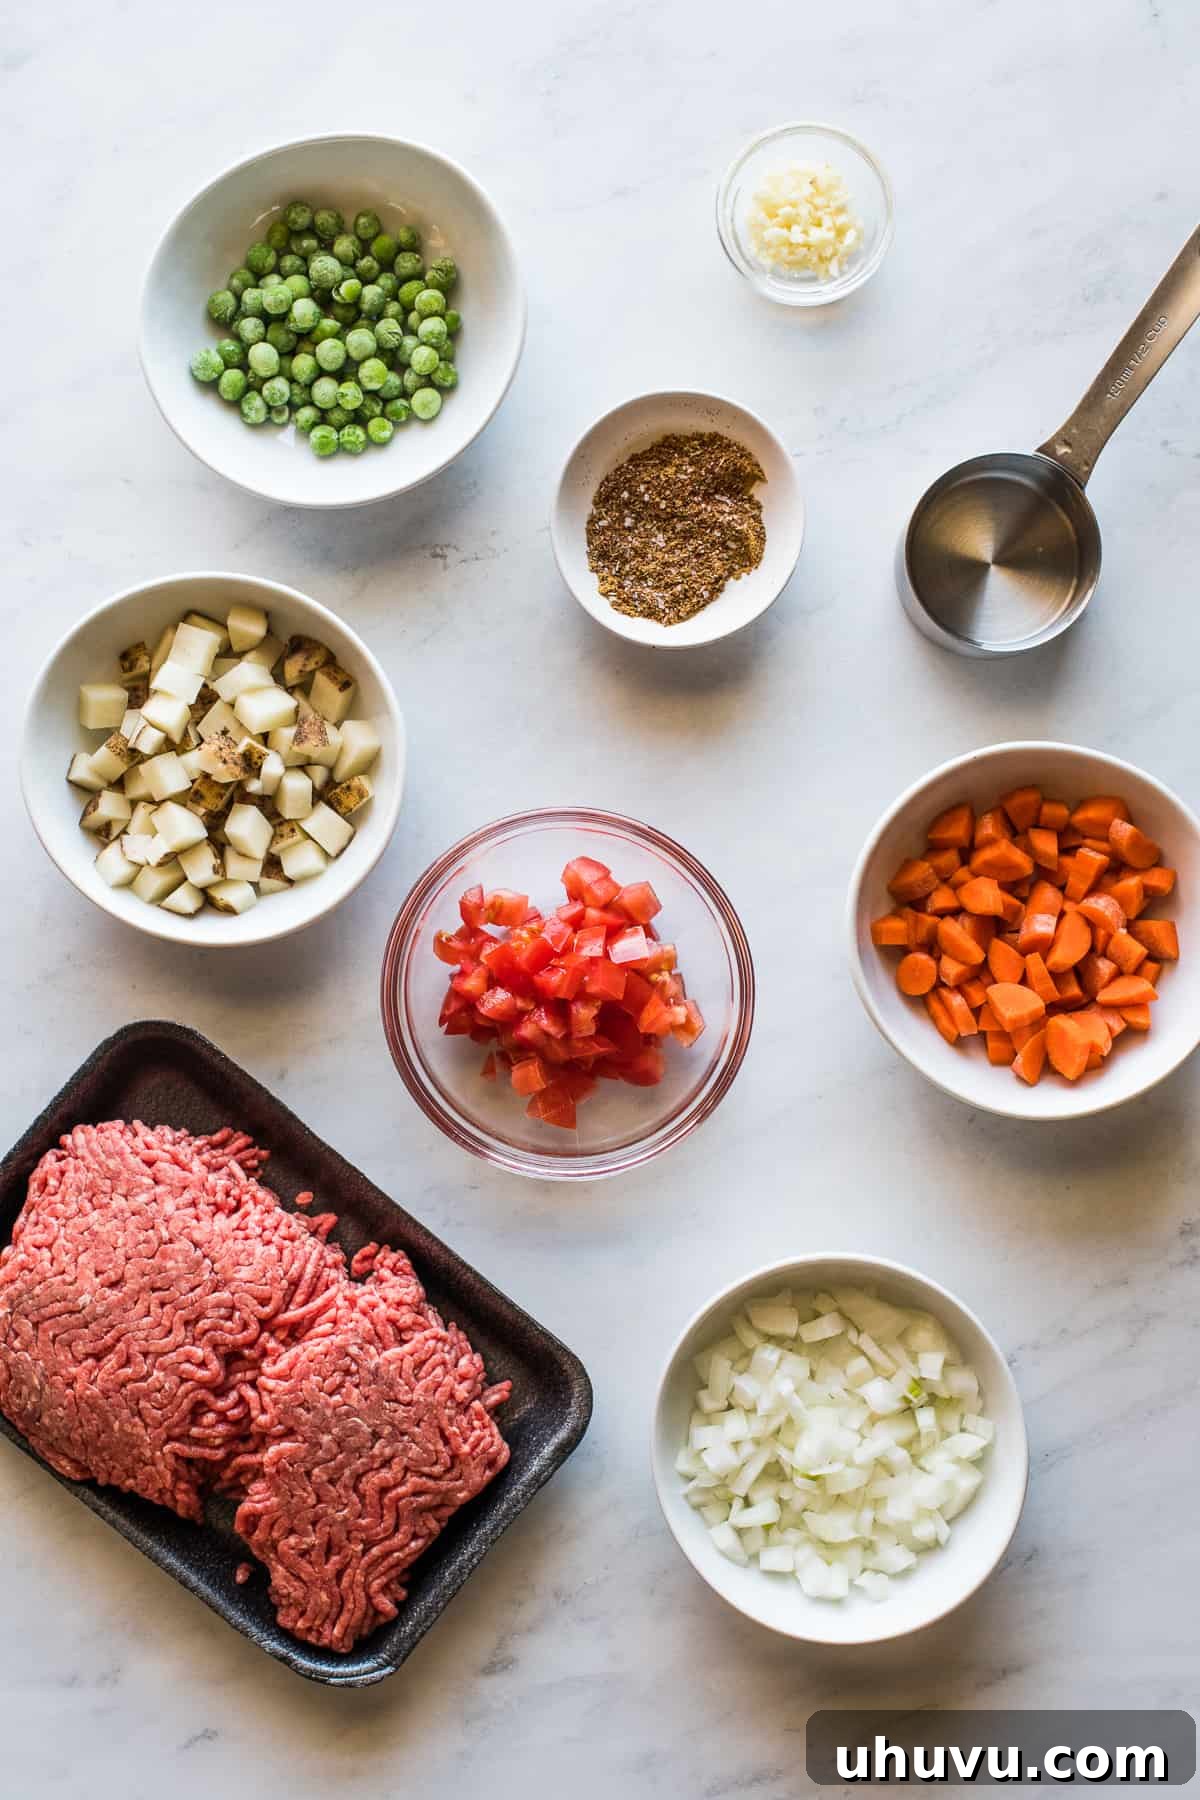
For these empanadas, we’re crafting a deeply flavorful ground beef and vegetable mixture, inspired by the classic picadillo recipe. Picadillo is a traditional Latin American dish with countless regional variations, often featuring ground meat simmered with tomatoes, onions, garlic, and an array of spices, sometimes incorporating vegetables or fruits. Our version focuses on robust savory notes and a satisfying texture. Here’s what you’ll need to create this irresistible filling:
- Lean ground beef: I highly recommend using lean ground beef, such as 90/10 or 93/7. This ensures a rich, beefy flavor without an excessive amount of grease, which can make your empanadas soggy. If you use a fattier cut, be sure to drain any excess fat before adding other ingredients.
- Aromatics (Tomatoes, onions, and garlic): These are the foundation of our flavor profile. We’ll caramelize the tomatoes and onions first to bring out their natural sweetness and depth. The garlic is added shortly after, releasing its aromatic essence to create a complex base that is both fragrant and moist, perfectly complementing the beef.
- Hearty vegetables (Peas, carrots, and potatoes): These vegetables are more than just fillers; they add wonderful texture, natural sweetness, and a boost of nutrients. The diced potatoes and carrots become tender as they simmer, absorbing all the delicious flavors of the picadillo. Frozen peas are added at the end to retain their vibrant color and slight crunch. Together, they transform these empanadas into a well-rounded and satisfying meal.
- Signature Spices: The magic of picadillo comes alive with a carefully selected blend of spices. I use a combination of chili powder, cumin, oregano, coriander, and salt. Chili powder provides a gentle warmth and earthy undertone, while cumin adds a distinct savory, slightly smoky note. Dried oregano offers a classic Mediterranean and Latin American herbaceousness, and ground coriander contributes a hint of citrusy, sweet warmth. This blend creates a harmonious and incredibly flavorful filling that is neither too spicy nor too mild.
- Shredded cheese: The addition of cheese takes these empanadas to the next level, providing a creamy, melty counterpoint to the savory beef. I prefer a shredded Mexican-blend cheese for its excellent melt and balanced flavor, but feel free to use any shredded cheese you have on hand. Classic choices like sharp cheddar, mild Monterey Jack, or even a spicy pepper jack would all be fantastic options, adding their own unique character to the filling.
Step-by-Step Guide: How to Make Irresistible Beef Empanadas
Making homemade empanadas might seem daunting, but by breaking it down into manageable steps, you’ll find the process quite enjoyable and rewarding. Follow these detailed instructions to create beautifully baked beef empanadas with a perfect crust and a flavorful filling.
Preparing the Dough
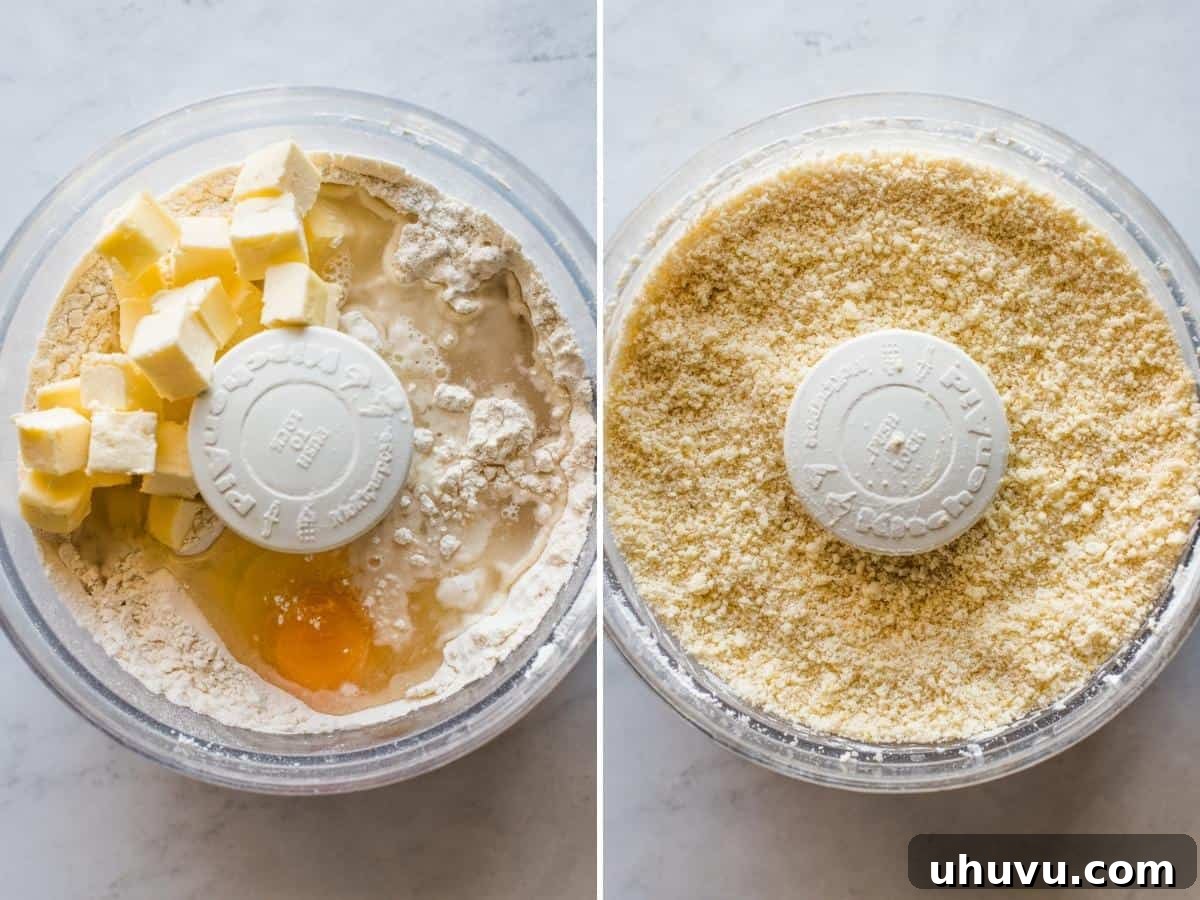
1. Begin with the Dough: In your food processor, combine the all-purpose flour and salt. Pulse briefly to ensure they are well mixed. Then, add the cold unsalted butter (cut into ½-inch cubes), one large chilled egg, and the ice water. Pulse the mixture in short bursts until it forms coarse, pebble-like crumbs. Be careful not to over-process; the mixture should still have distinct pieces of butter, which are essential for flakiness. If your food processor is small, you may need to divide the ingredients and work in batches.
2. Knead and Chill: Transfer the crumbly dough mixture onto a clean, lightly floured surface. Gently gather the dough and knead it for about 5 minutes. The dough should come together, becoming smooth and pliable. Avoid over-kneading, as this can develop too much gluten, resulting in a tough crust. Once smooth, divide the dough into two equal-sized balls. Tightly wrap each ball in plastic wrap to prevent it from drying out, and refrigerate them for at least 30 minutes (or while you prepare the filling). Chilling the dough is crucial; it allows the gluten to relax and solidifies the butter, making the dough easier to roll and ensuring a flaky crust.
Crafting the Savory Filling
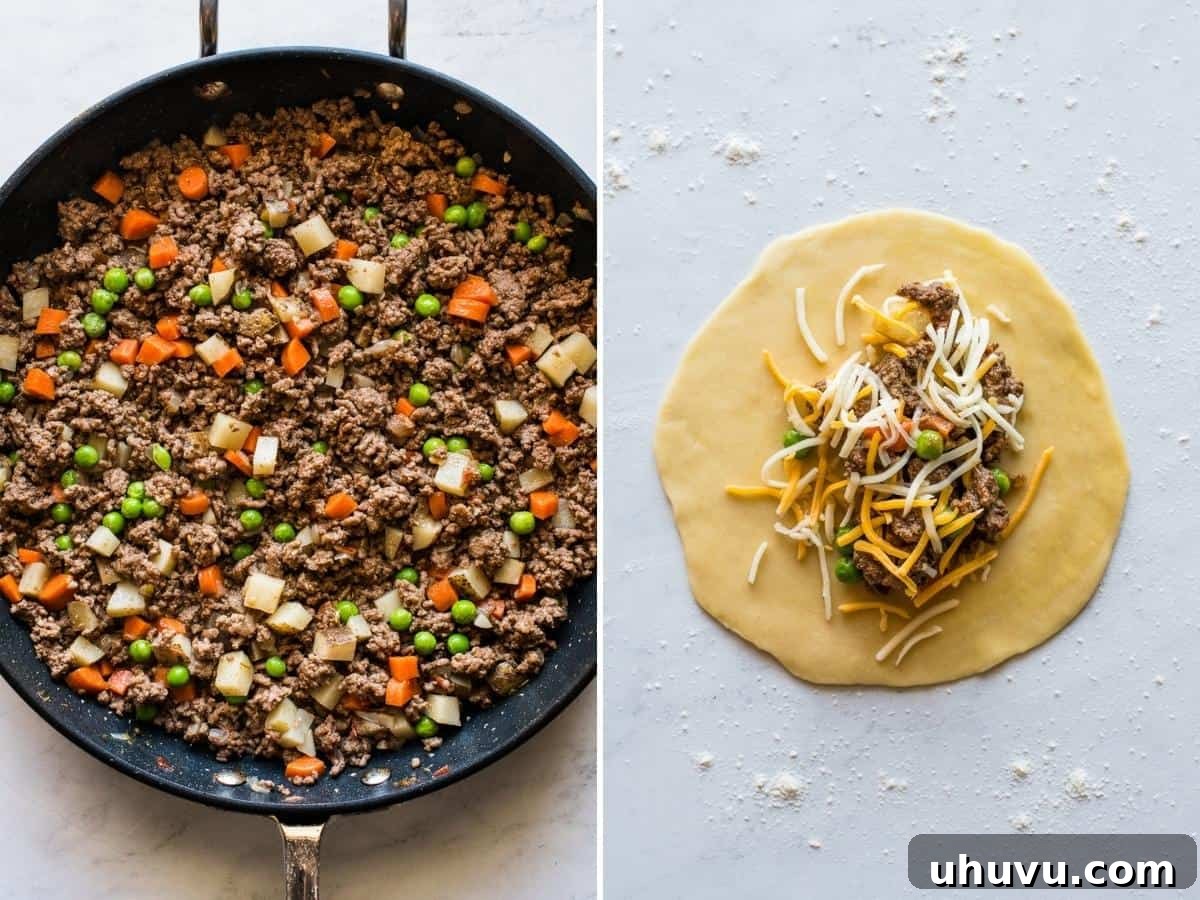
3. Prepare the Picadillo Filling: Heat 1 tablespoon of olive oil in a large skillet over medium-high heat. Add the diced plum tomato and diced yellow onion. Sauté for about 5 minutes, stirring occasionally, until the onions soften and become translucent, and the tomatoes begin to break down, releasing their juices. This step builds a foundational layer of flavor. Next, add the minced garlic and cook for another 30 seconds, or until fragrant, being careful not to burn it.
Now, add the lean ground beef to the skillet, along with the chili powder, kosher salt, ground cumin, dried oregano, and ground coriander. Break up the beef with a spoon and cook for 6-8 minutes, stirring occasionally, until it is thoroughly browned and no pink remains. Drain any excess grease from the skillet if necessary. Stir in the diced russet potato, diced carrot, and ½ cup of beef broth (or water). Reduce the heat to medium-low, cover the skillet, and let it simmer for about 10 minutes, or until the potatoes and carrots are soft and tender. Remove the skillet from the heat, taste the filling, and adjust seasoning with more salt if desired. Finally, stir in the frozen peas. The residual heat will gently cook them. Set the filling aside to cool slightly while you prepare the dough rounds.
Assembling the Empanadas
4. Roll Out the Dough Rounds: Take one ball of chilled dough from the refrigerator. On a lightly floured surface, divide it into 9 equal pieces (for a total of 18 empanadas). Roll each piece into a small ball. Using a rolling pin, roll each dough ball evenly into a 6½ to 7-inch circle. Aim for a consistent thickness, about ⅛ inch, for even baking and a crisp crust. Try to make the circles as round as possible, but don’t worry about perfection.
5. Fill the Empanadas: In a small bowl, beat the remaining large egg with a fork to create an egg wash – this will be used for sealing and for brushing the tops of the empanadas. Working one at a time, place 3-4 tablespoons of the cooled beef picadillo filling onto one half of the dough circle, leaving a clear ½-inch border around the edge. Top the filling with a small pinch of shredded cheese (about ½ to 1 tablespoon per empanada).
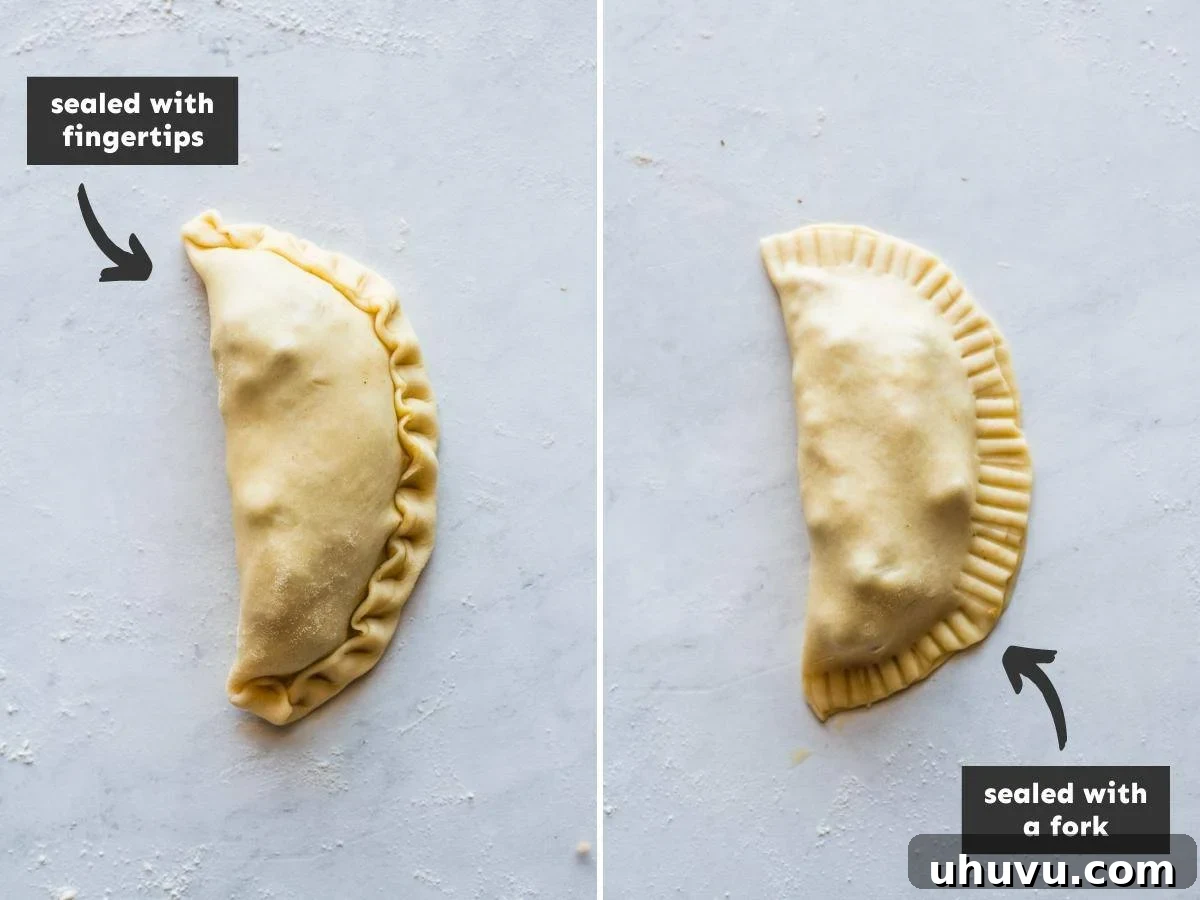
6. Seal the Empanadas: Using a pastry brush, lightly brush the inside edge of the empanada round with the egg wash. This acts as a “glue” to ensure a secure seal and prevent the filling from leaking out during baking. Carefully fold the dough in half over the filling, creating a crescent shape. Gently press the edges together to seal. You have two main options for sealing:
- **Fork Method:** Press the tines of a fork firmly along the entire curved edge of the empanada, creating a decorative, crimped pattern.
- **Repulgue (Fingertip Method):** For a more traditional look, use your fingers to fold and pleat the edge of the dough in small increments. This creates a beautiful, braided seal. While it takes a bit of practice, the repulgue adds a rustic charm to your empanadas.
Repeat this filling and sealing process until all empanadas are assembled.
Baking and Serving
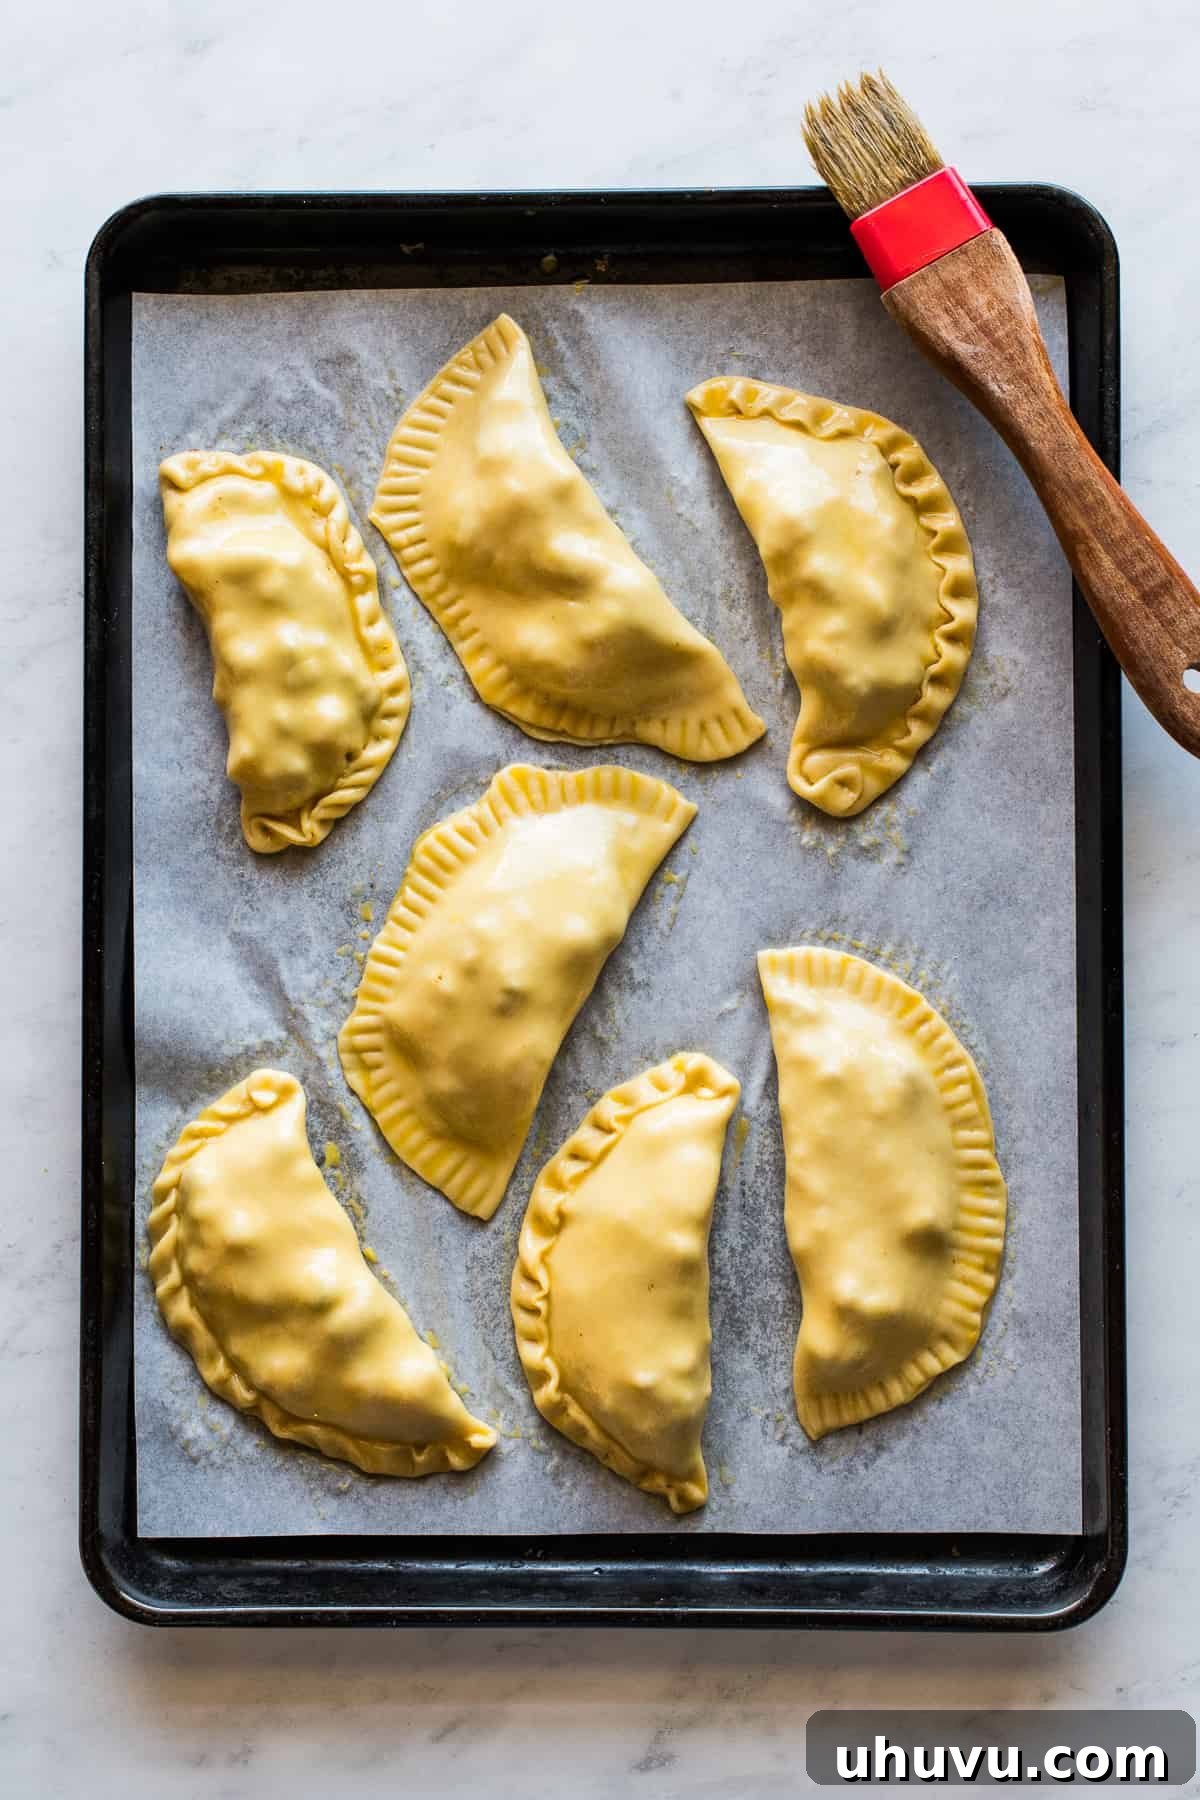
7. Chill Before Baking: Line two large baking sheets with parchment paper. Carefully transfer the assembled empanadas to the prepared baking sheets, ensuring there is some space between each one to allow for even baking. Refrigerate the empanadas for 15 minutes. This brief chill helps the pastry hold its shape better in the oven and contributes to a flakier crust.
8. Bake to Golden Perfection: While the empanadas are chilling, preheat your oven to 400°F (200°C) with the rack positioned in the center of the oven. Before baking, brush the tops of each chilled empanada with the remaining egg wash. This will give them a beautiful, glossy golden-brown finish. Bake for 25-30 minutes, or until the crust is deeply golden and feels crisp to the touch. Once baked, remove the empanadas from the oven and let them cool on the baking sheets for at least 10 minutes before serving. This cooling time is important, as it allows the hot filling to set, preventing it from spilling out and ensuring a more enjoyable bite. Serve warm and enjoy these homemade delights!
Expert Tips for Making the Best Beef Empanadas
- **Mastering the Seal (Repulgue):** While sealing the empanadas by folding the edges over with your fingers (known as “repulgue”) creates a beautiful, rustic look, it does take a bit of practice. Don’t be discouraged if your first attempts aren’t perfectly symmetrical; they will still taste absolutely delicious! The fork method is always a reliable and quick alternative for a secure seal.
- **The Power of Egg Wash:** Using an egg wash on the inside edges of the dough before folding and sealing is a critical step. It acts as a powerful adhesive, significantly helping to prevent the empanadas from bursting open in the oven, keeping all that wonderful filling safely inside. Brushing the tops with egg wash before baking also ensures a gorgeous, golden-brown, and slightly shiny crust.
- **Optimal Dough Thickness:** When rolling out the dough circles, aim for a consistent thickness of about ⅛ inch. If the dough is too thick, the crust might be chewy; too thin, and it risks tearing or becoming too delicate to hold the filling.
- **Preventing Soggy Bottoms:** To ensure your empanadas have a crisp bottom crust, avoid overfilling them. Excess filling can create too much moisture. Also, ensure your filling has cooled sufficiently before assembling the empanadas.
- **Perfect Pairings:** These savory beef empanadas are fantastic on their own, but they truly shine when served with complementary dipping sauces. Classic choices include fresh, zesty guacamole, tangy salsa verde, or a creamy avocado crema. A vibrant chimichurri sauce would also add a delightful herbaceous kick.
- **Even Baking:** For an even, golden crust, rotate your baking sheets halfway through the baking time. This compensates for any hot spots in your oven.
Frequently Asked Questions About Empanadas
Absolutely! Empanadas are fantastic for meal prepping. You can prepare and freeze unbaked empanadas for up to 3 months. This makes them perfect for a quick dinner or snack whenever the craving strikes.
If you’re short on time or prefer a shortcut, you can certainly use store-bought dough. Frozen puff pastry or rolled-out pie dough are excellent substitutes for homemade empanada dough. You might find pre-made empanada discs in the international frozen foods section of your grocery store, which are also very convenient.
Empanadas originated in Spain, where they were traditionally large, pie-like pastries. From there, they traveled with Spanish explorers and colonizers, becoming incredibly popular and evolving into the diverse, handheld versions we know and love all over Latin America, the Caribbean, and even the Philippines.
Yes, you can! If you prefer a crispy, golden-fried empanada, simply heat about 2-3 inches of vegetable oil in a deep pot or Dutch oven to 350°F (175°C). Fry the empanadas in batches for 3-5 minutes per side, or until golden brown and cooked through. Be sure not to overcrowd the pot. Drain on a wire rack set over paper towels.
Certainly! The beauty of empanadas is their adaptability. You can easily substitute the ground beef with ground chicken, turkey, or pork. For a vegetarian option, consider a hearty black bean and corn mixture, or a medley of roasted vegetables.
Storing, Freezing, and Reheating Empanadas
Proper storage is key to enjoying your delicious beef empanadas for longer. Whether you’re planning ahead or saving leftovers, here’s how to do it right:
To store cooked empanadas, allow them to cool completely on a wire rack at room temperature. Once cooled, transfer them to an airtight storage container. They can be refrigerated for up to 3-4 days. For best quality and to prevent sogginess, place a paper towel at the bottom of the container to absorb any moisture.
To freeze unbaked empanadas for future use, prepare them as directed, assembling and sealing them, but skip the step of brushing the tops with egg wash. Arrange the unbaked empanadas in a single layer on a large baking sheet lined with parchment paper, ensuring they do not touch each other. Place the baking sheet in the freezer for about 3 hours, or until the empanadas are solid. Once frozen solid, transfer them to freezer-safe bags or airtight containers. They can be stored in the freezer for up to 3 months. When you’re ready to bake, you can either thaw them completely in the refrigerator overnight (then brush with egg wash and bake as normal) or bake them directly from frozen. If baking from frozen, add an additional 5-10 minutes to the baking time, and brush with egg wash just before placing them in the oven.
To reheat cooked empanadas, the oven is your best friend for restoring their crispness. Place the refrigerated empanadas on a baking sheet lined with parchment paper and heat them in a preheated oven at 350°F (175°C) for 5-10 minutes, or until warmed through and the crust is crisp again. You can also reheat them in an air fryer at 350°F (175°C) for 3-5 minutes. While the microwave is a convenient option for quick reheating (in 1-minute increments), be aware that it will soften the crust, making it less crispy.
More Delicious Recipes to Explore
If you loved these beef empanadas, be sure to check out these other fantastic recipes that bring vibrant Latin American flavors to your table:
- Crispy Flautas: Rolled tacos, often fried, filled with meat or cheese.
- Simple Guacamole: The perfect creamy, fresh dip for any occasion.
- Zesty Chimichurri: A bright and herbaceous sauce, excellent with grilled meats or empanadas.
- Authentic Mexican Rice: A classic side dish that pairs wonderfully with any Mexican or Latin American meal.

Beef Empanadas Recipe
Isabel Orozco-Moore
1 hour 5 minutes
25 minutes
1 hour 30 minutes
18
empanadas
Ingredients
For the dough
- 3 ¾ cups all-purpose flour
- ¾ teaspoon fine salt
- ¾ cup cold unsalted butter, cut into ½-inch cubes
- 2 large eggs, chilled and divided
- ¾ cup ice water
For the filling
- 1 tablespoon oil
- 1 plum tomato, diced
- ¼ medium yellow onion, diced
- 2 cloves garlic, minced
- 1 pound lean ground beef
- 1 teaspoon chili powder
- 1 teaspoon kosher salt
- ½ teaspoon ground cumin
- ¼ teaspoon dried oregano
- ¼ teaspoon ground coriander
- 1 small russet potato, diced
- 1 medium carrot, diced
- ½ cup beef broth (or water)
- ¼ cup frozen peas
- 1 cup shredded cheddar cheese
Instructions
-
Make the pastry dough: In a food processor, add the all-purpose flour and salt. Pulse to combine. Add the butter, 1 egg, and ice water. Pulse until the mixture resembles coarse crumbs. (You may need to do this in batches depending on the size of your food processor.)
-
Transfer the dough mixture onto a clean surface and knead it for 5 minutes until it comes together and is smooth. Shape it into 2 equal sized balls, tightly cover each in plastic wrap, and refrigerate while you make the filling.
-
Make the filling: In a large skillet over medium-high heat, add the oil. When hot, add the tomato and onion, and cook for 5 minutes, stirring occasionally. Add the garlic and cook for 30 seconds, until fragrant.
-
Add the ground beef, chili powder, salt, ground cumin, dried oregano, and ground coriander, and cook for 6-8 minutes, using a spoon to break up the meat into smaller pieces and stirring occasionally.
-
Stir in the potato, carrot, and water, then reduce the heat to medium-low, cover, and cook for 10 minutes until the potatoes and carrots are soft and tender.
-
Remove the skillet from heat, taste, and season with more salt if desired. Stir in the frozen peas and set aside to cool.
-
Remove the dough balls from the refrigerator and divide them into 18 equal pieces, then roll each piece into a ball.
-
On a lightly floured surface, roll each ball evenly into a 6½ -7-inch circle with a rolling pin.
-
In a small bowl, beat the remaining egg with a fork to make an egg wash.
-
Working one at a time, add 3-4 tablespoons of filling to one side of the empanada round and top with a small pinch of shredded cheese.
-
Using a pastry brush, brush the inside edge of the empanada round, then fold the dough in half over the filling.
-
Seal the empanada by pressing the edges together with the tines of a fork or folding over the edges in increments with your fingers. Repeat until all the empanadas are filled and sealed.
-
Transfer the empanadas to 2 large baking sheets lined with parchment paper, and refrigerate for 15 minutes.
-
Preheat the oven to 400°F (200°C) with the rack in the center of the oven.
-
Brush the tops of each empanada with the remaining egg wash and bake for 25-30 minutes or until golden brown. Let them cool for 10 minutes before serving.
Nutrition Information (per serving)
Serving: 1 empanada | Calories: 251 kcal | Carbohydrates: 23g | Protein: 11g | Fat: 13g | Saturated Fat: 7g | Polyunsaturated Fat: 1g | Monounsaturated Fat: 4g | Trans Fat: 0.4g | Cholesterol: 63mg | Sodium: 311mg | Potassium: 214mg | Fiber: 1g | Sugar: 1g | Vitamin A: 974IU | Vitamin C: 2mg | Calcium: 62mg | Iron: 2mg
Nutrition information is automatically calculated, so should only be used as an approximation.
Did you make this recipe?
Leave a comment and star rating below!