
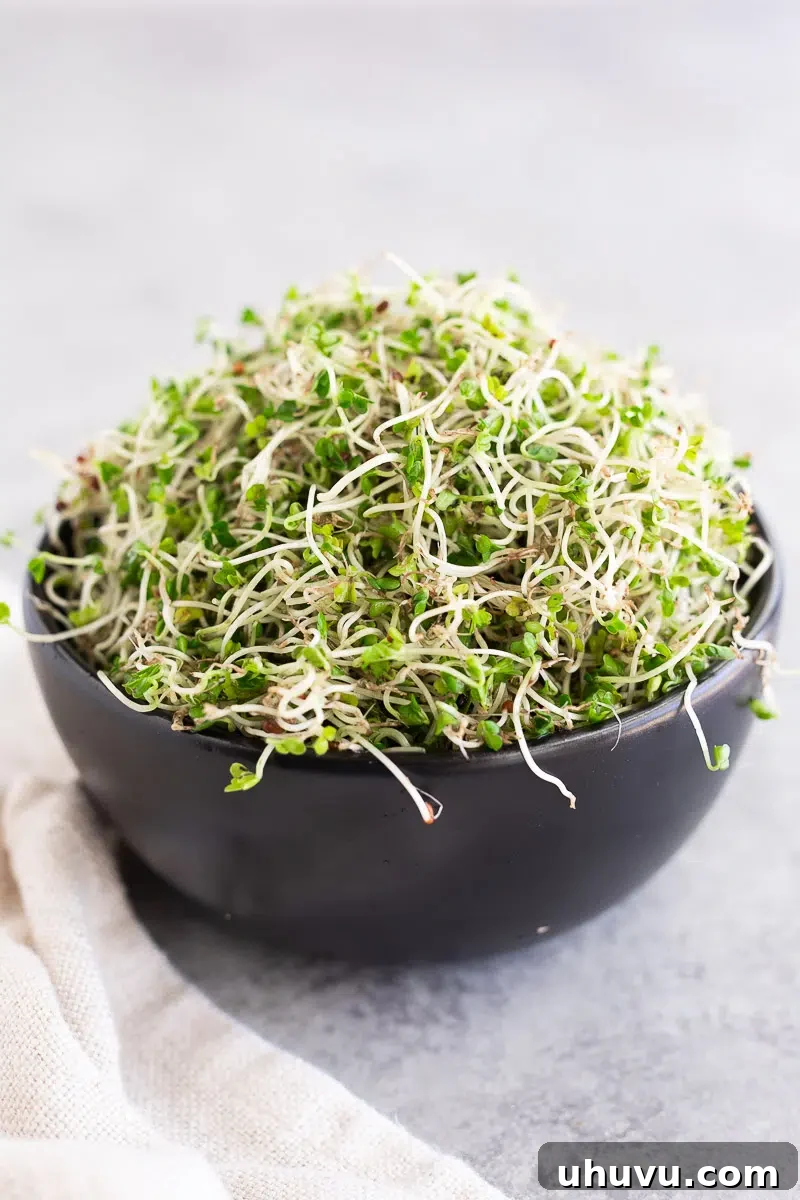
Grow Your Own Superfood: A Complete Guide to Homemade Broccoli Sprouts
Tired of high grocery store prices for fresh greens? Imagine cultivating your very own supply of nutrient-dense, peppery broccoli sprouts right on your kitchen counter! This comprehensive, step-by-step guide will transform you into a successful home sprouter, ensuring you always have a fresh batch of this incredible superfood at your fingertips.
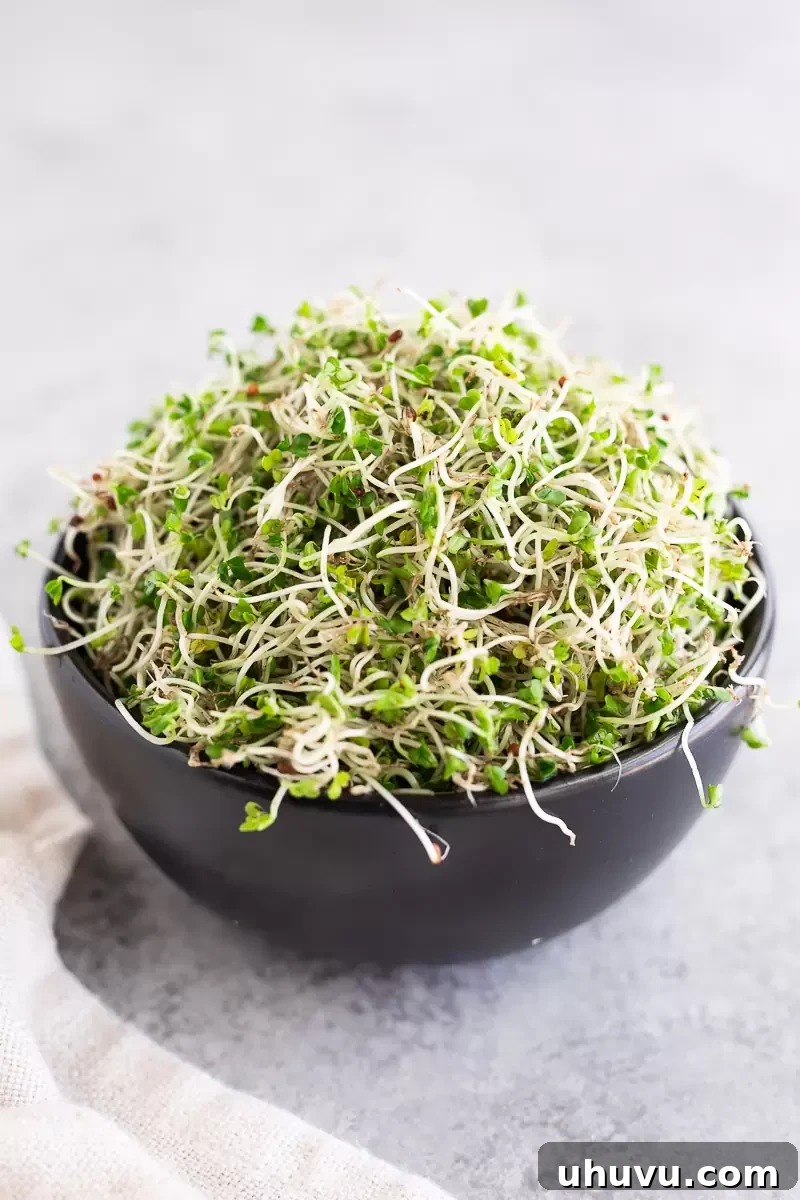
For the past two years, I’ve integrated these tiny, vibrant greens into my daily routine, and I can confidently say they are an absolute game-changer. I love how they add a delightful crunch and a unique peppery kick to my salads, sandwiches, and even smoothies. The most astonishing part? Growing them is incredibly straightforward, even for those who claim to have a “brown thumb.” You don’t need extensive gardening experience or specialized equipment; just a few basic items and a little patience will yield impressive results.
Even if your culinary skills are basic, mastering the art of growing broccoli sprouts at home is easily achievable. The entire process is remarkably simple, requiring just a handful of affordable ingredients to begin your journey to homegrown goodness. Prepare to be amazed by how quickly and effortlessly you can cultivate this powerhouse superfood.
Looking for more easy kitchen tips to elevate your home cooking? Check out these popular guides: How To Cook Quinoa Perfectly Every Time and The Easiest Way To Cut and Mince Ginger.
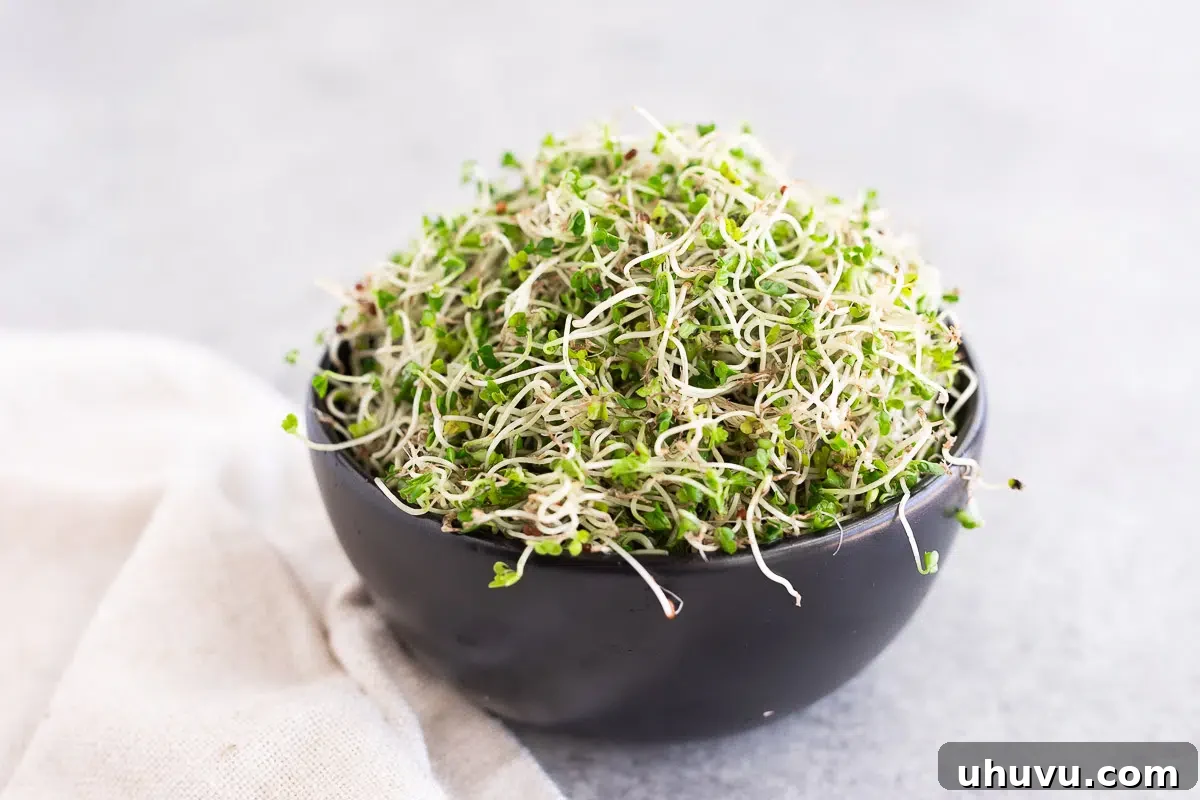
Why Growing Broccoli Sprouts at Home is a Must
Beyond the simple joy of growing your own food, homemade broccoli sprouts offer a myriad of compelling benefits. From their superior freshness to their unmatched nutritional profile, here’s why you’ll fall in love with cultivating these miniature greens:
- Affordable Superfood: Purchasing broccoli sprouts from health food stores can quickly add up. Growing them yourself is a significantly more economical option, allowing you to enjoy this superfood regularly without breaking the bank. A small packet of seeds yields many batches of sprouts, providing excellent value for money.
- Unbeatable Freshness: Store-bought sprouts may have traveled long distances and sat on shelves for several days, diminishing their freshness and potency. By growing your own, you ensure an unparalleled level of freshness. You harvest them at their peak, guaranteeing maximum flavor, crunch, and nutritional value.
- Delicious & Versatile: The subtle earthy, nutty, and slightly peppery flavor of broccoli sprouts makes them a versatile addition to almost any dish. They provide a delightful crunch that elevates salads, sandwiches, smoothies, and more. Their mild taste allows them to complement a wide range of recipes without overpowering other ingredients.
- Empowering Experience: There’s immense satisfaction in nurturing something from seed to harvest. Growing your own sprouts offers a rewarding connection to your food source, empowering you to take control of what you eat and appreciate the simple wonders of nature.
The Incredible Health Benefits of Broccoli Sprouts
Broccoli sprouts aren’t just a tasty addition to your meals; they are nutritional powerhouses, often lauded as one of nature’s finest superfoods. While they resemble mature broccoli in miniature, their nutritional composition is far more concentrated, especially concerning a compound called sulforaphane.
What is Sulforaphane?
Sulforaphane is an isothiocyanate, a sulfur-rich compound found in cruciferous vegetables like broccoli, cabbage, and kale. However, broccoli sprouts contain significantly higher levels of glucoraphanin, the precursor to sulforaphane, than mature broccoli. When you chew or chop broccoli sprouts, an enzyme called myrosinase converts glucoraphanin into bioactive sulforaphane, which is then readily absorbed by your body.
Key Health Advantages:
- Potent Antioxidant Properties: Sulforaphane is a powerful antioxidant that helps combat oxidative stress in the body. It supports cellular health and can help protect against damage caused by free radicals, which are implicated in various chronic diseases.
- Detoxification Support: This compound is renowned for its ability to activate the body’s natural detoxification pathways. It boosts the production of phase II enzymes, which are crucial for neutralizing and eliminating harmful toxins and carcinogens from the body.
- Anti-Inflammatory Effects: Chronic inflammation is a root cause of many health issues. Sulforaphane exhibits strong anti-inflammatory properties, helping to reduce inflammation throughout the body and supporting overall immune function.
- Digestive Health: The fiber content in broccoli sprouts supports healthy digestion and can contribute to a balanced gut microbiome. A healthy gut is essential for nutrient absorption and overall well-being.
- Cardiovascular Health: Research suggests that sulforaphane may play a role in promoting heart health by supporting blood vessel function and reducing markers of cardiovascular disease.
- Brain Health: Emerging studies indicate that sulforaphane may have neuroprotective properties, potentially supporting cognitive function and offering protection against neurodegenerative conditions.
- Immune System Boost: By supporting detoxification and reducing inflammation, broccoli sprouts contribute to a robust immune system, helping your body defend against illnesses.
Incorporating broccoli sprouts into your diet is an excellent way to harness these impressive health benefits, making your homemade sprouts not just a treat for your taste buds but a boost for your entire body.
Essential Supplies for Sprouting Success
Starting your home sprouting journey requires minimal investment. Here’s a breakdown of the few crucial items you’ll need. Don’t worry, most of these are readily available and reusable!
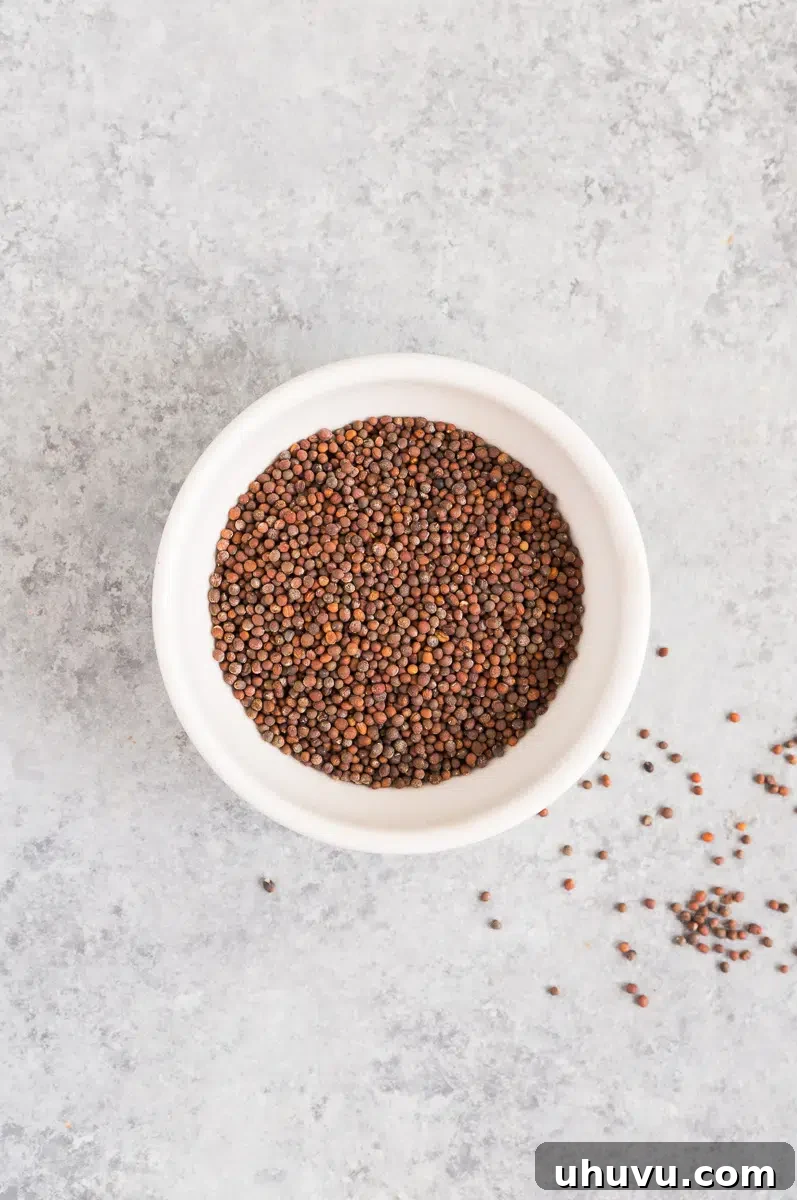
- Broccoli Sprouting Seeds: This is the cornerstone of your sprouting operation! It’s crucial to purchase seeds specifically labeled for sprouting, not gardening seeds. Gardening seeds might be treated with chemicals or fungicides unsuitable for consumption. I highly recommend these organic non-GMO sprouting seeds for consistent and healthy yields. You’ll only need a couple of tablespoons per jar to start a new batch.
- Wide-Mouth Glass Mason Jar: A standard quart-sized (32 oz) wide-mouth mason jar is ideal. The wide opening makes it easy to add and remove seeds, as well as to rinse and drain the sprouts effectively. Make sure it’s clean and sterilized before use.
- Sprouting Lid: This specialized lid features a fine mesh screen, allowing water to drain while keeping your tiny seeds securely inside. It’s a game-changer for hassle-free rinsing. If a dedicated mesh lid isn’t in your budget right now, you can easily create a DIY version using a piece of cheesecloth secured over the jar opening with a rubber band. Many convenient sprouting kits are also available, often including jars, lids, and even a stainless steel stand for optimal drainage.
- Clean Water: Use filtered or purified water whenever possible. Tap water, depending on your area, might contain chlorine or other impurities that could hinder sprout growth or flavor.
How To Grow Broccoli Sprouts: A Step-by-Step Visual Guide
Ready to embark on your sprouting adventure? Follow these simple steps to cultivate your own fresh, crunchy broccoli sprouts in just a few days.
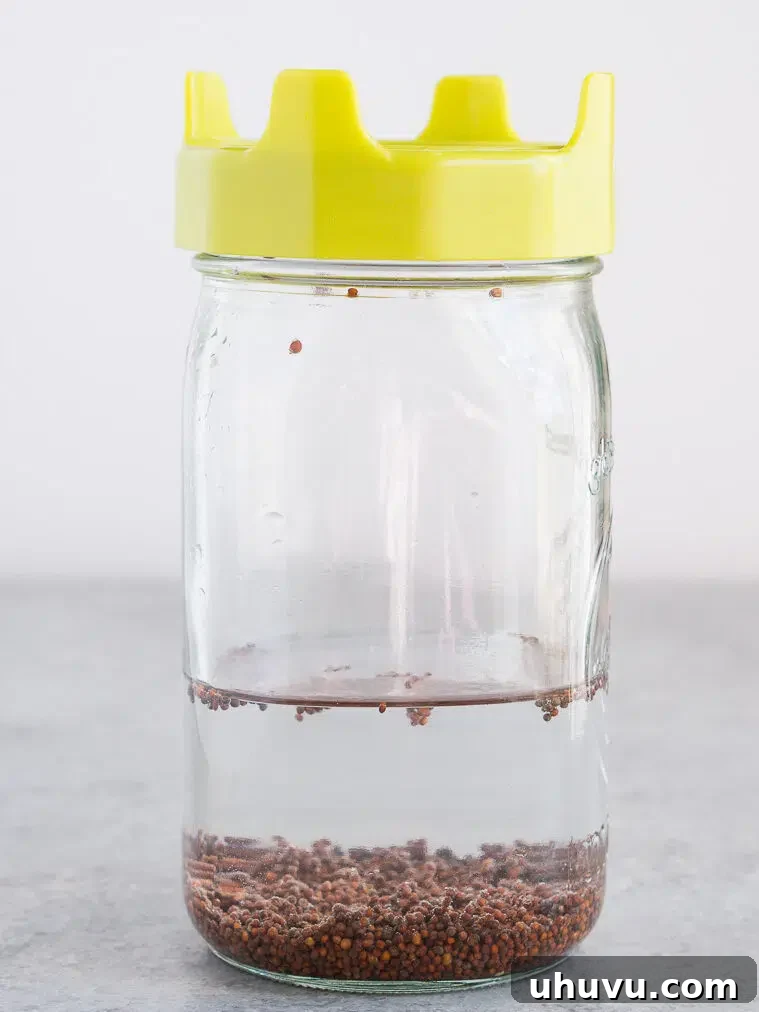
- Prepare & Soak the Seeds: Begin by placing 2 tablespoons of your chosen broccoli sprouting seeds into the clean wide-mouth mason jar. Fill the jar with about 2 cups of clean water, ensuring the seeds are fully submerged. Secure your sprouting lid (or cheesecloth with a rubber band) over the jar opening. Allow the seeds to soak overnight for approximately 8-12 hours. This initial soaking phase awakens the dormant seeds and kickstarts the germination process.
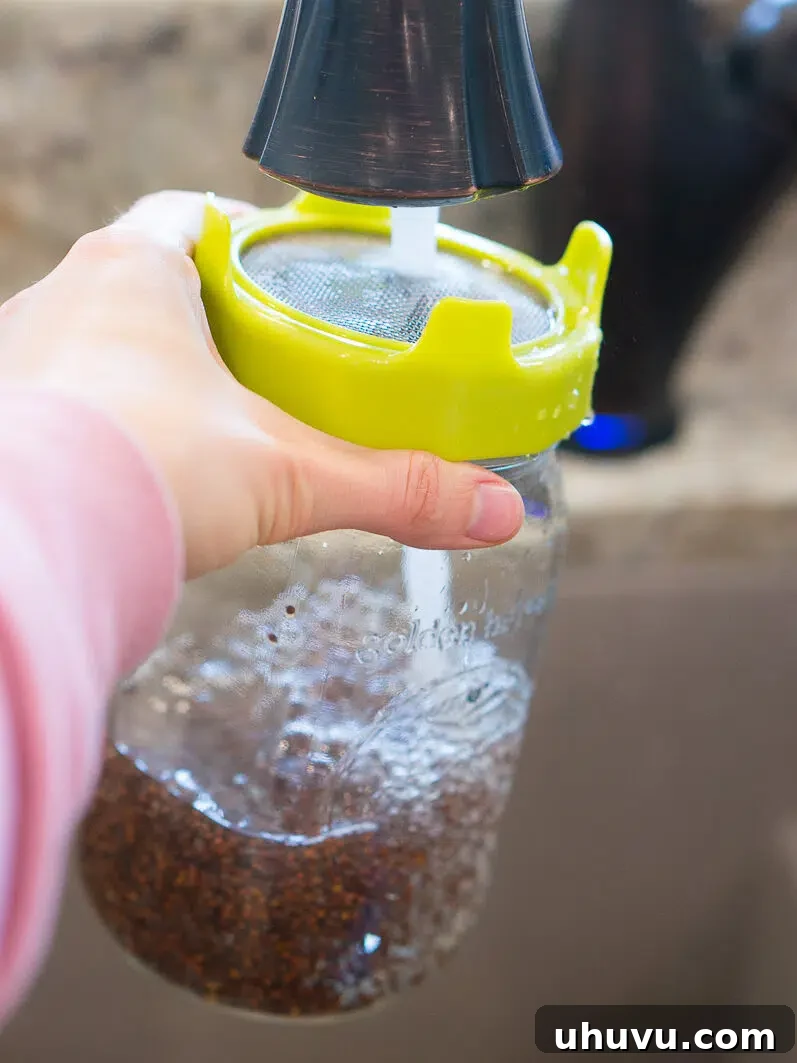
- Drain and Rinse: Once the soaking period is complete, hold the jar upside down to thoroughly drain all the water through the sprouting lid. After draining, rinse the seeds generously with fresh, cool water. Swirl the water gently inside the jar to ensure all seeds are washed. Drain the water completely once more. This crucial step removes any residual soaking water and helps prevent mold or bacterial growth.
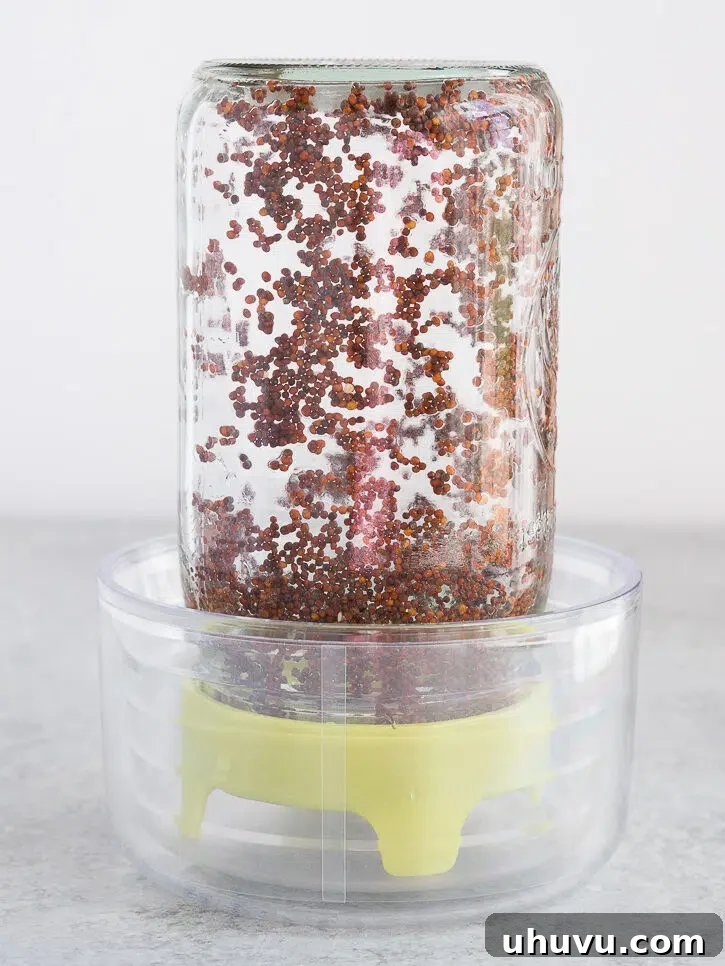
- Start Sprouting: Once drained, position the jar upside down, or at a slight angle (around 45 degrees), with the lid side down. You can use a dedicated sprouting stand, a bowl, or even a dish rack to maintain this angle. This allows any remaining excess water to drain completely, which is vital for preventing rot and ensuring proper air circulation. Keep the jar in a cool, dark place at room temperature – a cabinet or a shaded corner of your kitchen counter works perfectly.
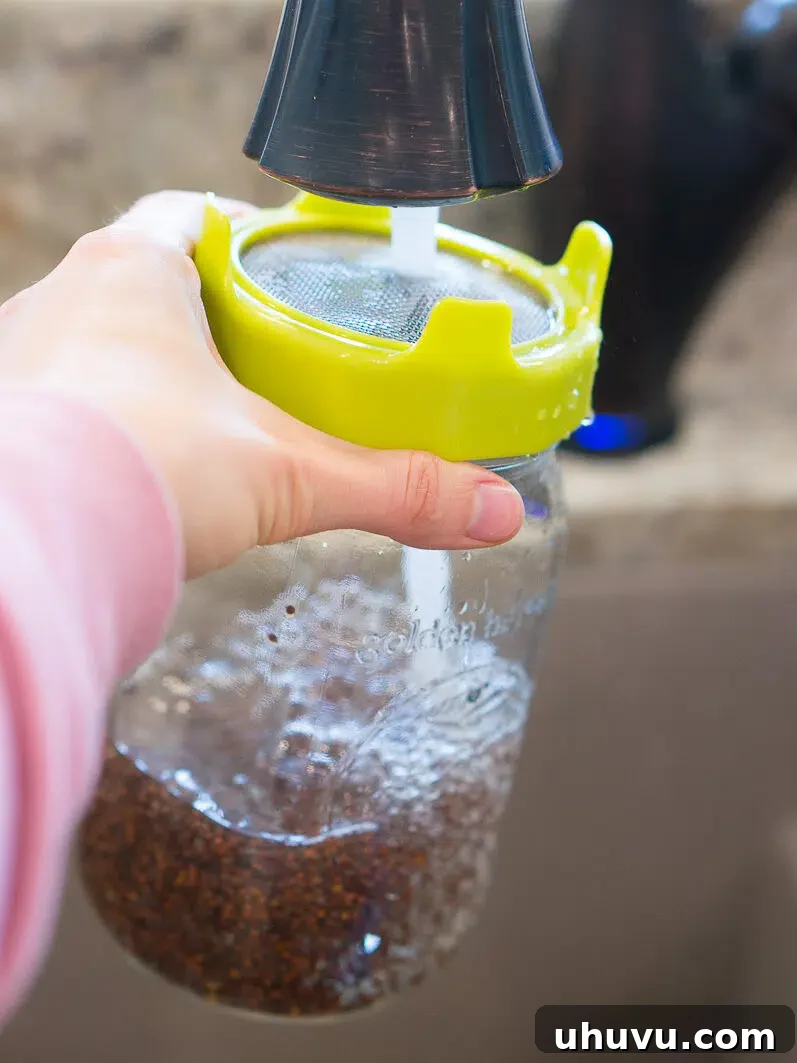
- Rinse Daily: Consistency is key during the sprouting phase. Rinse your seeds twice a day – once in the morning and once in the evening. Each rinse involves filling the jar with fresh water, gently swirling, and then draining completely. This provides the sprouts with the moisture they need to grow and washes away any metabolic waste, ensuring a clean and healthy environment.
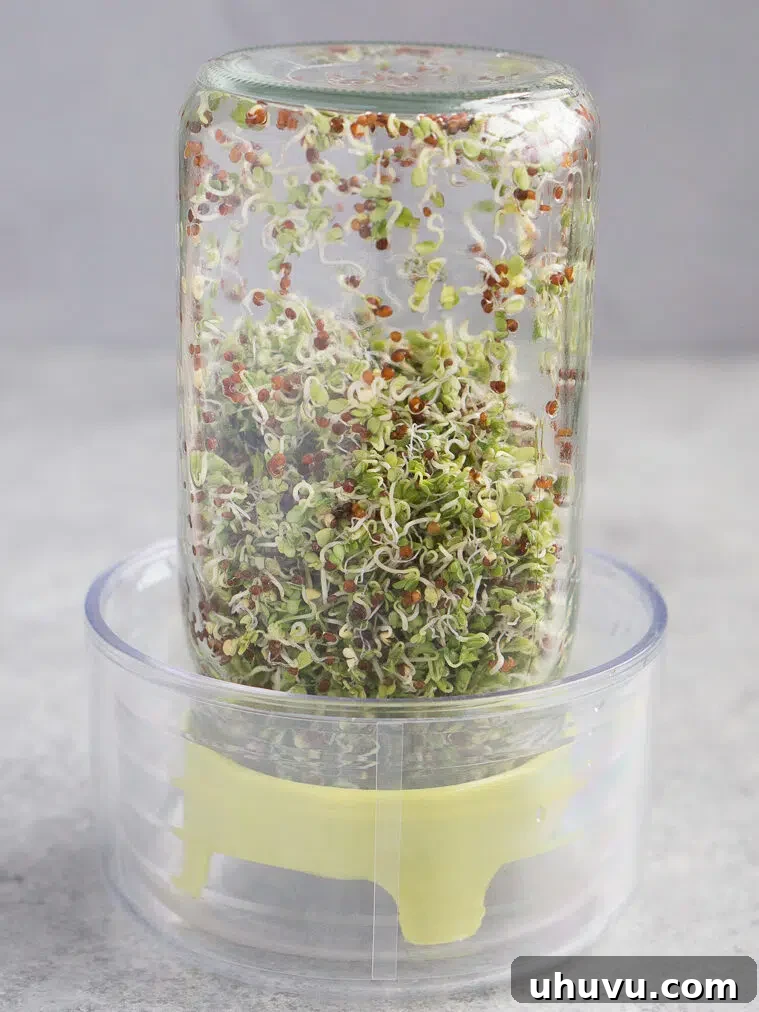
- Let Them Grow & Green Up: Within 3-5 days of consistent rinsing, you’ll observe tiny green sprouts emerging and growing taller. At this stage, it’s time to introduce them to indirect sunlight. Place the jar in a spot with bright, indirect light for a couple of hours each day. This exposure encourages the development of chlorophyll, turning the pale shoots into vibrant green sprouts. Avoid direct, harsh sunlight, which can dry out or cook your delicate sprouts.
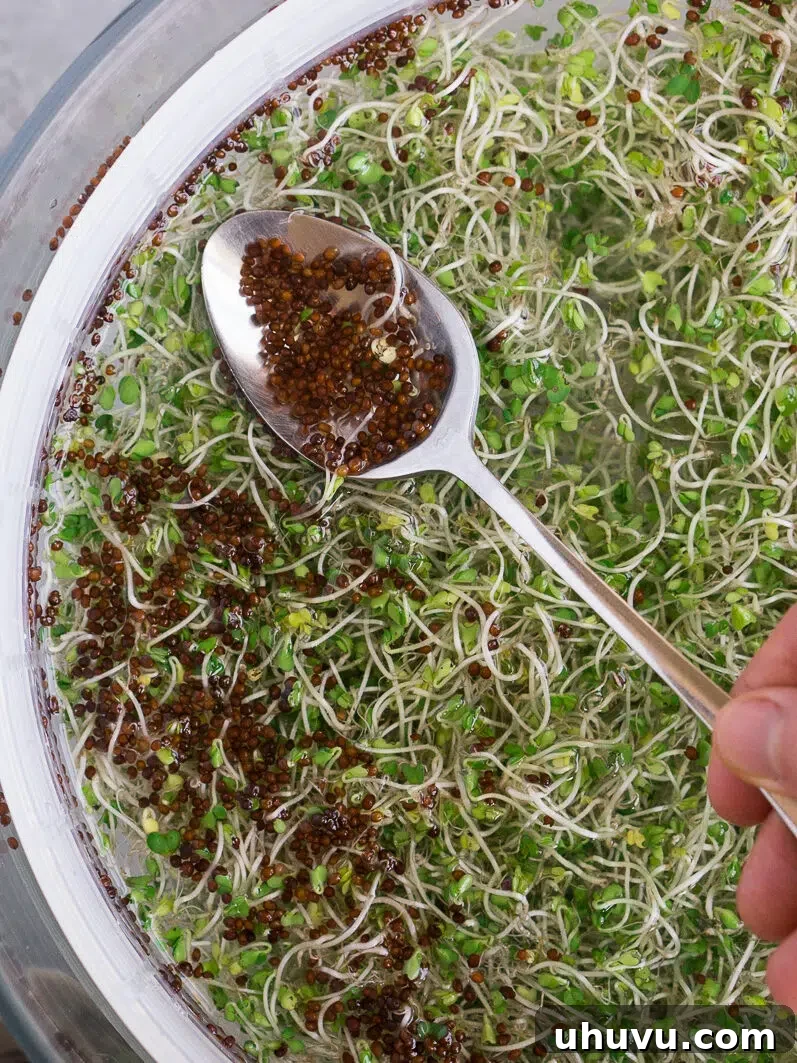
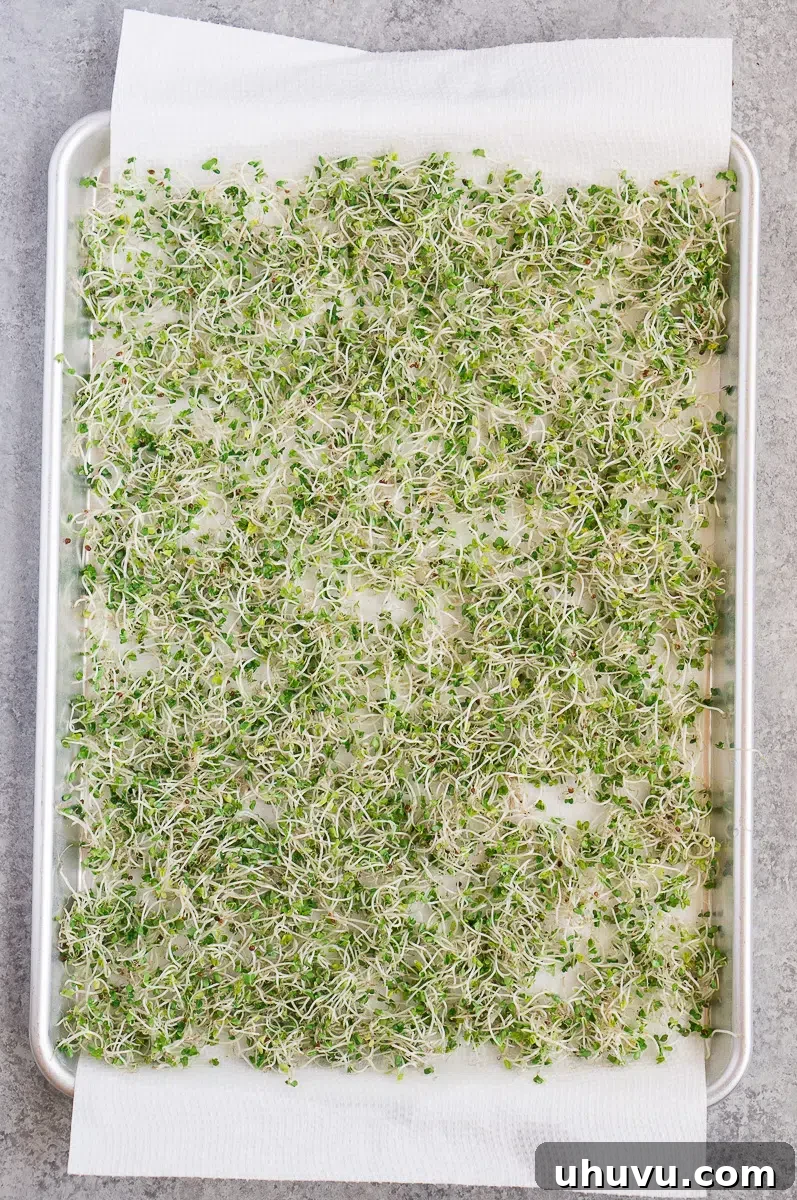
- Harvest the Sprouts: Your broccoli sprouts are typically ready for harvest when they are about 2-3 inches long and have developed small, green cotyledon leaves (the first set of leaves). To harvest and clean them, transfer the sprouts to a large bowl filled with cool water. Gently swirl them around; this action helps separate the tiny brown seed hulls that float to the surface. Skim off as many hulls as possible with a spoon or your hand. Don’t stress about getting every single one; a few remaining hulls are perfectly fine to consume. After cleaning, transfer the sprouts to a paper towel-lined baking sheet or colander to drain any excess moisture for about 30 minutes to an hour before storing.
Broccoli Sprouts Growing Stages: A Visual Timeline
Witnessing the transformation of tiny seeds into vibrant sprouts is fascinating. Here’s a typical timeline of what you can expect:
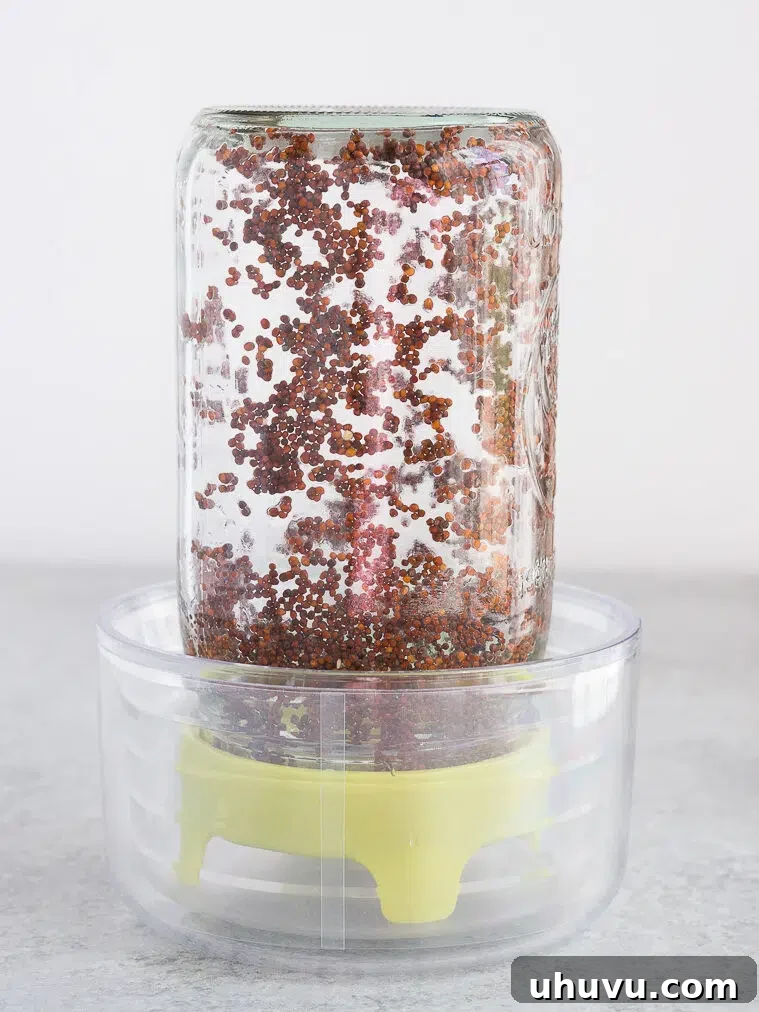
Day 1: Broccoli sprouts begin as tiny, hard brown seeds. After their initial soak, they swell significantly, absorbing water and initiating the germination process. You won’t see much outward change yet, but the internal awakening has begun.
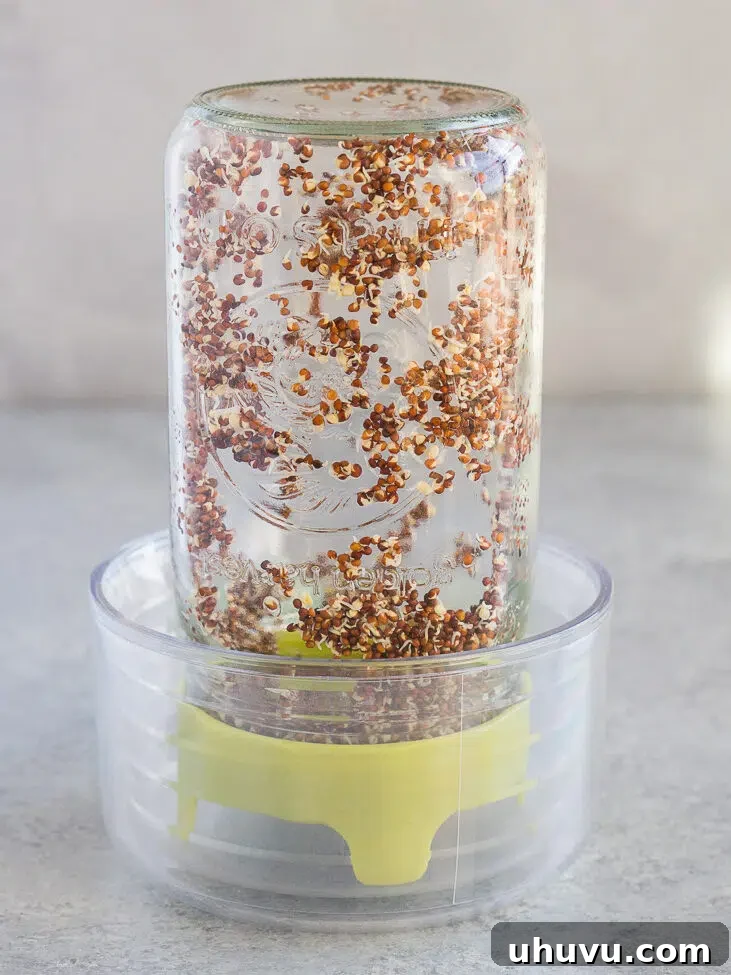
Day 2: Tiny white root tails, also known as radicles, begin to emerge from the seeds. These delicate roots are searching for moisture and anchorage, marking the first visible sign of active growth. The seeds are actively germinating.
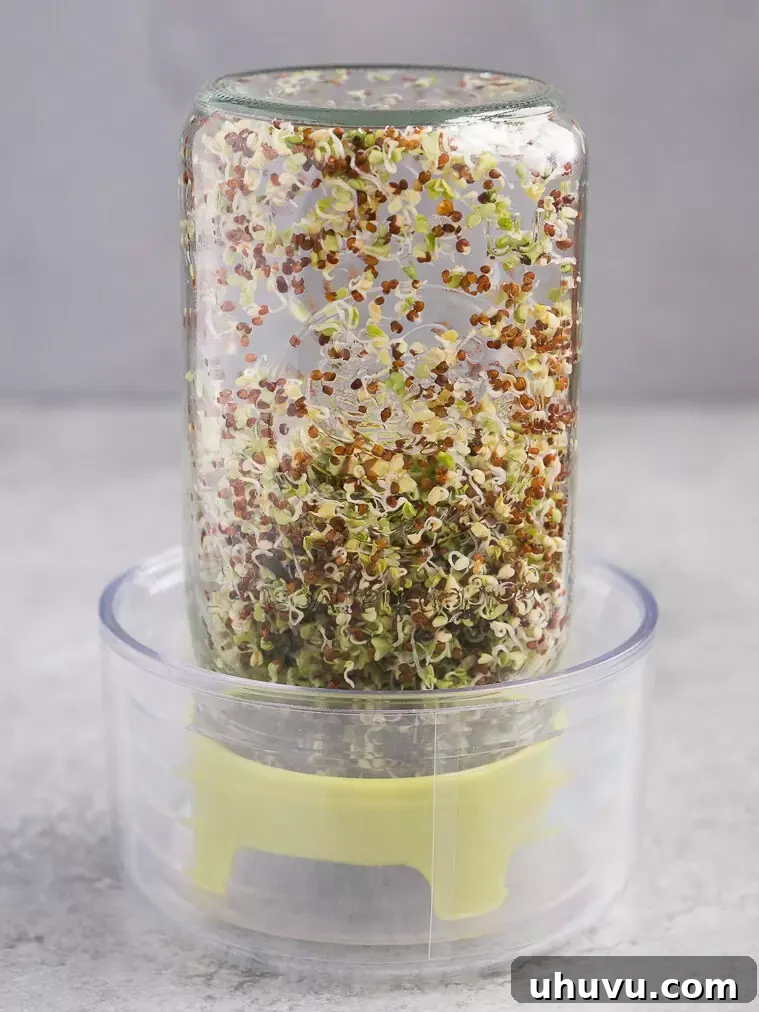
Day 3: The delicate root tails lengthen, and you’ll start to see pale shoots pushing their way out of the seed hulls. These shoots are still light in color as they haven’t been exposed to light to produce chlorophyll.
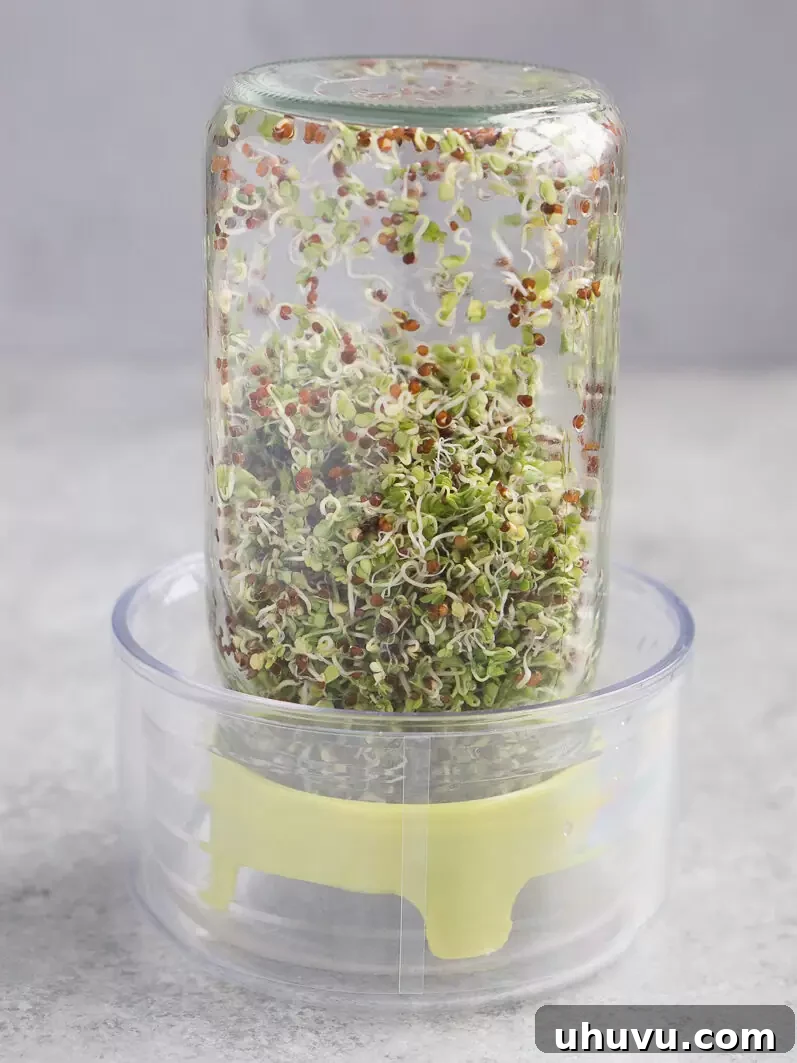
Day 4: The shoots are noticeably longer, and tiny, folded leaves (cotyledons) begin to unfurl. These embryonic leaves are still yellow or very pale at this stage because they’ve been growing in darkness. This is when you’ll start exposing them to indirect light.
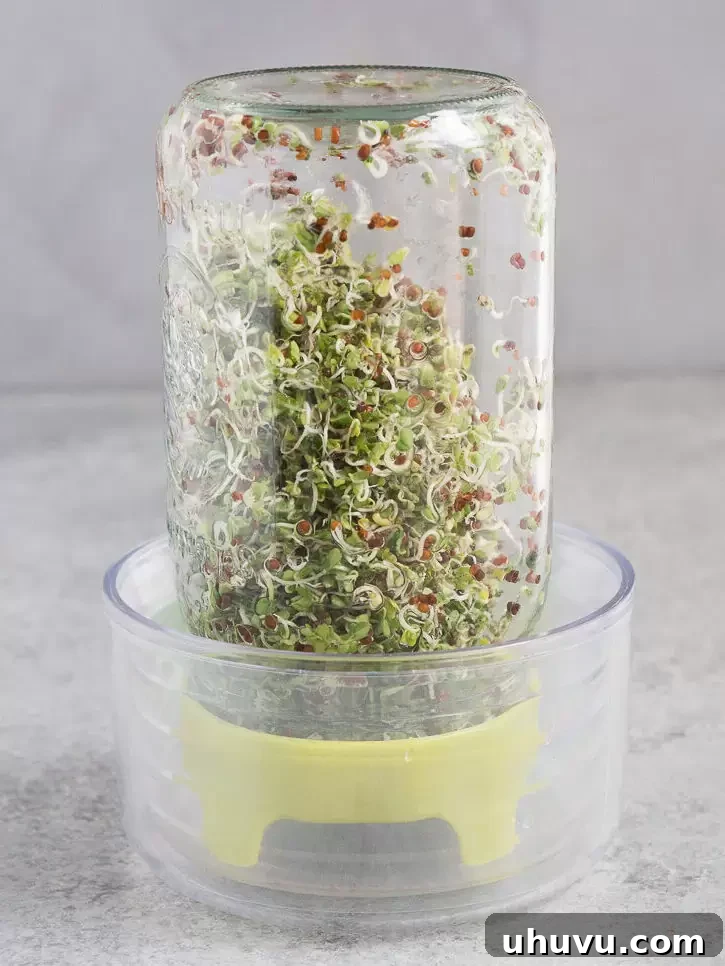
Day 5: With exposure to indirect light, the sprouts undergo a remarkable transformation. Their stems stretch taller, and their tiny leaves begin to turn a vibrant green as they start producing chlorophyll through photosynthesis. Over the next couple of days, they will become fuller and more robust, reaching their ideal harvest height of about 2–3 inches.
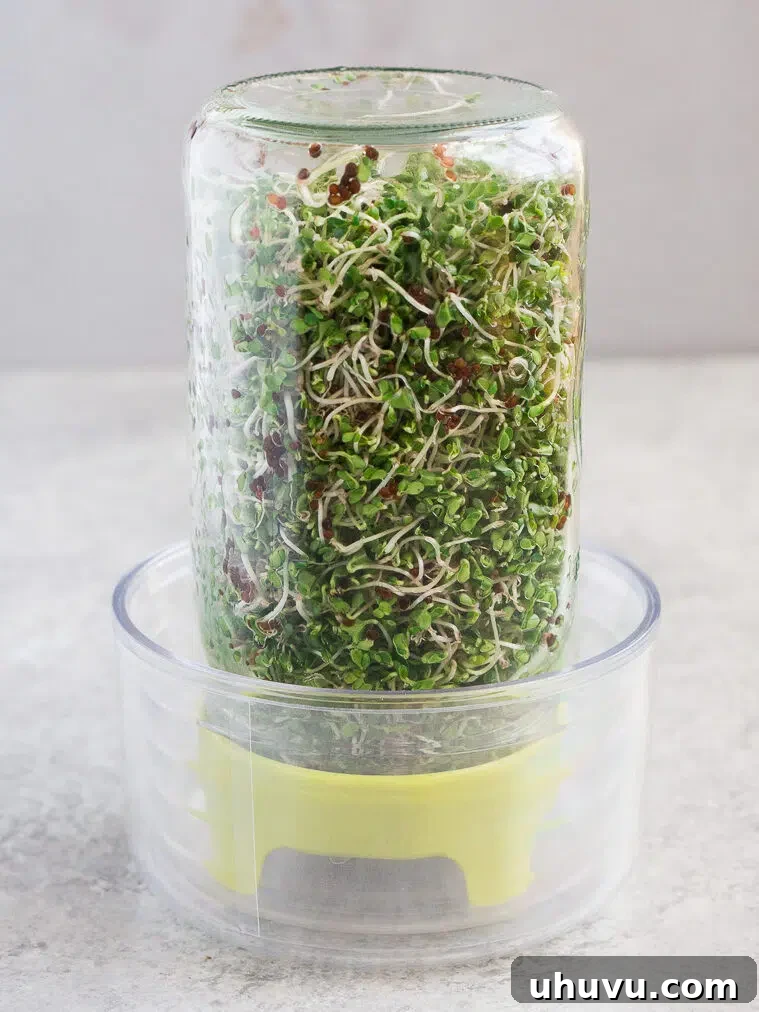
Day 6: By day 6 (or sometimes day 7), your sprouts are crisp, deeply green, and have reached their full potential. They are now perfectly ready to be harvested, cleaned, and enjoyed! This whole process, from initial soak to harvest, takes about 4-6 days.
TIPS FROM NELI’S KITCHEN
Expert Tips From The Test Kitchen for Perfect Sprouts
Achieving consistently great broccoli sprouts is simple with a few insider tricks. Follow these expert tips to ensure your batches are always fresh, vibrant, and free from common issues.
- Master the Rinse and Drain: When rinsing your sprouts daily, the goal is to keep them consistently moist but never waterlogged. After each rinse, ensure every drop of excess water is drained. Leaving standing water in the jar is the most common cause of mold and spoilage. Invert the jar at an angle for at least 15-30 minutes after each rinse to allow for complete drainage and proper airflow.
- Indirect Sunlight is Key: Sprouts absolutely require some light to “green up” and develop chlorophyll, which is where their vibrant color and some nutrients come from. However, they are sensitive to direct sunlight. Placing them in a spot with bright, indirect light (like near a window but not in direct sunbeams) for a few hours each day during their last 2-3 days of growth is ideal. Too much direct sun can dry them out or cause them to overheat.
- Trust Your Nose: Fresh, healthy sprouts should have a clean, slightly earthy, and pleasant aroma. If you detect any off-putting, funky, or sour smell, it’s a strong indicator that they may have become too waterlogged and developed mold or bacteria. In such cases, it’s safer to discard the entire batch and start fresh. Your health is more important than salvaging a questionable batch.
- Choose Specific Sprouting Seeds: This tip cannot be stressed enough. There’s a significant difference between seeds intended for gardening and seeds specifically prepared for sprouting. Garden seeds may be treated with fungicides or pesticides that are not safe for consumption, or they may simply have lower germination rates. Always purchase seeds specifically labeled for sprouting from reputable suppliers to ensure safety and success.
- Maintain Room Temperature: Broccoli sprouts thrive at typical room temperatures, ideally between 68-75°F (20-24°C). Temperatures that are too hot can accelerate spoilage, while overly cold temperatures can significantly slow down growth.
- Ensure Good Air Circulation: Along with proper drainage, good airflow around your sprouting jar is important. This helps prevent the humid, stagnant conditions that mold loves. Using a sprouting stand that lifts the jar slightly can improve circulation.
Delicious Ways to Enjoy Your Homemade Broccoli Sprouts
The beauty of broccoli sprouts lies not only in their nutritional benefits but also in their incredible versatility. Their fresh, slightly nutty, and distinctively peppery flavor, combined with a satisfying crunch, makes them a fantastic addition to almost any meal. Here are some of my favorite ways to incorporate them into your diet:
- Wraps & Tacos: Elevate your favorite handheld meals! Layer a generous handful of sprouts into a Turkey Club Wrap, pile them onto vibrant Salmon Tacos, crunchy Shrimp Tacos, or classic Chicken Tacos for an added burst of freshness and texture.
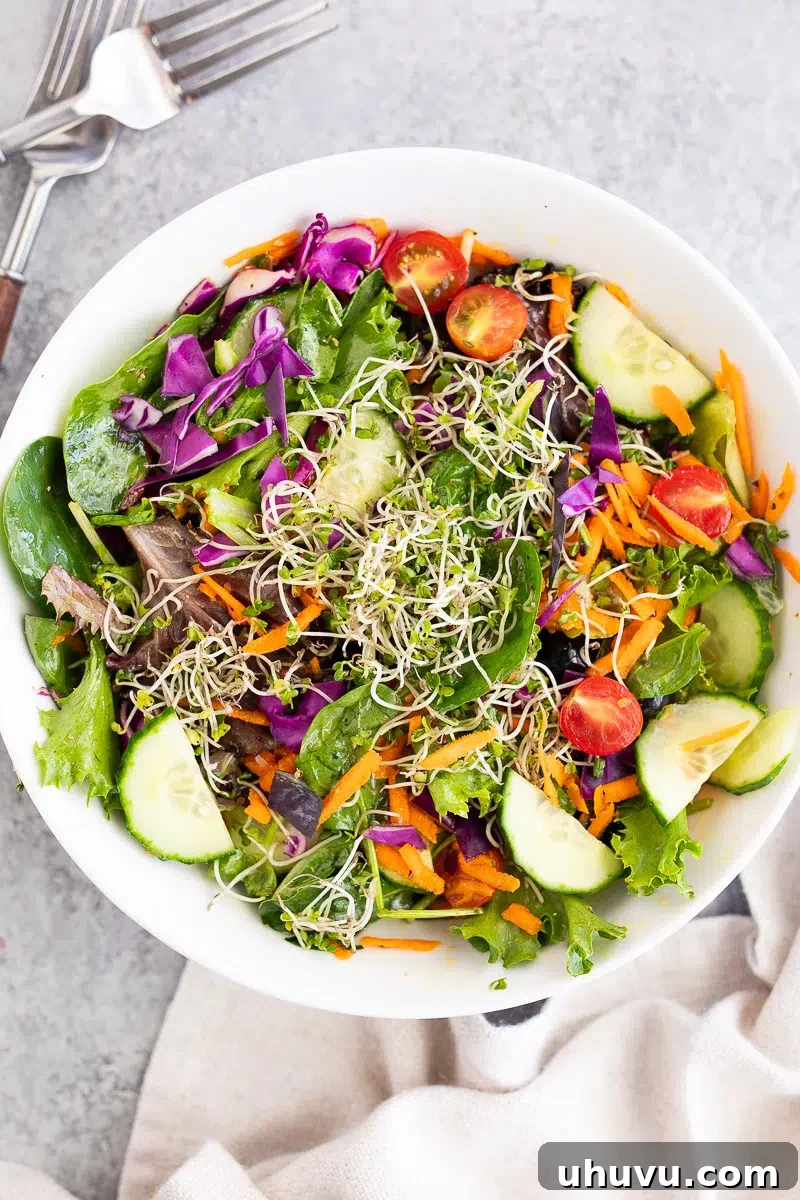
- Sensational Salads: Sprouts are a natural fit for salads. Toss them into my hearty Chickpea Salad, refreshing Mediterranean Tuna Salad, or a loaded Cobb Salad. They also make a fantastic topping for a Quinoa Salad with Salmon, or simply your go-to everyday green salad for an extra nutritional punch and crispness.
- Wholesome Bowls: Transform your grain bowls and Buddha bowls into superfood powerhouses. Broccoli sprouts are the perfect vibrant garnish for satisfying Salmon Rice Bowls or hearty Black Bean Sweet Potato Bowls.
- Savory Sandwiches & Toasts: Add a fresh, peppery bite to your sandwiches. They’re excellent on Egg Salad Sandwiches, creamy Salmon Salad Sandwiches, or piled high on a perfectly toasted Avocado Toast for an irresistible crunch and flavor contrast.
- Stir-Frys (Added Fresh): While it’s generally best not to heat sprouts excessively to preserve their delicate nutrients, they can be a wonderful fresh addition to stir-fries. I recommend stirring them in just before serving, off the heat, for a vibrant, crisp element in dishes like Beef and Broccoli Stir Fry, light Chicken Lettuce Wraps, or a flavorful Egg Roll in a Bowl.
- Nutrient-Boosting Smoothies: For an easy and quick nutritional upgrade, toss a small handful of broccoli sprouts into your favorite Green Smoothie. Their mild flavor blends seamlessly, adding an invisible boost of vitamins and beneficial compounds.
- Garnish for Soups & Omelets: Finish off creamy soups or fluffy omelets with a sprinkle of fresh sprouts for an elegant touch and added texture.
Storing Your Freshly Grown Sprouts
Proper storage is essential to keep your homegrown broccoli sprouts crisp and fresh for as long as possible.
- Refrigerator Storage: After harvesting and ensuring your sprouts are adequately dried (as described in the harvesting step), transfer them to an airtight container or a clean glass jar. You can also place a dry paper towel at the bottom of the container to absorb any residual moisture. Store them in the coolest part of your refrigerator. When stored correctly, fresh broccoli sprouts will maintain their quality for 5-7 days.
- Freezing Sprouts (Optional): While best enjoyed fresh, you can freeze broccoli sprouts for longer storage if you have an abundant harvest. Place them in a single layer on a baking sheet and freeze until solid, then transfer to a freezer-safe bag or container. They can be stored for up to one month. Frozen sprouts lose their crispness when thawed, so they are best used directly from frozen in cooked dishes like stir-fries, soups, or blended into smoothies.
Troubleshooting Common Sprouting Issues
Even with the simplest methods, sometimes issues arise. Here’s how to address common sprouting problems:
- Foul Odor: If your sprouts smell sour, rotten, or generally unpleasant, it’s a sign of bacterial growth, usually due to insufficient drainage or rinsing. Discard the batch immediately and thoroughly clean your sprouting equipment before starting again.
- Lack of Growth: If seeds aren’t sprouting, ensure they are fresh and specifically labeled for sprouting. Old seeds or gardening seeds might not germinate. Also, check that the temperature isn’t too cold, as this can inhibit growth.
- Mold vs. Root Hairs: Sometimes, new sprouters confuse fine white root hairs (radicles) with mold. Root hairs are delicate and fuzzy, forming a network around the seeds, and disappear when rinsed with water. Mold, on the other hand, is usually grey, green, or black, clumped, and has a distinct musty smell that won’t go away with rinsing.
- Mushy Sprouts: This typically results from over-watering or poor drainage. Ensure you are draining thoroughly after each rinse, leaving no standing water in the jar.
Recipe FAQs
Removing seed hulls is a simple process that improves the texture and appearance of your sprouts. After your sprouts are fully grown and ready for harvest, transfer them into a large bowl filled with cool water. Gently swirl the sprouts around in the water with your hands. The empty brown seed hulls, being lighter than the sprouts, will float to the surface. Use a spoon, a small sieve, or your hands to scoop them out. You might also notice some unsprouted seeds sinking to the bottom; you can discard these too. Don’t feel the need to remove every single hull; a few remaining are harmless and can be consumed. Once you’ve removed most of the hulls, lift the sprouts out and place them on a paper towel-lined baking sheet or colander to dry slightly before storing.
The entire process of growing broccoli sprouts from start to finish is remarkably quick! Including the initial soaking of the seeds, you can typically expect your fresh, crunchy broccoli sprouts to be ready for harvest and enjoyment in about 4 to 6 days. The exact duration can sometimes vary slightly depending on factors like room temperature, humidity, and the specific batch of seeds, but this timeframe is a reliable average.
Broccoli sprouts offer a distinctive and enjoyable flavor profile that is quite unique. They possess a fresh, slightly earthy, and subtly nutty taste, complemented by a pleasant peppery undertone. This peppery note is often described as similar to a mild radish or arugula, adding a delightful zing to dishes. Beyond their flavor, they also provide a wonderful, crisp crunch, which makes them a delicious textural addition to salads, wraps, and various other recipes. This complex yet refreshing taste is part of what makes them so popular.
While there’s no official recommended daily allowance, many health enthusiasts and studies suggest consuming anywhere from 1/4 cup to 1 cup of fresh broccoli sprouts per day to benefit from their sulforaphane content. Start with smaller amounts and gradually increase to see how your body responds. Due to their concentrated nutrients, a small amount goes a long way!
No, it is highly recommended to use seeds specifically labeled as “sprouting seeds” or “for sprouting.” Regular gardening seeds may be treated with fungicides, pesticides, or other chemicals that are not safe for human consumption. Sprouting seeds are typically untreated and tested for high germination rates and safety, ensuring a healthy and edible crop.
More Homemade & Better-Than-Store-Bought Recipes
Unlock more culinary confidence by making your own kitchen staples. These recipes are not only simple but also often healthier and more delicious than their store-bought counterparts:
- Homemade Mayonnaise: Creamy & Customizable
- How To Make Hummus: The Easiest & Creamiest Recipe
- How To Make Butter From Milk: A Simple Guide
- Fresh & Flavorful Basil Pesto Recipe
If you enjoyed this Broccoli Sprouts guide or any other recipe on my blog, please leave a ⭐ star rating and let me know how it went in the 📝 comments below. Your feedback is greatly appreciated!
Pin this now to find it later
Pin It
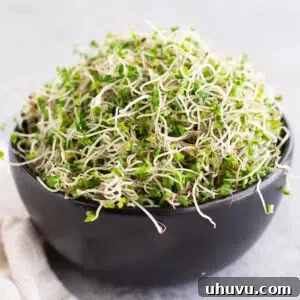
How To Grow Broccoli Sprouts (Step-By-Step Guide)
Neli Howard
5 minutes
2 minutes
15 minutes (active), 4-6 days (growth)
8 servings (or approx. 2 cups of sprouts)
Equipment
-
1 sprouting lid and wide mouth mason jar
Ingredients
- 2 Tablespoons broccoli sprouting seeds
- ¼ cup water (for soaking, plus more for rinsing)
Instructions
-
Prepare & soak the seeds: Place 2 tablespoons of broccoli sprouting seeds in your wide-mouth mason jar. Add about 2 cups of clean water to completely cover the seeds. Secure the sprouting lid over the jar opening and let the seeds soak for 8-12 hours (overnight).
-
Drain and Rinse: After soaking, thoroughly drain all the water through the lid. Then, rinse the seeds with fresh, cool water and drain again completely. Ensure no standing water remains.
-
Start Sprouting: Position the jar upside down or at an angle (approx. 45 degrees) with the lid side down in a bowl or on a stand. This allows any excess water to drain and ensures proper air circulation. Keep it in a cool, dark place at room temperature.
-
Rinse Daily: Continue to rinse and drain the seeds twice a day (once in the morning, once in the evening). This keeps them moist and cleans away metabolic byproducts.
-
Watch Them Grow & Green Up: After 3-5 days, you’ll see green sprouts emerging. At this point, move the jar to indirect sunlight for a few hours daily to help the sprouts develop chlorophyll and turn vibrant green. Avoid direct, harsh sunlight.
-
Harvest & Clean: When the sprouts are about 2-3 inches long with green leaves (typically day 4-6), they are ready. Transfer them to a large bowl of water and gently swirl to separate the seed hulls that float. Skim off as many hulls as possible. Then, transfer the cleaned sprouts to a paper towel-lined baking sheet or colander to drain and air-dry for 30-60 minutes before storing.
Notes
- When rinsing the sprouts daily, you want to ensure that they’re moist but not waterlogged. Complete drainage is crucial.
- The sprouts do need light to green up. However, they don’t like direct sunlight. Make sure to put them in indirect sunlight instead.
- Sprouts should smell fresh when they’re done. If they have a bit of a funky, sour, or moldy smell, it means they got too waterlogged and could have mold or bacterial growth. Toss the batch and start again with clean equipment.
- There’s a critical difference between gardening seeds and sprouting seeds. When setting up, make sure you buy seeds specifically labeled for sprouting to ensure safety and germination success.
- Optimal growth happens at room temperature, ideally between 68-75°F (20-24°C).
- For best storage, ensure sprouts are as dry as possible after rinsing and before refrigerating.
Nutrition
|
Carbohydrates: 0.3g
|
Protein: 1g
|
Fat: 0.1g
|
Saturated Fat: 0.01g
|
Polyunsaturated Fat: 0.1g
|
Monounsaturated Fat: 0.01g
|
Sodium: 1mg
|
Potassium: 13mg
|
Fiber: 0.3g
|
Sugar: 0.03g
|
Vitamin A: 26IU
|
Vitamin C: 1mg
|
Calcium: 6mg
|
Iron: 0.2mg
Nutrition Disclaimer: Nutritional values are estimates and may vary with ingredients, brands, and portion sizes. For accuracy, use your preferred nutrition calculator.