
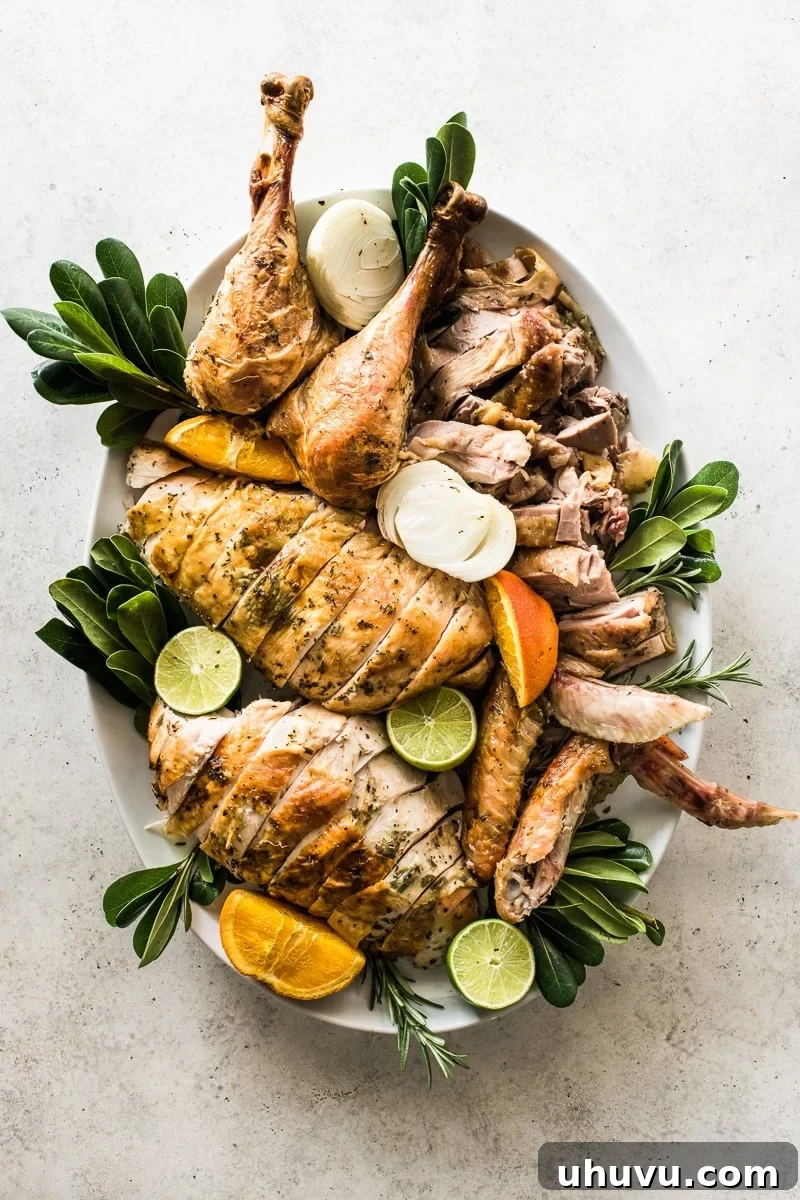
Master the art of turkey carving with this comprehensive, step-by-step guide. Elevate your holiday meal and impress your guests this Thanksgiving, Christmas, and throughout the festive season with perfectly carved poultry!
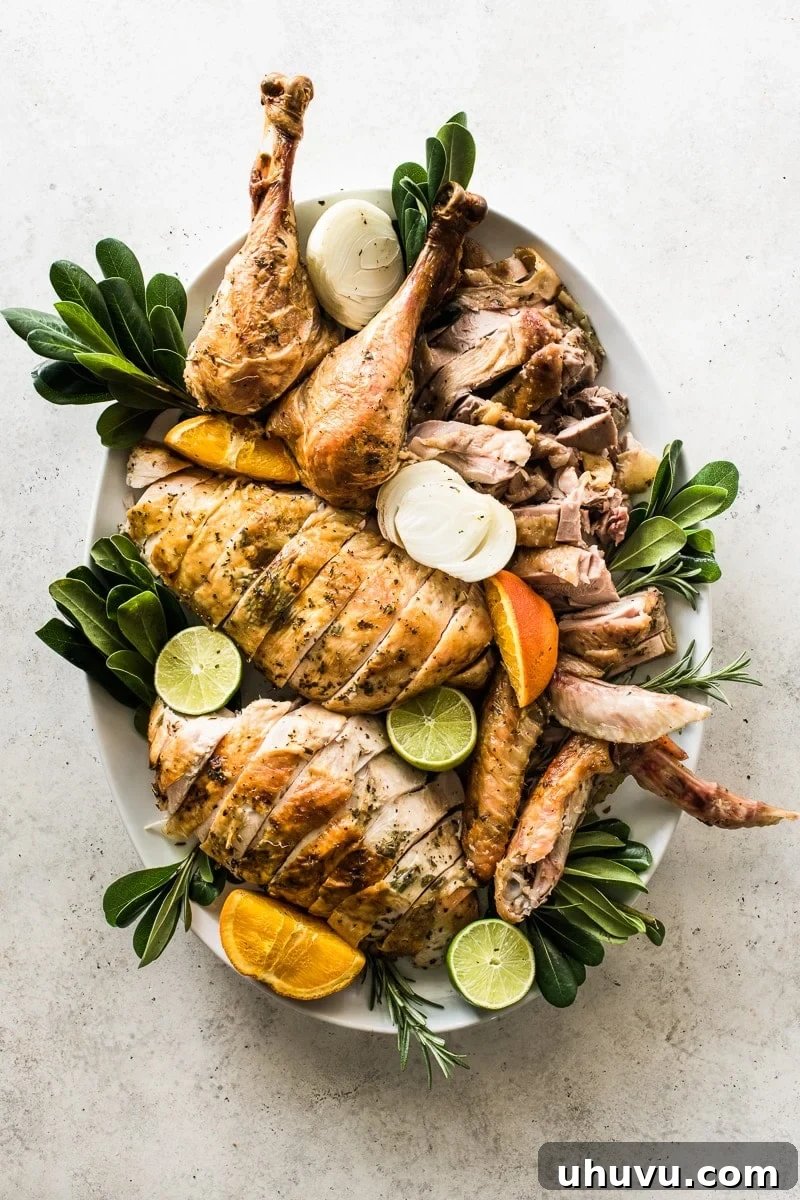
The moment has arrived! You’ve spent hours perfecting your holiday turkey, achieving that golden-brown skin and succulent interior. Now, it’s time for the grand finale: carving. While it might seem daunting, learning how to carve a turkey like a pro is an invaluable skill that ensures every guest receives a beautiful, evenly sliced portion. This detailed guide will walk you through each step, providing expert tips and insights to make your carving experience smooth, efficient, and stress-free, ensuring your festive feast is as impressive as it is delicious.
Before you dive into the hands-on process, watching a visual demonstration can significantly boost your confidence. A clear video tutorial can illustrate the precise cuts and techniques discussed here, making it easier to replicate them on your magnificent bird.
(Video Placeholder: A detailed video tutorial demonstrating each step of turkey carving will be displayed here, offering visual guidance for every cut.)
Essential Tools for Perfect Turkey Carving
Having the right equipment at your fingertips is crucial for a clean, efficient, and safe carving process. Gathering all your tools beforehand will save you precious time and frustration, allowing you to focus entirely on breaking down your beautifully roasted turkey. Here’s a detailed list of what you’ll need:
- Large Carving Board: A spacious cutting board is non-negotiable when carving a large bird. Look for one with a deep juice groove around the perimeter; this essential feature will expertly catch all the delicious turkey drippings, preventing a messy countertop and allowing you to collect those valuable juices for the best homemade gravy. The generous surface area also provides ample room to maneuver the turkey comfortably and safely.
- Long, Sharp Carving Knife: This is undoubtedly your most important tool. A long (preferably 10-12 inches) and razor-sharp knife is absolutely vital for making clean, precise cuts through the turkey’s meat and joints. A dull knife, on the other hand, will tear the meat, creating ragged and unappetizing slices, and can also be dangerous as you’ll need to exert more force. Invest in a dedicated carving knife or ensure your chef’s knife is impeccably sharpened.
- Paper Towels or Clean Cloths: Keep a roll of paper towels or several clean kitchen cloths readily available. These are perfect for wiping down your knife after each cut, cleaning your hands, and quickly addressing any spills or excess fat. A clean knife ensures cleaner cuts, and a tidy workspace enhances safety.
- Large Serving Platter: Select an attractive and suitably sized platter to elegantly showcase your beautifully carved turkey. It should be spacious enough to hold all the various cuts of meat – breasts, thighs, drumsticks, and wings – allowing for a visually appealing presentation at your holiday table.
- Carving Fork (Optional but Highly Recommended): A sturdy two-pronged carving fork can be incredibly helpful for stabilizing the turkey as you carve. It provides a firm grip, allowing for better control over the bird and preventing it from slipping or rotating on the board, thereby increasing both precision and safety.
- Kitchen Towel (for Added Stability): For an extra layer of safety, place a damp kitchen towel or a non-slip mat underneath your carving board. This simple trick prevents the board from sliding around on your countertop as you apply pressure during carving.
Before You Begin: The Critical Step of Resting Your Turkey
This preliminary step is perhaps the most crucial for achieving a truly juicy, tender, and flavorful turkey, yet it’s often overlooked by eager hosts. After your turkey has finished roasting and reached its internal temperature, remove it from the oven and carefully transfer it to your prepared carving board. Tent it loosely with aluminum foil to keep it warm, and allow it to rest undisturbed for at least 20-30 minutes for smaller birds (around 10-12 lbs), or even up to an hour for larger turkeys (20+ lbs). This resting period is not merely a suggestion; it’s a scientific necessity. It allows the meat fibers, which have contracted during cooking, to relax and, more importantly, to reabsorb the flavorful juices that have migrated to the center of the bird. If you carve immediately, these precious juices will simply run out onto the board, leaving you with dry meat. Resting ensures a significantly more moist, tender, and delicious turkey for your guests.
How to Carve a Turkey: A Step-by-Step Professional Guide
Once your turkey has rested sufficiently and all your essential carving tools are laid out and ready, it’s time to begin the carving process. Follow these methodical steps to efficiently break down your beautifully roasted bird and prepare it for an impressive serving.
Follow these detailed steps to expertly carve your roasted turkey, ensuring every piece is perfectly separated and ready for your guests to enjoy the tender white and succulent dark meat.
-
Step 1: Remove the Legs and Thighs
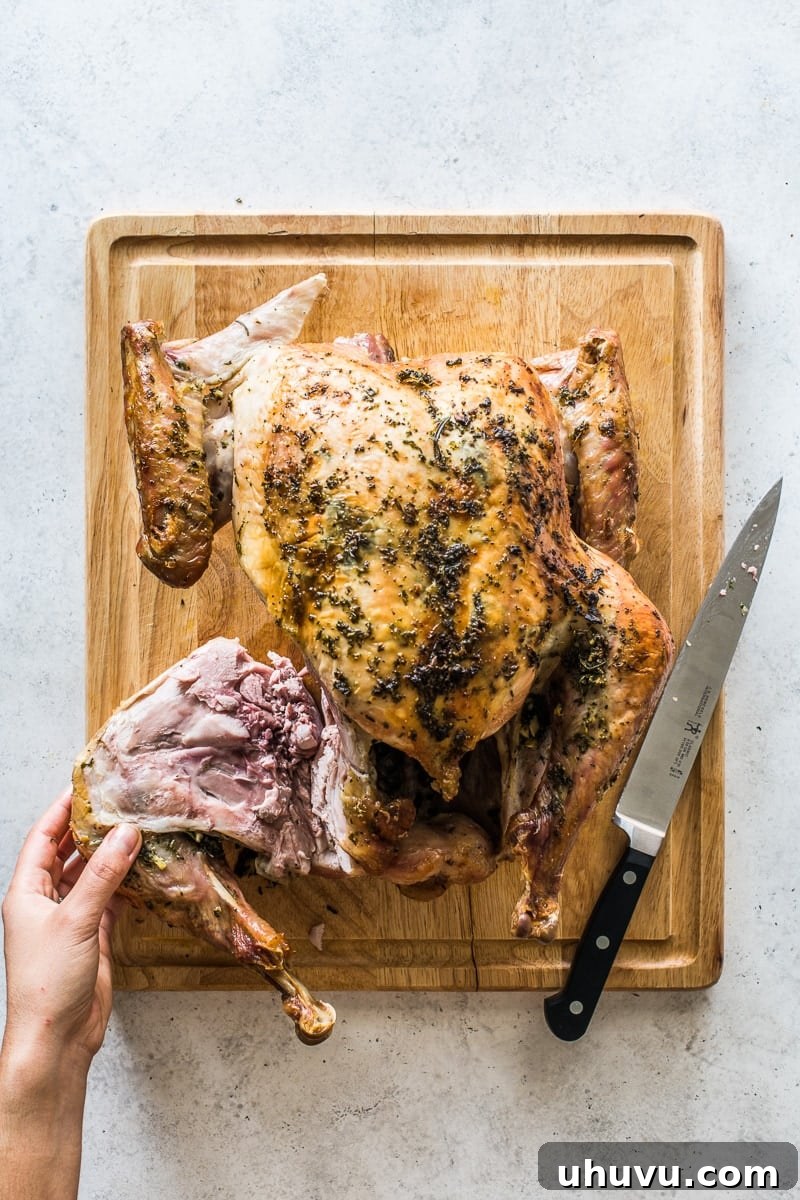
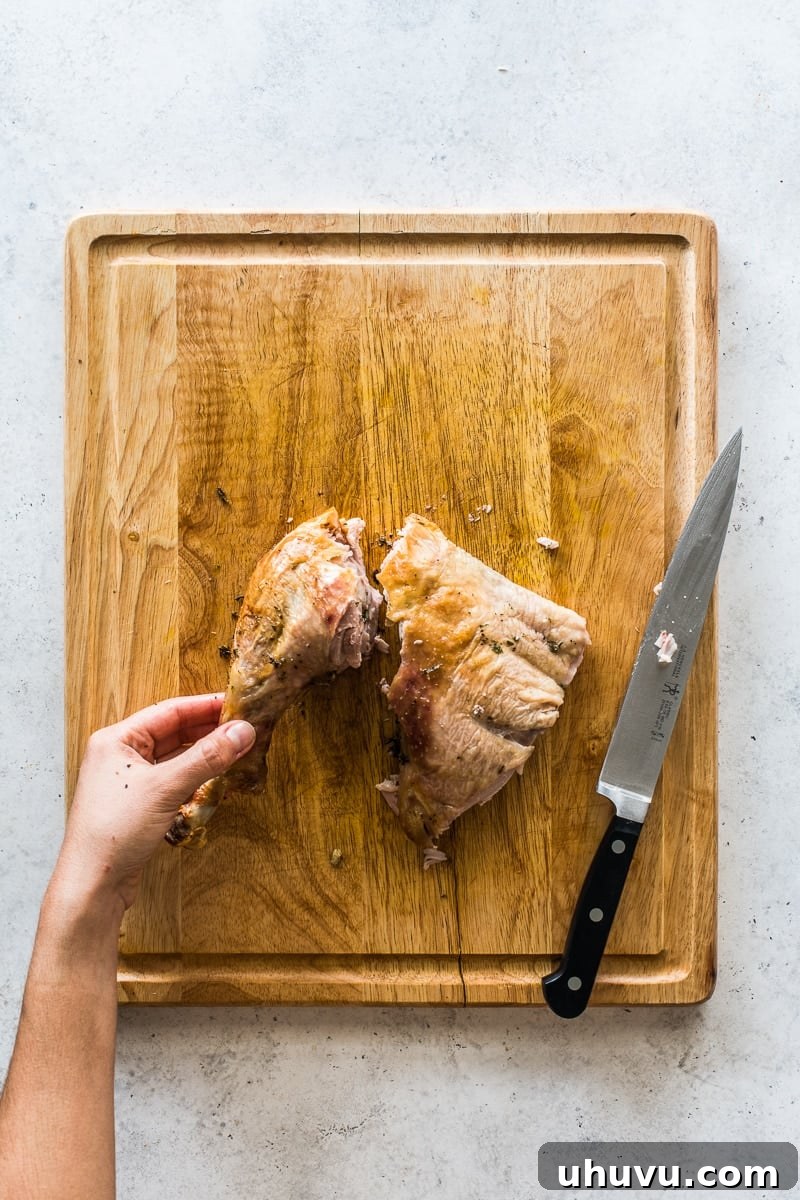
Begin by positioning the turkey on your carving board so that one side is facing you, making it easier to access the leg and thigh. Using your long, sharp knife, carefully slice through the skin that connects the breast and the thigh. Continue cutting down, applying gentle pressure, until you feel the ball-and-socket joint that firmly connects the thigh to the main carcass. Gently push and open the thigh away from the body with one hand, which will expose the joint more clearly. With your other hand holding the knife, make a clean, decisive slice through this joint. Repeat the identical process for the other leg and thigh on the opposite side of the turkey. Once removed, set both leg-thigh assemblies aside on a separate plate or cutting board for further processing. This initial separation creates a stable base for carving the breast meat.

-
Step 2: Partially Remove the Wings for Stability
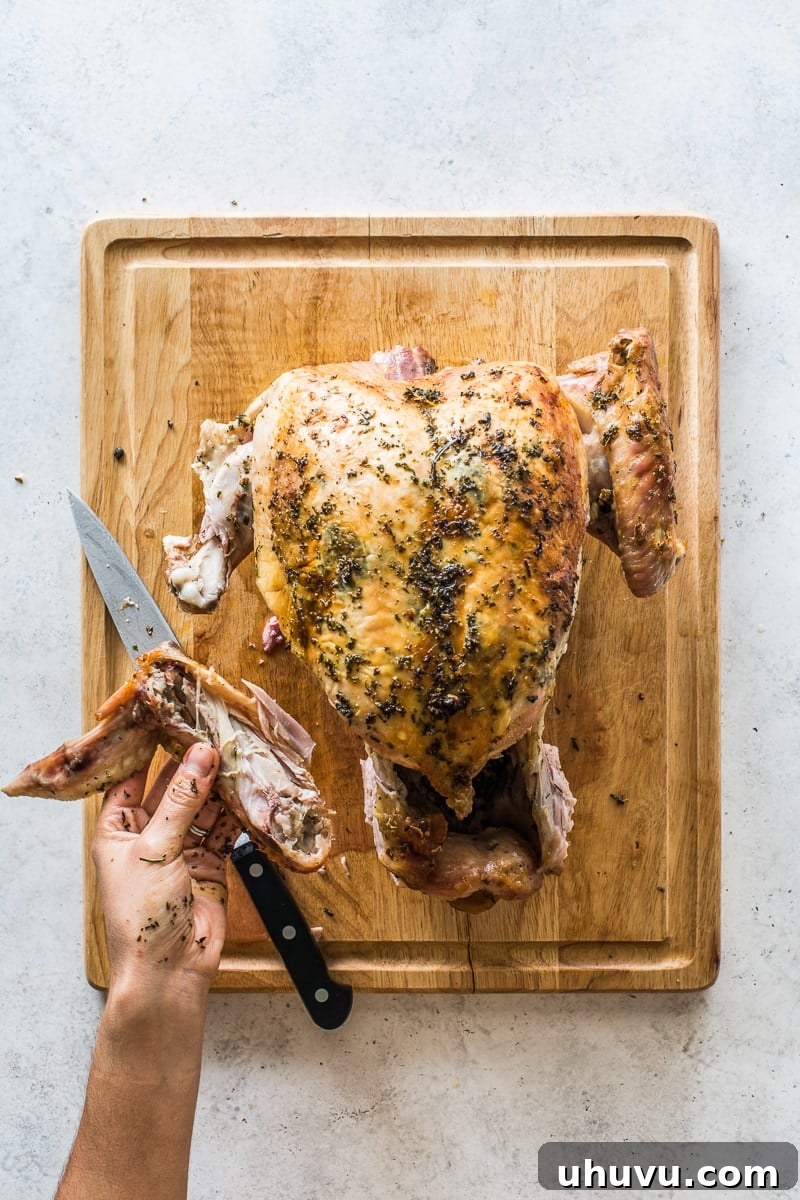
Next, turn your attention to the wings. While some prefer to remove them completely from the start, a common professional technique involves untucking the wings from beneath the bird’s body and partially separating them. Carefully cut through the joint that connects the drumette (the meaty part of the wing closest to the body) to the flat and tip of the wing. By leaving the drumette still attached to the turkey carcass at this stage, you create additional stability, which can significantly ease the process of carving the large breast sections. Once separated from the drumette, transfer the wing flats and tips to your large serving platter or a holding plate. These can be served as is or saved for making stock.
-
Step 3: Remove the Breast Meat (White Meat)
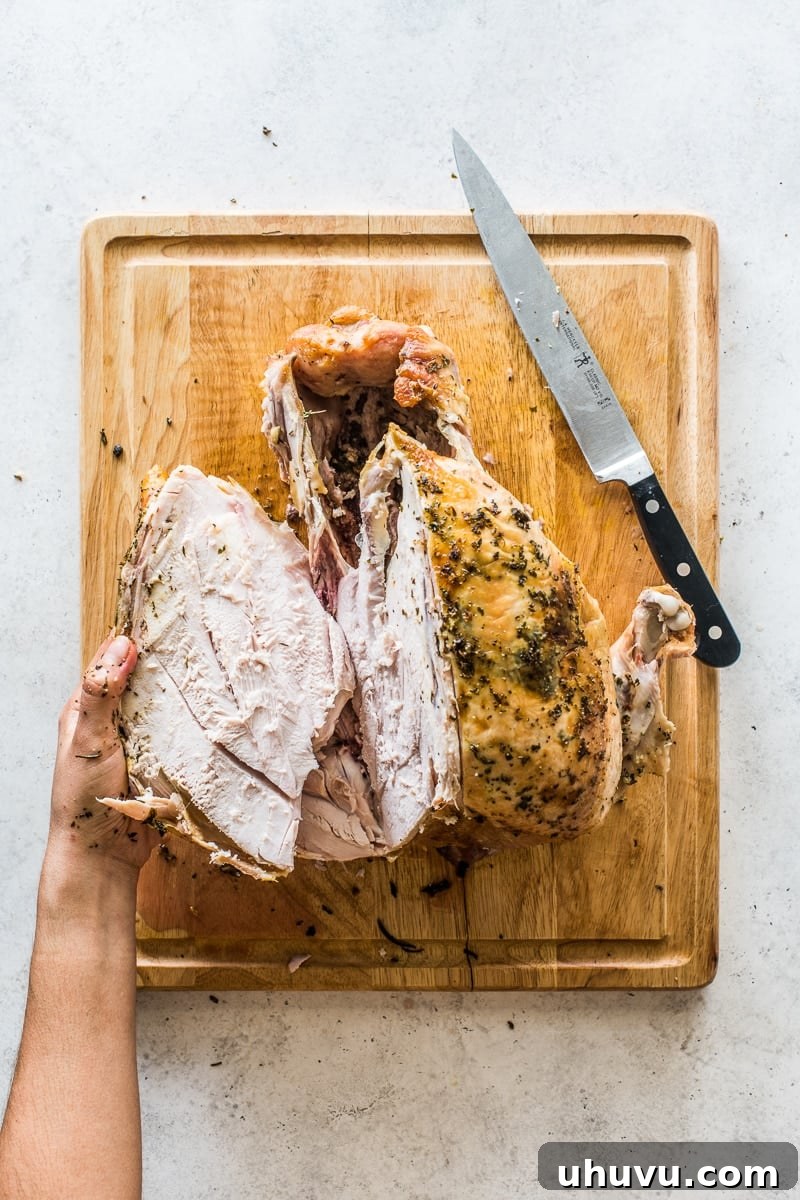
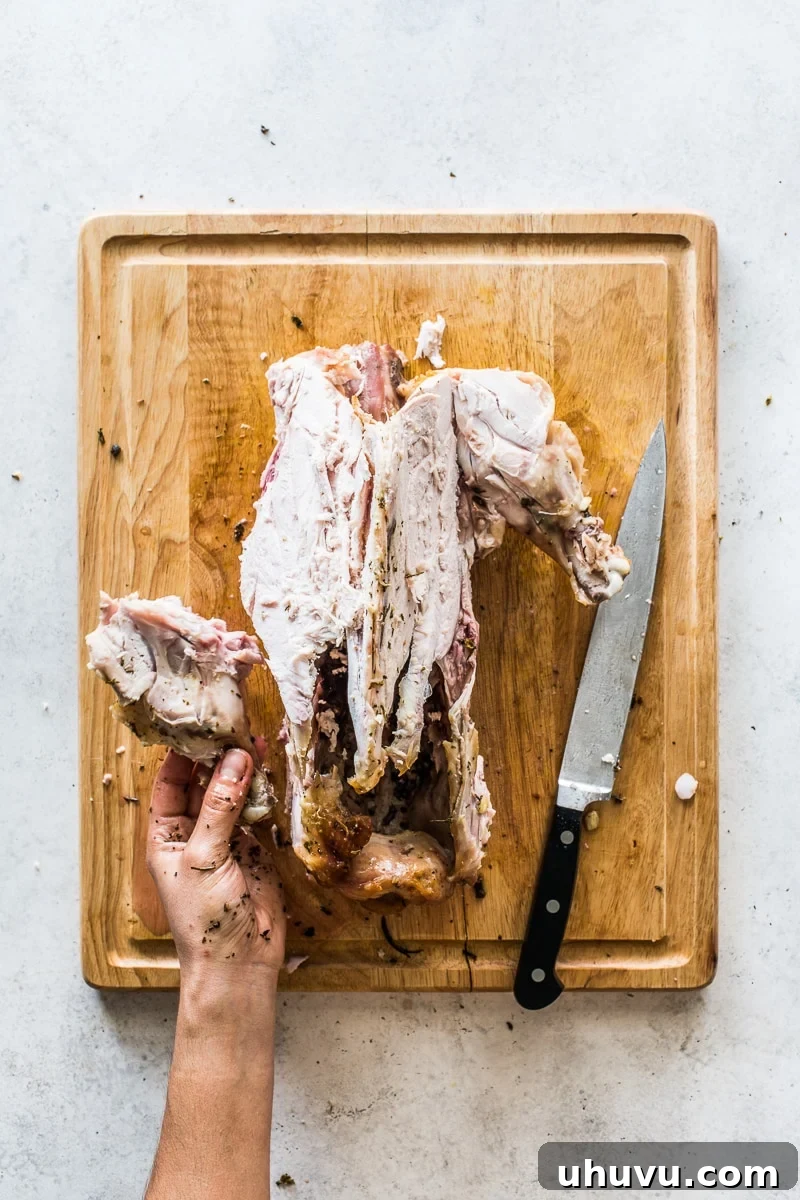
Now it’s time for the prized white meat, often the highlight of the holiday meal. Locate the prominent breastbone, which runs vertically down the very center of the turkey’s chest. Start by making a long, deep cut parallel to one side of the breastbone, extending from the neck cavity all the way down to the tail end. As you cut, slightly angle your knife to follow the natural contour of the rib cage. Use your free hand to gently pull the breast meat away from the bone as you slice, guiding the knife along the bone structure. Continue making smooth, long slicing motions, working your way down until the entire breast half is cleanly separated from the carcass. Remember that the breastbone might be at a slight angle, so adjusting your knife’s angle is key to maximize meat yield. Repeat this precise process for the other breast. Once both breast halves are removed, set them aside on a clean surface.
-
Step 4: Remove the Remaining Wing Drumettes
With the large breast sections successfully removed, the remaining wing drumettes (if you opted to leave them on for stability) will now be much easier to detach. Locate the distinct joint where each drumette connects to the breastbone area of the carcass. Make a clean, swift slice through this joint to separate them completely from the bird. These meaty drumettes are delicious and can be served as they are, or you can add them to a pot with the carcass for making a rich homemade turkey stock later. Transfer the removed drumettes to your main serving platter or a holding plate, keeping your carving board clear.
-
Step 5: Separate the Drumsticks from the Thighs
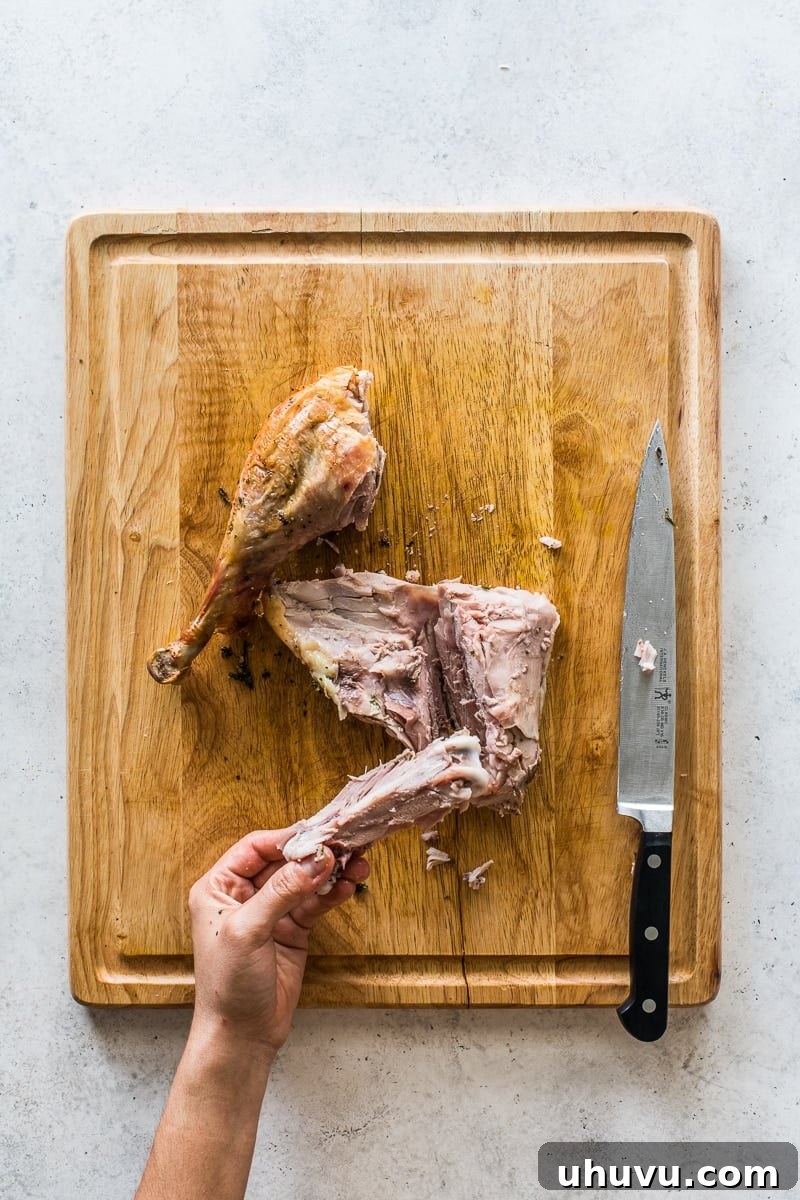
Now, return to the leg-thigh assemblies that you initially set aside. On your carving board, carefully find the natural joint that connects the drumstick (the lower part of the leg) from the thigh (the upper, meatier part). This is another clear ball-and-socket joint. To expose it clearly, you can gently bend the drumstick and thigh apart. Once the joint is visible, make a clean, precise slice through it with your knife. Repeat this process for both leg-thigh assemblies. You should now have two separate drumsticks and two separate thighs, ready for further preparation.
-
Step 6: Remove the Thigh Bone (for Boneless Dark Meat)
For a more refined serving of the succulent dark meat, many prefer to debone the thighs. Place one thigh skin-side down on your carving board. Carefully locate the large thigh bone running through the center of the meat. Using the tip of your sharp knife, meticulously cut along the length of the bone, separating the rich thigh meat from it. Use long, smooth slicing motions to remove as much meat as possible, working carefully around the bone until it can be cleanly lifted out. This technique yields boneless thigh meat, which is considerably easier to slice and serve uniformly. Repeat this process for the other thigh. The removed thigh bones can also contribute to your turkey stock.
-
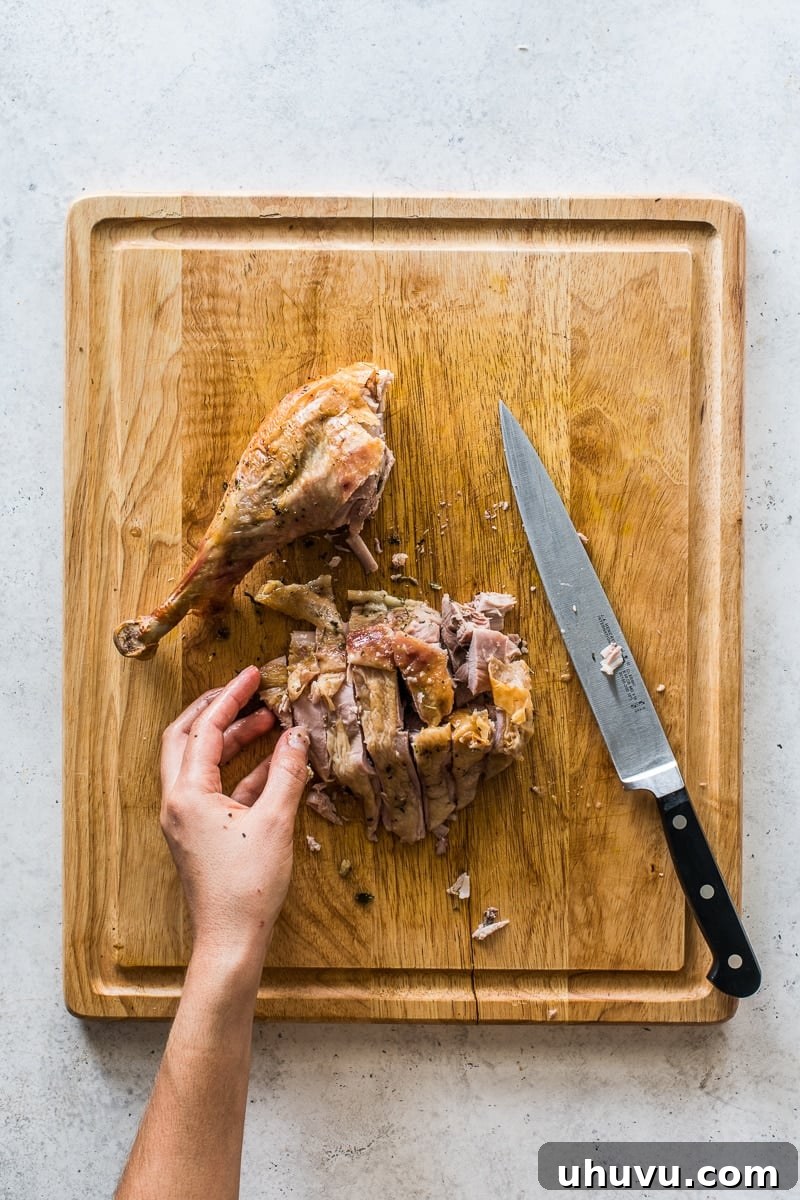
Step 7: Slice the Thigh Meat (Dark Meat)
Once the thighs are deboned, place the boneless thigh meat skin-side up on your carving board. Using your sharp knife, slice the thigh meat across the grain into even, bite-sized pieces. Slicing against the grain is an extremely important technique, as it shortens the muscle fibers, resulting in significantly more tender and palatable dark meat. Arrange the beautifully sliced dark meat alongside the whole drumsticks on your main serving platter. The rich, full-flavored dark meat is a highly anticipated component of any holiday meal, beloved by many guests.
-
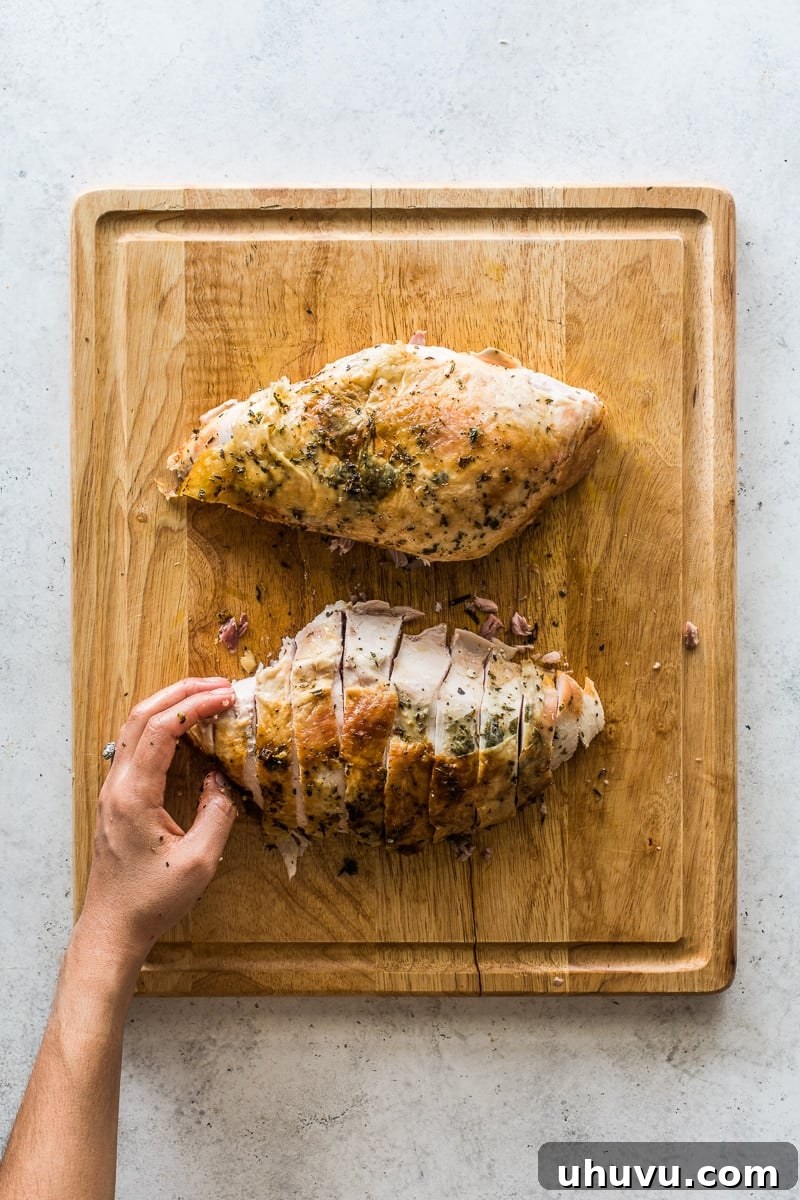
Step 8: Slice the Breast Meat (White Meat)
Finally, it’s time to prepare the exquisite breast halves you set aside earlier. Place one breast half, skin-side up, on your carving board. Using your long, sharp knife, slice the breast meat against the grain into uniform slices, typically ranging from 1/4 to 1/2 inch thick. Just like with the dark meat, slicing against the grain is absolutely essential for ensuring the white meat remains tender, moist, and not at all stringy. Arrange these elegant, perfectly sliced pieces of white meat attractively on your serving platter. Repeat this process for the second breast half. Your perfectly carved white meat is now ready to be presented, offering both a beautiful appearance and tender texture.
Presenting Your Masterpiece: Serving Your Carved Turkey with Flair
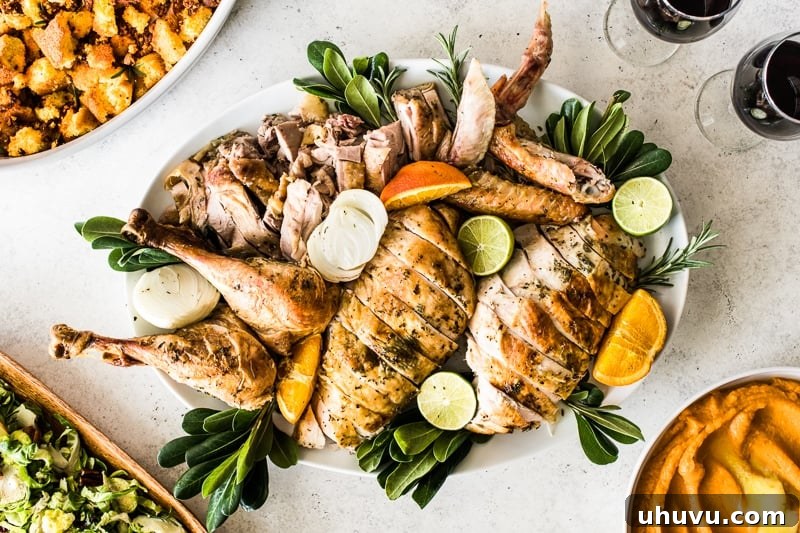
Once all the delicious meat is expertly carved and prepared, the final touch is the presentation. Artfully arrange the different cuts – the tender white meat slices, succulent dark meat, whole drumsticks, and any reserved wings – on your large serving platter. You can elevate the visual appeal by garnishing the platter with fresh, aromatic herbs like rosemary or parsley, vibrant orange slices, or festive cranberries. A beautifully presented platter not only makes the meal more visually appealing but also highlights the care and effort you’ve put into your holiday feast. Don’t forget to have a pitcher of rich, warm gravy, ideally made from those precious turkey drippings, ready to complete this unforgettable dining experience.
Expert Tips for a Flawless Turkey Carving Experience
Beyond the step-by-step instructions, these additional tips will help you achieve perfection and ensure a smooth, enjoyable carving process:
- Always Keep Your Knife Sharp: We cannot overstate this. A sharp knife is not only more effective for clean cuts but also significantly safer as it requires less force, reducing the chance of slipping. Give your knife a quick sharpen or hone just before you begin carving.
- Work Methodically and Patiently: There’s no need to rush the carving process, especially during a celebratory meal. Take your time, follow each step carefully, and enjoy the process. Rushing often leads to messy cuts and wasted meat.
- Angle Your Knife Correctly: This technique is particularly important when removing the breast meat. Angling your knife closely along the contours of the turkey’s rib cage ensures that you cleanly remove as much meat as possible, leaving minimal behind on the carcass.
- Crucially, Cut Against the Grain: This fundamental rule applies to both white and dark meat. By slicing perpendicular to the direction of the muscle fibers, you effectively shorten them, resulting in meat that is incredibly more tender and pleasant to chew.
- Don’t Waste Anything: The turkey carcass, along with any leftover bones, skin, and smaller bits of meat, is a treasure trove of flavor. Don’t discard it! These components are perfect for making an incredible homemade turkey stock or broth, which can be the foundation for future soups, stews, or even next year’s gravy.
Frequently Asked Questions About Turkey Carving
- How long should a turkey rest before carving?
A turkey should ideally rest for a minimum of 20-30 minutes for smaller birds (around 10-12 lbs) and up to a full hour for larger birds (20+ lbs). This crucial resting period allows the juices to redistribute throughout the meat, guaranteeing a moist and flavorful result. Skipping this step often leads to dry meat as the juices will simply run out onto your carving board.
- What kind of knife is best for carving a turkey?
For optimal results, a long (typically 10-12 inches), sharp carving knife with a relatively thin blade is highly recommended. A good carving fork with sturdy prongs can also be an invaluable tool for stabilizing the bird and providing better control during the carving process.
- Can I carve a turkey the day before?
While you certainly can carve a turkey in advance, it is generally recommended to carve it just before serving for the best possible warmth, juiciness, and presentation. If you must carve ahead of time, store the carved meat tightly covered in its own juices to prevent it from drying out, and gently reheat it before serving.
- What do I do with the turkey carcass?
Absolutely do not throw away the turkey carcass! It is gold for culinary purposes. The carcass, along with any leftover bones, skin, and even giblets, is perfect for making a rich, deeply flavorful homemade turkey stock or broth. This stock can then be used as a base for delicious soups, savory gravies, comforting risottos, or as a flavorful liquid in countless other recipes.
Delicious Turkey Recipe Ideas to Complete Your Feast
Now that you’ve mastered the art of carving, here are some fantastic recipes that will ensure your entire turkey feast is truly unforgettable. From preparing the main bird itself to creating an indispensable gravy, these dishes are designed to perfectly complement your beautifully carved turkey and impress your guests.
- Herb Roast Turkey: Discover a timeless, aromatic recipe that consistently yields a perfectly moist and incredibly flavorful bird. This classic preparation is an ideal choice for any traditional holiday gathering, promising a succulent centerpiece.
- Chipotle Citrus Thanksgiving Turkey: For those who appreciate a culinary adventure, this recipe offers a unique and tantalizing twist. Infused with zesty citrus and a hint of smoky chipotle, it provides a delicious and memorable alternative to more conventional turkey preparations.
- How to Make Turkey Gravy from Drippings: The ultimate accompaniment to your perfectly carved turkey is a rich, savory gravy. Learn the secrets to transforming those precious pan drippings into a luscious, full-bodied gravy that will elevate every bite of your holiday meal.
Conclusion: Carve with Confidence and Enjoy Your Feast
Carving a whole turkey doesn’t have to be an intimidating task. With a truly sharp knife, a little patience, and these comprehensive step-by-step instructions, you can approach your perfectly roasted bird with complete confidence. You’re now equipped to skillfully transform it into an elegant platter of evenly sliced, delicious meat. Embrace the satisfaction of serving your guests a beautifully carved turkey this holiday season, and most importantly, enjoy the fruits of your labor!