
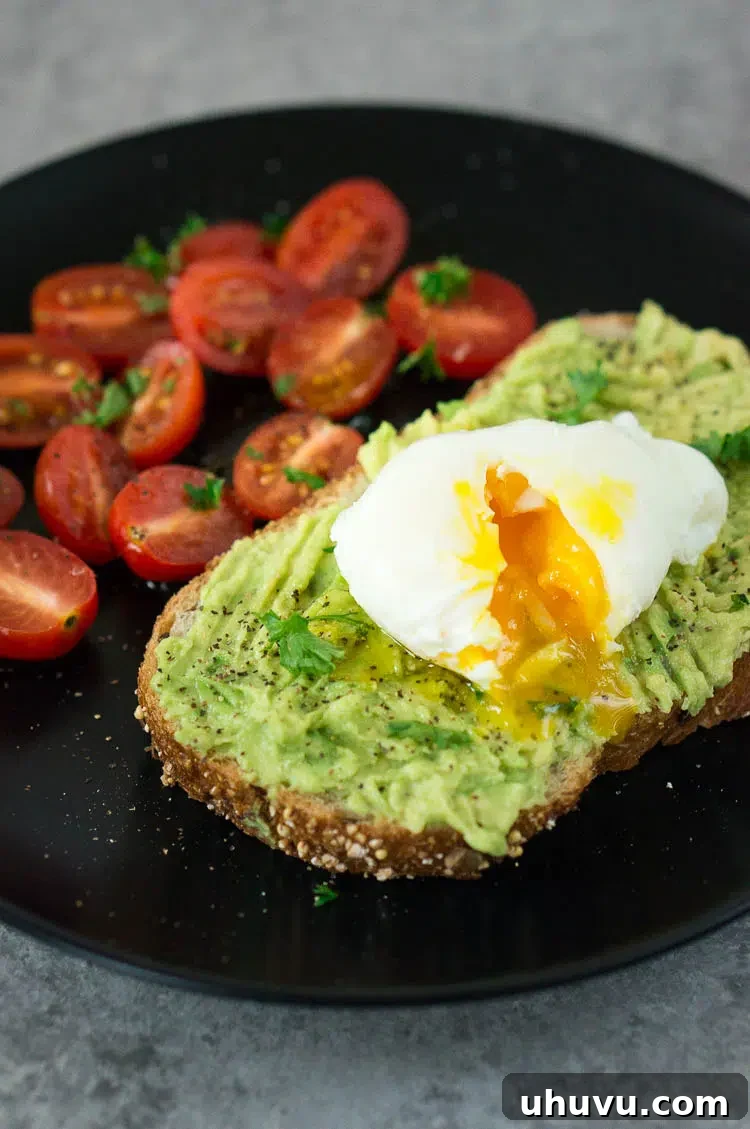
Mastering Perfect Poached Eggs: The Ultimate Guide to a Runny Yolk Every Time
Poached eggs are a culinary staple, transforming any ordinary breakfast or brunch into an elegant and satisfying experience. Renowned for their delicate texture, tender whites, and an irresistibly runny yolk that beautifully enriches any dish, they are often perceived as a challenge to master. However, with the right techniques and a few simple tips, you can achieve consistently perfect poached eggs with remarkable ease and confidence. This comprehensive guide will demystify the art of poaching, ensuring you create flawless eggs every single time, without the hassle or fear of wispy, broken results.
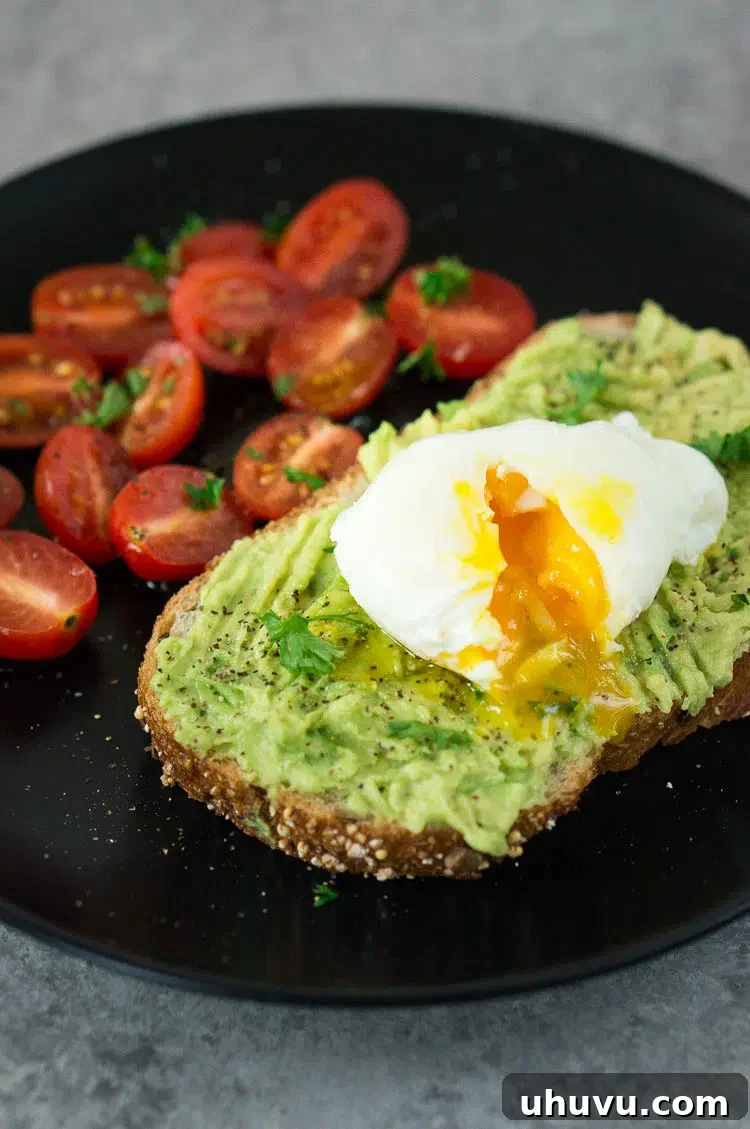
For many home cooks, the idea of poaching an egg can seem daunting, often leading to intimidation or disappointing results. However, this gentle cooking method, which uses no added fats or oils, yields an incredibly soft and clean-tasting egg that stands miles apart from its fried or scrambled counterparts. The secret to success lies not in complex culinary skills, but in understanding a few fundamental principles. Once you unlock these simple tricks, you’ll be able to create those wonderfully soft eggs with their rich, runny yolks that are truly out of this world, making them a personal favorite and a crowd-pleaser.
Why You’ll Fall in Love with This Easy Poached Egg Recipe
- Quick and Effortless: Contrary to popular belief, poaching eggs is incredibly fast! This method takes just a few minutes from start to finish, making it an ideal choice for busy weekday mornings when you need a wholesome meal without the fuss, or a quick, elegant protein boost any time of day. You’ll be amazed at how quickly you can have a gourmet-looking dish on your table.
- Incredibly Healthy and Light: One of the biggest advantages of poached eggs is that they are cooked without a single drop of added fats or oils. This keeps them wonderfully light, nutritious, and perfectly suited for a balanced and health-conscious diet. They’re a fantastic source of lean protein, making them an excellent choice for maintaining energy levels and feeling full longer, all while being incredibly low in calories.
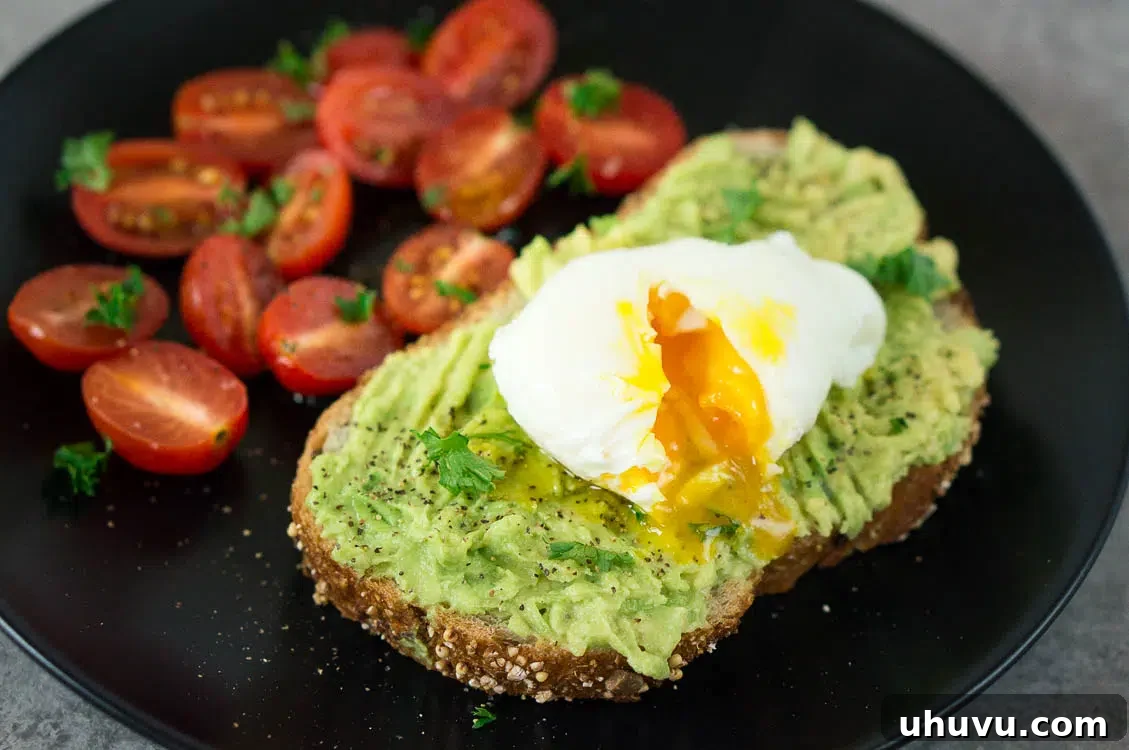
- Remarkably Versatile and Delicious: The understated elegance of a poached egg means it pairs beautifully with an astonishing array of dishes. Beyond the classic toast, think vibrant salads, hearty grain bowls, warming soups, or even as a luxurious topping for pasta. They are the ultimate chameleon in the kitchen, effortlessly enhancing flavor and presentation wherever they go. Imagine them atop creamy avocado toast for a trendy brunch, or alongside savory bacon and crisp hash browns for a fuller, elevated breakfast feast.
- Foolproof and Consistent Results: Say goodbye to frustration and hello to perfectly formed, neatly cooked poached eggs every single time. This guide breaks down the process into easy, actionable steps, coupled with expert tips that address common pitfalls. You’ll learn how to prevent those annoying wispy whites and ensure a compact, aesthetically pleasing egg with that desired runny center, making you feel like a pro chef in your own kitchen.
How To Make Perfect Poached Eggs: A Step-by-Step Guide
Achieving restaurant-quality poached eggs at home is simpler than you think. Follow these clear, detailed steps for a flawlessly cooked egg every single time.
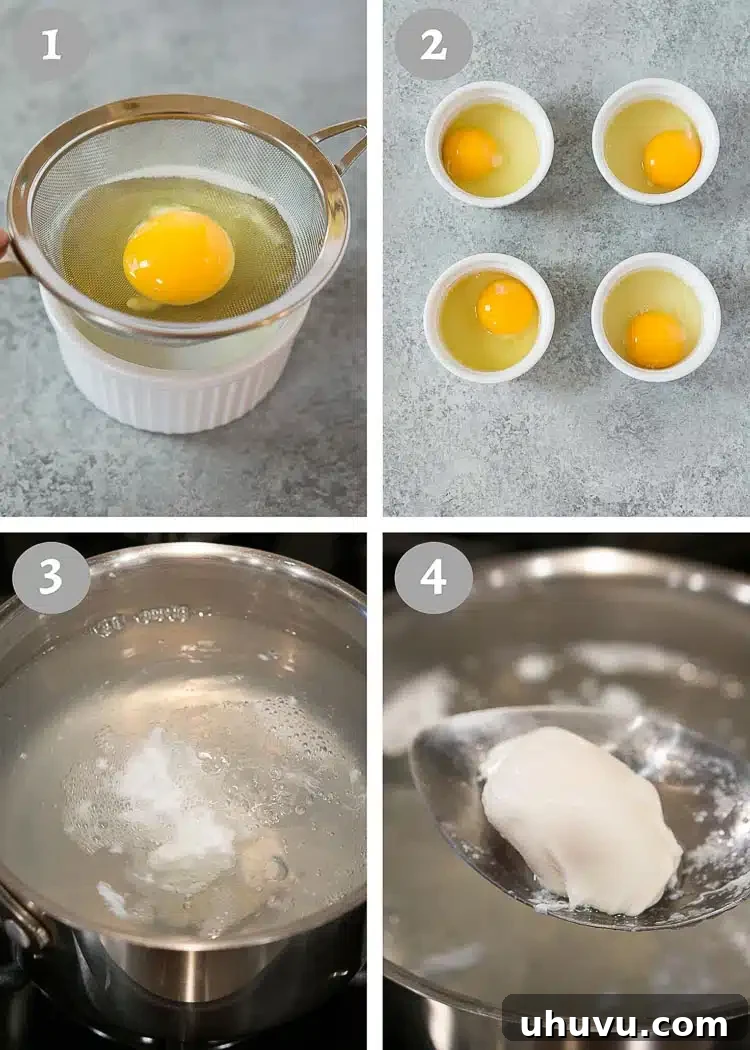
- Prepare Your Water: Begin by filling a large, deep pot with water. Ensure there’s enough water to completely submerge your eggs without them touching the bottom. Bring this water to a rolling boil over high heat. Using a deep pot is crucial as it allows the egg to cook without spreading horizontally, promoting a beautiful, spherical shape.
- Strain and Prep Your Eggs: While waiting for the water to boil, prepare your eggs. Crack one very fresh egg into a fine-mesh sieve, positioned over a small bowl. Allow it to sit for approximately 30 seconds to a minute. This essential step drains away the thinner, more watery parts of the egg white, which are responsible for creating those undesirable “wispy” trails in the poaching water. By removing this excess liquid, you ensure a compact and neat poached egg. Once strained, carefully transfer the egg to a small ramekin or a shallow dish. Repeat this process for each egg you intend to poach, keeping them separate.
- Add Vinegar, Reduce Heat, and Create a Vortex: Once the water is at a rolling boil, significantly reduce the heat until it settles into a gentle simmer. You should see small, lazy bubbles forming at the bottom of the pot, but no vigorous boiling. Add 1-2 tablespoons of white vinegar (or apple cider vinegar) to the water. The acidity of the vinegar plays a vital role in helping the egg whites coagulate more quickly, preventing them from dispersing too widely. Next, using a spoon, gently stir the water in a continuous circular motion to create a slow, controlled vortex (whirlpool) in the center of the pot. This swirling motion will encourage the egg white to wrap tightly around the yolk as it cooks, ensuring that classic, appealing round shape.
- Carefully Poach the Egg: Gently slide the prepared egg from the ramekin directly into the center of the swirling vortex. It’s important to keep the ramekin as close to the water’s surface as possible to prevent the egg from breaking or deforming upon entry. Allow the egg to cook for approximately 3-4 minutes, or until the whites are fully set and the yolk reaches your desired level of runniness. Consult our detailed cooking time guide below for precise doneness. If you are poaching multiple eggs, it is highly recommended to do them one at a time to maintain the effectiveness of the vortex and prevent eggs from sticking together.
- Remove and Serve Immediately: Once your perfect poached egg is cooked to your liking, carefully remove it from the water using a slotted spoon. Gently dab the bottom of the spoon (or the egg itself) on a clean paper towel or a dry kitchen cloth. This crucial step removes any excess poaching water, ensuring your plate remains clean and your beautifully poached egg is presented at its best. Serve your exquisite poached egg warm immediately, either on its own, atop your favorite toast, or as an elegant component of a larger dish.
EXPERT INSIGHTS FOR YOUR KITCHEN
Top Tips for Foolproof Poached Eggs Every Time
Crafting beautifully poached eggs requires attention to a few key details. By understanding the science behind each step and diligently following these proven techniques, you will consistently achieve perfect results, impressing both yourself and your guests.
- Always Use the Freshest Eggs: This is arguably the most crucial tip for perfect poached eggs. Fresher eggs have denser, firmer whites (primarily high-quality albumin) that hold their shape exceptionally well when introduced to hot water. Older eggs, on the other hand, have thinner, more watery whites that tend to spread out and create unsightly wisps, leading to a less desirable appearance and texture. To test for freshness, gently place an egg in a bowl of cold water: if it sinks and lies flat on its side, it’s incredibly fresh and ideal for poaching. If it stands on end, it’s a bit older but still perfectly usable. If it floats, it’s past its prime and should be avoided for poaching.
- Strain the Thin Egg Whites: Even the freshest eggs can have a small amount of thinner, outer egg white that might separate and create undesirable wisps in the water. To counteract this, crack your egg into a fine-mesh sieve positioned over a small bowl. Let it sit for about 30 to 60 seconds, allowing this runny portion to drain away. This simple yet effective trick leaves you with only the thicker, more desirable part of the white, significantly contributing to a compact, neatly formed poached egg that won’t feather out in the water.
- Utilize a Deep Pot of Water: The size and depth of your pot significantly impact the final shape of your poached egg. A deep pot of water allows the egg to submerge fully without touching the bottom, providing ample space for the whites to set uniformly around the yolk. This vertical cooking environment encourages the egg to achieve its characteristic spherical or elegant teardrop shape, rather than flattening out. Ensure there’s enough water for the egg to float freely and cook undisturbed.
- Incorporate a Splash of Vinegar (Essential!): Adding 1 to 2 tablespoons of white vinegar or apple cider vinegar to the poaching water is a true game-changer. Vinegar, being an acid, works wonders by helping the egg whites coagulate (set) faster and more firmly. This rapid setting prevents the whites from dispersing too much in the water, ensuring they wrap tightly around the yolk and cook uniformly. The result is a beautifully compact egg with that coveted perfectly runny center. Don’t fret about taste; the minimal amount of vinegar dissipates during cooking, leaving no detectable flavor in the final product.
- Create a Gentle Vortex: Before carefully introducing your egg, use a spoon to gently stir the simmering water in a continuous circular motion, creating a soft whirlpool or vortex in the center of the pot. Once the vortex is formed, gently slide your prepared egg into its very core. The gentle centrifugal force of this swirling motion helps the egg white to wrap around itself and the yolk, forming a symmetrical, beautifully shaped poached egg. This technique is particularly effective when poaching one egg at a time, ensuring each egg is a masterpiece.
- Maintain a Gentle Simmer, Not a Rolling Boil: The temperature of your poaching water is critical. The water should be at a gentle simmer, characterized by small, lazy bubbles consistently rising from the bottom of the pot, but never a vigorous, rolling boil. Boiling water is far too aggressive; its intense movement will mercilessly break apart the delicate egg, resulting in scattered whites and a less defined, often fragmented shape. A gentle simmer ensures even, tender cooking, allowing the egg to set gently.
- Poach Eggs One at a Time (or in Small Batches): For truly perfect, individual poached eggs with ideal shape and texture, it’s highly recommended to poach them one at a time. This allows you to effectively utilize the vortex technique and gives each egg ample space to cook uniformly without interference. Since each egg only takes about 3-4 minutes, the process is surprisingly quick. If you absolutely must poach multiple eggs for a larger gathering, use a very large pot and gently slide 2-3 eggs in, ensuring they have plenty of room and do not touch. Overcrowding will significantly drop the water temperature, prolong cooking times, and increase the likelihood of eggs sticking together or cooking unevenly.
- Slide Eggs in Slowly from a Ramekin: Cracking an egg directly into the pot can lead to breakage, scattering of whites, and an inconsistent shape. To prevent this, always crack your egg into a small ramekin or a shallow bowl first. This allows for a controlled, gentle slide into the simmering water, minimizing any disruption to the egg’s delicate structure and ensuring the yolk remains intact and perfectly centered.
- Master the Cooking Time (Use a Timer!): The exact cooking time is paramount for achieving your desired yolk consistency. Generally, poaching for 3 minutes will yield a soft, very runny yolk, which is the hallmark of a classic poached egg. Extending the time to 3.5 minutes results in a medium-cooked yolk that is still soft and deliciously gooey. For a firm but still moist yolk, similar to a soft-boiled egg, poach for about 4 minutes. Overcooking will inevitably lead to a firm, rubbery yolk, defeating the purpose of a beautifully poached egg. Using a reliable kitchen timer is your best friend here!
- Remove Excess Water Before Plating: After carefully removing your perfectly poached egg from the water with a slotted spoon, take a moment to gently blot the bottom of the spoon (or even gently touch the egg itself) on a clean paper towel or a dry kitchen cloth. This simple, often overlooked step removes any residual poaching water, preventing your plate from becoming watery and ensuring your beautifully prepared poached egg looks its absolute best upon serving.
How Long to Poach an Egg for Your Desired Yolk Consistency
The key to perfect poached eggs lies in precise timing. The duration of poaching directly dictates the firmness of the yolk, allowing you to customize your egg exactly how you like it. After you’ve brought your water to a gentle simmer, added vinegar, and created your vortex, carefully slide the egg from the ramekin into the center and let it poach according to these guidelines:
- Soft Poached Egg (Runny Yolk): For that gloriously warm, liquid golden yolk that oozes out with the slightest touch, poach your egg for approximately 3 minutes. The whites will be fully set yet incredibly tender and delicate. This is the classic poached egg experience.
- Medium Poached Egg (Soft, Gooey Yolk): If you prefer a yolk that’s still wonderfully soft and gooey but with a slightly thicker consistency, aim for around 3.5 minutes of poaching. This offers a beautiful balance, ensuring the whites are perfectly cooked while the yolk remains rich and flowing.
- Well Done Poached Egg (Firm Yolk): For a yolk that is completely set but still moist and tender throughout, much like a soft-boiled egg, poach for approximately 4 minutes. While this isn’t the traditional “runny” style, it’s a preferred doneness for some and still yields a delicious, healthy egg.
These times are general guidelines. Factors such as egg size (small vs. large), water temperature fluctuations, and even altitude can slightly affect the cooking duration. It’s always a good idea to practice and adjust to your specific kitchen setup and personal preference. Using a kitchen timer is highly recommended for accuracy.
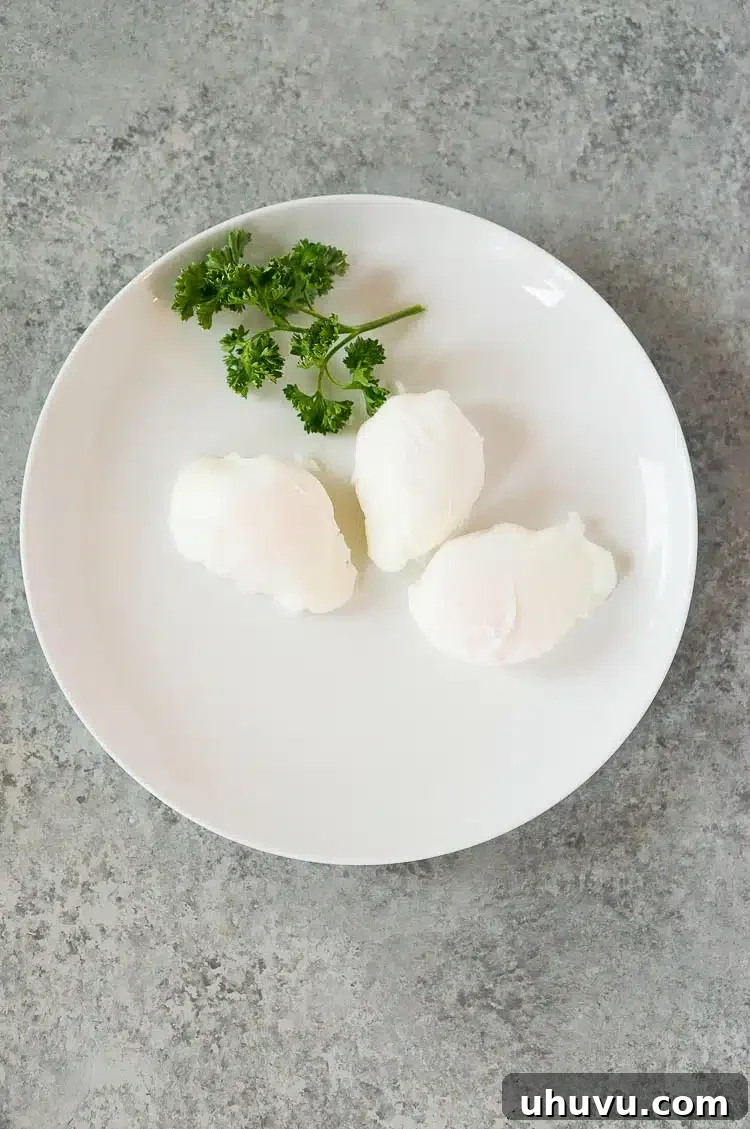
Creative Ways to Enjoy Poached Eggs
While often celebrated as a breakfast or brunch item, poached eggs are incredibly versatile and can elevate a wide variety of meals throughout the day. Their delicate flavor and creamy texture make them a fantastic addition to almost any dish. Here are some delightful and creative serving suggestions:
- The Ultimate Breakfast or Brunch: The quintessential pairing! Serve your perfectly poached eggs on a slice of toasted sourdough or whole-grain bread, perhaps with a generous smear of mashed avocado or a dollop of creamy ricotta. For a heartier meal, accompany them with crispy oven-baked bacon, savory roasted potatoes, or classic hash browns. Don’t forget a sprinkle of salt, pepper, and fresh herbs!
- Eggs Benedict (or Florentine): The undisputed king of brunch dishes relies on a perfectly poached egg. Serve on an English muffin with Canadian bacon and rich hollandaise sauce for Eggs Benedict, or with sautéed spinach for the vegetarian-friendly Eggs Florentine.
- Elevate Your Salads: A warm, runny poached egg adds an incredible richness and creamy element to almost any salad. Try it atop a simple mixed green salad with a tangy vinaigrette, a robust Caesar salad, or a more substantial Nicoise salad. The warm yolk acts as a natural, luxurious dressing, binding the flavors together beautifully.
- Wholesome Grain Bowls: Transform your everyday grain bowl into a gourmet experience. Top your favorite base (quinoa, farro, brown rice, or even cauliflower rice) with a poached egg, an assortment of roasted vegetables, and a lean protein like grilled chicken, chickpeas, or smoked salmon for a wholesome, filling, and utterly satisfying lunch or dinner.
- Hearty Soups and Stews: For an extra layer of richness, depth, and protein, gently drop a poached egg into a hearty lentil soup, a comforting ramen, a warming vegetable stew, or even a spicy shakshuka just before serving. The soft yolk will meld with the broth, creating an incredibly satisfying texture.
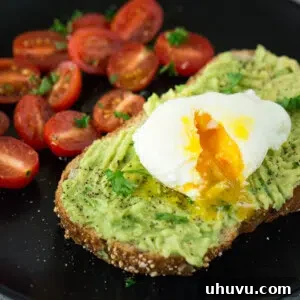
- Avocado Toast Reinvented: The modern classic reaches new heights with a perfectly poached egg. Layer creamy mashed avocado on toasted bread, then crown it with your beautiful poached egg. Finish with a sprinkle of chili flakes, ‘everything bagel’ seasoning, or a drizzle of good olive oil for an Instagram-worthy and delicious meal.
- Simple Pasta Dishes: A poached egg can transform a simple pasta dish into something truly special. Serve it atop spaghetti with a light garlic and olive oil sauce, a vibrant pesto pasta, or a fresh primavera with seasonal vegetables. Break the yolk to create a luxurious, creamy sauce that coats every strand of pasta.
Can You Poach More Than One Egg at a Time?
While it is technically possible to poach multiple eggs simultaneously, for truly perfect, individual results – especially if you’re aiming for that classic spherical shape and tender texture – it’s generally best to poach one egg at a time using the vortex method. The reason lies in the delicate process: creating a gentle swirl in the water helps the egg white wrap neatly around the yolk. If you introduce two or more eggs at the same time into a single vortex, the increased turbulence can cause them to tangle, break apart, or interfere with each other’s formation, leading to less defined shapes and uneven cooking.
The good news is that each egg only takes about 3-4 minutes to cook, so making them individually is a surprisingly quick process and ensures each egg is a masterpiece. If you absolutely need to poach several eggs for a crowd and are willing to accept a slightly less perfect shape, you can gently slide 2-3 eggs into a very large pot of simmering water. Ensure they have plenty of space and do not touch each other, as overcrowding will significantly lower the water temperature, prolong cooking, and increase the likelihood of them sticking together or cooking unevenly. Another option for batch poaching is to use silicone egg poacher cups, which keep the eggs separate, though many purists prefer the traditional method without a poacher for a superior, free-form texture and shape.
Can You Make Poached Eggs Ahead of Time?
Yes, absolutely! Poached eggs are wonderfully suited for making ahead, which makes them an excellent option for entertaining, large family brunches, or simply streamlining your morning routine. This method allows you to enjoy stress-free meals, as the bulk of the preparation is done in advance, leaving only a quick rewarming step before serving.
To make them ahead, poach the eggs as normal but slightly undercook them. Aim for about 2 to 2.5 minutes of poaching time, so the whites are just set but the yolk is still very runny. Immediately after poaching, remove the eggs with a slotted spoon and transfer them directly into an ice bath (a bowl of cold water with plenty of ice cubes). This crucial step rapidly stops the cooking process, ensuring the yolks remain perfectly runny and the whites stay tender. Once completely cooled (which usually takes a few minutes), gently transfer the eggs to an airtight container filled with fresh, cold water. They can be stored in the refrigerator for up to 2-3 days without any loss of quality.
When you’re ready to serve, simply rewarm the eggs. Gently place them into a pot of simmering (not boiling) water for 30 seconds to 1 minute. This will gently heat them through without cooking the yolk any further. You can rewarm several eggs at once using this method, making it an ideal solution for serving a crowd without compromising on the deliciousness or the perfect runny yolk.
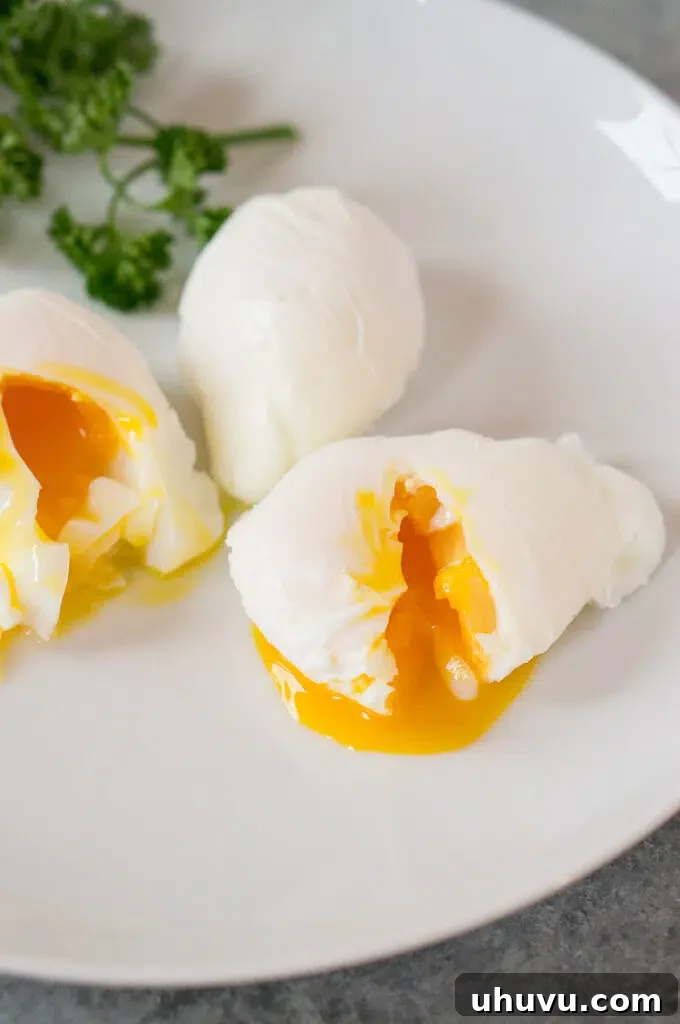
Common Poaching Mistakes and How to Avoid Them
Even with the best intentions, a few common errors can derail your poached egg efforts. Being aware of these pitfalls and knowing how to prevent them will ensure your success every time.
-
Using Old Eggs: As highlighted, older eggs have thinner, more watery whites that easily spread and break apart in hot water.
Solution: Always prioritize using the freshest eggs available. A simple water test can confirm their freshness. -
Water That’s Too Hot (Rolling Boil): Vigorous boiling water is too harsh for delicate eggs. It can tear the whites, creating unsightly wisps and potentially breaking the yolk.
Solution: Ensure your water is at a gentle simmer, with only small, lazy bubbles rising from the bottom. -
Not Straining the Egg: The thin, outer layer of egg white is a primary culprit for wispy threads in the water.
Solution: Crack your egg into a fine-mesh sieve and let it drain for 30-60 seconds before poaching. -
Forgetting Vinegar (or Not Enough): Without an acidic element, egg whites take longer to coagulate, leading to more dispersion in the water.
Solution: Add 1-2 tablespoons of white vinegar to the poaching water. It helps the whites set quickly and neatly. -
Overcrowding the Pot: Too many eggs at once will significantly drop the water temperature, leading to inconsistent cooking and a higher chance of eggs sticking together.
Solution: Poach eggs one at a time, or in very small batches in a large pot, ensuring ample space between each egg. -
Incorrect Cooking Time: Too short and the whites might be undercooked; too long and you’ll end up with a firm yolk, losing that desirable runny center.
Solution: Use a reliable kitchen timer and stick to the recommended cooking times for your desired yolk consistency. -
Cracking Eggs Directly into Water: This method offers no control and can cause the egg to break or spread unevenly upon impact with the water.
Solution: Always crack the egg into a small ramekin or shallow bowl first, then gently slide it into the simmering water. -
Not Drying Eggs Before Serving: Serving directly from the water can lead to a watery plate, diluting flavors and making your presentation less appealing.
Solution: Gently blot the poached egg on a paper towel after removing it from the water to remove any excess moisture.
Recipe FAQs
While it is technically possible to poach an egg without vinegar, it is highly recommended for achieving consistently perfect results. The acid in vinegar helps the egg whites to firm up quickly, preventing them from dispersing into the water and ensuring they wrap neatly around the yolk. This rapid setting is key to that beautiful, compact shape and wonderfully runny yolk. Don’t worry, the small amount of vinegar won’t affect the taste. If you don’t have vinegar, a squeeze of lemon juice can serve a similar purpose.
The ideal water temperature for poaching eggs is a gentle simmer, not a rolling boil. You should see small, lazy bubbles forming at the bottom of the pot and gently rising to the surface, but no vigorous bubbling. This temperature range is typically between 180°F to 190°F (82°C to 88°C). Water that is too hot will aggressively break apart the egg, while water that is too cool will prevent the whites from setting properly.
It’s generally better to use eggs that are at least at room temperature for poaching, though very fresh eggs will still poach well even if slightly cool. Cold eggs can slightly lower the water temperature when introduced, potentially affecting the cooking time and how quickly the whites set. For optimal results, take your eggs out of the refrigerator 10-15 minutes before you plan to poach them, allowing them to come closer to room temperature.
Preventing egg whites from spreading involves a combination of key techniques:
- Always use very fresh eggs, as their whites are firmer.
- Crack the egg into a fine-mesh sieve and drain the thin outer whites for 30-60 seconds.
- Add 1-2 tablespoons of white vinegar to the poaching water to aid rapid coagulation.
- Ensure the water is at a gentle simmer, not a vigorous boil.
- Create a gentle vortex in the water before carefully sliding the egg into its center.
Following these steps will yield beautifully compact, well-formed poached eggs.
More Easy Egg Recipes to Master
- Classic Deviled Eggs
- Fluffy Scrambled Eggs
- How To Make The Perfect Hard Boiled Eggs
- Quick Breakfast Egg Muffins
- Sweet Potato, Sausage, and Egg Breakfast Casserole
If you enjoyed this ultimate Poached Eggs recipe or any other recipe on my blog, please leave a ⭐ star rating and let me know how it went in the 📝 comments below. Your feedback is truly appreciated! Thanks for visiting!
Pin this now to find it later
Pin It
☝ Share your experience in the comments!
Perfect Poached Eggs
Neli Howard
2
3-4
5-6
4 eggs
Ingredients
- 4 large fresh eggs
- 1-2 Tablespoons white vinegar (or apple cider vinegar)
- Large pot of water
Instructions
-
Bring a large, deep pot of water to a rolling boil over high heat.
-
Prepare your eggs. Crack one egg into a fine-mesh sieve over a bowl and let it strain for 30-60 seconds to remove thin whites. Transfer the strained egg to a small ramekin. Repeat for each egg.
-
Reduce heat to a gentle simmer. Stir in 1-2 tablespoons of vinegar. Create a gentle vortex in the water with a spoon. Carefully slide one egg from its ramekin into the center of the swirling water.
Cook the egg for approximately:
Soft poached egg (runny yolk): 3 minutes
Medium poached egg (soft, gooey yolk): 3.5 minutes
Well done poached egg (firm yolk): 4 minutes
-
Once cooked, remove the egg with a slotted spoon and gently dab it on a paper towel to remove any excess water. Serve warm immediately.
Notes
For detailed tips and common mistake avoidance, please refer to the “Top Tips for Foolproof Poached Eggs Every Time” section within the article above.
Nutrition
Calories:
64
kcal
|
Carbohydrates:
1
g
|
Protein:
6
g
|
Fat:
4
g
|
Saturated Fat:
1
g
|
Cholesterol:
164
mg
|
Sodium:
63
mg
|
Potassium:
61
mg
|
Sugar:
1
g
|
Vitamin A:
238
IU
|
Calcium:
25
mg
|
Iron:
1
mg
Nutrition Disclaimer: Nutritional values are estimates and may vary with ingredients, brands, and portion sizes. For accuracy, use your preferred nutrition calculator.
Loved this recipe? Share your thoughts below!