
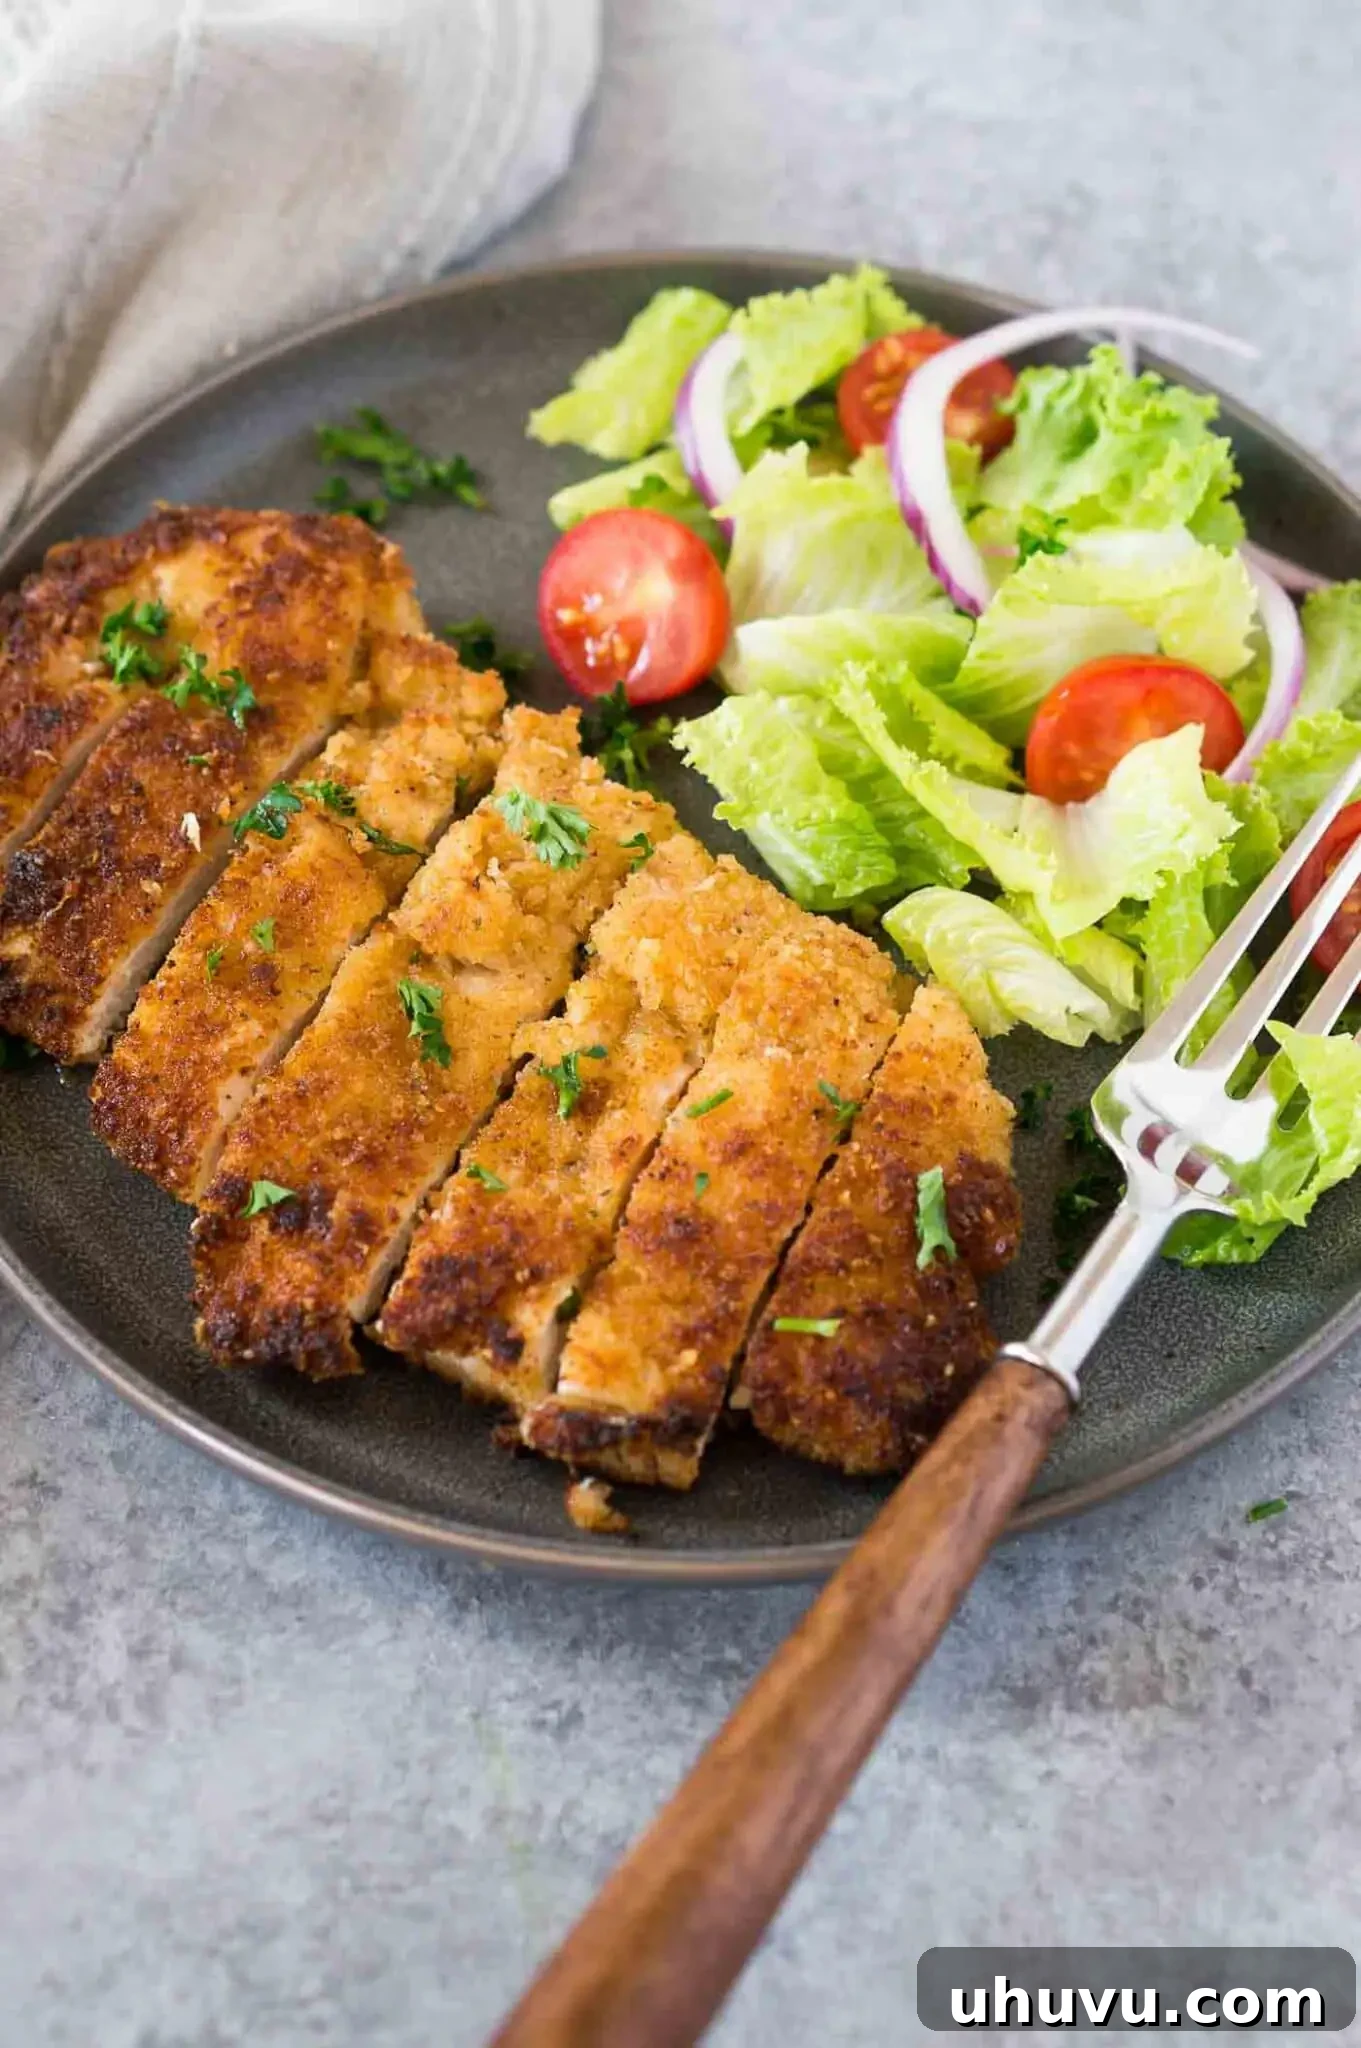
Transform your weeknight dinner routine with this incredibly simple yet profoundly delicious **Chicken Milanese recipe**. Inspired by the classic Italian dish, this recipe features tender chicken cutlets, perfectly seasoned and coated in a golden-crisp blend of Parmesan cheese and Panko breadcrumbs, then pan-fried to achieve a truly irresistible texture. It’s a culinary journey to Milan, right in your own kitchen, promising an effortless way to elevate your everyday meals with vibrant flavors and satisfying crunch.
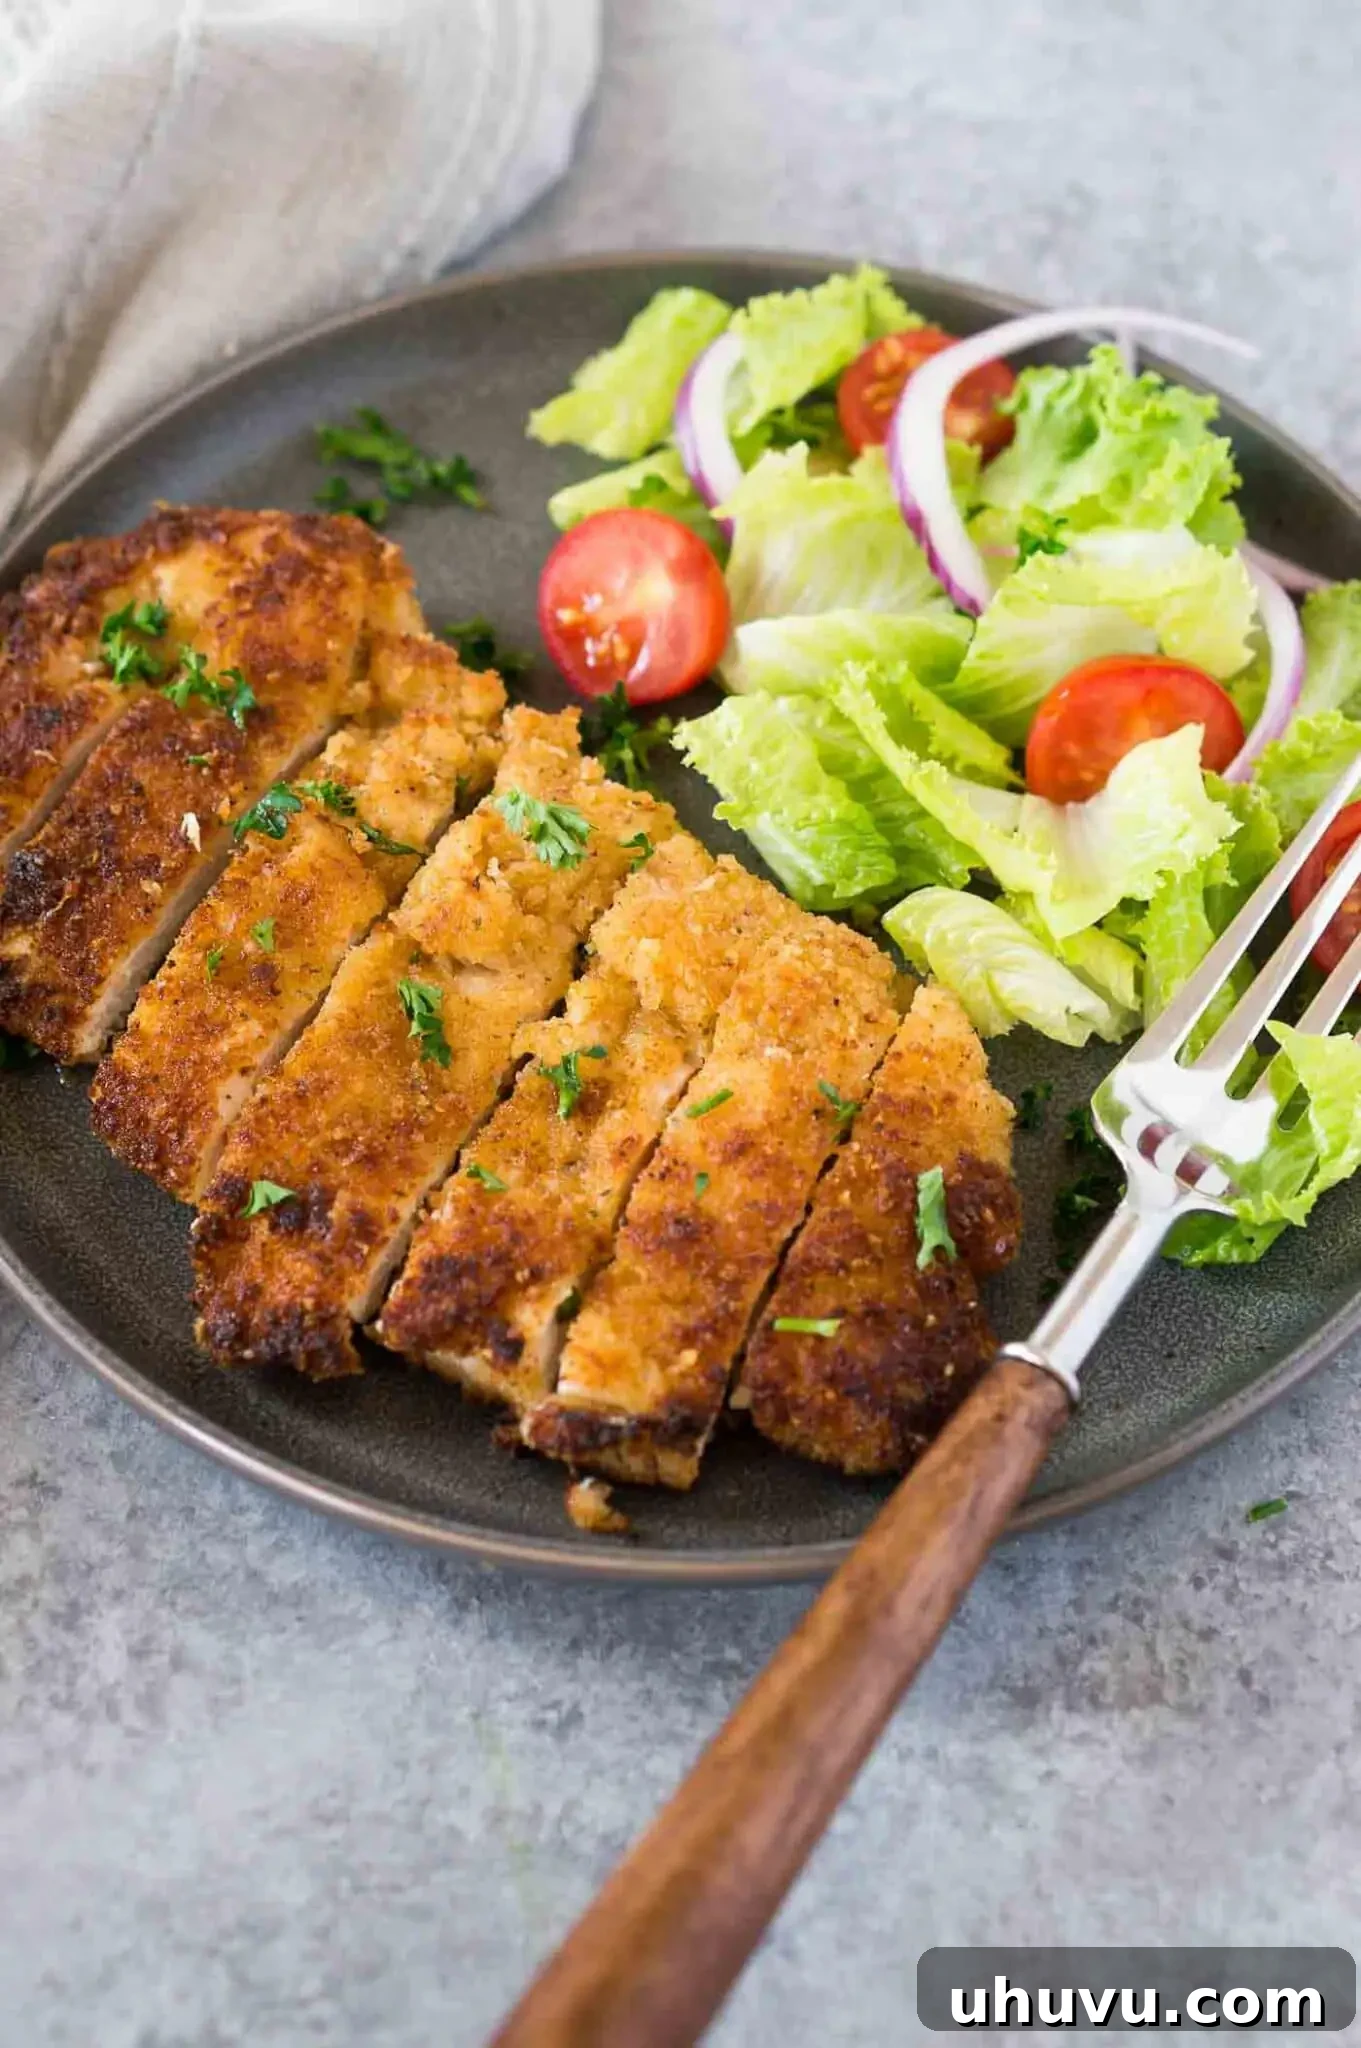
Hailing from the culinary heart of Milan, Italy, Chicken Milanese embodies perfection in its simplicity. If you’re searching for an easy, impactful dish to revitalize your chicken dinners, look no further. This recipe checks every box: succulent chicken, perfectly seasoned, encased in a delightful crispy coating, and pan-fried to golden-brown excellence. It’s quick to prepare, boasts a short ingredient list, and delivers an undeniable taste that makes it a family favorite. Get ready to impress with this straightforward Italian classic!
While you’re here, be sure to explore other fantastic chicken recipes like my Chicken Meatballs and Baked Chicken Tenders for more delightful meal inspiration!
Why You Will Adore This Easy Chicken Milanese Recipe
There are countless reasons why this Chicken Milanese will become a cherished recipe in your culinary repertoire:
- Effortlessly Simple: Don’t let its sophisticated reputation intimidate you. The process of making Chicken Milanese is incredibly straightforward. You’ll simply dredge the chicken, coat it, and pan-fry it to golden perfection. No complex techniques or fancy equipment required, making it ideal for even beginner cooks.
- Remarkably Quick: Life gets busy, and weeknight dinners often demand speed without sacrificing flavor. This recipe shines in its efficiency. From start to finish, these breaded chicken cutlets are ready to serve in under 30 minutes, making it the ultimate solution for a delicious and speedy meal after a long day.
- Pantry-Friendly Ingredients: You won’t need to hunt for exotic items at a specialty store. This recipe relies on a handful of common, everyday ingredients that you likely already have stocked in your pantry and refrigerator. It’s a testament to how incredible flavors can be created from simple, accessible components.
- Unforgettable Crispy Texture: The combination of Panko breadcrumbs and freshly grated Parmesan creates an unparalleled crispy crust that locks in the chicken’s juices, delivering a satisfying crunch with every bite. It’s a textural masterpiece that sets Chicken Milanese apart.
- Versatile and Customizable: Whether you prefer to serve it with a fresh salad, over pasta, or with a rich sauce, Chicken Milanese is incredibly adaptable. It serves as a fantastic base for various meal combinations, allowing you to easily switch up your sides and flavors according to your mood.
- A Touch of Italian Elegance: This dish brings a taste of Italy to your table with minimal fuss. It’s a classic for a reason, offering a comforting yet refined meal that feels special without requiring hours in the kitchen.
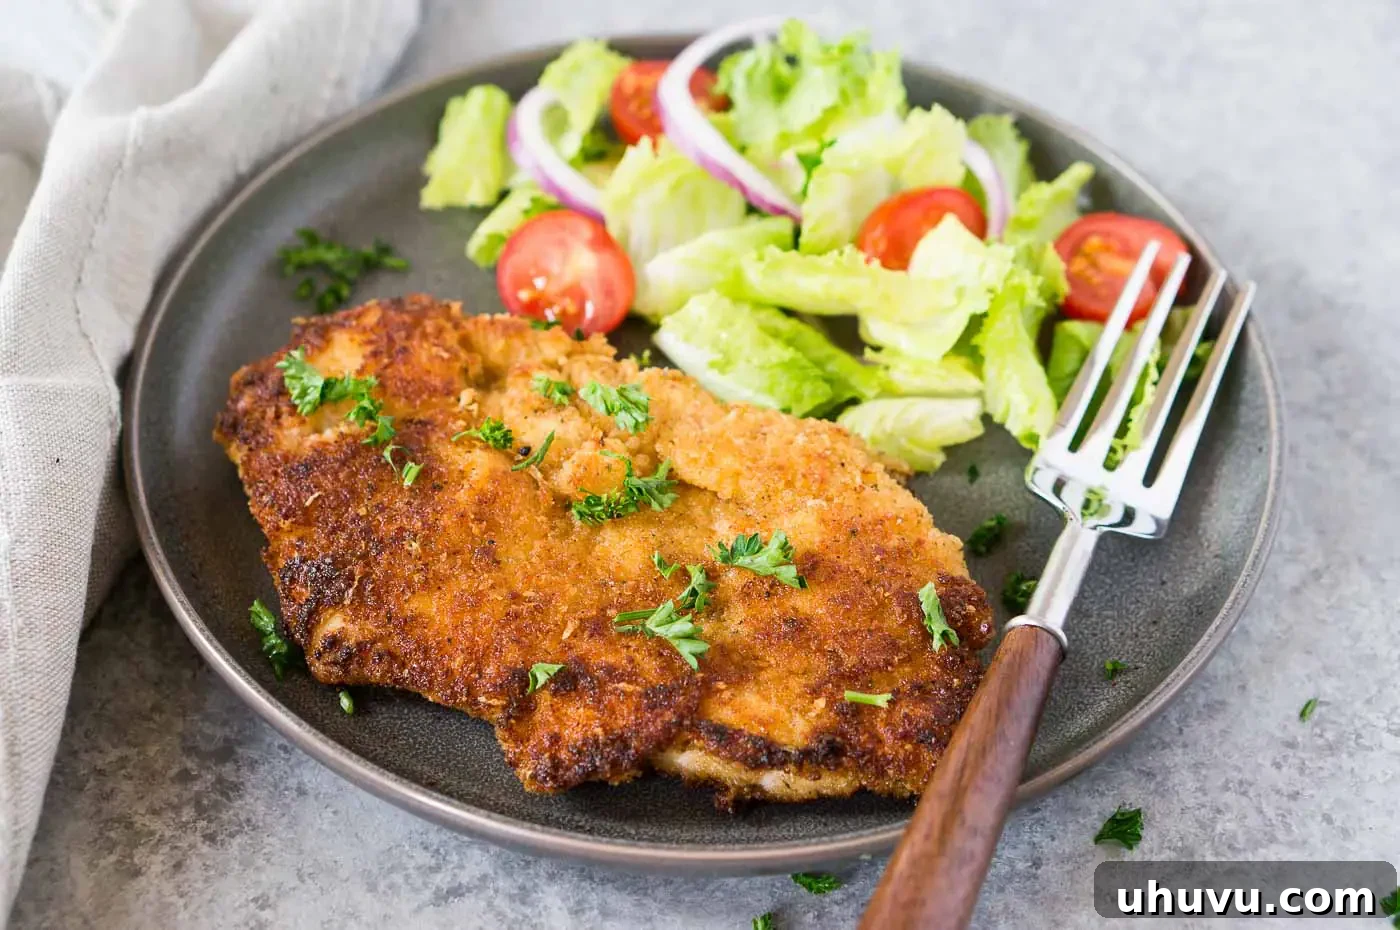
Understanding Chicken Milanese: An Italian Classic
To truly appreciate this dish, it’s worth delving into its origins. The term “Milanese” directly references its birthplace, Milan, Italy, a city renowned for its rich culinary heritage. Traditionally, “Cotoletta alla Milanese” was crafted from thin cutlets of veal, breaded and pan-fried. Over time, as culinary traditions evolved and adapted, chicken became a popular and accessible alternative, giving rise to the beloved Chicken Milanese we enjoy today.
At its core, Milanese-style chicken involves thin chicken cutlets that are carefully breaded in a flavorful mixture, typically consisting of Parmesan cheese and breadcrumbs, before being pan-fried until beautifully golden and crisp. The hallmark of a great Milanese is its incredibly crunchy exterior, achieved by a meticulous breading process, and its juicy, tender interior. The simplicity of preparation often belies the depth of flavor and satisfying texture it delivers. This dish is usually served simply, often with a wedge of fresh lemon to add a bright, acidic counterpoint, and a light green salad to complete a perfectly balanced meal.
The beauty of Chicken Milanese lies in its unpretentious elegance. It’s a staple in Italian homes and restaurants alike, celebrated for its comforting familiarity and ability to satisfy. Whether you’re a seasoned chef or a home cook looking for a reliable and delicious recipe, Chicken Milanese offers a taste of authentic Italian comfort with every crispy bite.
Essential Ingredients for Authentic Chicken Milanese
Crafting the perfect Chicken Milanese requires just a few key ingredients, each playing a crucial role in achieving that signature crispy texture and savory flavor. Here’s a closer look at what you’ll need and why:
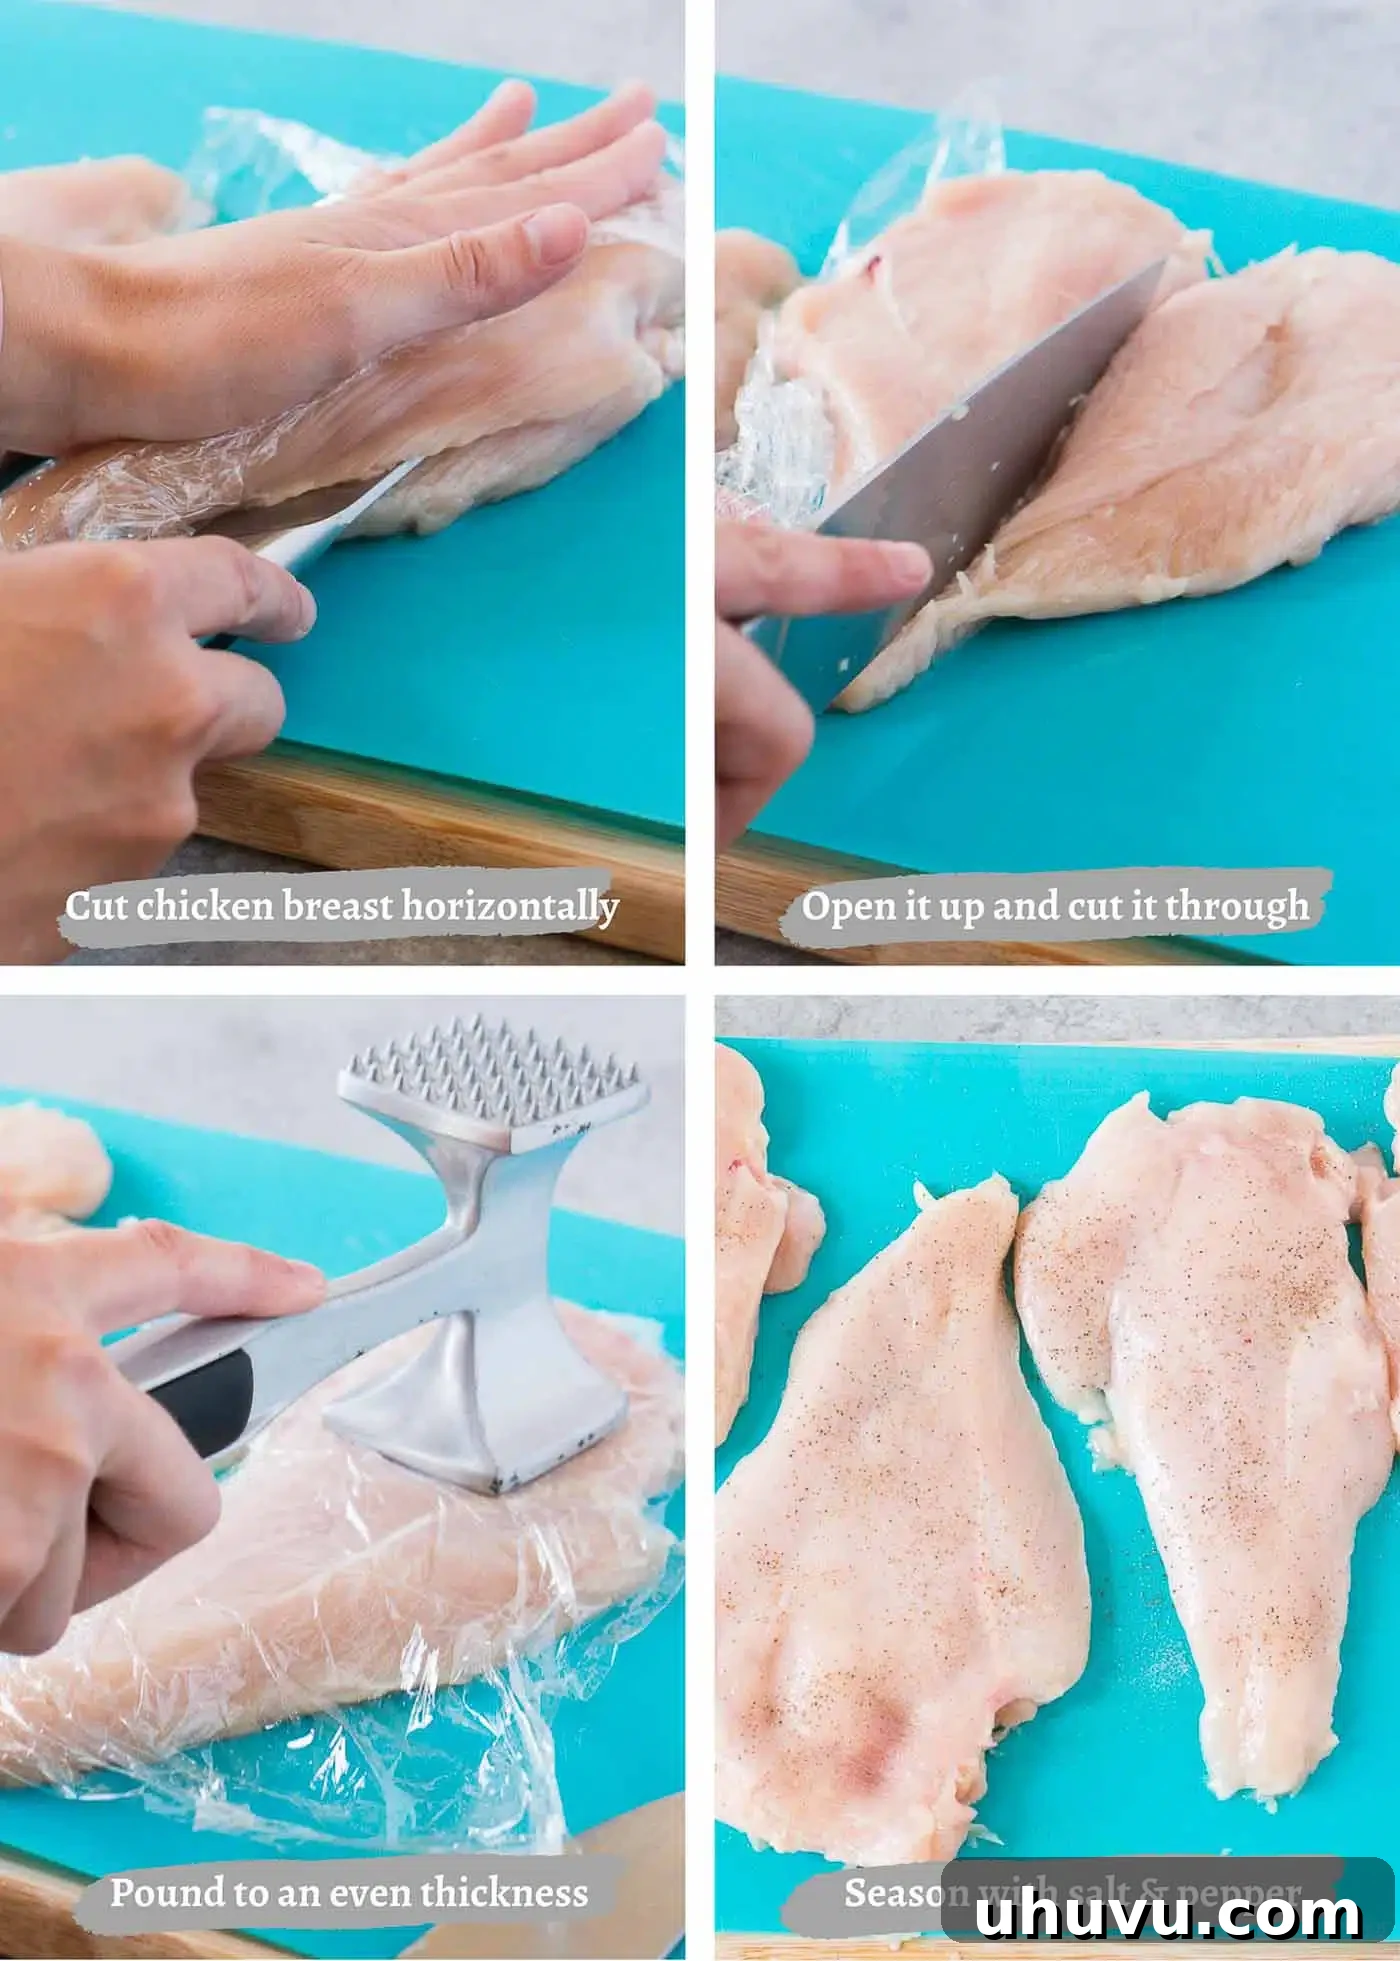
- Chicken: The foundation of our dish! Chicken cutlets are ideal for this recipe because their naturally thin profile ensures quick and even cooking. If you’re starting with thicker chicken breasts, don’t worry. You can easily prepare them by cutting them in half horizontally to create thinner cutlets, then pounding them to an even thickness. This crucial step ensures uniform cooking and tenderness, preventing some parts from drying out while others cook through.
- Salt and Black Pepper: These basic seasonings are fundamental for enhancing the natural flavors of the chicken. Don’t be shy; season your chicken generously on both sides. Proper seasoning before breading is key to a well-flavored final dish.
- All-Purpose Flour: The first step in our breading station, flour creates a dry surface on the chicken, allowing the egg wash to adhere effectively. This initial coating is essential for ensuring the breadcrumbs stick uniformly, resulting in a consistent, crispy crust. You can easily substitute all-purpose flour with a gluten-free alternative if you have dietary restrictions.
- Eggs: Beaten with a touch of water, the eggs act as the binder that helps the breadcrumbs cling to the floured chicken. The egg wash creates a moist, sticky surface for the Panko and Parmesan mixture to form a secure and flavorful coating.
- Panko Breadcrumbs: For that ultimate crispiness, Panko breadcrumbs are a game-changer. Unlike traditional fine breadcrumbs, Panko is coarser and flakier, absorbing less oil and yielding a much lighter, airier, and crunchier texture. While you can use fine breadcrumbs, they won’t achieve the same remarkable crispness that Panko delivers.
- Freshly Grated Parmesan Cheese: This ingredient adds a wonderfully nutty, salty depth of flavor to the breading, enhancing its savory profile. Crucially, always opt for freshly grated Parmesan over pre-grated varieties. Fresh Parmesan melts beautifully and integrates seamlessly into the crust, contributing superior flavor and texture that pre-grated versions simply can’t match.
- Extra Virgin Olive Oil: Essential for pan-frying, a good quality olive oil imparts a subtle richness and helps the chicken achieve its golden-brown, crispy exterior. You’ll need about 1/2 cup total, but adjust as necessary depending on the size of your skillet and the number of batches you cook.
Mastering the Art of Chicken Milanese: Step-by-Step Instructions
Creating perfect Chicken Milanese is simpler than you might think. Follow these detailed steps to achieve a dish that’s crispy on the outside and wonderfully juicy within:
- **Prepare the Chicken:** Begin by patting your chicken cutlets dry with paper towels. This step is crucial for ensuring the seasonings and breading adhere properly. Generously season both sides of each chicken cutlet with salt and freshly ground black pepper. Don’t underestimate the importance of seasoning the chicken itself, as this builds a flavorful base.
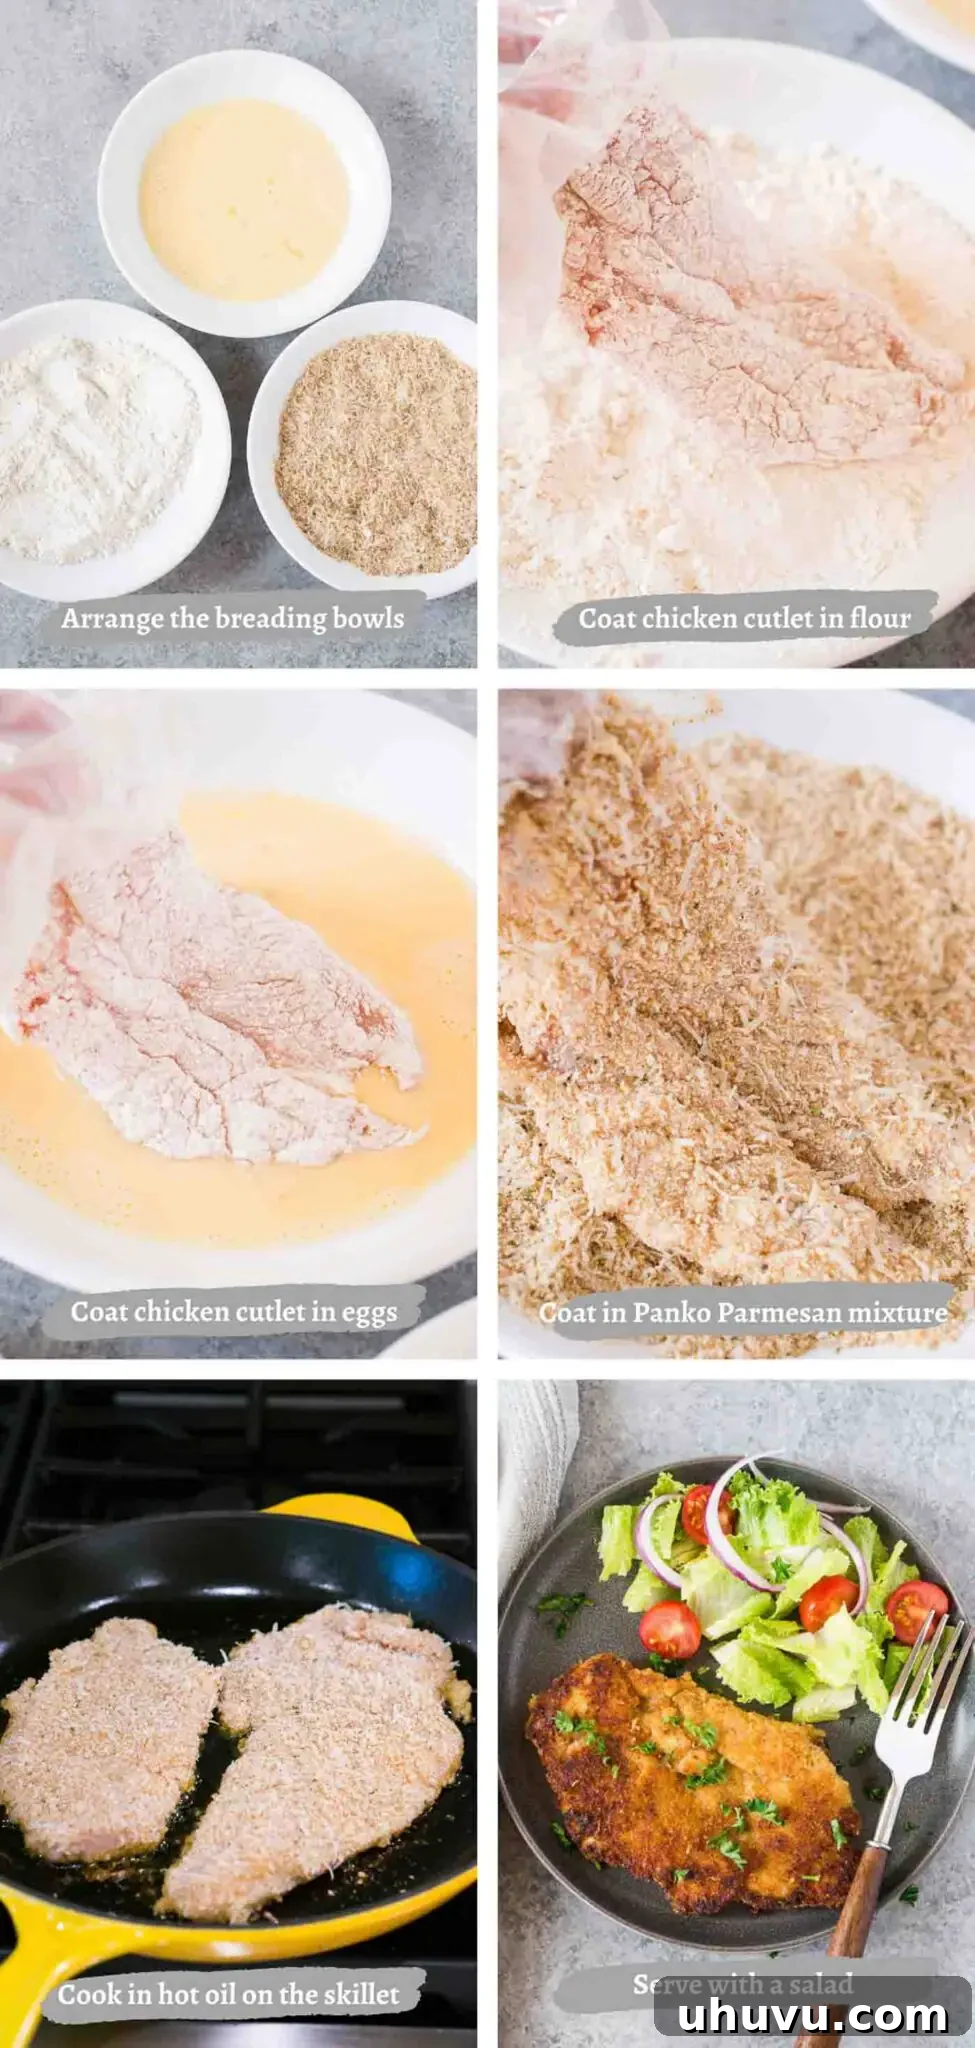
- **Set Up the Breading Station:** Arrange three shallow bowls or plates in a row. In the first bowl, add the all-purpose flour. In the second bowl, whisk together the large eggs with 2 tablespoons of water until well combined and frothy. In the third bowl, combine the Panko breadcrumbs and freshly grated Parmesan cheese, mixing them thoroughly.
- **The Breading Process:** Take one seasoned chicken cutlet and coat it evenly in the flour, shaking off any excess. Next, dip the floured chicken into the egg wash, ensuring it’s fully coated, then allow any excess egg to drip off. Finally, carefully press the chicken into the Panko and Parmesan mixture, coating both sides thoroughly. Press gently to ensure the breadcrumbs adhere firmly. Repeat this process for all remaining chicken cutlets, setting them aside on a clean plate as you go.
- **Pan-Frying to Perfection:** Heat about 1/4 inch of extra virgin olive oil in a large, heavy-bottomed skillet (such as cast iron or stainless steel) over medium heat. It’s vital that the oil is hot enough, but not smoking, before adding the chicken. A good test is to drop a tiny pinch of breadcrumbs into the oil; if it sizzles immediately, it’s ready.
- **Cook in Batches:** Carefully place the breaded chicken cutlets into the hot skillet in a single layer, making sure not to overcrowd the pan. Overcrowding can lower the oil temperature and lead to soggy chicken. Cook the chicken for approximately 3-4 minutes per side, or until it’s beautifully golden brown and crispy, and cooked through (internal temperature should reach 165°F / 74°C).
- **Rest and Serve:** As each batch finishes cooking, transfer the golden-brown chicken cutlets to a plate lined with paper towels to absorb any excess oil. Cover them loosely with aluminum foil to keep them warm while you cook the remaining chicken. Add more olive oil to the pan between batches if necessary. Serve your warm, crispy Chicken Milanese immediately with your favorite sides and a fresh lemon wedge.
How to Perfectly Cut Chicken Breasts for Milanese
Achieving uniformly thin chicken cutlets is paramount for Chicken Milanese. Thin cutlets ensure quick and even cooking, resulting in tender chicken and a perfectly crisp crust. If you’re starting with large, thick chicken breasts, here’s how to prepare them into ideal cutlets:
Place one chicken breast on a clean cutting board. With your non-dominant hand firmly on top of the chicken breast, use a sharp chef’s knife or a long, thin slicing knife to carefully cut the chicken breast horizontally. Start from the thickest side and gradually work your way across, maintaining an even thickness as you slice. You’re essentially butterflying the chicken, but instead of leaving it hinged, you’re separating it into two thinner pieces. This technique will yield two thinner cutlets from a single chicken breast.
Once you have your thinner cutlets, place them between two sheets of plastic wrap or in a large zip-top bag. Using the flat side of a meat mallet or a rolling pin, gently pound the chicken until it reaches a uniform thickness of about 1/4 to 1/2 inch. Be gentle to avoid tearing the meat. This pounding step not only tenderizes the chicken but also ensures that each piece cooks at the same rate, preventing some cutlets from being undercooked or overcooked.
EXPERT TIPS FOR CHICKEN MILANESE SUCCESS
Recipe Notes and Pro Tips for the Best Chicken Milanese
Achieving perfectly crispy and tender Chicken Milanese is all about attention to a few key details. Keep these expert tips in mind for consistently delicious results:
- Achieve Uniform Thickness: If you’re using large chicken breasts, always cut them horizontally to create two thinner cutlets. Then, use the flat end of a meat mallet to pound them to an even thickness, ideally about 1/4 to 1/2 inch. This is crucial for even cooking, ensuring your chicken cooks quickly and remains juicy throughout.
- Fresh Parmesan Makes a Difference: For the best flavor and melting texture, always use freshly grated Parmesan cheese. Pre-grated cheeses often contain anti-caking agents that can prevent them from melting properly and can affect the crispiness of your breading.
- Panko for Maximum Crispiness: While regular breadcrumbs can be used, Panko breadcrumbs are highly recommended. Their larger, flakier texture results in an exceptionally crispy and light coating that truly elevates the dish. If you only have regular breadcrumbs, you can still make this recipe, but expect a slightly denser, less airy crust.
- Master the Breading Technique: Ensure each chicken cutlet is fully coated in flour, then egg, and finally the breadcrumb mixture. Shake off any excess after each step to prevent a thick, gummy coating. A ‘dry hand, wet hand’ technique can be helpful: use one hand for handling the dry ingredients (flour, breadcrumbs) and the other for the wet (egg).
- Pre-heat Your Oil Properly: The oil in your skillet must be hot before adding the chicken. If the oil isn’t hot enough, the breading will absorb too much oil and become greasy and soggy instead of crispy. Conversely, if it’s too hot, the breading will burn before the chicken cooks through. Medium heat is typically perfect. Test with a small crumb: if it sizzles gently, you’re ready.
- Don’t Overcrowd the Pan: Cook the chicken in batches if necessary, allowing ample space between each cutlet. Overcrowding lowers the oil temperature, making it harder to get a golden, crispy crust and can cause the chicken to steam rather than fry.
- Bring Chicken to Room Temperature: For the most tender and evenly cooked chicken, take it out of the fridge about 20-30 minutes before you plan to cook. This slight warm-up helps the chicken cook more evenly from edge to center.
- Rest the Cooked Chicken: After frying, transfer the chicken to a wire rack set over a baking sheet (rather than directly on paper towels) to allow air circulation. This helps maintain crispiness as it rests and keeps any excess oil from soaking back into the crust.
Can You Oven Bake Chicken Milanese for a Lighter Option?
While pan-frying yields the most traditional and intensely crispy Chicken Milanese, for those seeking a lighter alternative or simply preferring not to deep-fry, oven baking is a viable option. You can certainly bake your breaded chicken cutlets, though the texture will be slightly different—less greasy, but perhaps not quite as intensely crunchy as its pan-fried counterpart.
To oven bake, prepare your chicken cutlets following the same breading steps. Once breaded, arrange them in a single layer on a parchment-lined baking sheet. To help achieve a golden-brown finish and add a touch of crispness, lightly spray the tops of the breaded chicken with olive oil or cooking spray. Preheat your oven to 400°F (200°C) and bake for 15 to 20 minutes, or until the chicken is cooked through and the breading is golden. Flipping halfway through baking can promote more even browning. Always ensure the internal temperature of the thickest part of the chicken reaches 165°F (74°C) for food safety.
Preparation and Storage: Make Ahead & Leftovers
The hallmark crispiness of Chicken Milanese is best enjoyed immediately after frying. The delicate breadcrumb coating is at its peak of crunch when freshly prepared, complementing the juicy chicken beautifully. However, some aspects of this recipe can be prepared in advance to streamline your cooking process:
You can **dredge and bread the chicken cutlets up to 24 hours ahead of time**. After breading, arrange them in a single layer on a baking sheet, cover tightly with plastic wrap, and store them in the refrigerator. This allows you to quickly fry them up when you’re ready to cook, making it perfect for entertaining or busy weeknights.
If you happen to have **leftovers of cooked Chicken Milanese**, they will store well in an airtight container in the refrigerator for 3 to 4 days. While the breading may lose some of its initial crispness, the chicken will remain flavorful. For reheating, avoid the microwave, as it will make the breading soggy. The best way to revive leftovers is in the oven or an air fryer. Preheat your oven to 350°F (175°C) and bake the chicken for about 10-15 minutes, or until warmed through and the crust has re-crisped slightly. An air fryer at 375°F (190°C) for 5-8 minutes also works wonders for crisping up the exterior.
Delicious Serving Suggestions for Chicken Milanese
One of the best qualities of Chicken Milanese is its incredible versatility. It pairs beautifully with a wide array of side dishes, allowing you to easily transform it into a complete and satisfying meal. Here are some fantastic ideas to complement your crispy chicken cutlets:
- **Classic Italian Pairing:** Serve your Chicken Milanese over a bed of pasta, generously smothered in your favorite rich marinara sauce or a simple lemon-butter sauce. This creates a hearty and comforting Italian-inspired dinner.
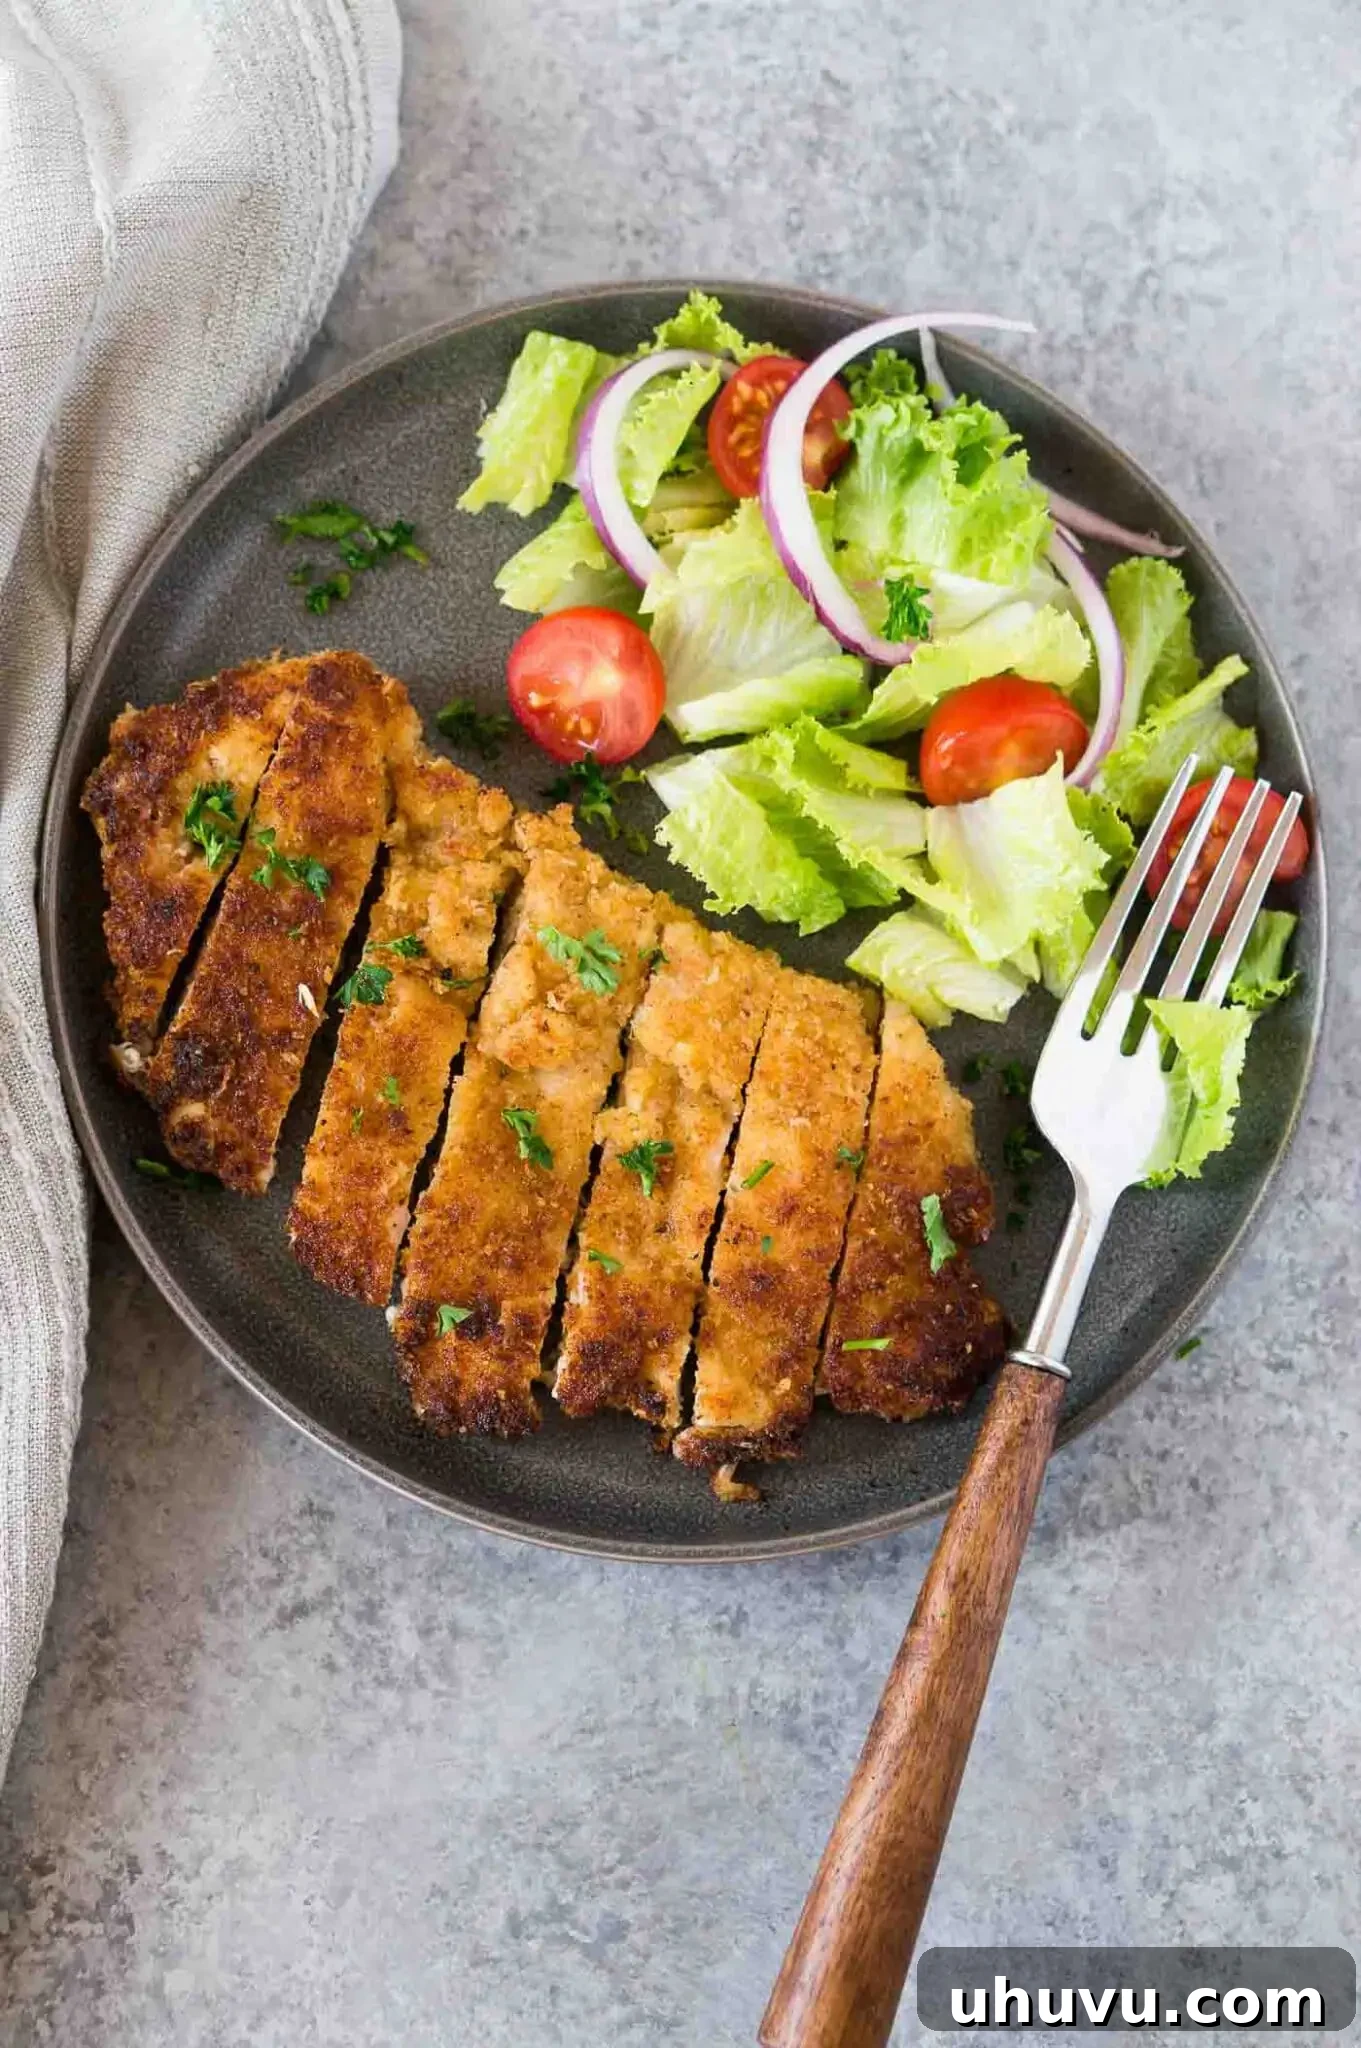
- **Fresh and Light:** A classic and popular choice is to serve it alongside a crisp, light green salad, dressed with a simple vinaigrette. The freshness and acidity of the salad perfectly balance the richness of the fried chicken. Consider adding cherry tomatoes, thinly sliced red onion, and cucumber for extra texture and flavor.
- **Hearty Vegetables:** Roasted asparagus, steamed broccoli, or green beans almondine offer delicious and nutritious accompaniments. The slight bitterness or earthiness of these vegetables provides a lovely contrast.
- **Potato Perfection:** Potatoes are always a welcome side. Classic Creamy Mashed Potatoes offer a smooth contrast, while crispy Baked Potato Wedges or roasted mini potatoes provide an extra layer of texture. French fries are also a popular choice for a more casual meal.
- **Grains and Risotto:** For a more substantial side, consider a light lemon herb risotto, a simple couscous, or a quinoa salad.
- **Additional Side Ideas:**
- Creamy Mashed Potatoes: A classic comfort food that pairs perfectly.
- Baked Potato Wedges: Crispy and flavorful, a great alternative to fries.
- Green Beans Almondine: Elegant and quick, with a delightful nutty crunch.
- Broccoli Salad: A vibrant, fresh salad offering a different texture.
- Fresh Lemon Wedges: Always a must-have for a bright, zesty finish.
- Caprese Salad: Slices of fresh mozzarella, tomatoes, and basil, drizzled with balsamic glaze.
- Garlic Bread or Focaccia: Perfect for soaking up any delicious juices or sauces.
No matter how you choose to serve it, Chicken Milanese is a guaranteed crowd-pleaser that allows for endless culinary creativity.
Explore More Delectable Italian Chicken Recipes
If you’ve fallen in love with the flavors of this Chicken Milanese, you’re in for a treat! Italian cuisine offers a wealth of incredible chicken dishes that are both satisfying and easy to prepare. Here are a few more Italian-inspired chicken recipes to expand your culinary horizons:
- Chicken Piccata: Zesty lemon-caper sauce elevates tender chicken cutlets, creating a bright and flavorful dish perfect for any occasion.
- Chicken Cacciatore & Instant Pot Chicken Cacciatore: A rustic and hearty dish featuring chicken braised in a rich tomato sauce with bell peppers, onions, and herbs. Choose between a one-skillet stovetop method or the quick convenience of an Instant Pot.
- Italian Chicken Puttanesca: Bursting with bold flavors from olives, capers, tomatoes, and garlic, this fiery dish is a savory adventure for your taste buds, all made in one skillet.
- Chicken Florentine: Elegant and creamy, this dish features tender chicken breasts served with spinach in a luxurious white wine or cream sauce, often finished with Parmesan cheese.
- Chicken Francese: Lightly battered chicken breasts are pan-fried and served in a delicate lemon-butter sauce, offering a tender and tangy experience.
These recipes highlight the diversity and appeal of Italian chicken dishes, providing plenty of options for your next mealtime inspiration.

Crispy Pan-Fried Chicken Milanese
Ingredients
- 1.5 lbs chicken cutlets, or chicken breasts cut in half horizontally & pounded to an even thickness
- salt
- black pepper
- ½ cup flour, all-purpose or gluten-free
- 2 large eggs
- 2 Tablespoons water
- 1.5 cups panko breadcrumbs, gluten-free or regular
- ½ cup grated Parmesan cheese
- Extra virgin olive oil, about 1/2 cup total may be needed for pan-frying
Instructions
-
Season the chicken cutlets generously on both sides with salt and pepper.
-
Set out three breading bowls: add flour in one, whisk eggs and water in the next, and combine panko breadcrumbs and Parmesan cheese in the third.
-
Coat each chicken cutlet first in flour (shake off excess), then in egg (shake off excess), then firmly press into the panko breadcrumbs-Parmesan mixture until fully coated.
-
Heat olive oil in a large skillet over medium heat. When hot, add chicken cutlets in a single layer (cook in batches). Cook for about 4 minutes on each side until golden and crispy. Transfer to a plate, cover loosely with foil, and continue cooking remaining cutlets, adding more oil if needed.
-
Serve warm, accompanied by your favorite side dish or a fresh side salad.
Notes
- Butterfly chicken breasts if using large chicken breasts by cutting horizontally to make two thinner cutlets, then pound to even thickness for optimal cooking.
- Use the flat end of a meat mallet to pound chicken into thin slices for even and faster cooking.
- Always use **freshly grated Parmesan cheese** for better flavor and melt compared to pre-grated varieties.
- **Panko breadcrumbs** yield a crispier exterior; regular breadcrumbs can be used but will result in a slightly different texture.
- Ensure chicken is thoroughly coated with eggs and flour for even breadcrumb adherence.
- **Heat the oil adequately** before adding chicken to prevent a greasy or soggy crust.
- Allow chicken to come to room temperature for about 30 minutes before cooking for the best texture and even cooking.
Nutrition
Calories: 346kcal | Carbohydrates: 19g | Protein: 32g | Fat: 15g | Saturated Fat: 4g | Polyunsaturated Fat: 2g | Monounsaturated Fat: 7g | Trans Fat: 1g | Cholesterol: 134mg | Sodium: 584mg | Potassium: 493mg | Fiber: 1g | Sugar: 1g | Vitamin A: 186IU | Vitamin C: 1mg | Calcium: 136mg | Iron: 2mg
Nutrition Disclaimer: Nutritional values are estimates and may vary with ingredients, brands, and portion sizes. For accuracy, use your preferred nutrition calculator.