
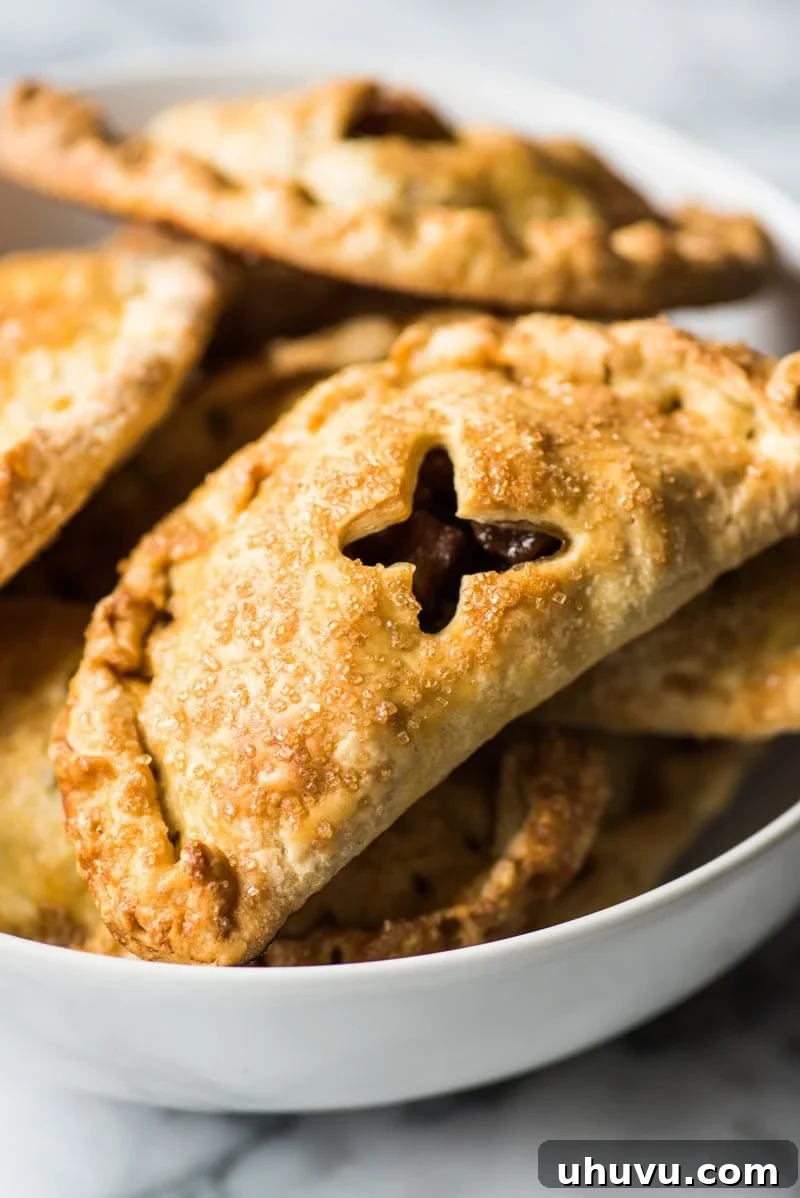
Welcome to the enchanting world of Baked Apple Empanadas, a dessert that effortlessly captures the essence of the fall and winter seasons! These delightful handheld pastries are more than just a sweet treat; they are a symbol of comfort, warmth, and shared joy. Imagine biting into a perfectly golden, flaky crust, revealing a tender, spiced apple filling that evokes memories of crisp autumn days and cozy winter evenings. They’re not only incredibly delicious and undeniably addictive, but their portable nature also makes them ideal for any gathering, from festive holiday parties to intimate family moments.
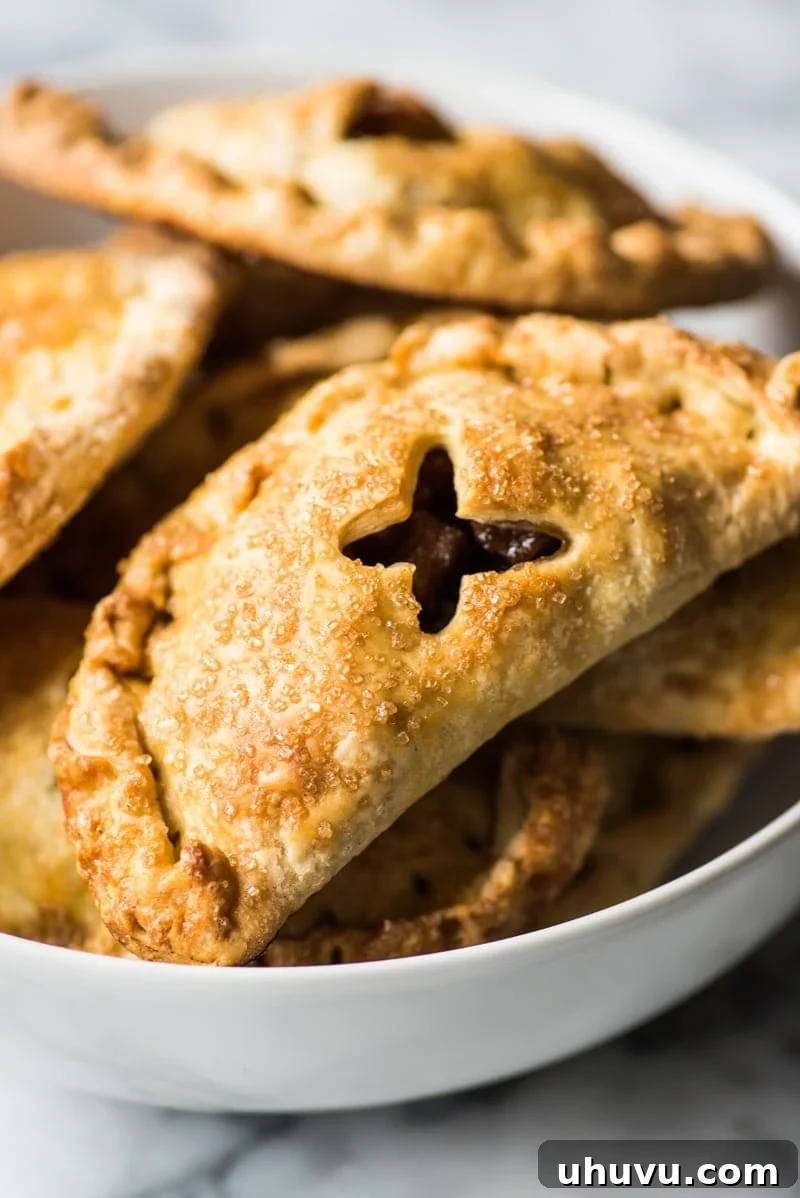
Irresistible Baked Apple Empanadas: Your Ultimate Guide to a Perfect Seasonal Dessert
While pumpkin spice often dominates the autumn culinary landscape, we’re making a compelling case for apples to take center stage, and these Baked Apple Empanadas are the ultimate proof! It seems this year, the great pumpkin craze might have finally reached its saturation point for many, myself included. After making just a couple of pumpkin recipes last month, my enthusiasm for the orange gourd waned, a feeling I never thought possible. But fear not, because a new, equally comforting obsession has taken hold: apples!
Replacing everything pumpkin with the vibrant, versatile apple has been a delightful journey, culminating in this incredibly satisfying empanada recipe. These apple pockets are not just a dessert; they are a sensory experience, filling your home with an aroma that speaks volumes about comfort and tradition. The moment they start baking, your kitchen will be enveloped in the sweet, spicy embrace of cinnamon and cloves, a scent so inviting it will instantly make any day feel cozier. I’ve made several batches of these in a short span, and the lingering fragrance throughout my house was nothing short of glorious. They are a testament to the simple, enduring charm of classic apple desserts, elevated by the unique format of an empanada.
Crafting the Perfect Apple Filling
The heart of any great apple empanada lies in its filling. Achieving the right balance of sweetness, spice, and texture is crucial for that truly exceptional taste. For this recipe, we focus on creating a filling that is rich in flavor and wonderfully tender, yet still holds its shape within the pastry.
Selecting Your Apples: The Foundation of Flavor
The choice of apples significantly impacts the final taste and texture of your filling. While Honeycrisp apples are highly recommended for their perfect blend of sweetness, tartness, and firm flesh that holds up beautifully to baking, don’t hesitate to experiment with your favorite baking apples. Other excellent choices include Granny Smith (for a tarter kick), Fuji (sweet and crisp), or Gala (mildly sweet and juicy). A general rule of thumb for baking is to select apples that are firm and not too watery, as these will prevent a soggy filling and maintain a pleasant consistency after cooking. Using a mix of sweet and tart apples can also add wonderful complexity to your empanada filling.
Sweeteners and Spices: A Symphony of Aroma
To infuse our apples with that quintessential fall and winter warmth, we turn to a combination of ground cinnamon and ground cloves. These spices not only add depth and character but also fill your kitchen with an irresistible aroma as they simmer. For sweetness, Mexican piloncillo is a fantastic choice, offering a rustic, caramel-like flavor with subtle molasses undertones that brown sugar simply can’t replicate. Piloncillo, often found in the Hispanic section of grocery stores, comes in cones and needs to be chopped or grated. If piloncillo isn’t available, dark brown sugar is a suitable substitute, providing a similar deep, rich sweetness. A splash of vanilla extract further enhances the overall warmth, while a touch of lemon juice brightens the flavors and prevents the apples from browning excessively during cooking.
The Cooking Process: Bringing it All Together
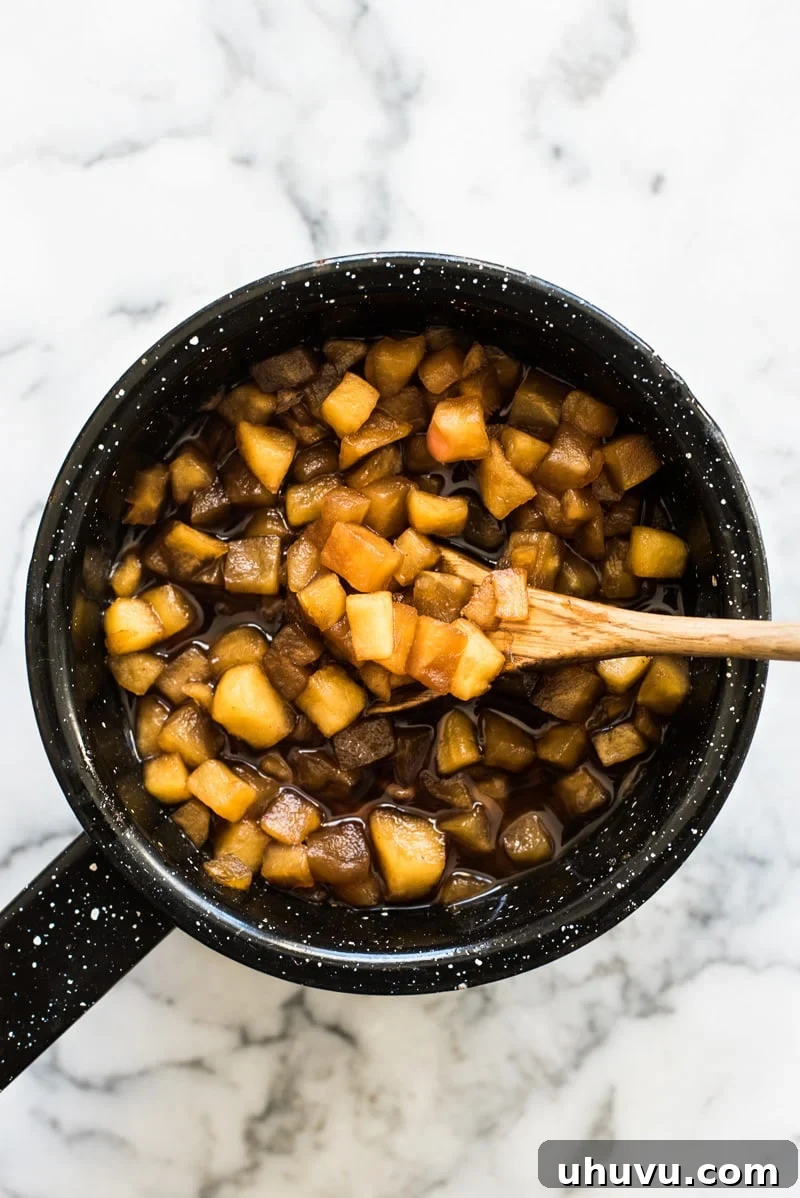
Making the apple filling is straightforward. Combine your peeled and diced apples with the piloncillo (or brown sugar), lemon juice, vanilla extract, ground cinnamon, and ground cloves in a small pot. Cook this mixture over medium-high heat for about 15 to 20 minutes, stirring occasionally. The goal is for the apples to become super tender, yielding easily when pressed, and for the sugar to melt and create a beautiful, syrupy liquid that the apples will soak up. This process concentrates the flavors, resulting in a rich, jammy filling that’s absolutely divine. Once cooked, transfer the apple mixture to a bowl and set it aside to cool completely. This cooling step is critical, as a hot filling can make your dough difficult to work with and potentially lead to a soggy crust.
The Heart of the Empanada: Flaky, Buttery Dough
While the apple filling is undoubtedly the star, a perfect empanada wouldn’t be complete without an equally impressive crust. For dessert empanadas, we aim for a pastry dough that is buttery, incredibly flaky, subtly sweet, and wonderfully addictive – a true delight to eat on its own!
Homemade vs. Store-Bought: Convenience Meets Craftsmanship
You have two excellent options for the dough: making it from scratch or opting for store-bought frozen empanada discs. Each has its merits.
- Homemade Dough: Crafting your own dough allows for complete control over the ingredients, ensuring the freshest flavors and the most exquisite texture. The result is a uniquely buttery, melt-in-your-mouth flakiness that elevates the entire empanada experience. While it requires a bit more time and effort, especially with the rolling and chilling steps, the reward of a truly artisanal pastry is well worth it. It’s also an incredibly satisfying process, particularly for those who enjoy the craft of baking.
- Store-Bought Discs: If you’re looking to significantly cut down on prep time without sacrificing too much quality, store-bought frozen empanada discs are a fantastic shortcut. These convenient discs are readily available in the baking freezer aisle of most grocery stores, already cut into perfect rounds and ready to be filled. They’re a lifesaver for busy bakers or anyone new to making empanadas, allowing you to focus on the delicious apple filling and the fun of assembly.
Preparing Homemade Dough: Tips for Flakiness
If you choose the homemade route, the process is relatively easy, especially with the aid of a food processor. In a food processor, combine all-purpose flour, granulated sugar, and a pinch of kosher salt. Then, add cold butter (cut into pieces), large eggs, and cold water. Pulse the mixture until a clumpy dough begins to form. The key here is to avoid overmixing, which can develop the gluten too much and result in a tough crust. If you don’t have a food processor, a large bowl and a pastry cutter work just as well to incorporate the cold butter into the dry ingredients, followed by the eggs and water.
Once your dough has formed, transfer it to a lightly floured surface and knead it gently into a cohesive ball. To create uniform empanada discs, divide the dough into four equal pieces, and then divide each of those pieces into four smaller, roughly equal portions, totaling 16 pieces. Roll each small portion into a smooth ball using the palms of your hands. Next, working on your floured surface, use a rolling pin to flatten each ball into a disk, approximately 6 to 7 inches in diameter. The consistent size is important for even baking.
Arrange your dough disks on a baking sheet lined with parchment paper. To save space, you can stack them with layers of parchment paper in between to prevent sticking. Once all disks are formed, cover the baking sheet tightly with plastic wrap and chill it in the refrigerator for about 30 minutes. This chilling period is crucial: it firms up the butter in the dough, which contributes to flakiness, and makes the dough much easier to handle when it’s time to fill and seal your empanadas.
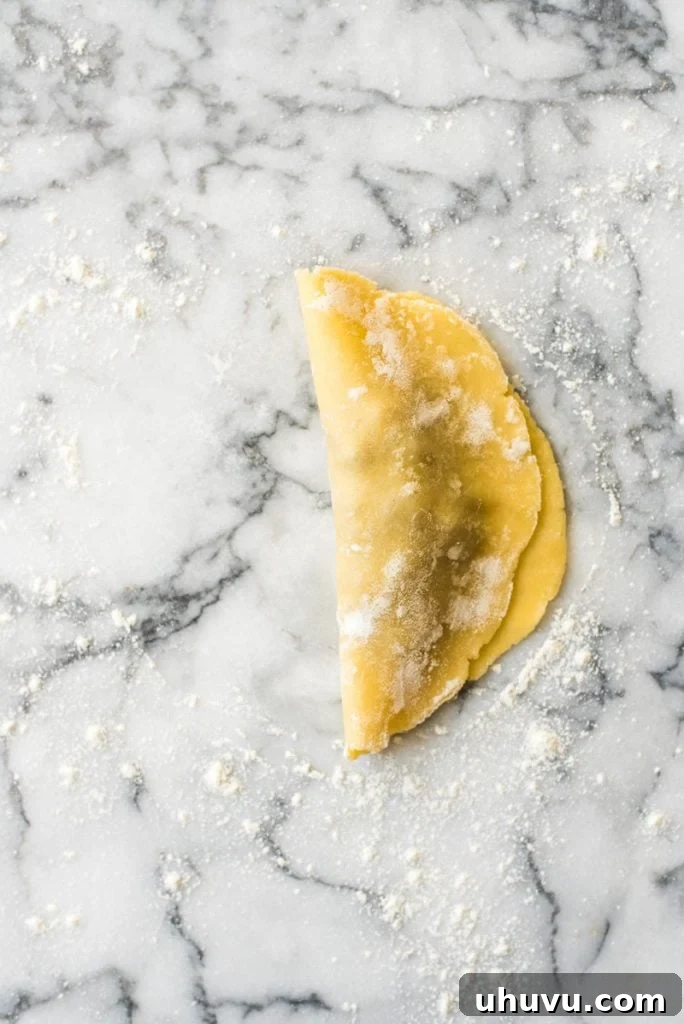
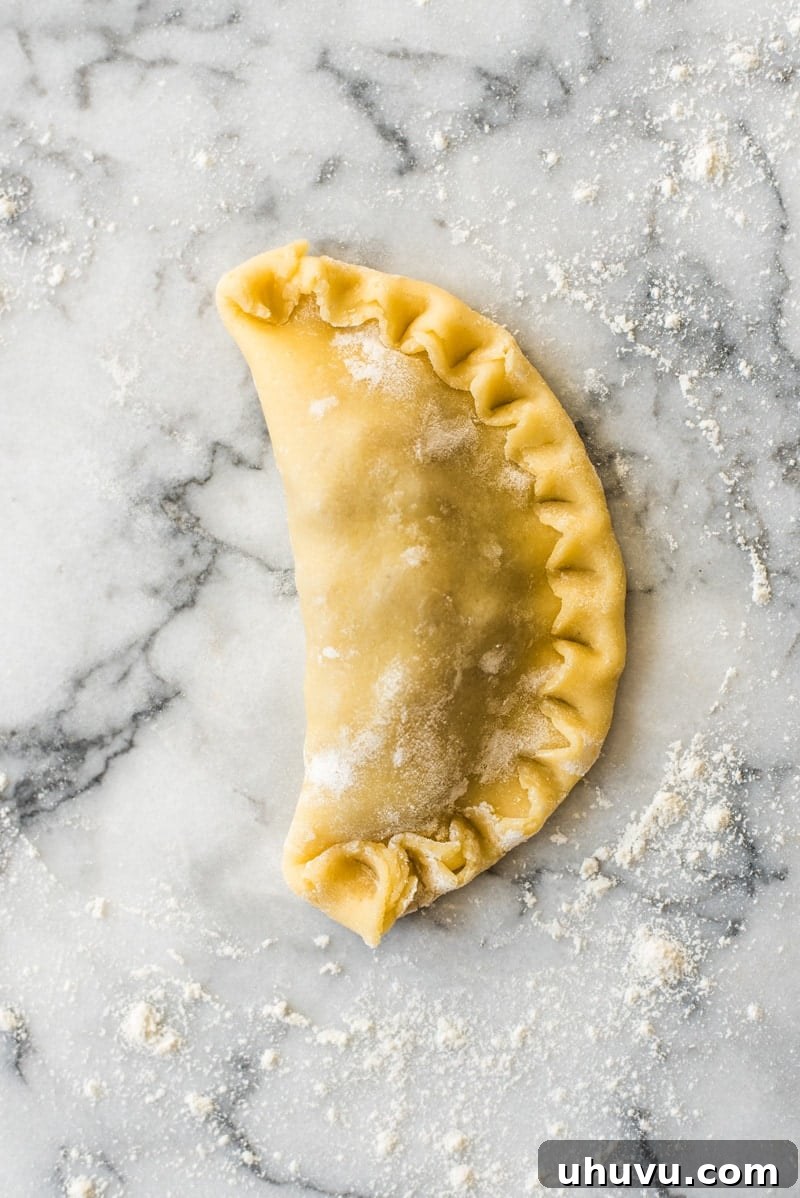
Assembling Your Apple Empanadas
Once your dough is perfectly chilled and your apple filling has cooled, the truly enjoyable part begins: assembling these delicious pastries! This is where you bring all your prepared components together to form those iconic crescent shapes.
Filling the Discs
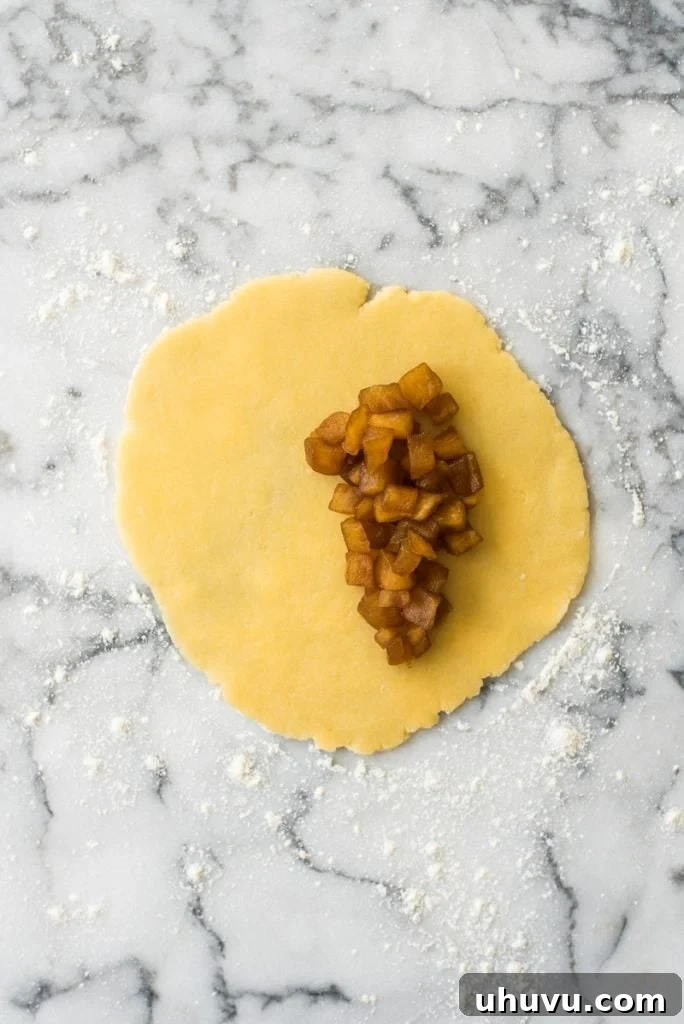
Working on a lightly floured surface, take one dough disk at a time. Place about 2 to 2½ tablespoons of the cooled apple filling onto one half of the flattened dough disk, leaving a small border around the edge. Be careful not to overfill, as this can make sealing difficult and may lead to leakage during baking. The filling should be generous enough to provide a satisfying bite but not so much that it spills out.
Sealing Techniques: The Finger Crimp or the Fork
Sealing the empanadas is an art form, and there are a couple of popular techniques you can use to create a secure and visually appealing edge:
- The Finger Crimp (Repulgue): This is a traditional method, often passed down through generations, that creates a beautiful, braided-like edge. To do this, gently fold the unfilled half of the dough over the filling, aligning the edges as precisely as possible to form a half-moon shape. Then, using your index finger, fold a small portion of the dough edge inward, pressing down firmly to pinch and seal it. Continue this motion, moving along the edge about every half an inch, folding and pinching until the entire empanada is securely sealed. This technique might take a few tries to perfect, so don’t be discouraged if your first few attempts aren’t flawless. Practice makes perfect, and soon you’ll be creating elegant, professional-looking crimps!
- The Fork Seal: For a simpler, more rustic look that’s equally effective at sealing, you can use the tines of a fork. After folding the dough over the filling and aligning the edges, gently press the tines of a fork along the entire curved edge of the empanada. This creates a distinct, ridged pattern and ensures a tight seal. While it looks different from the finger crimp, it’s a quick and reliable method, especially if you’re new to empanada making or preparing a large batch. The most important thing, regardless of the technique you choose, is to ensure the empanadas are fully sealed to prevent the delicious apple filling from escaping during baking. Have fun with it and embrace the process!
As you finish each empanada, place the filled and sealed pastries onto one or two large baking sheets lined with parchment paper, leaving a little space between each one for even airflow during baking.
The Golden Finish: Before Baking
The final touches before baking are essential for achieving that irresistible golden-brown crust and a perfectly cooked interior. These steps add both visual appeal and a delightful texture to your Apple Empanadas.
Venting for Perfection
To prevent your empanadas from bursting during baking and to ensure a crispy crust, it’s important to allow steam to escape from the filling. Using a small, sharp knife, cut a small slit or poke a few tiny holes into the top center of each empanada. This simple step helps to vent the steam produced by the cooking apples, ensuring your pastries maintain their beautiful shape and achieve that desired flaky texture.
The Golden Glow: Egg Wash
For that beautiful, glossy, golden-brown finish, brush the tops of your empanadas with an egg white wash. You can use a pastry brush to apply a thin, even layer of egg white over the entire surface of each empanada. The egg wash not only contributes to the rich color but also helps create a slightly crispier exterior, adding another layer of texture to this delightful dessert. While egg white is recommended for a lighter finish, a whole egg whisked with a tablespoon of water or milk can also be used for a deeper, richer color.
A Touch of Sweet Sparkle: Turbinado Sugar
Immediately after applying the egg wash, generously sprinkle the tops of the empanadas with turbinado sugar. Turbinado sugar, with its larger crystals and light molasses flavor, adds a wonderful coarse texture, a beautiful sparkle, and an extra hint of sweetness and crunch to the crust. As the empanadas bake, the sugar caramelizes, creating a delightful contrast with the flaky pastry and tender apple filling.
Now, with all these crucial steps complete, your Baked Apple Empanadas are ready for the oven, poised to transform into golden, aromatic treasures!
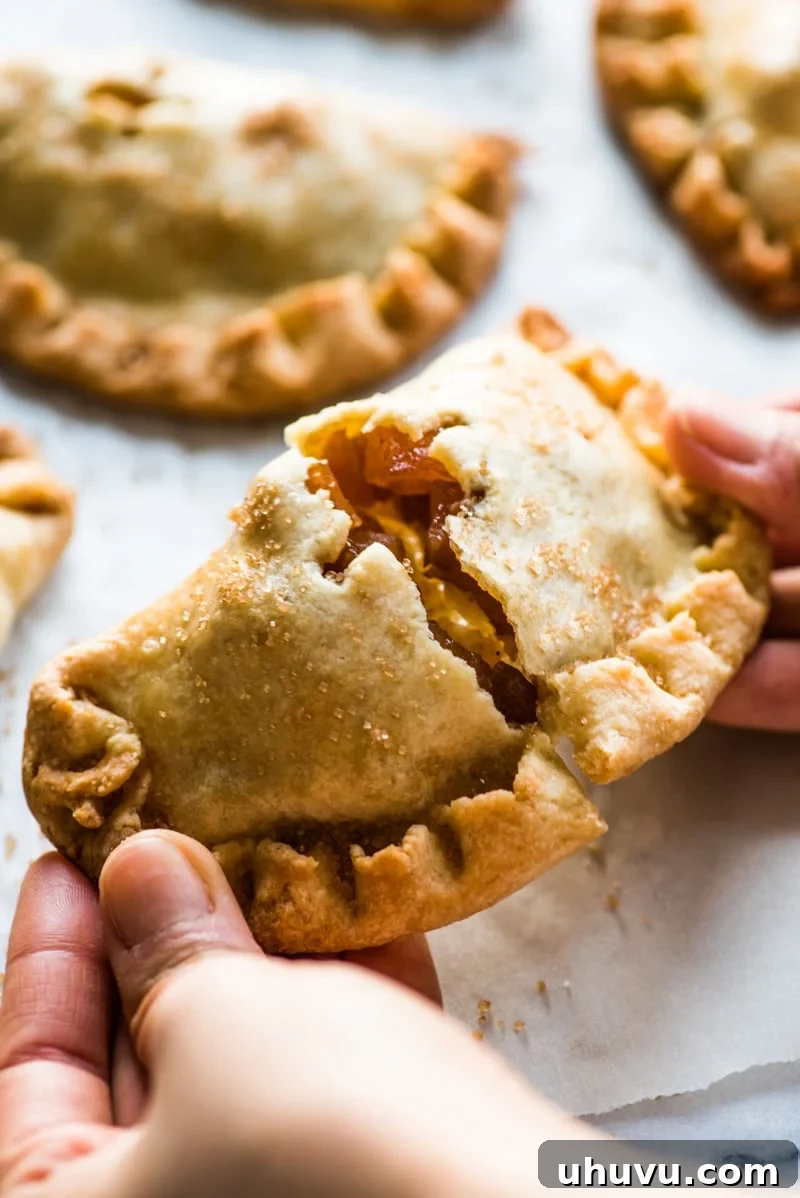
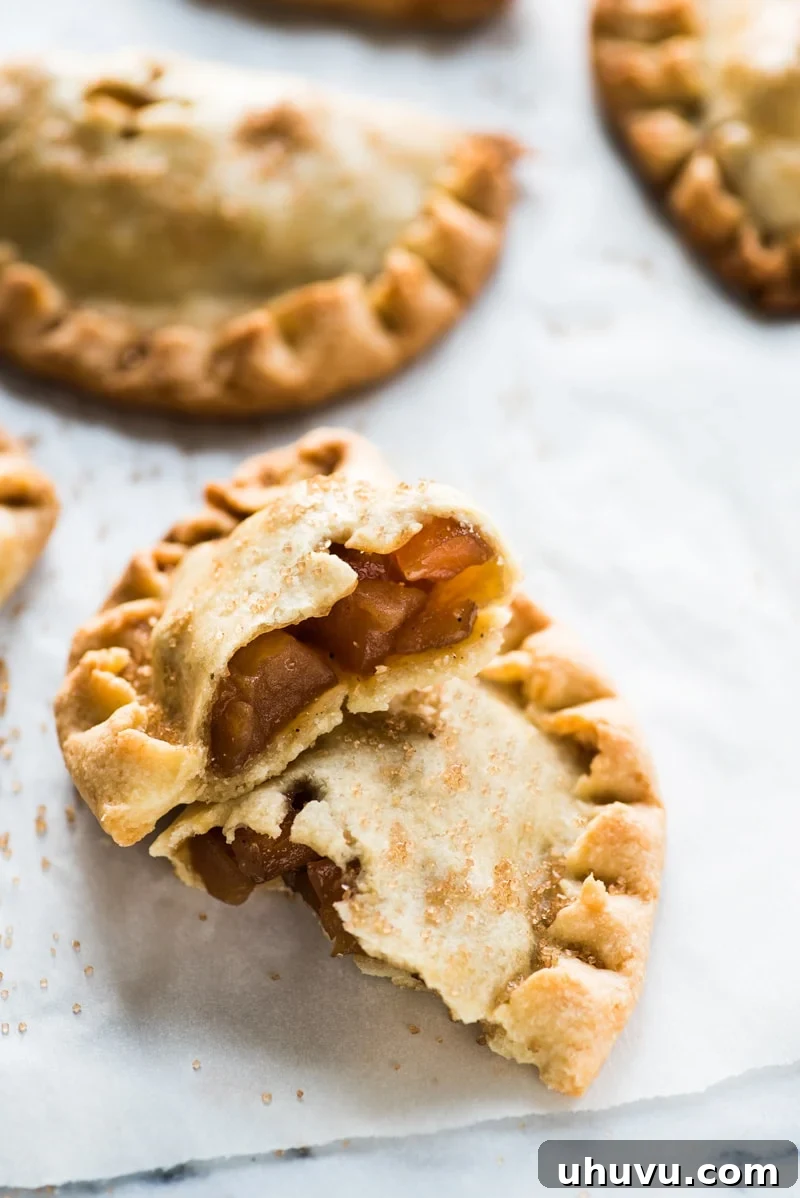
Baking and Serving Your Empanadas
With all the preparation complete, your beautiful Apple Empanadas are ready for their transformation in the oven. Preheat your oven to 375 degrees F (190 degrees C). Bake the empanadas for approximately 25-30 minutes, or until the pastry is gloriously golden brown and the filling is bubbling gently. The exact baking time may vary slightly depending on your oven, so keep an eye on them towards the end.
Once baked to perfection, carefully remove the empanadas from the oven. While it’s tempting to dig in immediately, allow them to cool on the baking sheets for a few minutes before transferring them to a wire rack to cool completely. This cooling period is important as it allows the filling to set properly, preventing it from being too runny and ensuring a pleasant texture with every bite. It also prevents you from burning your tongue on the hot filling!
Serving Suggestions
Baked Apple Empanadas are incredibly versatile when it comes to serving. They are delightful on their own, showcasing the natural sweetness of the apples and the warmth of the spices within their flaky crust. For an extra touch of indulgence, serve them warm with a scoop of vanilla bean ice cream, a dollop of freshly whipped cream, or a drizzle of rich caramel sauce. They also pair wonderfully with a hot cup of coffee, tea, or even a glass of cold milk.
Their portable nature makes them an excellent choice for a wide array of occasions. Pack them in lunchboxes for a special workday treat, bring them to potlucks, picnics, or holiday gatherings, or simply enjoy them as a comforting dessert at home. These empanadas are perfect for any time you crave a warm, sweet, and comforting pastry that truly tastes like the best of the season.
Tips for Success & Make-Ahead Options
To ensure your Baked Apple Empanadas are always a resounding success and to make your baking process even smoother, consider these helpful tips and make-ahead strategies:
Troubleshooting Common Issues
- Soggy Bottom: A common issue with fruit pies and pastries. To prevent this, ensure your apple filling is completely cooled before spooning it into the dough. You can also sprinkle a thin layer of fine breadcrumbs or crushed cornflakes on the bottom half of the dough before adding the filling. These will absorb excess moisture during baking.
- Filling Leaking: This often happens if the empanadas are overfilled or not properly sealed. Make sure you leave enough space around the edges for a firm seal, and don’t hesitate to press down firmly with your fingers or a fork to create a tight crimp.
- Dough Shrinking: If your homemade dough shrinks excessively when rolling or baking, it’s usually a sign that the gluten was overworked or the dough wasn’t chilled enough. Always work with cold dough and handle it gently. The chilling step is essential for the dough to relax.
Make-Ahead & Storage Tips
One of the best features of this recipe is its flexibility for make-ahead preparation, allowing you to enjoy fresh-baked empanadas with minimal last-minute effort:
- Prepared Filling: The cooked apple filling can be made in advance and stored in an airtight container in the refrigerator for up to a week. This is perfect for breaking up the preparation steps over several days.
- Prepared Dough Disks: If you’re making your dough from scratch, the rolled-out dough disks can also be prepared ahead of time. Store them carefully stacked with parchment paper in between, covered tightly with plastic wrap, in the refrigerator overnight. For longer storage, you can freeze them for up to a month. Thaw them in the refrigerator before assembling.
- Unbaked Empanadas: You can even assemble the empanadas completely, right up to the point of brushing with egg wash and sprinkling sugar. Place them on a parchment-lined baking sheet and freeze until solid. Once frozen, transfer them to an airtight freezer bag for up to 2-3 months. When ready to bake, you can bake them directly from frozen, adding about 10-15 minutes to the baking time, or until golden brown.
- Baked Empanadas: Leftover baked empanadas can be stored at room temperature in an airtight container for 2-3 days, or in the refrigerator for up to 5 days.
Reheating Baked Empanadas
To best reheat leftover empanadas, place them on a baking sheet and warm them in a preheated oven at 350°F (175°C) for 10-15 minutes, or until heated through and the crust is crisp again. This method helps restore their flaky texture, unlike microwaving which can make them soft.
By keeping these tips in mind, you’ll be able to create consistently delicious Baked Apple Empanadas that are sure to impress and satisfy, whether for a spontaneous craving or a planned celebration.
More Empanada Recipes to Explore
If you’ve fallen in love with the art of empanada making, there’s a whole world of flavors to discover! Here are a couple of other empanada recipes that you might enjoy, offering different profiles for both savory and sweet cravings:
- Pork Empanadas: A delicious savory option, perfect for a meal or appetizer.
- Pumpkin Empanadas: If you ever return to the pumpkin craze, these are a simple and sweet choice!

Baked Apple Empanadas
Ingredients
For the filling
- 5 large honeycrisp apples, peeled and diced
- 3/4 cup Mexican piloncillo, about 3/4 of a cone (or brown sugar)
- 1 tablespoon lemon juice
- 1 teaspoon vanilla extract
- 1/4 teaspoon ground cinnamon
- 1/8 teaspoon ground cloves
For the dough
- 3 cups all-purpose flour
- 1/2 cup granulated sugar
- 1 pinch of kosher salt
- 1 cup cold butter (2 sticks) , cut into 16 pieces
- 2 large eggs
- 2 tablespoons cold water
- 1 egg white
- 4 tablespoons turbinado sugar
Instructions
For the filling
-
Add all filling ingredients (apples, piloncillo/brown sugar, lemon juice, vanilla extract, cinnamon, cloves) into a small pot. Cook over medium-high heat, stirring occasionally, until the apples are super tender and have softened, absorbing much of the sugar and liquid. This should take about 15-20 minutes.
-
Transfer the cooked apples into a bowl and set aside to cool down completely before proceeding with assembly.
For the dough
-
In a food processor, combine the flour, granulated sugar, and kosher salt. Add the cold butter pieces, 2 large eggs, and 2 tablespoons of cold water. Pulse together until a clumpy dough forms, being careful not to overmix. If not using a food processor, mix dry ingredients in a large bowl with a fork, then use a pastry cutter to incorporate the butter, eggs, and water until a shaggy dough comes together.
-
Transfer the dough onto a lightly floured work surface and gently knead it into a cohesive ball. Divide the dough into 4 equal pieces, then cut each piece again into 4 smaller, roughly equal pieces. You should have a total of 16 pieces. Roll each piece into a smooth ball using the palm of your hands.
-
Working on your floured surface, roll each dough ball into a flat disk, about 6 to 7 inches in diameter, using a rolling pin. Place the finished disks onto a baking sheet covered in parchment paper. To save room, you can stack about 3 disks onto the parchment paper, place another layer of parchment paper on top, and continue stacking disks onto the same baking sheet, ensuring there’s always parchment paper in between each layer so they don’t stick together. Once all the disks are formed, cover the baking sheet with plastic wrap and chill in the refrigerator for about 30 minutes. This helps the dough firm up and become easier to handle.
-
Preheat your oven to 375 degrees F (190 degrees C). On a lightly floured surface, place about 2 1/2 tablespoons of the cooled apple filling onto one half of each flattened dough disk. Fold the other half of the dough over the filling, aligning the edges to form a half-moon. Firmly pinch the sides together using your index finger to create a traditional crimped seal (repulgue), or alternatively, press the edges together using the tines of a fork. The most important part is that the empanadas are fully sealed to prevent the filling from escaping.
Place the filled and sealed empanadas onto 2 large baking sheets lined with parchment paper, leaving some space between each.
-
Cut a small slit or poke a few holes in the top of each empanada using a sharp knife to allow steam to escape during baking. Brush the tops of the empanadas with the egg white and generously sprinkle with turbinado sugar. Bake for 25-30 minutes, or until the pastry is lightly golden brown and the filling is bubbling.
Notes
You can use store-bought frozen empanada discs (found in the baking freezer aisle) as a convenient alternative to making your own dough.
Nutrition
Nutrition information is automatically calculated, so should only be used as an approximation.