
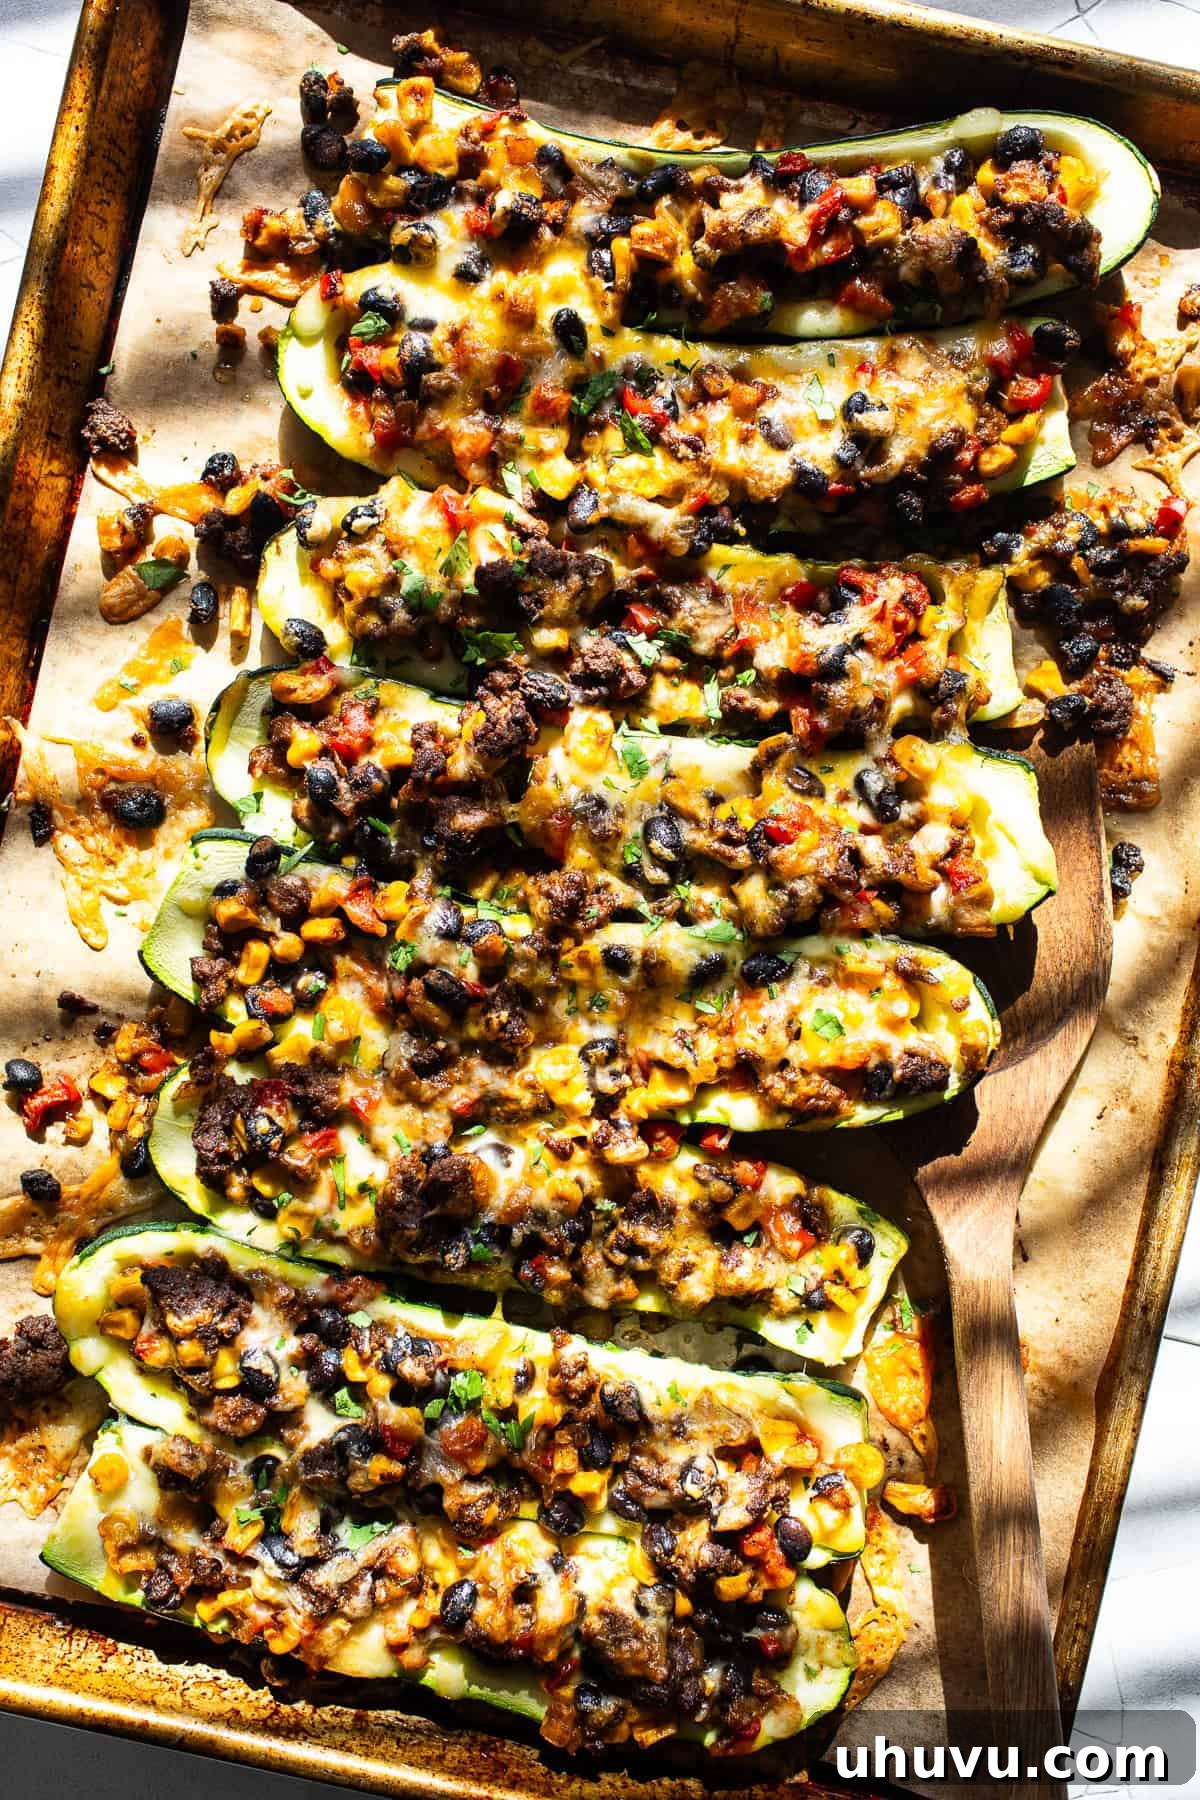
Transform your dinner routine with these incredibly flavorful and wholesome Mexican Stuffed Zucchini Boats. This delightful recipe offers a perfect blend of seasoned ground beef, hearty black beans, sweet corn, vibrant chopped vegetables, and a generous topping of melted cheese. It’s a culinary creation that proves you don’t have to sacrifice taste for health, making it an ideal choice for busy weeknights, effortless meal prepping, or whenever you crave a satisfying, low-carb dish.
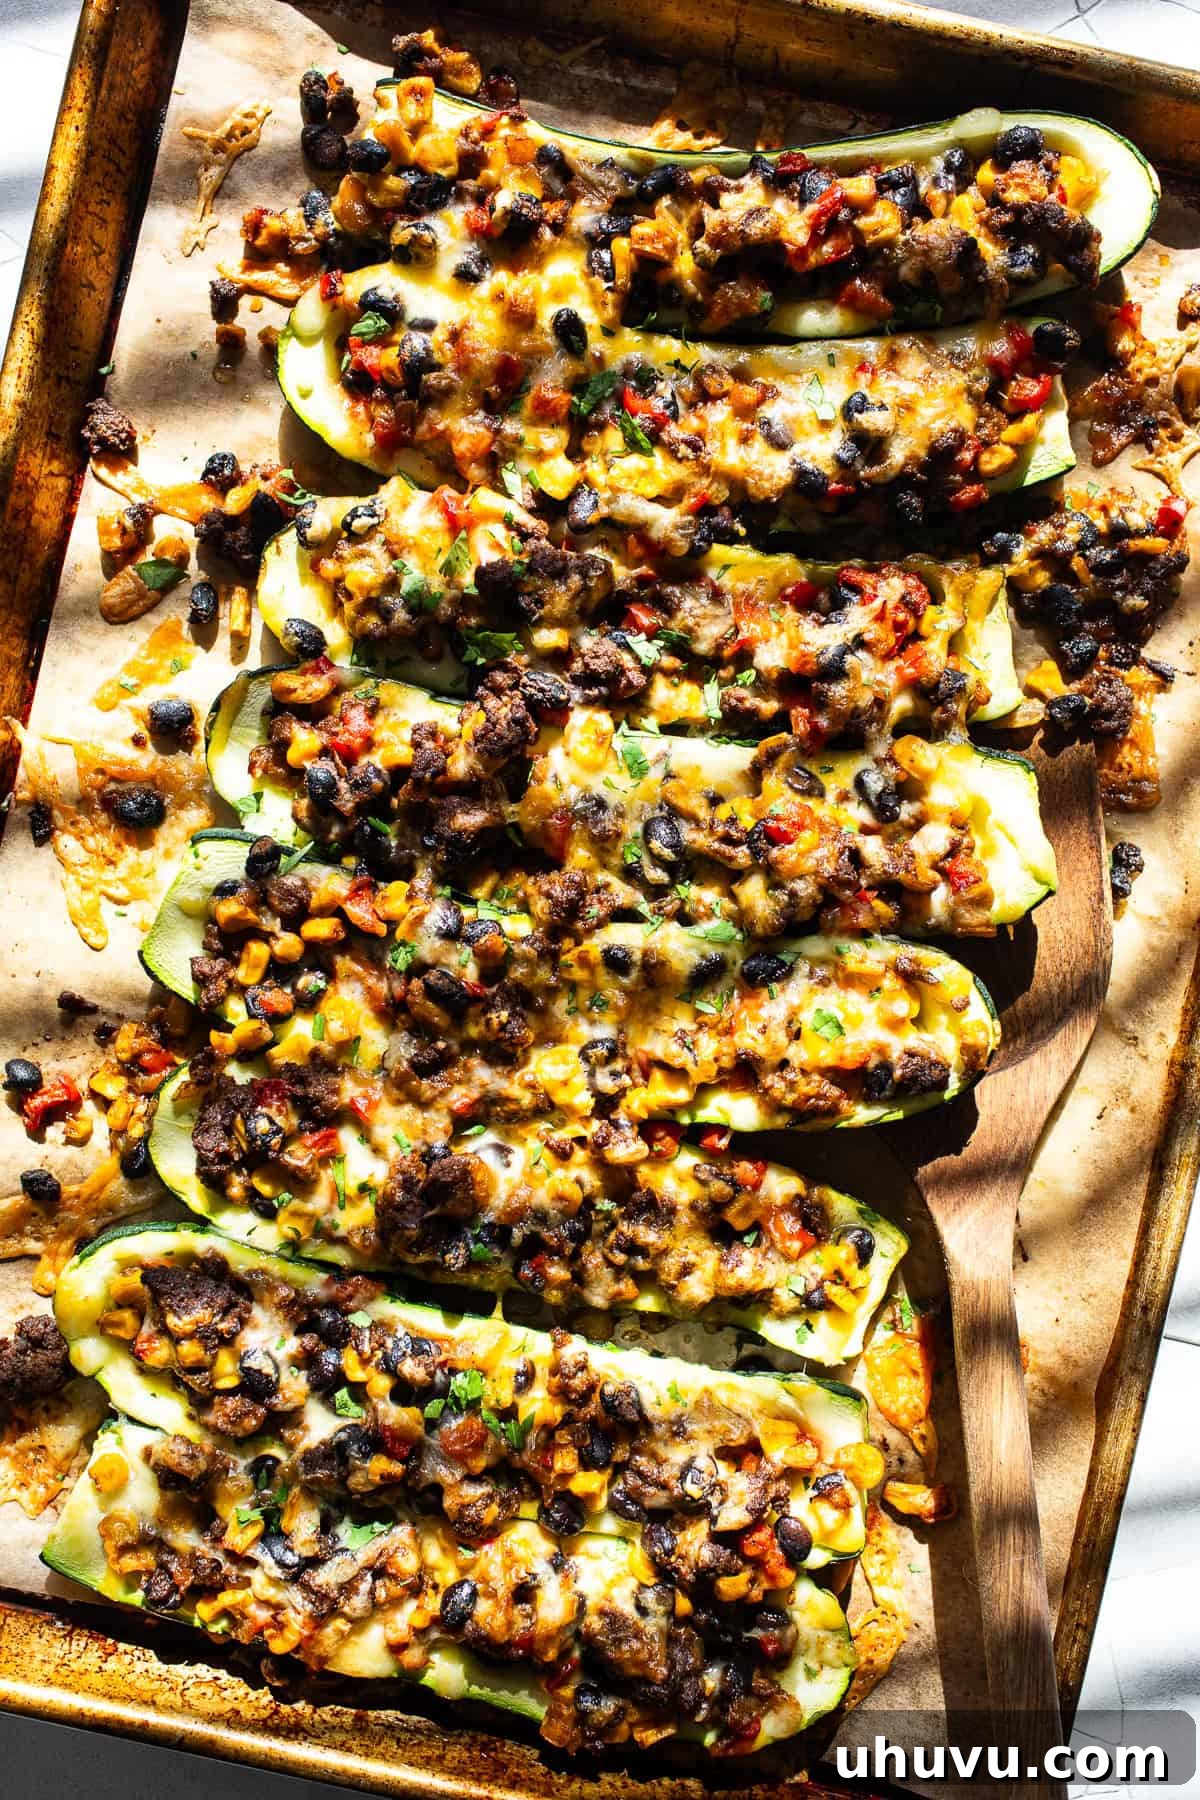
I find myself returning to this stuffed zucchini boats recipe time and time again. It’s a go-to for a lighter, healthier weeknight dinner, especially when I’m aiming for a lower-carb option without compromising on a rich, satisfying taste. Beyond its health benefits, it’s also one of my favorite ways to utilize the abundance of zucchini that often accumulates in the fridge during peak season or after a trip to the farmers market.
This Mexican-inspired rendition has become a beloved staple in my household. The robust filling, packed with savory ground beef, protein-rich black beans, naturally sweet corn, and a blend of spices, all crowned with plenty of cheese, creates a meal that is not only incredibly flavorful but also surprisingly simple to assemble. Even my toddler, who can be quite a picky eater, eagerly devours these zucchini boats, which is always a resounding success in my book!
Whether you’re looking to introduce more vegetables into your diet, seeking a fresh take on classic Mexican flavors, or simply need an easy-to-follow recipe that delivers on taste, these stuffed zucchini boats are sure to become a cherished addition to your recipe collection. They are versatile, nourishing, and packed with a vibrant array of ingredients that will tantalize your taste buds and leave everyone at the table feeling happy and fulfilled.
Essential Ingredients for Flavorful Stuffed Zucchini Boats
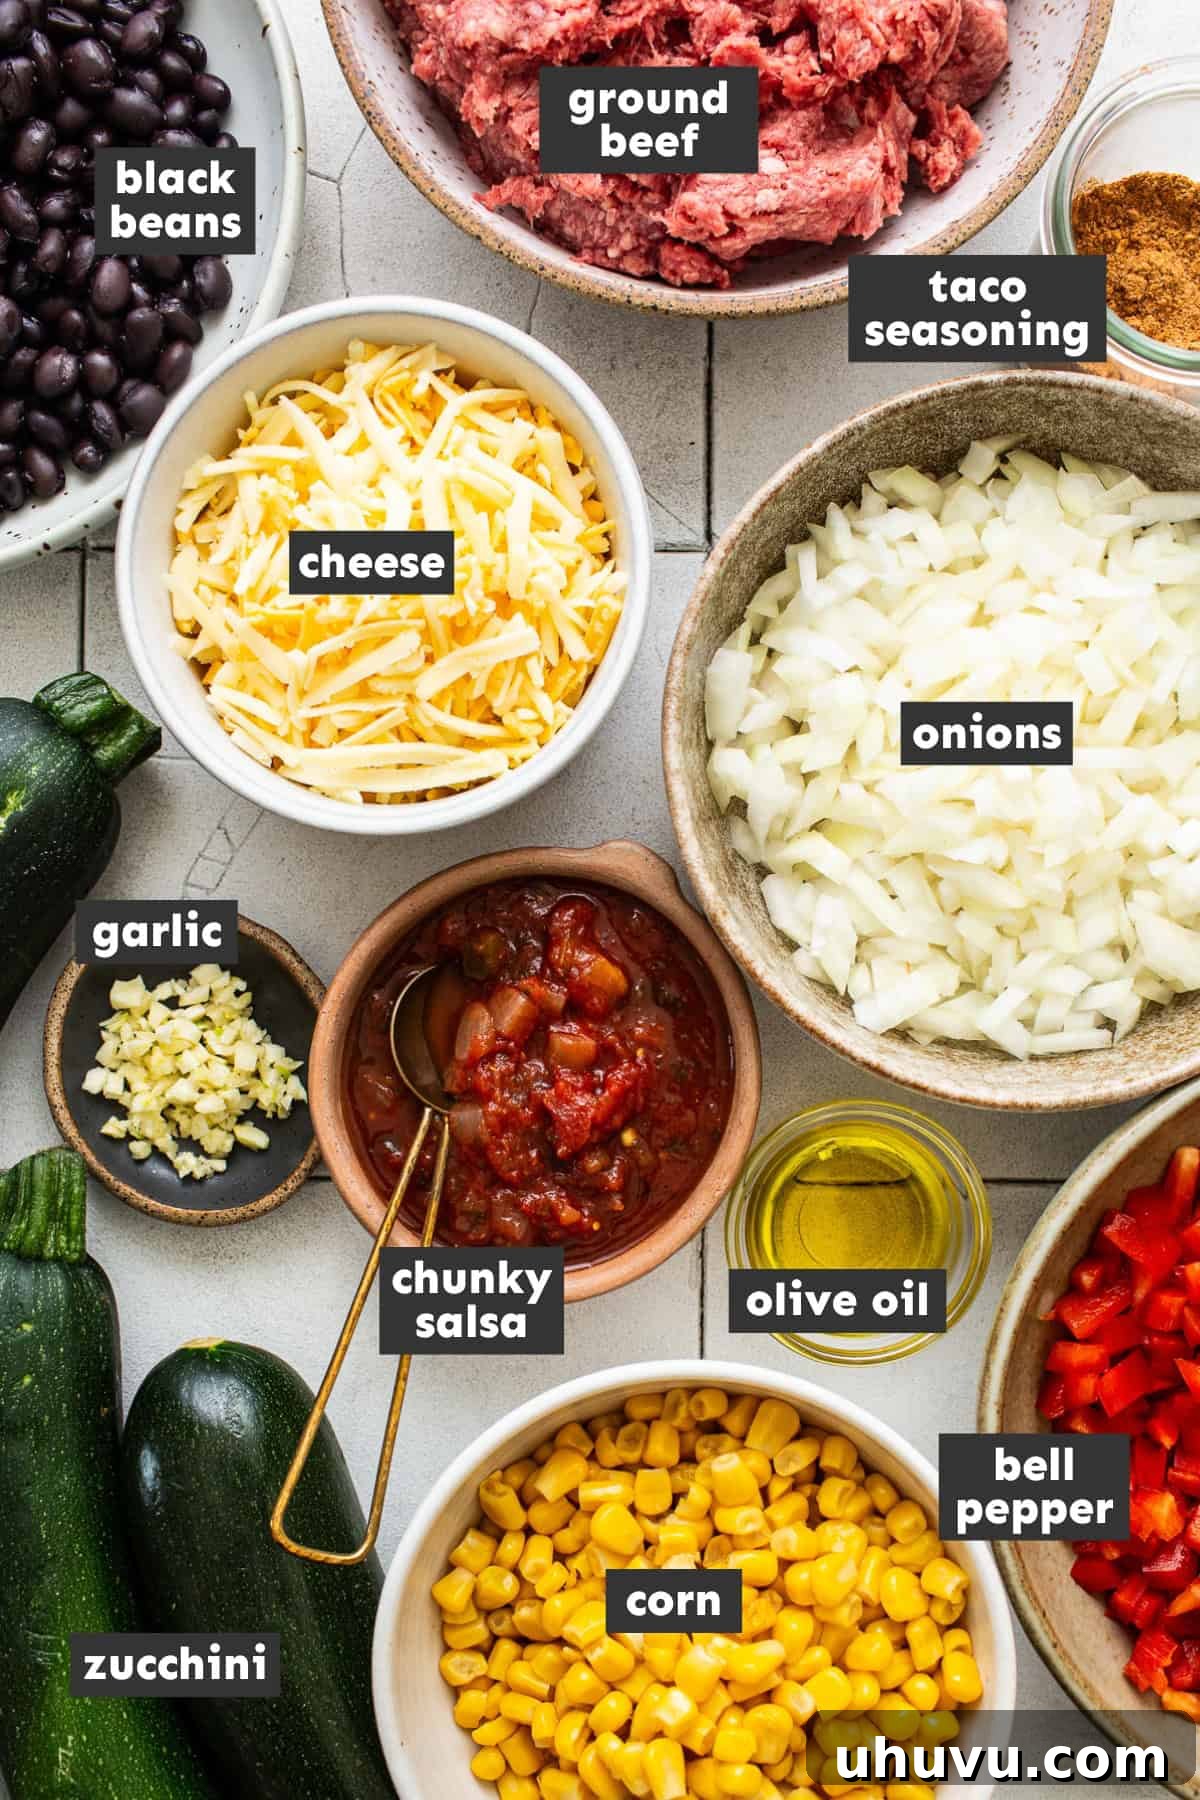
Crafting the perfect Mexican stuffed zucchini boats begins with selecting high-quality, fresh ingredients. Here’s a detailed look at what you’ll need to create this incredibly delicious and healthy dish:
- Zucchini: For this recipe, I recommend using 4 medium-sized zucchinis. The key is to choose ones that are firm, blemish-free, and as close to the same size as possible. This ensures they cook evenly and are tender throughout. Zucchini provides a fantastic low-carb, nutrient-dense vessel for our flavorful filling.
- Ground Beef: Lean ground beef is my go-to for a healthier profile, but you have excellent options here. Feel free to substitute with ground turkey or ground chicken for a different flavor or to further reduce fat content. For a completely vegetarian version, you can omit the meat entirely and increase the beans or add cooked lentils or mushrooms for a hearty texture.
- Olive Oil: A tablespoon of good quality olive oil is used to sauté the aromatics and ground meat, providing a healthy fat base and helping to build flavor from the start.
- Garlic, Onion, and Bell Pepper: These foundational vegetables are crucial for building a rich flavor base in the ground beef mixture. A finely chopped yellow onion will become sweet and translucent, while minced garlic adds a pungent depth. Bell peppers (any color – green, red, yellow, or orange) contribute sweetness, a slight crunch, and a boost of vitamins.
- Taco Seasoning: This is where the Mexican-inspired flavors truly come alive! I often use my homemade taco seasoning recipe, which I love to prepare in a larger batch to keep on hand. It allows for customizable spice levels and fresh, vibrant flavors. However, a good quality store-bought packet of your favorite taco seasoning will work perfectly well if you’re short on time.
- Mexican-Blend Cheese: A generous amount of shredded Mexican-blend cheese is used both in the filling to add creaminess and on top to create a golden, bubbly crust. This blend typically includes Monterey Jack, Cheddar, Asadero, and Queso Blanco, offering a fantastic melty texture and savory taste. Alternatively, shredded Colby or Monterey Jack cheese are excellent single-cheese substitutes.
- Black Beans and Corn: These two ingredients add incredible texture, flavor, and nutritional value. I use canned black beans and whole-kernel corn that have been thoroughly drained and rinsed. Rinsing canned beans helps remove excess sodium and improves their texture. They contribute fiber, protein, and a touch of natural sweetness to the savory filling.
- Salsa: Adding salsa to the filling provides essential moisture, tang, and a burst of tomatoey goodness. My preference is my roasted tomato salsa for its depth of flavor. If opting for store-bought, I recommend a good quality red salsa – mild, medium, or hot, depending on your heat preference. Chunky salsa works well to add more texture.
- Chopped Cilantro (for serving): Fresh cilantro offers a bright, herbaceous finish that complements the Mexican flavors perfectly. It’s an optional but highly recommended garnish for a pop of color and freshness.
Gathering these simple yet powerful ingredients is the first step toward creating a delicious and memorable meal that your family will ask for again and again.
Step-by-Step Guide: Crafting Your Mexican Stuffed Zucchini Boats
Making these vibrant Mexican stuffed zucchini boats is a straightforward process, broken down into a few easy steps. Follow along to create a delicious and healthy meal that’s perfect for any occasion.
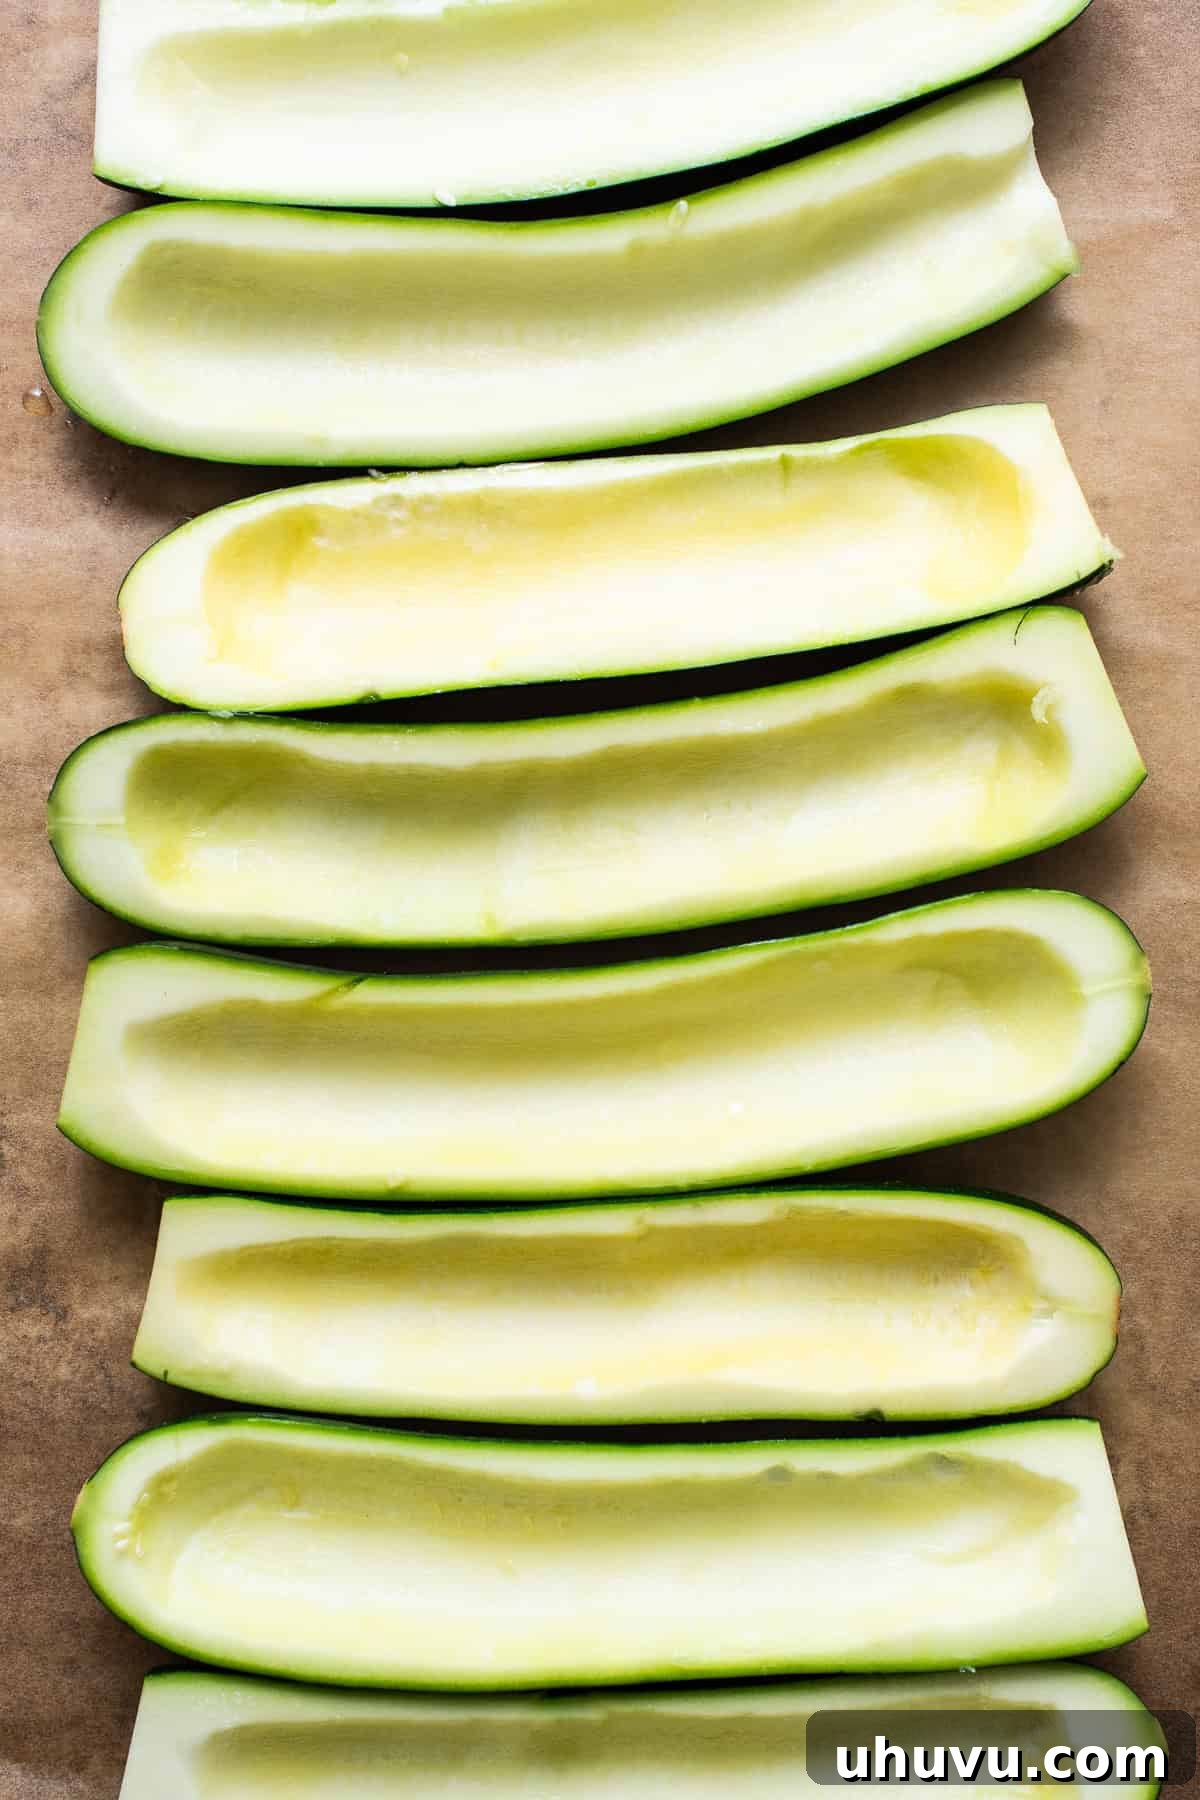
Step 1: Prepare the Zucchini. Begin by preheating your oven to a steady 375℉ (190°C). While the oven heats, it’s time to get your zucchini ready. Wash the zucchinis thoroughly, then carefully trim off both the top and bottom stems. Next, using a sharp knife, slice each zucchini in half lengthwise. With a spoon, gently scoop out the seeds and some of the inner flesh from each half, creating a boat-like cavity. Be careful not to scoop too deeply, leaving enough wall to hold the filling. Place the prepared zucchini boats, hollowed side up, onto a large baking sheet lined with parchment paper for easy cleanup. If you don’t have parchment paper, a light spray of cooking spray will also work.
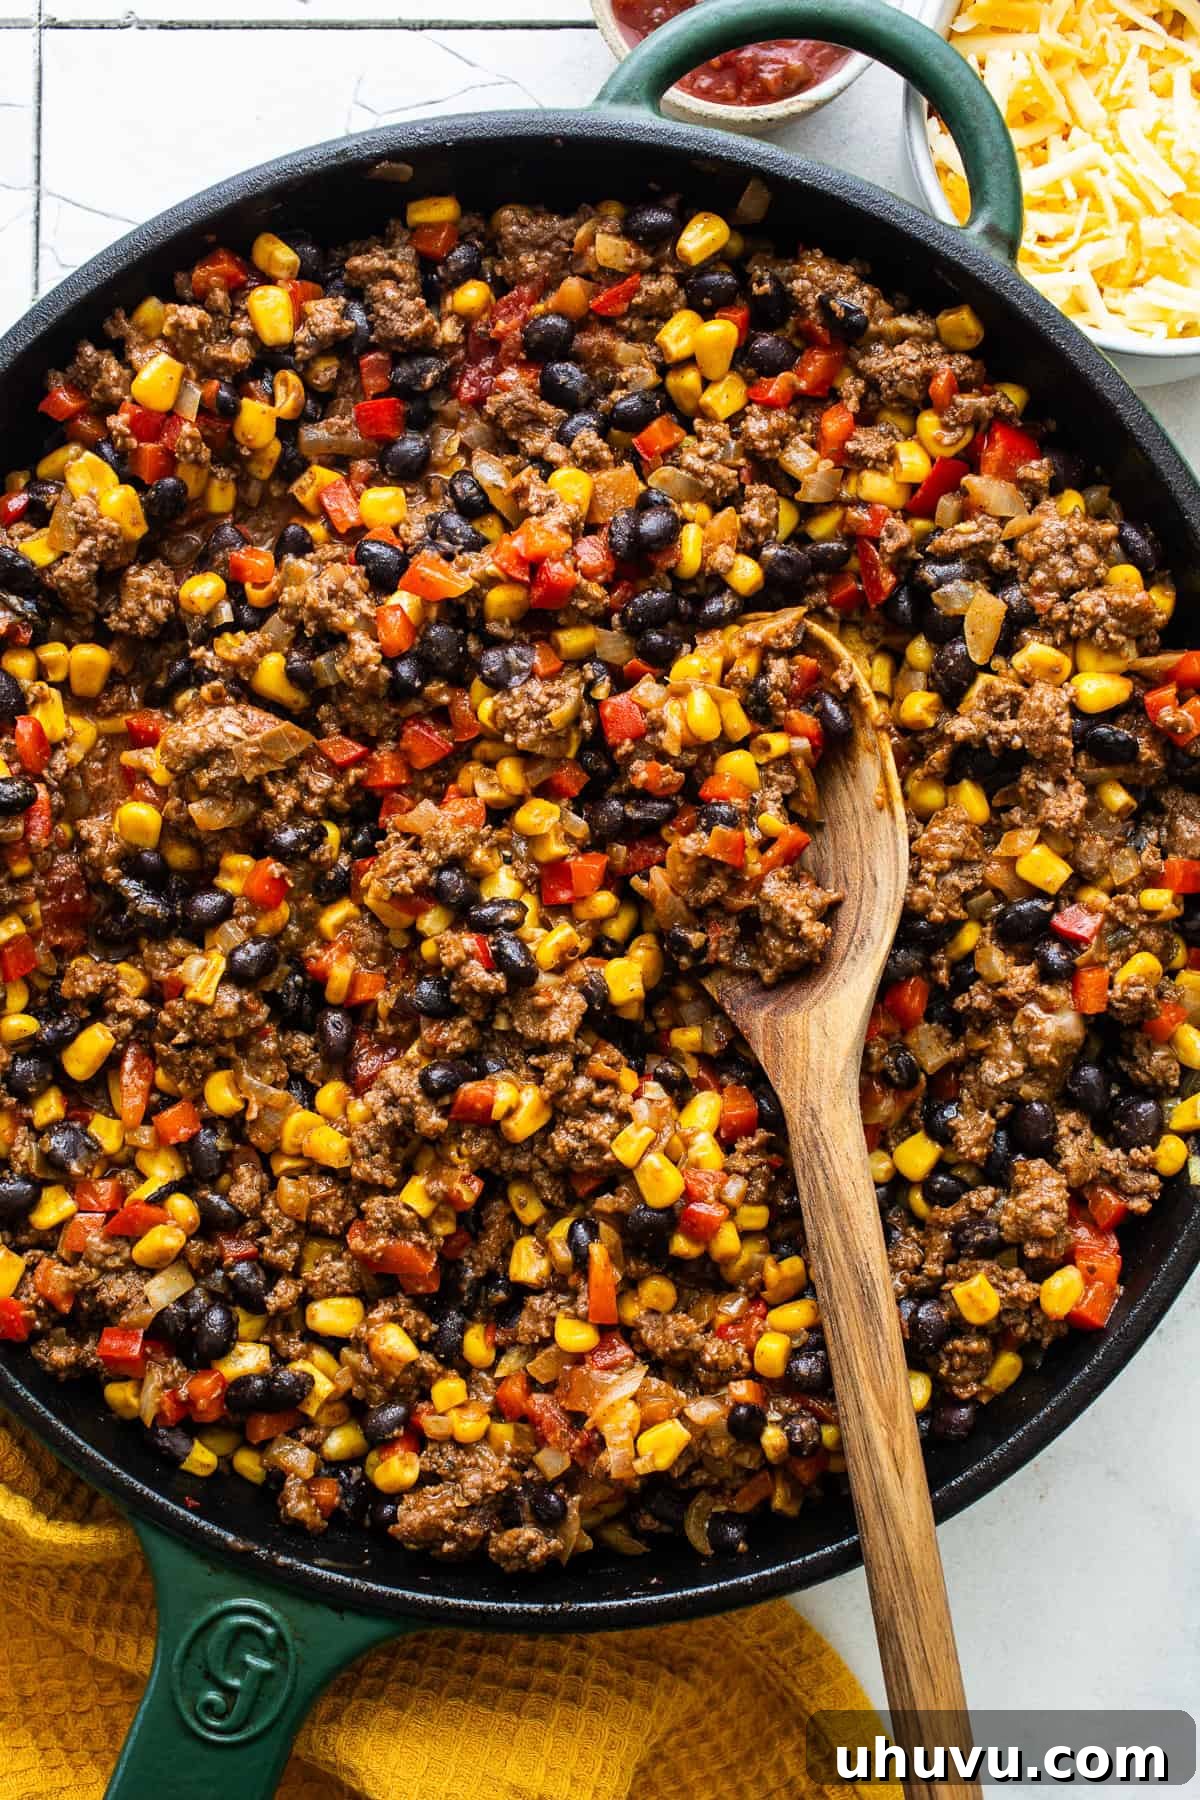
Step 2: Prepare the Filling. Heat one tablespoon of olive oil in a large skillet or frying pan over medium-high heat. Add the finely chopped yellow onions and cook for about 5 minutes, stirring occasionally, until they soften and become translucent. Next, stir in the minced garlic, lean ground beef, and finely chopped bell peppers. Break up the ground beef with a spoon as it cooks. Add the taco seasoning, ensuring it’s evenly distributed throughout the mixture. Continue to cook for 8-10 minutes, or until the ground beef is fully browned and cooked through, and the bell peppers have softened slightly. Once the meat is cooked, drain any excess grease from the skillet to keep the filling light and flavorful. Finally, stir in the drained and rinsed black beans, corn, about ½ cup of the shredded Mexican-blend cheese, and your favorite salsa. Cook for an additional 5 minutes, allowing the flavors to meld, the beans and corn to warm through, and the cheese to melt slightly into the mixture.
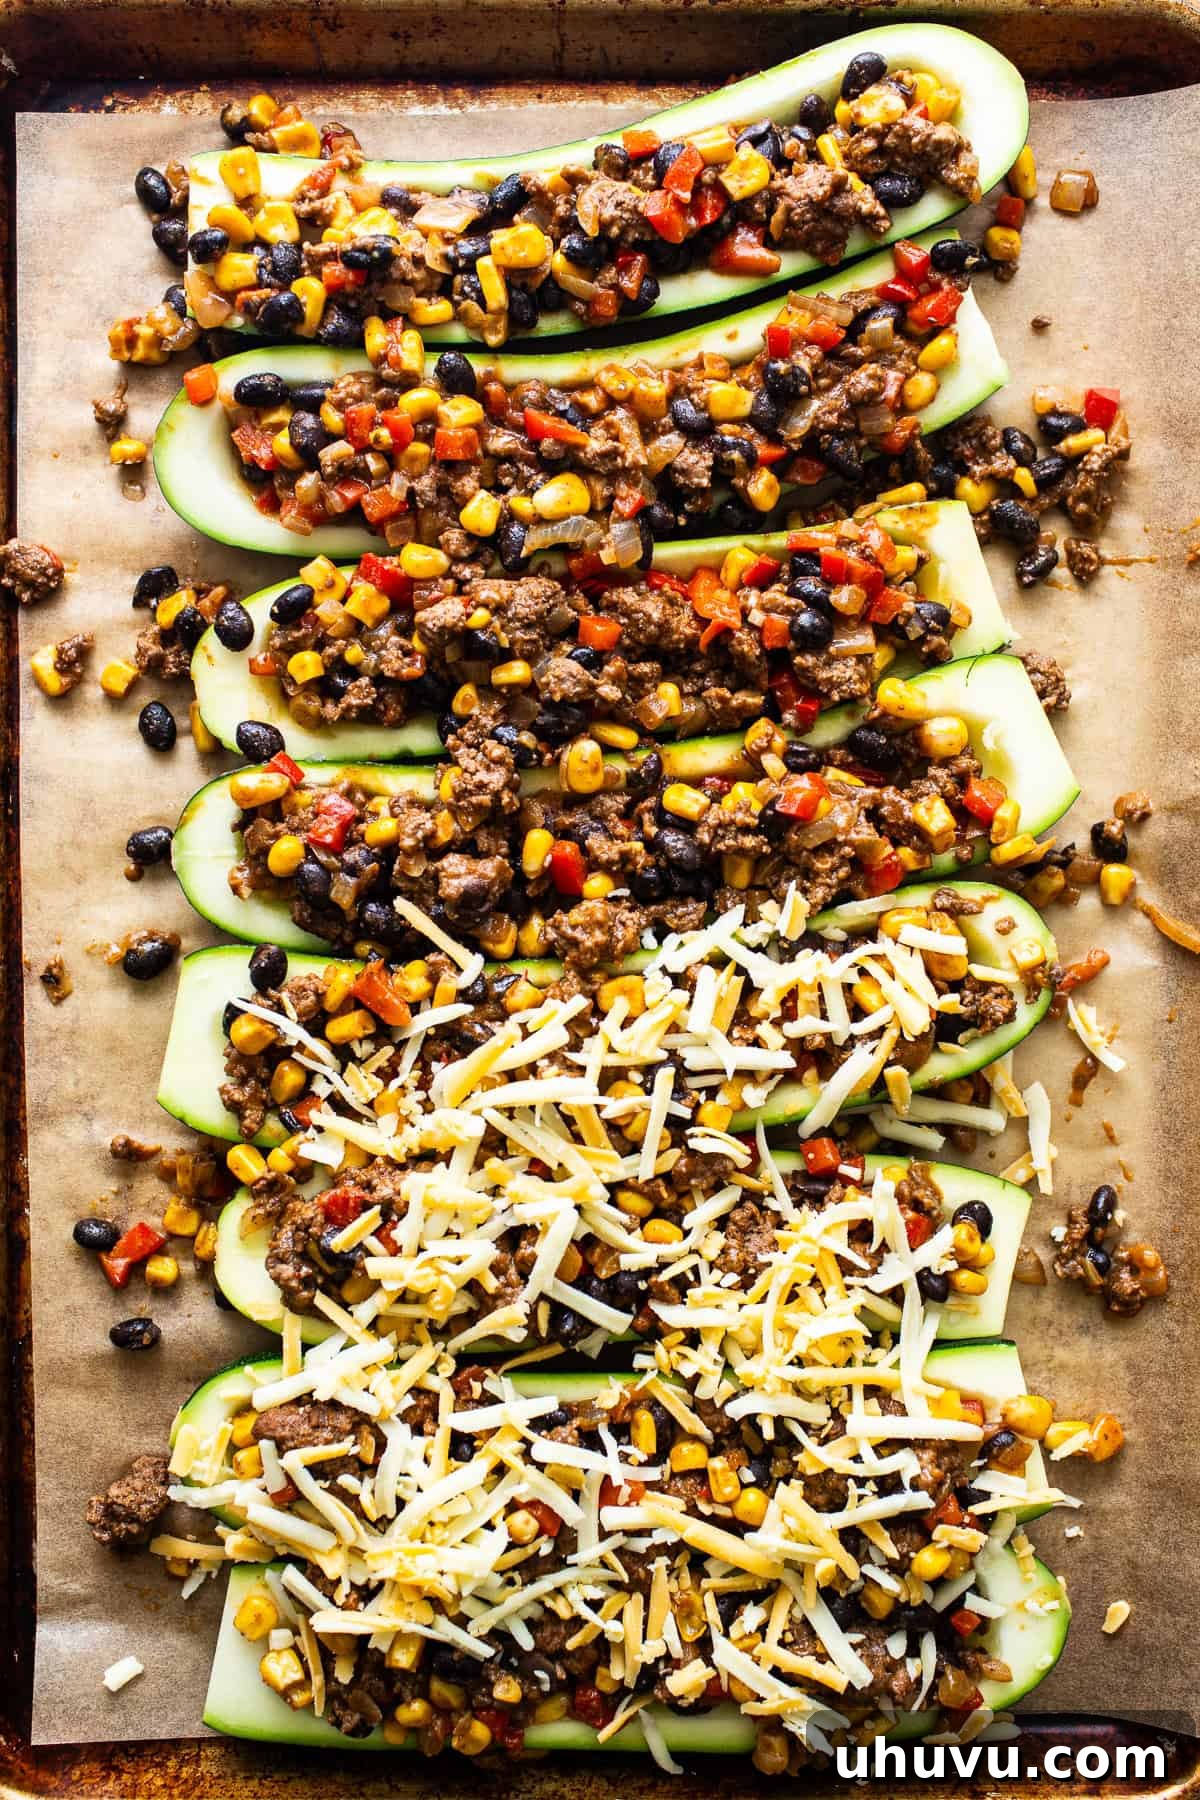
Step 3: Assemble the Zucchini Boats. With your zucchini boats prepped and the filling ready, it’s time to bring them together. Scoop equal amounts of the flavorful ground beef and vegetable mixture into each hollowed zucchini boat. Depending on the size of your zucchini, this will typically be around 3-4 tablespoons per half. Gently press the filling down to ensure it’s snug in the boats. Once all the zucchini halves are generously filled, sprinkle the remaining shredded Mexican-blend cheese evenly over the top of each boat. This cheese layer will melt into a delicious, golden-brown crust during baking.
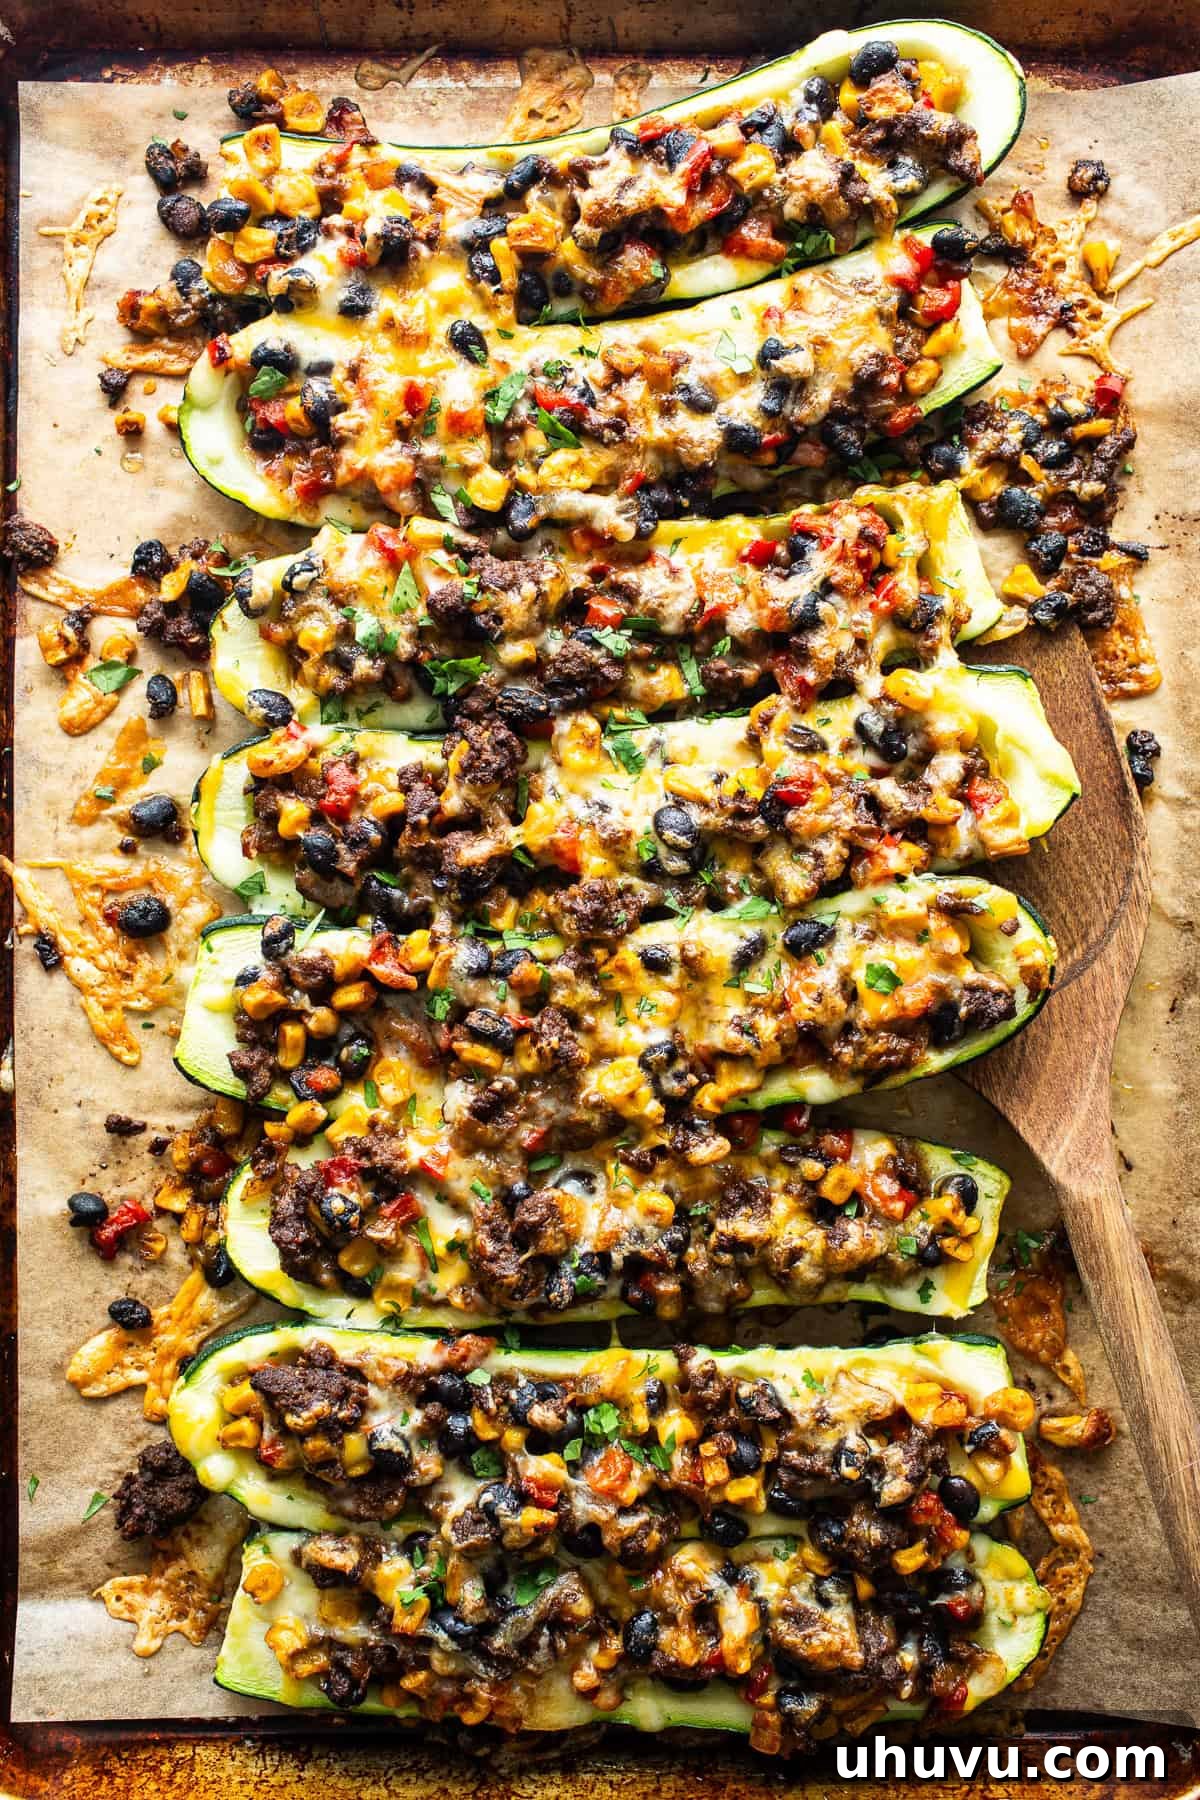
Step 4: Bake and Serve. Carefully cover the baking sheet containing your assembled zucchini boats with aluminum foil. This helps to steam the zucchini and ensures it becomes tender without drying out. Transfer the baking sheet to your preheated oven and bake for 25-30 minutes. You’ll know they’re ready when the zucchini is soft and tender when pierced with a fork. For an extra golden-brown, bubbly cheese topping, you can remove the foil for the last 5 minutes of baking, or even briefly place them under the broiler (watch carefully to prevent burning!). Once baked to perfection, remove the zucchini boats from the oven, garnish with fresh chopped cilantro if desired, and serve immediately while they are still warm and gooey. Enjoy!
Expert Tips & Delicious Variations for Stuffed Zucchini Boats
Unlock the full potential of your stuffed zucchini boats with these helpful tips and creative variations:
- Use a Different Protein: While lean ground beef is fantastic, these zucchini boats are incredibly versatile. Easily substitute with ground turkey or chicken for a lighter meal. For a plant-based option, consider using cooked lentils, crumbled firm tofu, or a hearty blend of sautéed mushrooms and quinoa.
- Make it Vegetarian or Vegan: To create a delicious vegetarian version, simply omit the ground beef. You can boost the filling with extra black beans, corn, diced bell peppers, or even some cooked brown rice or quinoa for added substance. For a vegan twist, replace the cheese with a dairy-free shredded cheese alternative and ensure your taco seasoning and salsa are vegan-friendly.
- Prevent Watery Zucchini: Zucchini can release a lot of water during baking, making your boats soggy. To minimize this, after scooping out the flesh, lightly salt the inside of the zucchini halves and let them sit for 10-15 minutes. You’ll see water droplets form. Blot them dry with paper towels before filling and baking.
- Spice it Up (or Down!): Adjust the heat level to your preference. Add a pinch of cayenne pepper or a diced jalapeño (seeds removed for less heat, left in for more) to the filling for an extra kick. For a milder flavor, choose a mild salsa and reduce the amount of taco seasoning.
- Leftover Filling? Don’t Waste It! If you find yourself with extra filling, it’s a treasure trove of possibilities! It makes an excellent ingredient for burritos, tacos, or gorditas. You can also use it as a topping for nachos, a flavorful addition to quesadillas, or even stirred into scrambled eggs for a hearty breakfast.
- Cheese, Please!: Don’t limit yourself to just Mexican-blend cheese. Experiment with other delicious cheeses like sharp cheddar, smoked gouda, or pepper jack for a spicy kick.
- Add More Veggies: Feel free to sneak in more vegetables! Finely diced carrots, spinach, or even the scooped-out zucchini flesh (chopped finely and sautéed with the onions) can be added to the filling for extra nutrients and texture.
- Batch Cooking and Freezing: While baked zucchini boats don’t freeze well (the zucchini gets mushy), the filling freezes beautifully for up to 3 months. Prepare a large batch of filling, freeze it in airtight containers, and then thaw it for a quick meal prep solution. Just scoop into fresh zucchini and bake!
With these tips and variations, your Mexican Stuffed Zucchini Boats can be tailored to suit any taste or dietary preference, making them a truly adaptable and delicious meal.
Perfect Pairings: What to Serve with Stuffed Zucchini Boats
These Mexican stuffed zucchini boats are a complete and satisfying meal on their own, especially when garnished simply with a dollop of cooling sour cream or a rich Mexican crema and a scoop of creamy guacamole. However, if you’re looking to elevate the dining experience or create a more substantial feast, there are plenty of wonderful side dishes that complement their savory flavors beautifully.
For a traditional and hearty accompaniment, consider pairing your zucchini boats with a classic side. A simple crisp green salad with a zesty lime vinaigrette offers a refreshing contrast. Some crusty garlic bread can be perfect for soaking up any delicious juices, while a serving of fluffy authentic Mexican rice or aromatic cilantro lime rice will make the meal even more filling and satisfying. You could also serve them with warm tortillas for a deconstructed taco experience.
If you’re aiming for a low-carb option, the possibilities are equally delicious. These stuffed zucchini boats pair wonderfully with Mexican cauliflower rice, which offers a similar texture to traditional rice without the carbohydrates. A vibrant avocado salad provides healthy fats and a creamy texture, while Mexican roasted vegetables like bell peppers, onions, and corn (if not already in the boats) can add more color and nutrients. A fresh pico de gallo or a simple cucumber and tomato salad can also offer a light and refreshing side.
Frequently Asked Questions About Zucchini Boats
While you can technically freeze cooked zucchini boats, I generally don’t recommend it. The zucchini itself has a high water content, and once frozen and thawed, it tends to become quite mushy and lose its appealing texture. However, the savory filling freezes exceptionally well! You can prepare a larger batch of the filling, let it cool completely, and then freeze it in an airtight container for up to 3 months. When you’re ready for a quick meal, simply thaw the filling, scoop it into freshly prepared zucchini boats, top with cheese, and bake as usual.
To store any leftover zucchini boats, allow them to cool completely before transferring them to an airtight container. Refrigerate them promptly for optimal freshness, where they will keep for up to 3-4 days. For reheating, the microwave is your quickest option: place the zucchini boats on a microwave-safe plate and reheat in 1-minute increments until thoroughly warmed through. For a crispier topping, you can also reheat them in a preheated oven at 350°F (175°C) for about 10-15 minutes, or in an air fryer for 5-7 minutes, until hot and the cheese is bubbly again.
Absolutely! Stuffed zucchini boats are a great option for meal prep. You can prepare everything as usual – hollow out the zucchini, cook the filling, and assemble the boats by scooping the filling into them and topping with cheese. Then, instead of baking immediately, cover the baking sheet loosely with plastic wrap or aluminum foil and store them in the refrigerator for up to 24 hours. When you’re ready to cook, simply pull them out of the fridge, uncover, and bake at 375°F (190°C) for approximately 25-30 minutes, or until the zucchini is tender and the filling is hot and bubbly.
To minimize sogginess, once you’ve scooped out the zucchini flesh, sprinkle a little salt inside each boat. Let them sit for about 10-15 minutes; you’ll notice water beads forming. Blot this moisture away with paper towels before adding the filling. This draws out excess water, helping the zucchini maintain a firmer texture during baking.
Explore More Delicious Zucchini Recipes
If you’re anything like me, you’re always on the lookout for new and exciting ways to enjoy zucchini. This versatile vegetable shines in countless dishes, from hearty mains to light and refreshing sides. Once you’ve mastered these Mexican Stuffed Zucchini Boats, be sure to explore some of these other fantastic zucchini recipes:
- Roasted Mexican Zucchini: A simple yet incredibly flavorful side dish that highlights the natural sweetness of zucchini with a touch of Mexican spice.
- Calabacitas: A traditional Mexican stew featuring zucchini, corn, and often other vegetables, simmered to perfection.
- Mexican Vegetable Soup: A comforting and nutritious soup packed with various vegetables, including zucchini, in a rich, savory broth.
- Zucchini Enchiladas: A creative and delicious way to enjoy enchiladas, using zucchini as a key ingredient for a fresh twist.
If you tried this Stuffed Zucchini Boats Recipe or any other recipe on Isabel Eats, don’t forget to 🌟 rate the recipe and let me know how it went in the comments below! I love hearing about your experience making it!
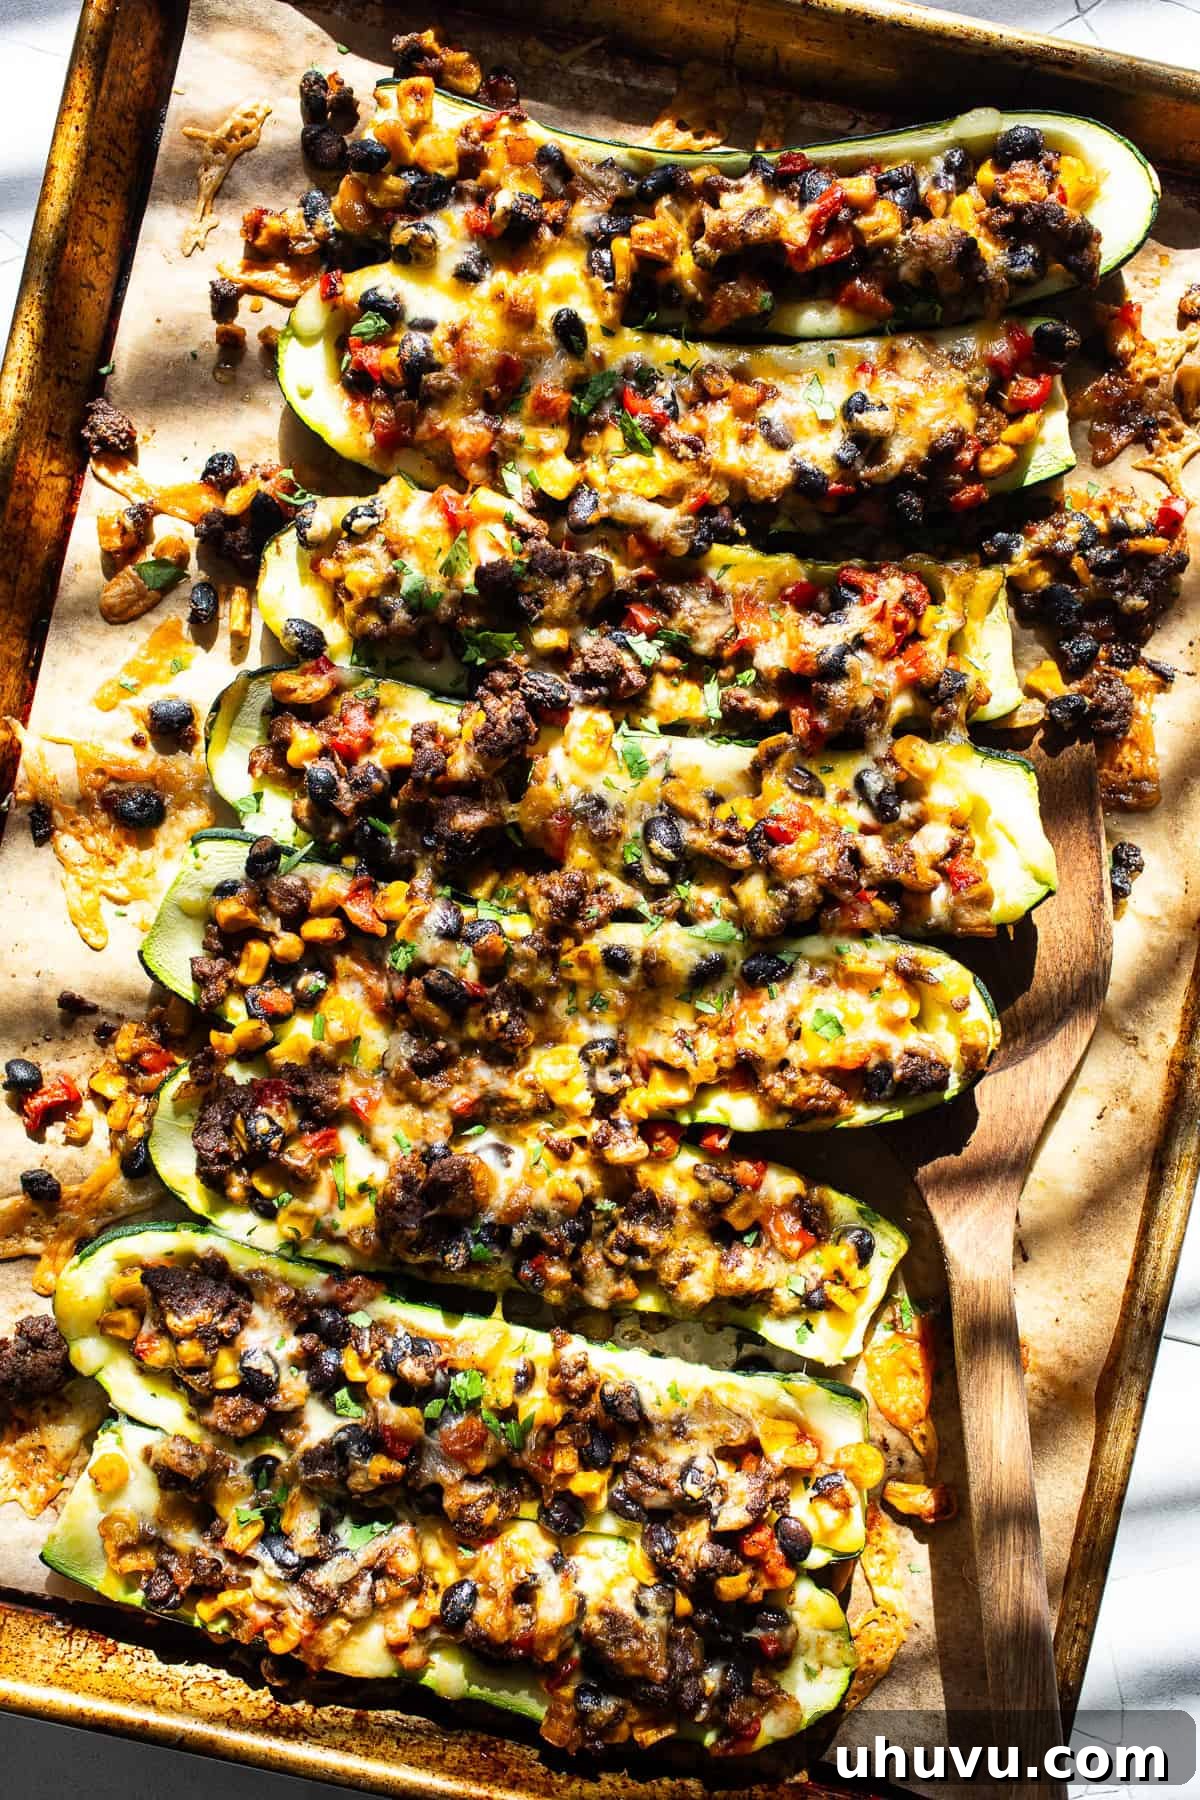
Stuffed Zucchini Boats
Ingredients
- 4 large zucchini
- 1 tablespoon olive oil
- ½ yellow onion, finely chopped
- 2 cloves garlic, minced
- 1 pound lean ground beef
- 1 bell pepper, finely chopped
- 3 tablespoons taco seasoning
- 1 (15-ounce) can black beans, drained and rinsed
- 1 (15-ounce) can whole kernel corn, drained and rinsed
- 1 ½ cups Mexican-blend cheese, divided
- ½ cup chunky salsa
- Chopped cilantro, for serving
Instructions
-
Preheat oven to 375℉ (190°C) and line a large baking sheet with parchment paper for easy cleanup, or spray a large baking dish with cooking spray.
-
Prepare the zucchini boats by cutting off the stems and slicing the zucchini in half lengthwise. Use a spoon to scoop out the flesh and seeds. Set the prepared zucchini on the lined baking sheet.
-
Heat the olive oil in a medium skillet over medium-high heat. Add the onions and cook until softened and translucent, about 5 minutes.
-
Add in the garlic, ground beef, bell pepper, and taco seasoning. Break up the ground beef and stir to combine. Cook until all the meat has browned and is cooked through, about 8-10 minutes. Drain any excess grease.
-
Stir in the black beans, corn, ½ cup of shredded cheese, and salsa. Cook for an additional 5 minutes, until the black beans and corn are warmed through and the cheese is melted.
-
Assemble Mexican zucchini boats by scooping equal amounts of filling, about 3-4 tablespoons, into each zucchini. Top with the remaining 1 cup of shredded cheese.
-
Cover with aluminum foil and bake for 25-30 minutes, until zucchini is soft and tender.
-
Remove foil, garnish with chopped cilantro, and serve immediately.
Notes
- Use a different protein. You can easily substitute ground turkey or chicken instead of ground beef.
- Make it vegetarian. You can make this recipe vegetarian by omitting the ground beef. Add extra beans, mushrooms, or quinoa for a heartier filling.
- Leftover filling? It makes a great filling for burritos, tacos, gorditas, quesadillas, or even nachos!
Nutrition
Calories: 283kcal |
Carbohydrates: 22g |
Protein: 23g |
Fat: 12g |
Saturated Fat: 5g |
Polyunsaturated Fat: 1g |
Monounsaturated Fat: 4g |
Trans Fat: 0.2g |
Cholesterol: 55mg |
Sodium: 619mg |
Potassium: 924mg |
Fiber: 6g |
Sugar: 6g |
Vitamin A: 1095IU |
Vitamin C: 51mg |
Calcium: 197mg |
Iron: 3mg
Nutrition information is automatically calculated, so should only be used as an approximation.
Leave a comment and star rating below!
This post was originally published in April 2018, and has been updated with new photos, more helpful tips, and a better overall recipe.
Photography by Ashley McLaughlin.