
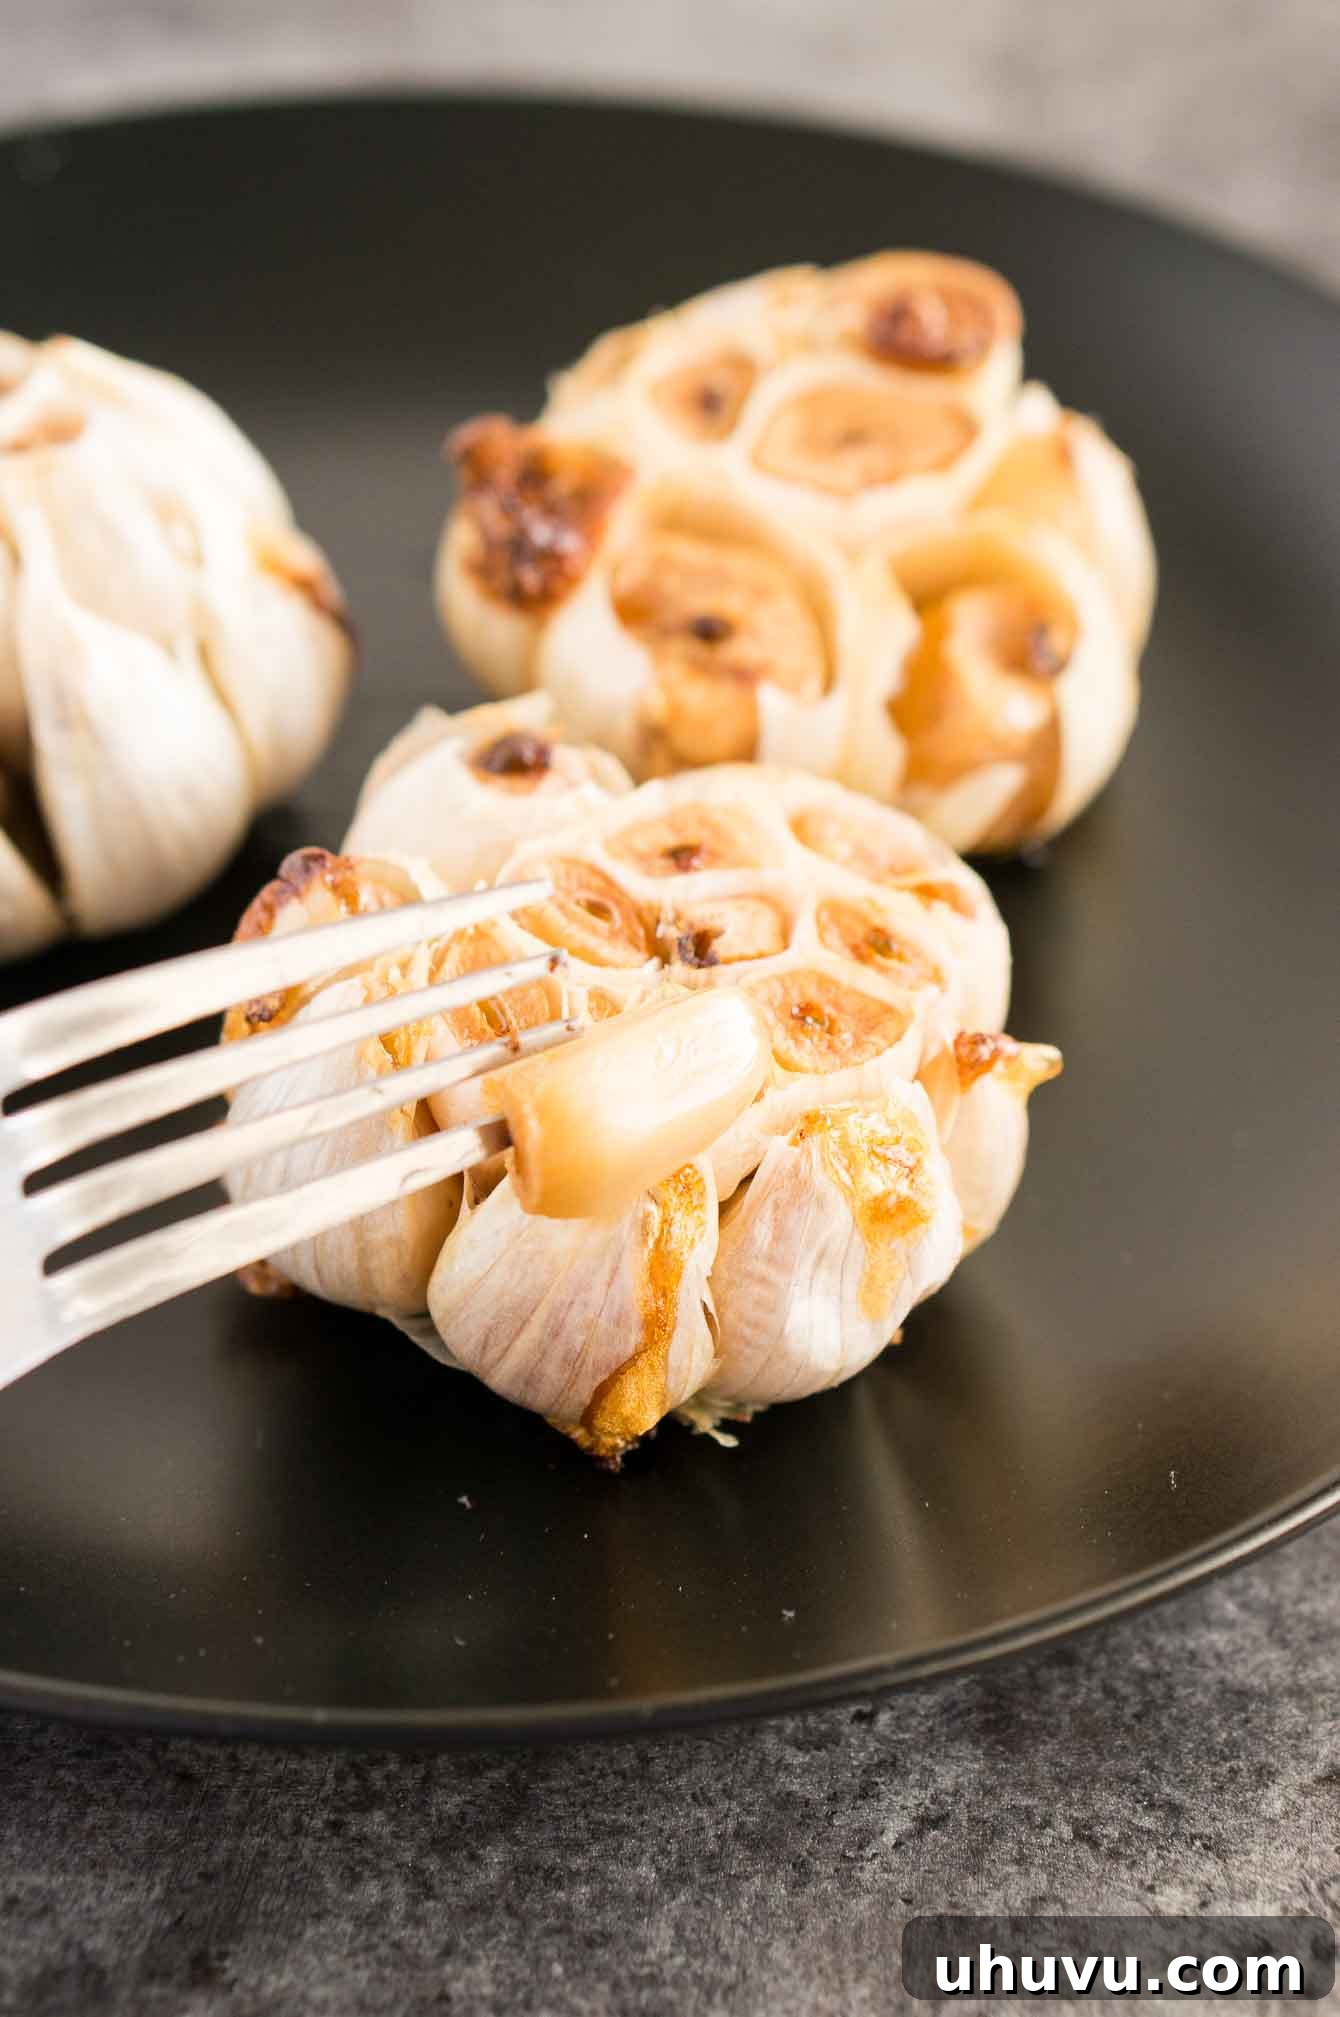
Discover the delightful transformation of ordinary garlic into a sweet, creamy, and utterly irresistible culinary gem. This easy-to-follow tutorial provides a comprehensive guide on how to make roasted garlic, revealing the best roasting techniques and countless ways to incorporate its rich flavor into your favorite meals. Say goodbye to the pungent bite of raw garlic and embrace the mellow, caramelized notes that only roasting can achieve. Whether you’re a seasoned chef or a home cook looking to elevate your dishes, learning to roast garlic is a simple skill that promises profound flavor rewards.
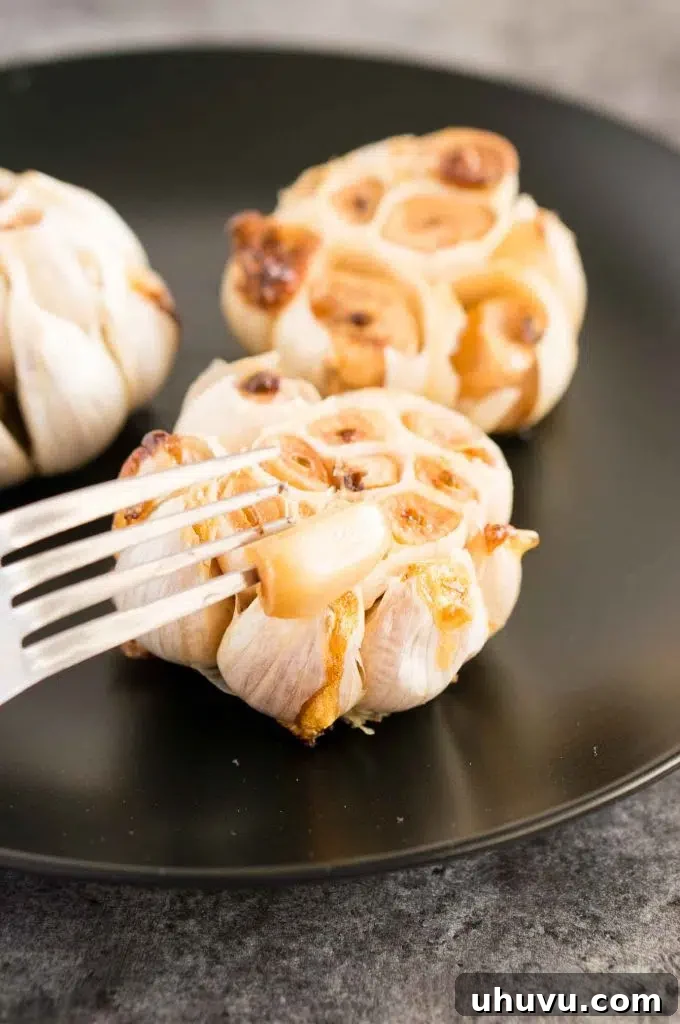
Garlic is a fundamental ingredient in cuisines worldwide, celebrated for its ability to infuse dishes with incredible depth and aroma. While raw garlic offers a sharp, spicy kick, the act of roasting fundamentally changes its character. The intense heat of the oven caramelizes the natural sugars within each clove, transforming them into a soft, buttery, and profoundly sweet delicacy. This process not only mellows its famous pungency but also creates a spreadable texture that can elevate anything from a simple slice of bread to elaborate sauces and marinades. Learning how to roast garlic is a simple skill that unlocks a whole new dimension of flavor, adding a savory boost and unparalleled richness to almost any meal you prepare. It’s significantly easier to eat without the intense flavor of raw garlic and acts as a gateway to more complex and inviting culinary experiences.
Why Roast Garlic? The Flavor Transformation
Roasting garlic isn’t just a cooking method; it’s an alchemical process that completely redefines this beloved allium. The high heat of the oven catalyzes a series of chemical reactions, most notably the Maillard reaction and caramelization, which are responsible for its profound transformation. Here’s why you should embrace oven roasted garlic:
- Mellowed & Sweetened Flavor: The intense pungency of raw garlic, caused by compounds like allicin, dissipates significantly during roasting. In its place emerges a rich, sweet, and nutty flavor profile, reminiscent of a delicate roasted onion but with the unmistakable depth of garlic. It loses its sharp edge, making it enjoyable even for those sensitive to raw garlic.
- Creamy, Buttery Texture: As the cloves cook, they soften to an almost spreadable consistency. They become tender and yielding, practically melting in your mouth. This buttery texture is perfect for mashing into dishes or spreading directly onto bread.
- Enhanced Aroma: While the sharp odor of raw garlic can be overpowering, roasted garlic emits a warm, inviting, and slightly earthy aroma that permeates your kitchen, promising a delicious experience.
- Digestibility: Many people find raw garlic difficult to digest, leading to heartburn or discomfort. Roasting breaks down some of the compounds responsible for this, making it much gentler on the digestive system.
- Versatility: The mild, complex flavor of roasted garlic makes it incredibly versatile. It can be a star ingredient or a subtle background note, enhancing a wide array of savory and even some sweet dishes.
- Health Benefits: While cooking can alter some nutrients, roasted garlic still retains many beneficial compounds. It’s a flavorful way to add garlic’s natural goodness, including antioxidants, to your diet without the harshness of raw forms.
Essential Ingredients and Tools for Roasted Garlic
Making roasted garlic requires minimal ingredients and basic kitchen tools, making it an accessible culinary technique for everyone. Ensure you have these on hand to get started:
Ingredients:
- Garlic Bulbs: The star of the show! Choose fresh, firm bulbs that feel heavy for their size and have no soft spots or green sprouts. Larger bulbs generally yield larger, easier-to-extract cloves.
- Olive Oil: A good quality extra virgin olive oil is highly recommended. It helps the garlic cloves caramelize, prevents them from drying out, and infuses them with a lovely fruity note that complements the garlic’s sweetness.
- Salt & Pepper (Optional): A pinch of flaky sea salt and freshly cracked black pepper can further enhance the flavor. While optional, a light seasoning can bring out the best in the roasted cloves.
Tools:
- Sharp Knife: Essential for cleanly trimming the top off the garlic bulb.
- Aluminum Foil: Crucial for creating a protective pouch. This pouch steams the garlic while it roasts, ensuring tenderness and preventing burning. Heavy-duty foil works best.
- Small Baking Sheet or Oven-Safe Dish: To hold the foil-wrapped garlic in the oven and catch any potential drips.
- Small Bowl (Optional): Useful for mashing the cloves after roasting into a smooth paste.
How To Roast Garlic In The Oven: A Simple Step-by-Step Guide
Roasting garlic in the oven is remarkably straightforward and yields consistently delicious results. Follow these steps to create your own batch of this flavorful ingredient, a perfect addition to countless recipes:
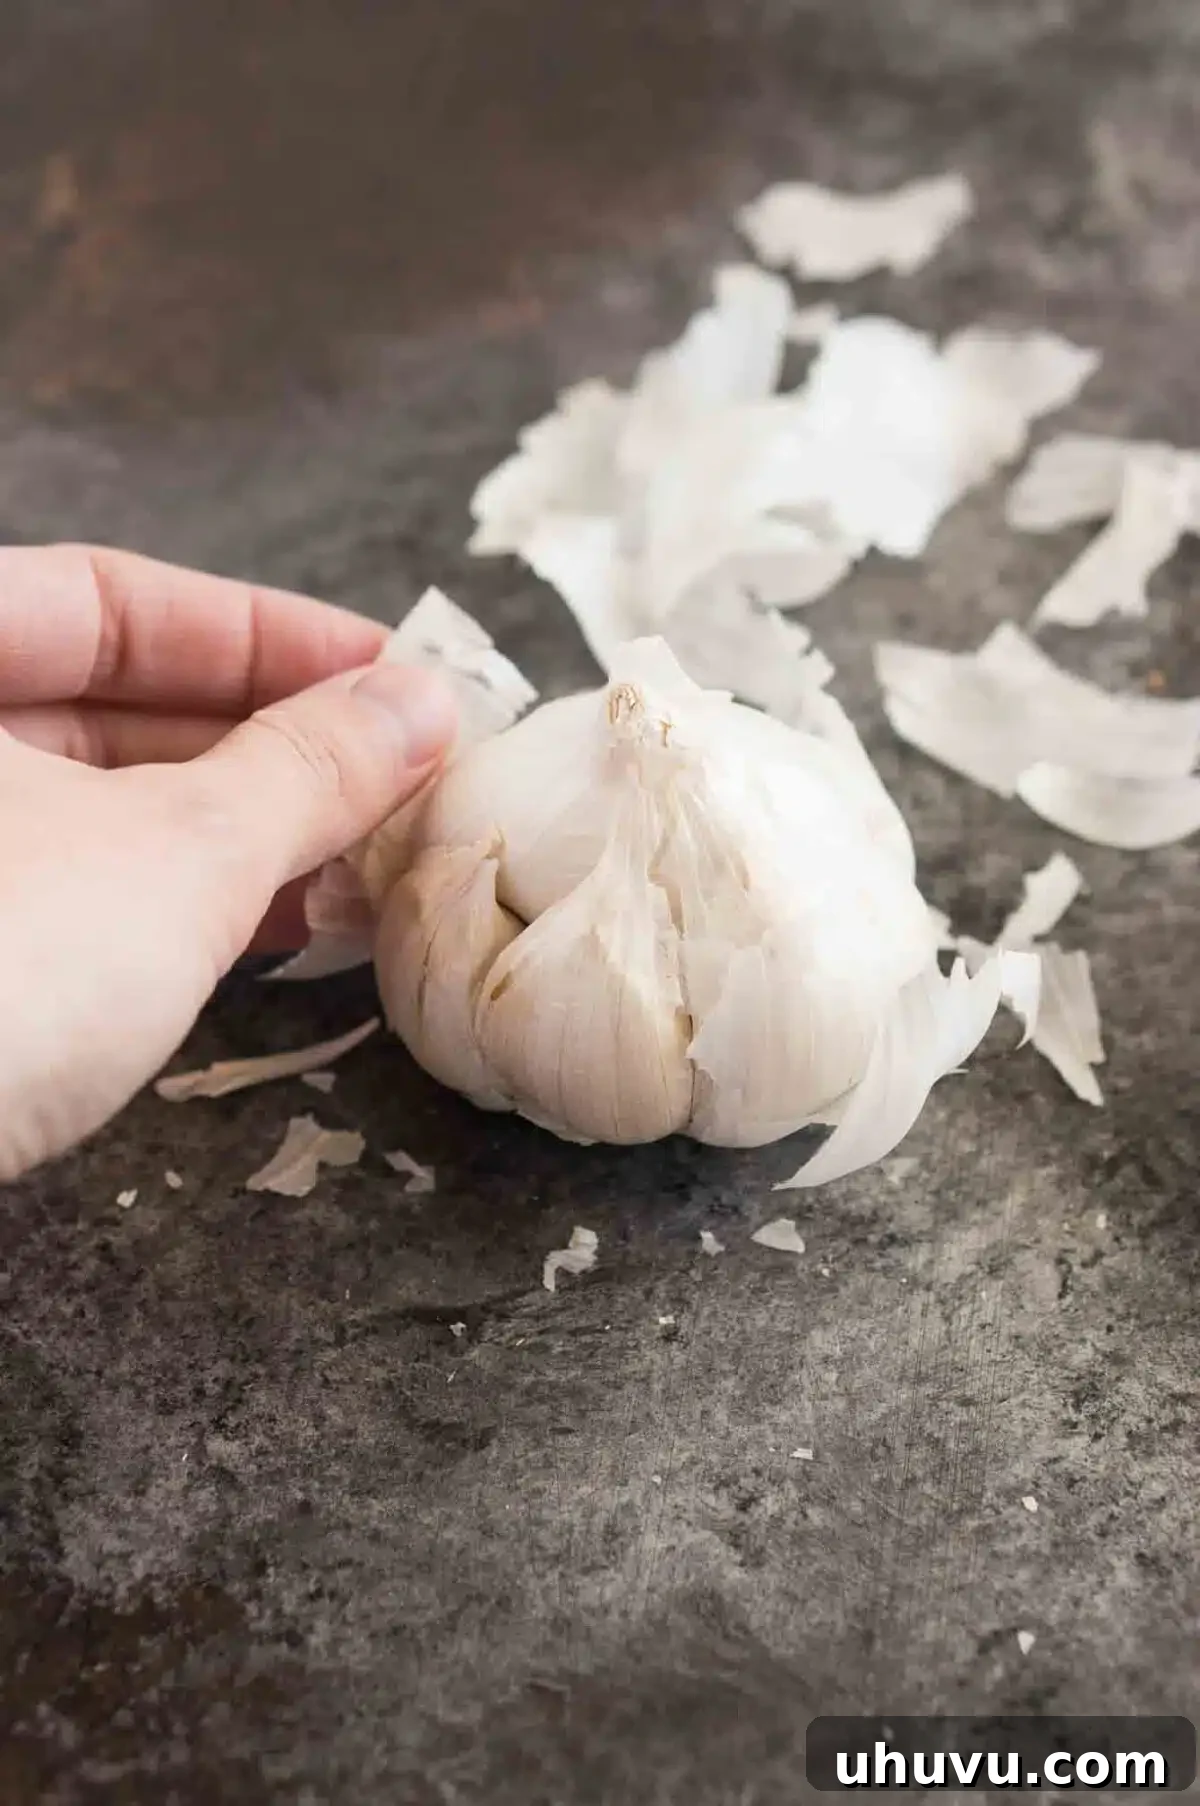
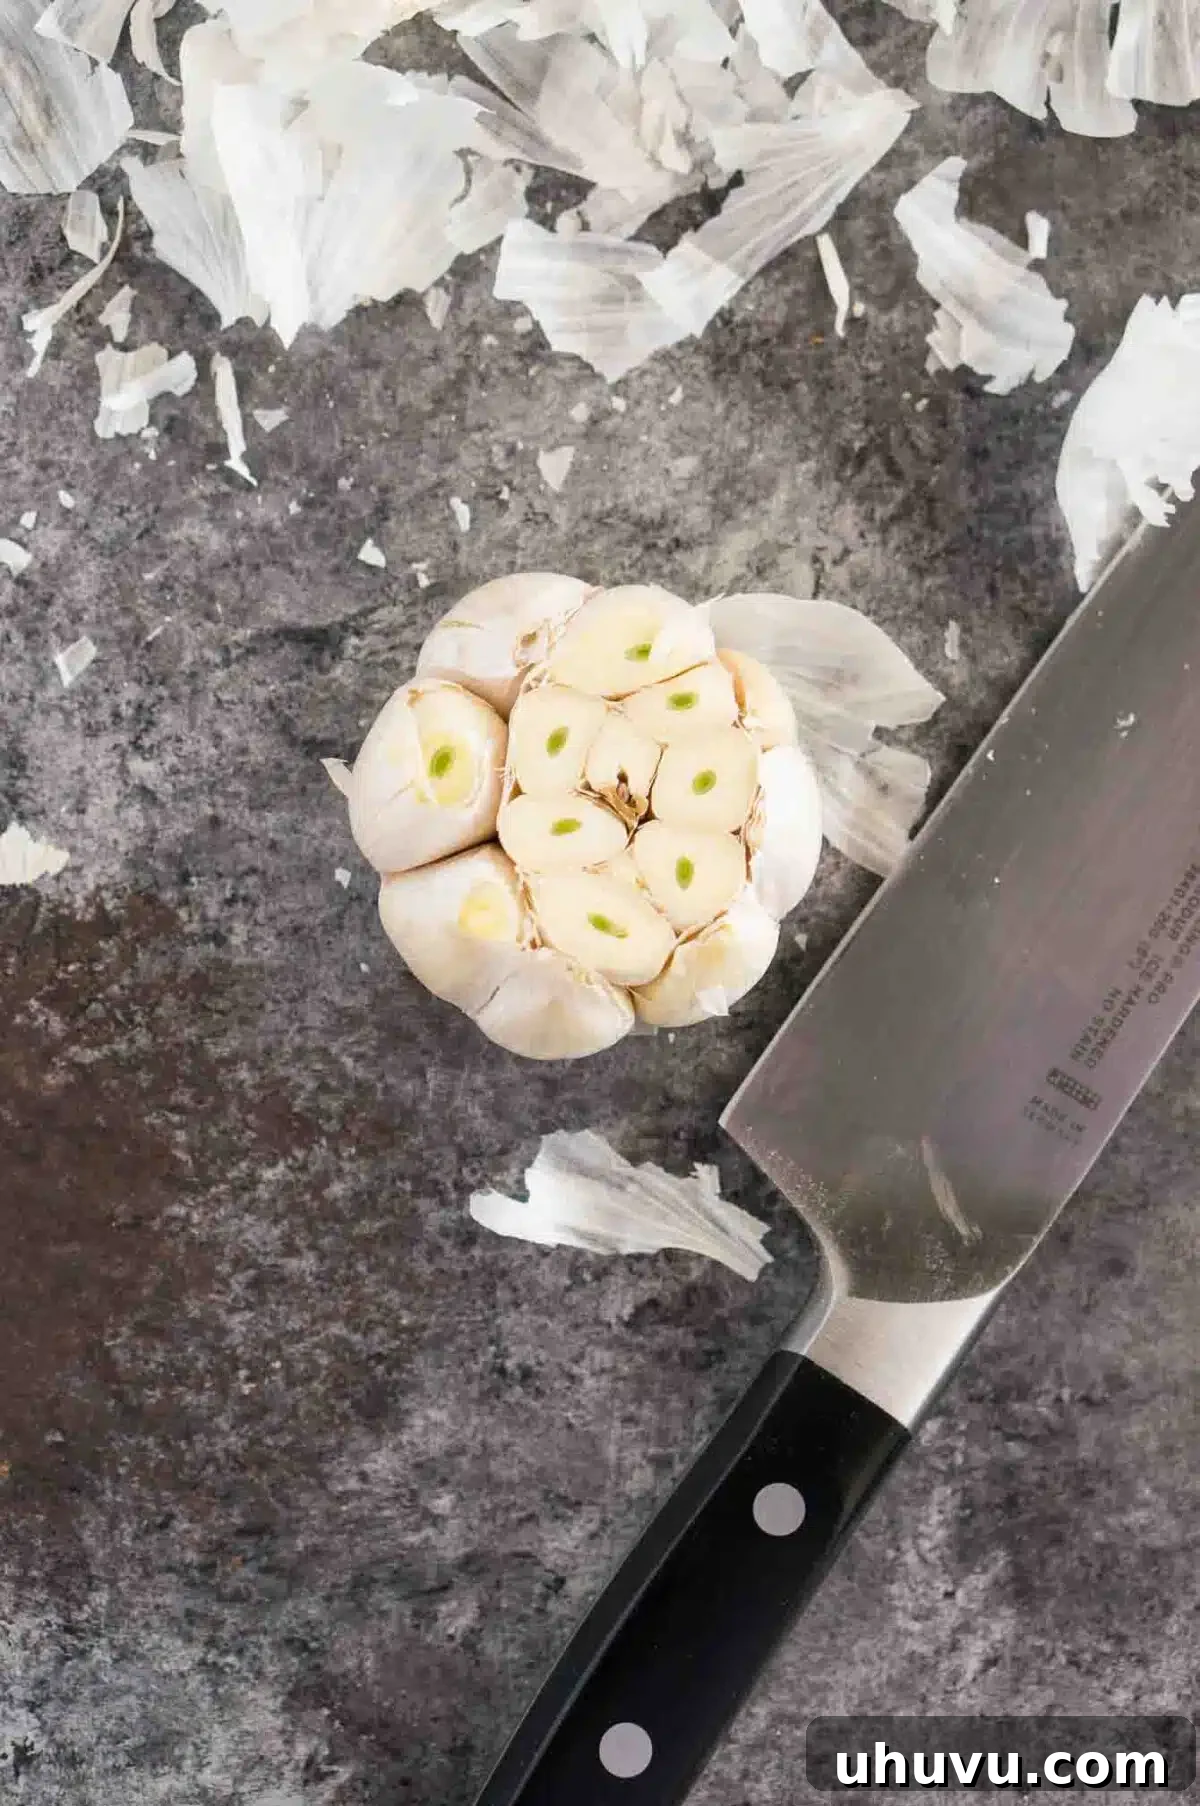
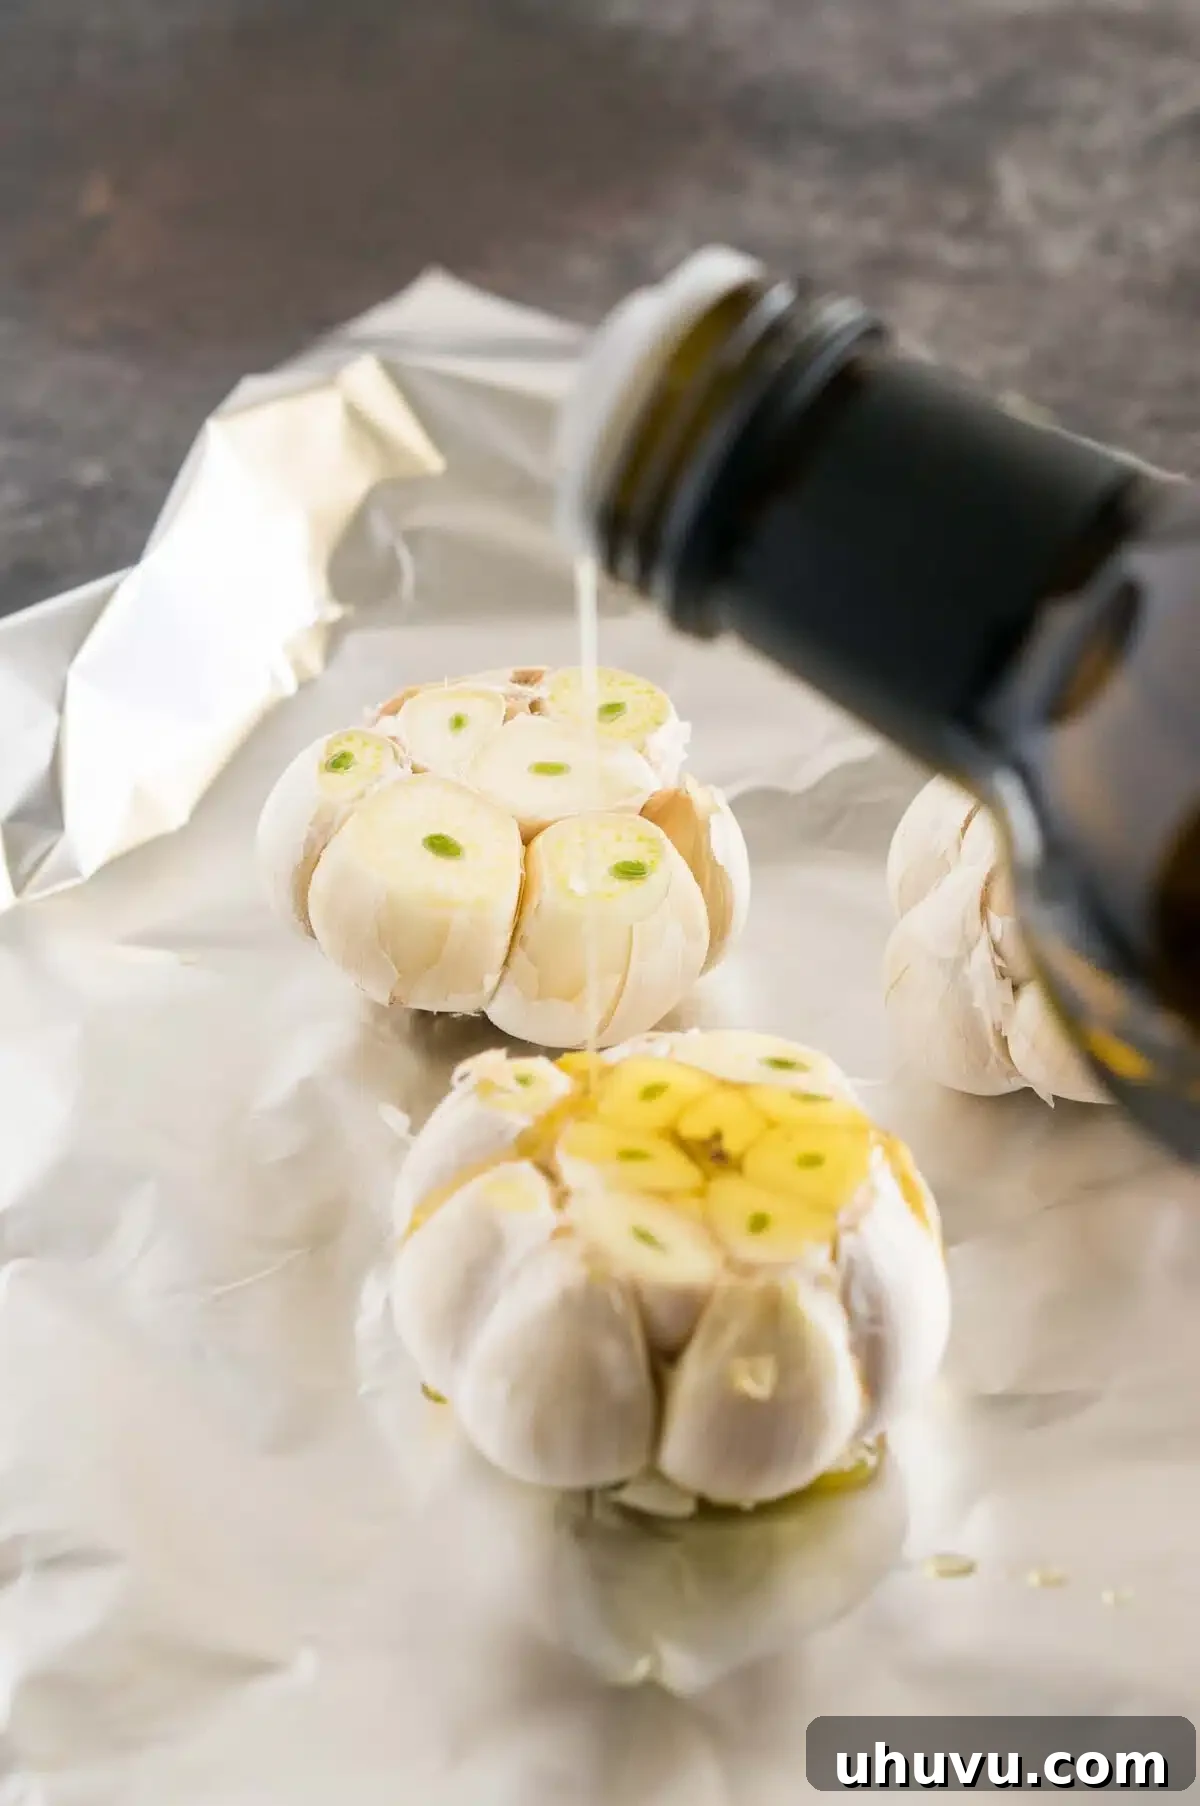
- Prepare the Garlic Bulb: Start by preheating your oven to 400°F (200°C). Then, take a whole garlic bulb and peel away only the outermost papery layers of skin. You want to leave the individual clove skins mostly intact. With a sharp knife, carefully cut about a quarter to half-inch off the very top of the garlic bulb. This crucial step exposes the tips of the individual cloves, allowing the olive oil and heat to penetrate them more effectively for even cooking.
- Season with Olive Oil: Place the trimmed garlic bulb(s) onto a square of aluminum foil that is large enough to create a secure pouch around it. Drizzle approximately one tablespoon of olive oil generously over the exposed cloves of each bulb. Ensure the oil seeps down into the bulb, coating each clove thoroughly. At this point, you can add a light sprinkle of salt and freshly cracked black pepper if desired, enhancing the flavor as it roasts.
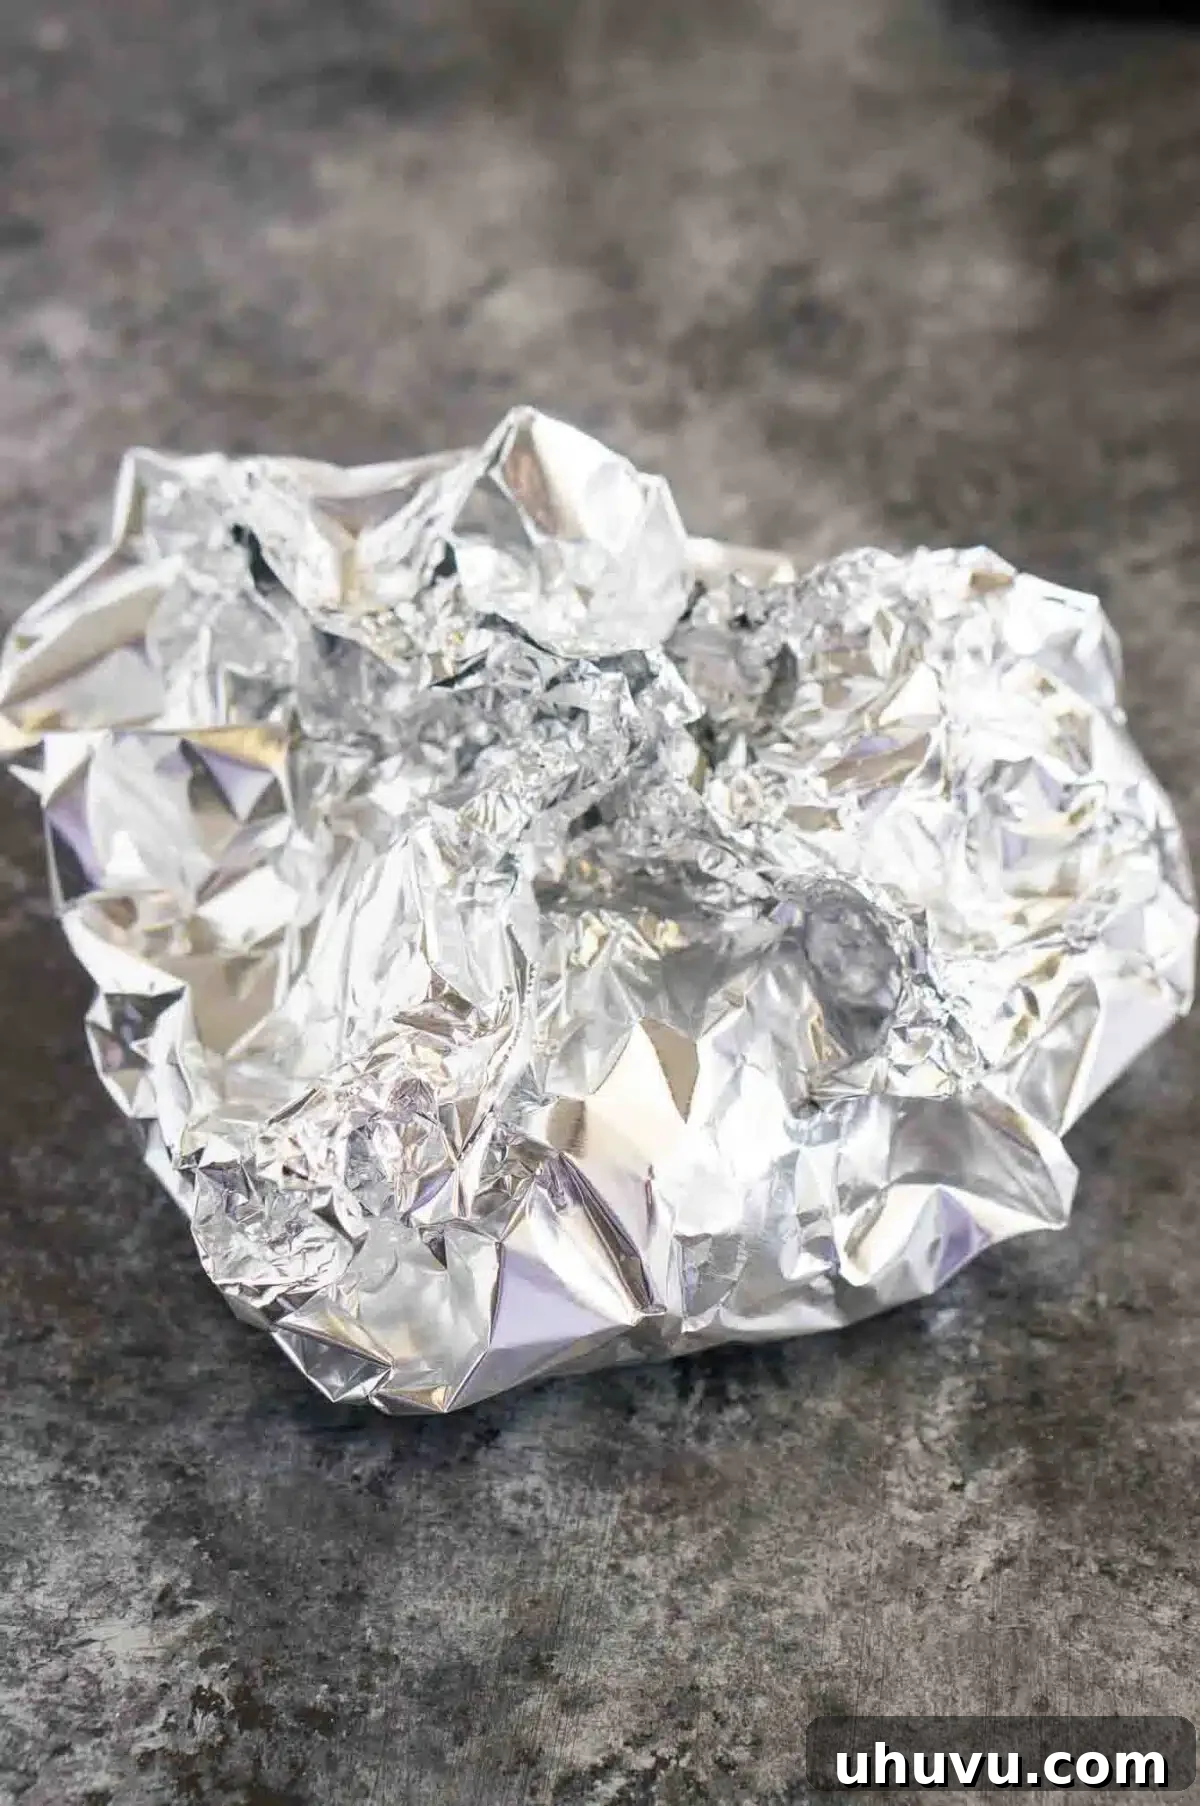
- Create a Foil Pouch: Carefully bring the edges of the aluminum foil up and over the garlic bulb, sealing them tightly at the top and sides to form a secure, almost airtight pouch. This enclosure is vital; it traps steam and moisture, ensuring the garlic cloves become incredibly soft, tender, and beautifully caramelized rather than dry and crunchy.
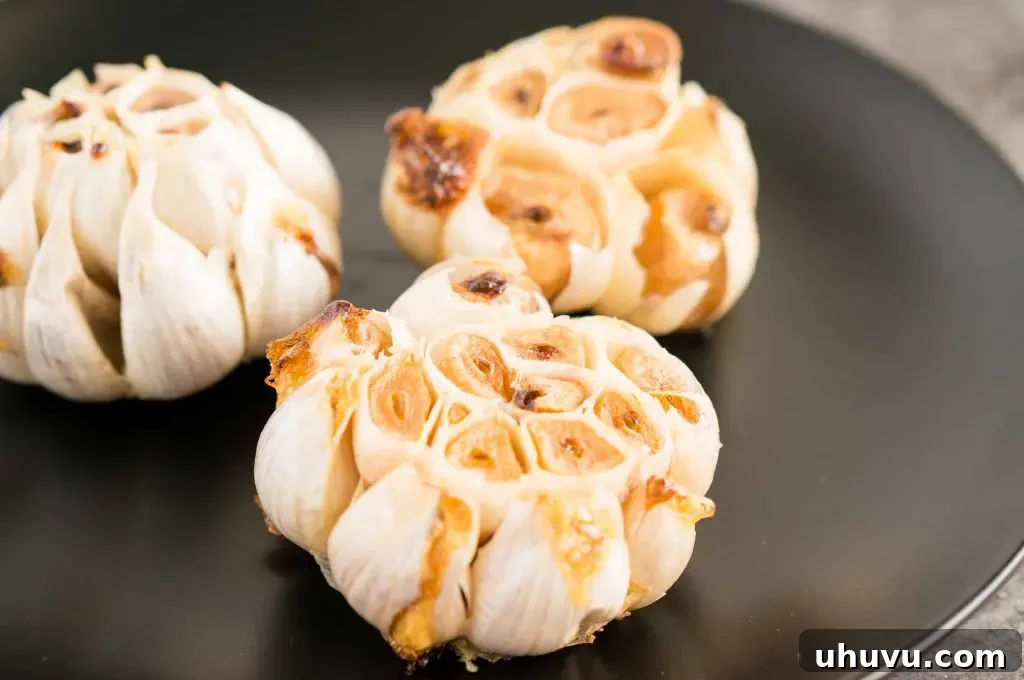
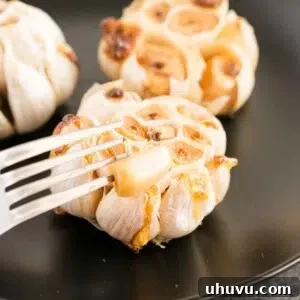
- Roast to Perfection: Place the foil-wrapped garlic pouch onto a small baking sheet (this helps catch any oil that might escape and makes transferring easier). Transfer it to your preheated oven. Roast for approximately 40-50 minutes. The exact time can vary depending on the size and freshness of your garlic bulbs. You’ll know it’s perfectly done when the cloves are incredibly soft (test by gently pressing through the foil), deeply golden brown, and easily squeezed out of their skins. They should also smell wonderfully sweet and fragrant, filling your kitchen with an enticing aroma.
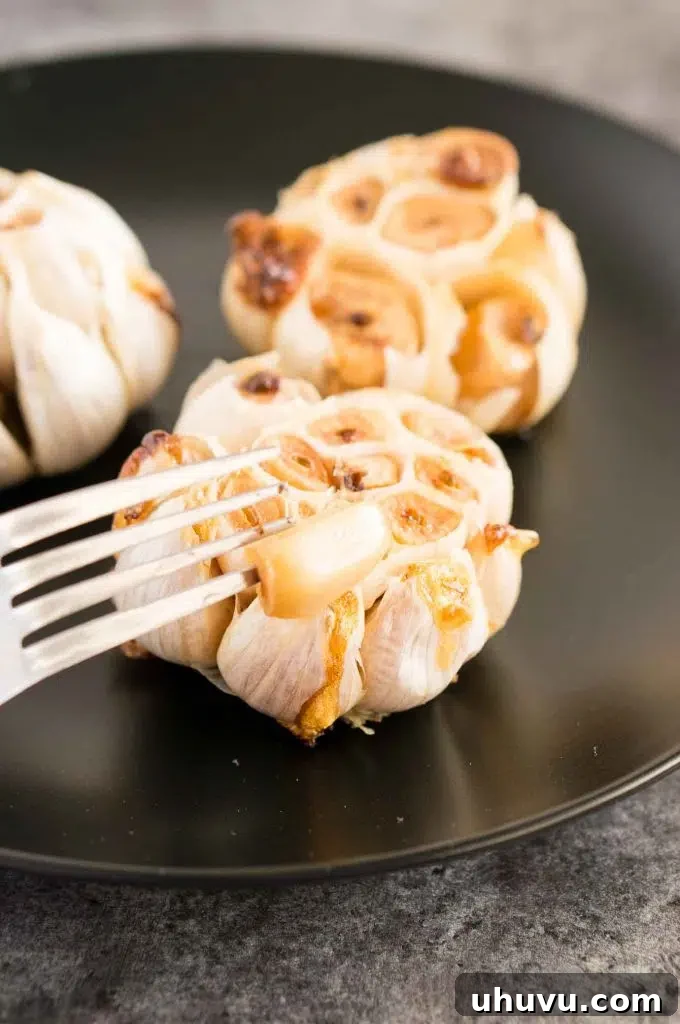
- Cool and Extract: Once roasted, carefully remove the garlic from the oven. Let the foil pouch cool down on the baking sheet for at least 10-15 minutes until it’s comfortable enough to handle. To extract the roasted cloves, simply hold the bulb at the bottom and gently squeeze the soft, caramelized cloves will pop right out of their skins. You can mash them with a fork for a smooth paste to use in recipes, or use them whole, enjoying their tender texture.
Tips for the Best Roasted Garlic
Achieving consistently perfect roasted garlic is easy with a few simple considerations. These tips will help you maximize flavor and ensure a buttery-soft texture every time:
- Choose Fresh, Quality Garlic: The fresher the garlic, the better the flavor and texture of your roasted product. Avoid bulbs that are soft, shriveled, or have green sprouts, as these indicate older garlic that may be bitter or dry.
- Don’t Skimp on Olive Oil: Olive oil is key to the caramelization and tender texture. It acts as a conductor for heat and prevents the garlic from drying out, infusing it with additional richness. Use good quality olive oil for the best results.
- Ensure a Tight Foil Pouch: The foil wrapper acts like a miniature oven, steaming the garlic to perfection while also protecting it from direct high heat that could cause burning. A loose seal can lead to dry or tough cloves, so make sure it’s snug.
- Monitor for Doneness: While 40-50 minutes is a good guideline, ovens vary. Keep an eye on the garlic. It should be deeply golden and easily squeezed from its skin. If it’s too pale, roast for a bit longer; if it’s getting too dark too quickly, your oven might be running hot, or the foil wasn’t sealed well. Trust your senses – the aroma will be sweet and earthy.
- Cool Slightly Before Handling: Freshly roasted garlic is extremely hot. Allow it to cool for at least 10-15 minutes before handling to avoid burns and to make the extraction of the soft cloves much easier.
- Experiment with Seasonings: While simple olive oil, salt, and pepper are classic, feel free to add other herbs (like a sprig of rosemary or thyme) or spices (a pinch of smoked paprika) to the top of the garlic before wrapping it in foil for an infused flavor.
Alternative Roasted Garlic Methods
While oven roasting whole bulbs is the classic and highly recommended method for making roasted garlic, there are a couple of alternatives if you’re short on time or prefer using other kitchen appliances. The results may vary slightly in depth of flavor and texture compared to traditional oven roasting, but they still produce delicious roasted garlic:
Air Fryer Roasted Garlic
For a quicker method that still delivers a lovely tender result, your air fryer can be a great option. Prepare the garlic bulb(s) as described above (remove outer papery layers, cut tops, drizzle generously with olive oil, and season). Wrap each bulb tightly in aluminum foil to create a sealed pouch. Place the foil pouch(es) directly into the air fryer basket. Cook at 350°F (175°C) for 20-30 minutes, or until the cloves are very soft and fragrant when squeezed. The exact cooking time will depend on the size of the garlic bulb and your specific air fryer model, so check for doneness around the 20-minute mark.
Stovetop Roasted Garlic (Cast Iron Skillet)
This method is less common for whole bulbs but can work in a pinch if an oven is unavailable. Prepare garlic bulbs as usual by cutting the tops and drizzling with olive oil. Wrap them tightly in aluminum foil. Heat a heavy-bottomed cast iron skillet (or similar heavy pan) over medium-low heat. Place the foil-wrapped garlic bulbs in the skillet, cover with a tight-fitting lid, and cook for approximately 45-60 minutes. Turn the pouches occasionally to ensure even cooking. This method requires more attention to prevent burning and may not yield the same deep caramelization as oven roasting, but it will still soften the garlic beautifully.
Storage and Preservation of Roasted Garlic
Once you’ve mastered how to roast garlic, proper storage is key to enjoying your flavorful creation safely and for as long as possible. Here’s how to store it effectively:
Refrigeration:
You can keep roasted garlic (either whole cloves or mashed into a paste) in an airtight container in the fridge for about a week. It’s crucial to store the plain roasted garlic without submerging it in oil at room temperature, as this can create an anaerobic environment where *Clostridium botulinum* bacteria can thrive. If you prefer to store it covered in oil, ensure the oil is fresh, the garlic is completely submerged, and it is refrigerated immediately. Consume garlic stored in oil in the refrigerator within 3-4 days to minimize any potential botulism risk. For maximum safety and extended shelf life, storing plain roasted garlic and adding oil just before use is highly recommended.
Freezing:
For longer-term storage, roasted garlic freezes beautifully and retains its flavor and texture remarkably well. This is an excellent way to have it on hand for months:
- Individual Cloves: Once cooled, carefully squeeze out the whole roasted cloves from their skins. Place them in a single layer on a parchment-lined baking sheet and freeze until solid (this prevents them from sticking together). Once frozen, transfer the individual cloves to a freezer-safe bag or airtight container.
- Mashed Garlic: Mash the roasted garlic into a smooth paste. You can then spoon portions into ice cube trays, creating convenient, single-use servings. Freeze until solid, then pop the frozen garlic cubes out and transfer them to a freezer-safe bag or container.
- In Olive Oil (Frozen): For an extra layer of flavor and easier thawing when ready to use, you can cover mashed or whole roasted garlic cloves with olive oil in ice cube trays before freezing. Once frozen, pop them out and store them in freezer bags. These “garlic oil bombs” are perfect for tossing into hot pasta, sautéing vegetables, or starting a sauce.
Frozen roasted garlic can last for several months in the freezer (up to 3-6 months) without significant loss of flavor or texture, making it a fantastic ingredient to meal prep in advance.
Creative Ways To Use Roasted Garlic: Elevate Your Meals
The culinary possibilities with roasted garlic are virtually endless. Its sweet, mellow flavor and creamy texture make it an incredibly versatile ingredient that can enhance both simple and sophisticated dishes. Once you have a batch of this golden goodness, you’ll find yourself reaching for it constantly. Here are some favorite and inspiring ways to incorporate this delicious ingredient into your cooking:
- Garlic Bread & Spreads: The most classic use! Simply mash the roasted cloves and spread them generously onto warm crusty bread, a toasted baguette, or even crackers. Season with a sprinkle of salt, pepper, fresh herbs like parsley or chives, or a dash of red pepper flakes for a delightful appetizer.
- Dips & Spreads:
- Hummus & Baba Ghanoush: Blend roasted garlic into homemade or store-bought hummus or baba ghanoush for an extra layer of savory depth and a milder garlic flavor.
- Cream Cheese or Ricotta: Mix mashed roasted garlic with softened cream cheese or ricotta for a gourmet bagel spread, a savory dip for vegetables and chips, or a stuffing for pasta shells.
- White Bean Dip: Combine with cannellini beans, lemon juice, olive oil, and herbs for a healthy and flavorful dip that’s perfect for entertaining.
- Soups & Stews: Stir mashed roasted garlic into your favorite soups, chili, or stews. It adds a subtle sweetness and body, especially to creamy vegetable soups, hearty lentil stews, or even a simple chicken noodle soup.
- Potatoes & Vegetables:
- Mashed Potatoes: Fold generous amounts of mashed roasted garlic into creamy mashed potatoes for an aromatic and incredibly flavorful side dish that will impress everyone.
- Roasted Vegetables: Toss whole roasted cloves with other roasted vegetables like Brussels sprouts, asparagus, carrots, or broccoli for an extra burst of caramelized flavor.
- Scalloped Potatoes: Layer thin slices of roasted garlic into cheesy scalloped potato dishes for an added dimension of savory sweetness.
- Sauces & Dressings:
- Pasta Sauces: Incorporate roasted garlic into tomato-based pasta sauces, creamy Alfredo, or simple olive oil and garlic (aglio e olio) sauces. It creates a richer, more complex flavor than raw garlic.
- Vinaigrettes: Whisk mashed roasted garlic into your homemade salad dressings for a savory, aromatic twist that elevates any green salad.
- Pesto: Substitute some or all of the raw garlic in pesto recipes with roasted garlic for a milder, sweeter version with a nuanced flavor.
- Marinades & Rubs: Blend mashed roasted garlic into marinades for chicken, beef, lamb, or fish. It tenderizes and infuses the meat with a gentle garlic flavor that caramelizes beautifully when cooked on the grill or in the oven.
- Compound Butter: Mash roasted garlic into softened butter along with fresh herbs (like rosemary, thyme, or chives) to create a luxurious compound butter. This is excellent melted over steaks, grilled corn on the cob, baked potatoes, or simply spread on crusty bread.
- Sandwiches & Wraps: Spread a thin layer of mashed roasted garlic on your sandwich bread, burger buns, or tortillas for an instant flavor upgrade. It pairs wonderfully with deli meats, roasted vegetables, or grilled cheese sandwiches.
From simple snacks to elaborate main courses, roasted garlic is a secret weapon in the kitchen, offering a delightful twist on a classic ingredient. Its versatility makes it truly perfect for just about anything.
If you enjoyed this Roasted Garlic recipe or found our tips helpful, please consider leaving a ⭐ star rating and let us know how it went in the 📝 comments below. Your feedback is greatly appreciated, and we love hearing from you!
Pin this now to find it later
Pin It
★★★★★
Rate this recipe!
Roasted Garlic Recipe
Neli Howard
5
40-50
45-55
1 bulb
Ingredients
- 1 garlic bulb
- 2 Tablespoons olive oil
- Pinch Salt & Pepper (optional, to taste)
Instructions
-
Preheat your oven to 400°F (200°C). Remove the outermost papery layers of skin from the garlic bulb, leaving the cloves mostly intact within their individual skins. Using a sharp knife, cut about ¼ to ½ inch off the very top of the garlic bulb to expose the cloves.
-
Place the trimmed garlic bulb on a square of aluminum foil that is large enough to create a pouch. Drizzle the exposed cloves generously with olive oil, ensuring it seeps down into the bulb. Add a pinch of salt and freshly ground black pepper at this stage if desired.
-
Bring the edges of the aluminum foil up and over the garlic bulb, sealing them tightly to form a secure pouch. This helps to trap steam and moisture, making the garlic tender.
-
Place the foil pouch on a small baking sheet and roast in the preheated oven for 40-50 minutes, or until the cloves are very soft, deeply golden brown, and easily squeezed from their skins. The aroma should be sweet and fragrant.
-
Remove from the oven and let the foil pouch cool for 10-15 minutes until it’s comfortable to handle. Once cooled, hold the bulb and gently squeeze the bottom to extract the softened garlic cloves. You can mash them with a fork for a smooth paste, or use them whole in your recipes.
Nutrition
Carbohydrates: 1g |
Protein: 1g |
Fat: 28g |
Saturated Fat: 4g |
Sodium: 1mg |
Sugar: 1g |
Vitamin C: 1mg
Nutrition Disclaimer: Nutritional values are estimates and may vary with ingredients, brands, and portion sizes. For accuracy, use your preferred nutrition calculator.
Love this recipe? Share your thoughts below!