

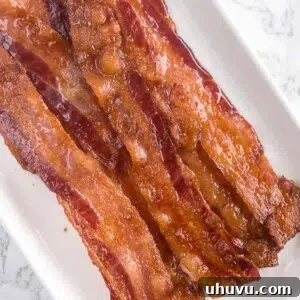
Unlock the secret to flawlessly crispy, mess-free bacon with this ultimate oven-baking guide. Say goodbye to greasy stovetop splatters and unevenly cooked strips; get perfect, golden results every single time – no flipping, no fuss!
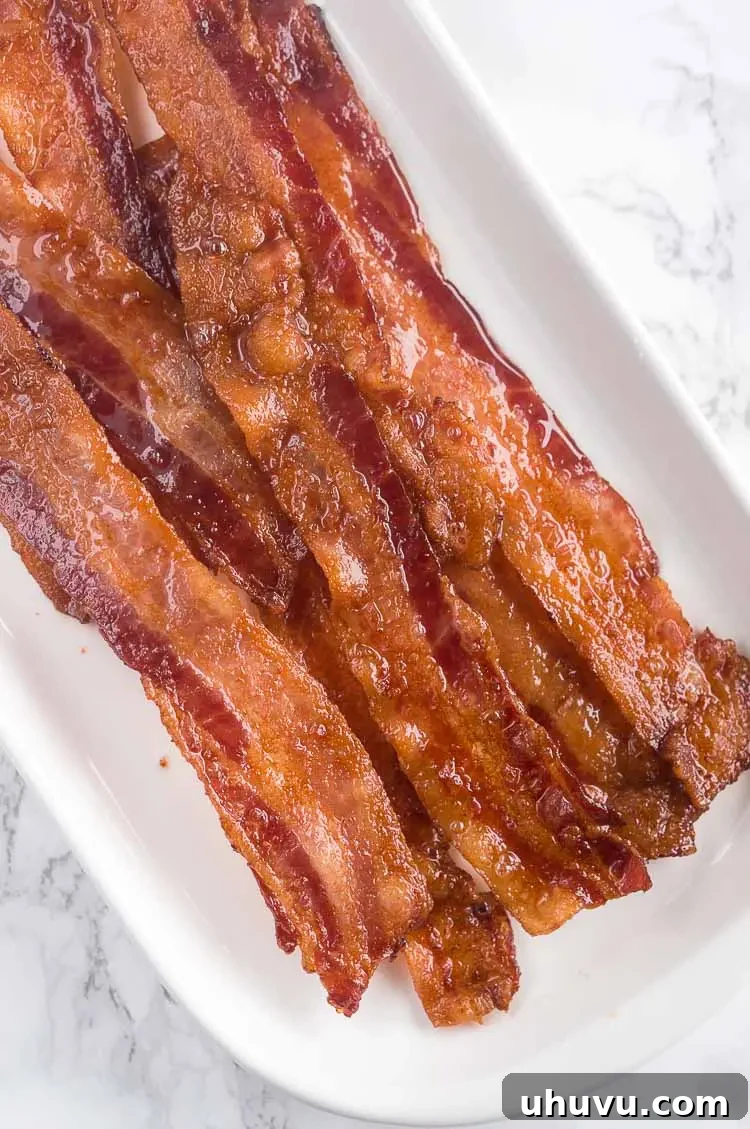
If you’re tired of the constant flipping, grease splatters, and inconsistent results that come with pan-frying bacon, then you’re in the right place. This article will revolutionize your bacon-cooking experience, guiding you through simple yet foolproof steps to achieve perfectly crispy bacon in the oven. Once you try this method, you’ll be convinced that baking bacon is not only significantly easier but also yields a superior, more evenly cooked product compared to the traditional stovetop approach.
Below, I’ll share all my top recipe tips for achieving the best oven-baked bacon, including the ideal temperature and precise cooking times for different bacon thicknesses. Don’t miss the invaluable advice at the end for storing your cooked bacon and, just as importantly, how to properly save and utilize that precious bacon fat, a flavor enhancer for countless dishes.
Why Oven-Baked Bacon is a Game Changer
Switching to the oven for your bacon isn’t just a minor tweak; it’s a fundamental upgrade to your cooking routine. Here’s why this method will quickly become your favorite:
- Unmatched Evenness and Texture: One of the biggest challenges with stovetop bacon is achieving uniform crispiness. The oven method solves this by providing consistent, ambient heat from all directions. This means your bacon cooks perfectly from edge to edge, rendering the fat slowly and evenly, resulting in an irresistibly golden and uniformly crispy texture every single time, without the burnt edges or undercooked centers often found in pan-fried bacon.
- Effortless and Time-Saving for Batch Cooking: Imagine cooking a large batch of bacon without hovering over a hot pan. Oven-baking makes this a reality. You can easily cook up to 24 strips on two baking sheets simultaneously in just 15-20 minutes, freeing you up to prepare other breakfast components like fried eggs, hard-boiled eggs, a fluffy omelet, or a stack of healthy pancakes. It’s the ultimate multitasking solution for busy mornings or meal prepping.
- Zero Splatter, Maximum Cleanliness: The notorious grease splatter associated with pan-frying bacon is entirely eliminated with the oven method. The bacon sizzles quietly within the confines of your oven, and any grease is neatly contained by the foil lining your baking sheet. This means no more wiping down your stovetop, countertops, or backsplash after breakfast – a truly mess-free experience!
- Simple and Speedy Cleanup: Cleanup is arguably the most dreaded part of cooking bacon. With this method, it becomes incredibly simple. By lining your baking sheet with heavy-duty aluminum foil or parchment paper, ensuring it goes up the sides, you create a barrier that catches all the rendered bacon grease. Once cooled, you can easily pour the drippings into a container for storage, then simply crumple up and toss the foil. Your baking pan remains virtually pristine, making dishwashing a breeze. For truly minimal mess, consider using heavy-duty aluminum foil.
How to Cook Bacon in the Oven: A Step-by-Step Guide
Achieving perfectly crispy bacon in the oven is incredibly straightforward. Follow these three simple steps for consistent, delicious results:
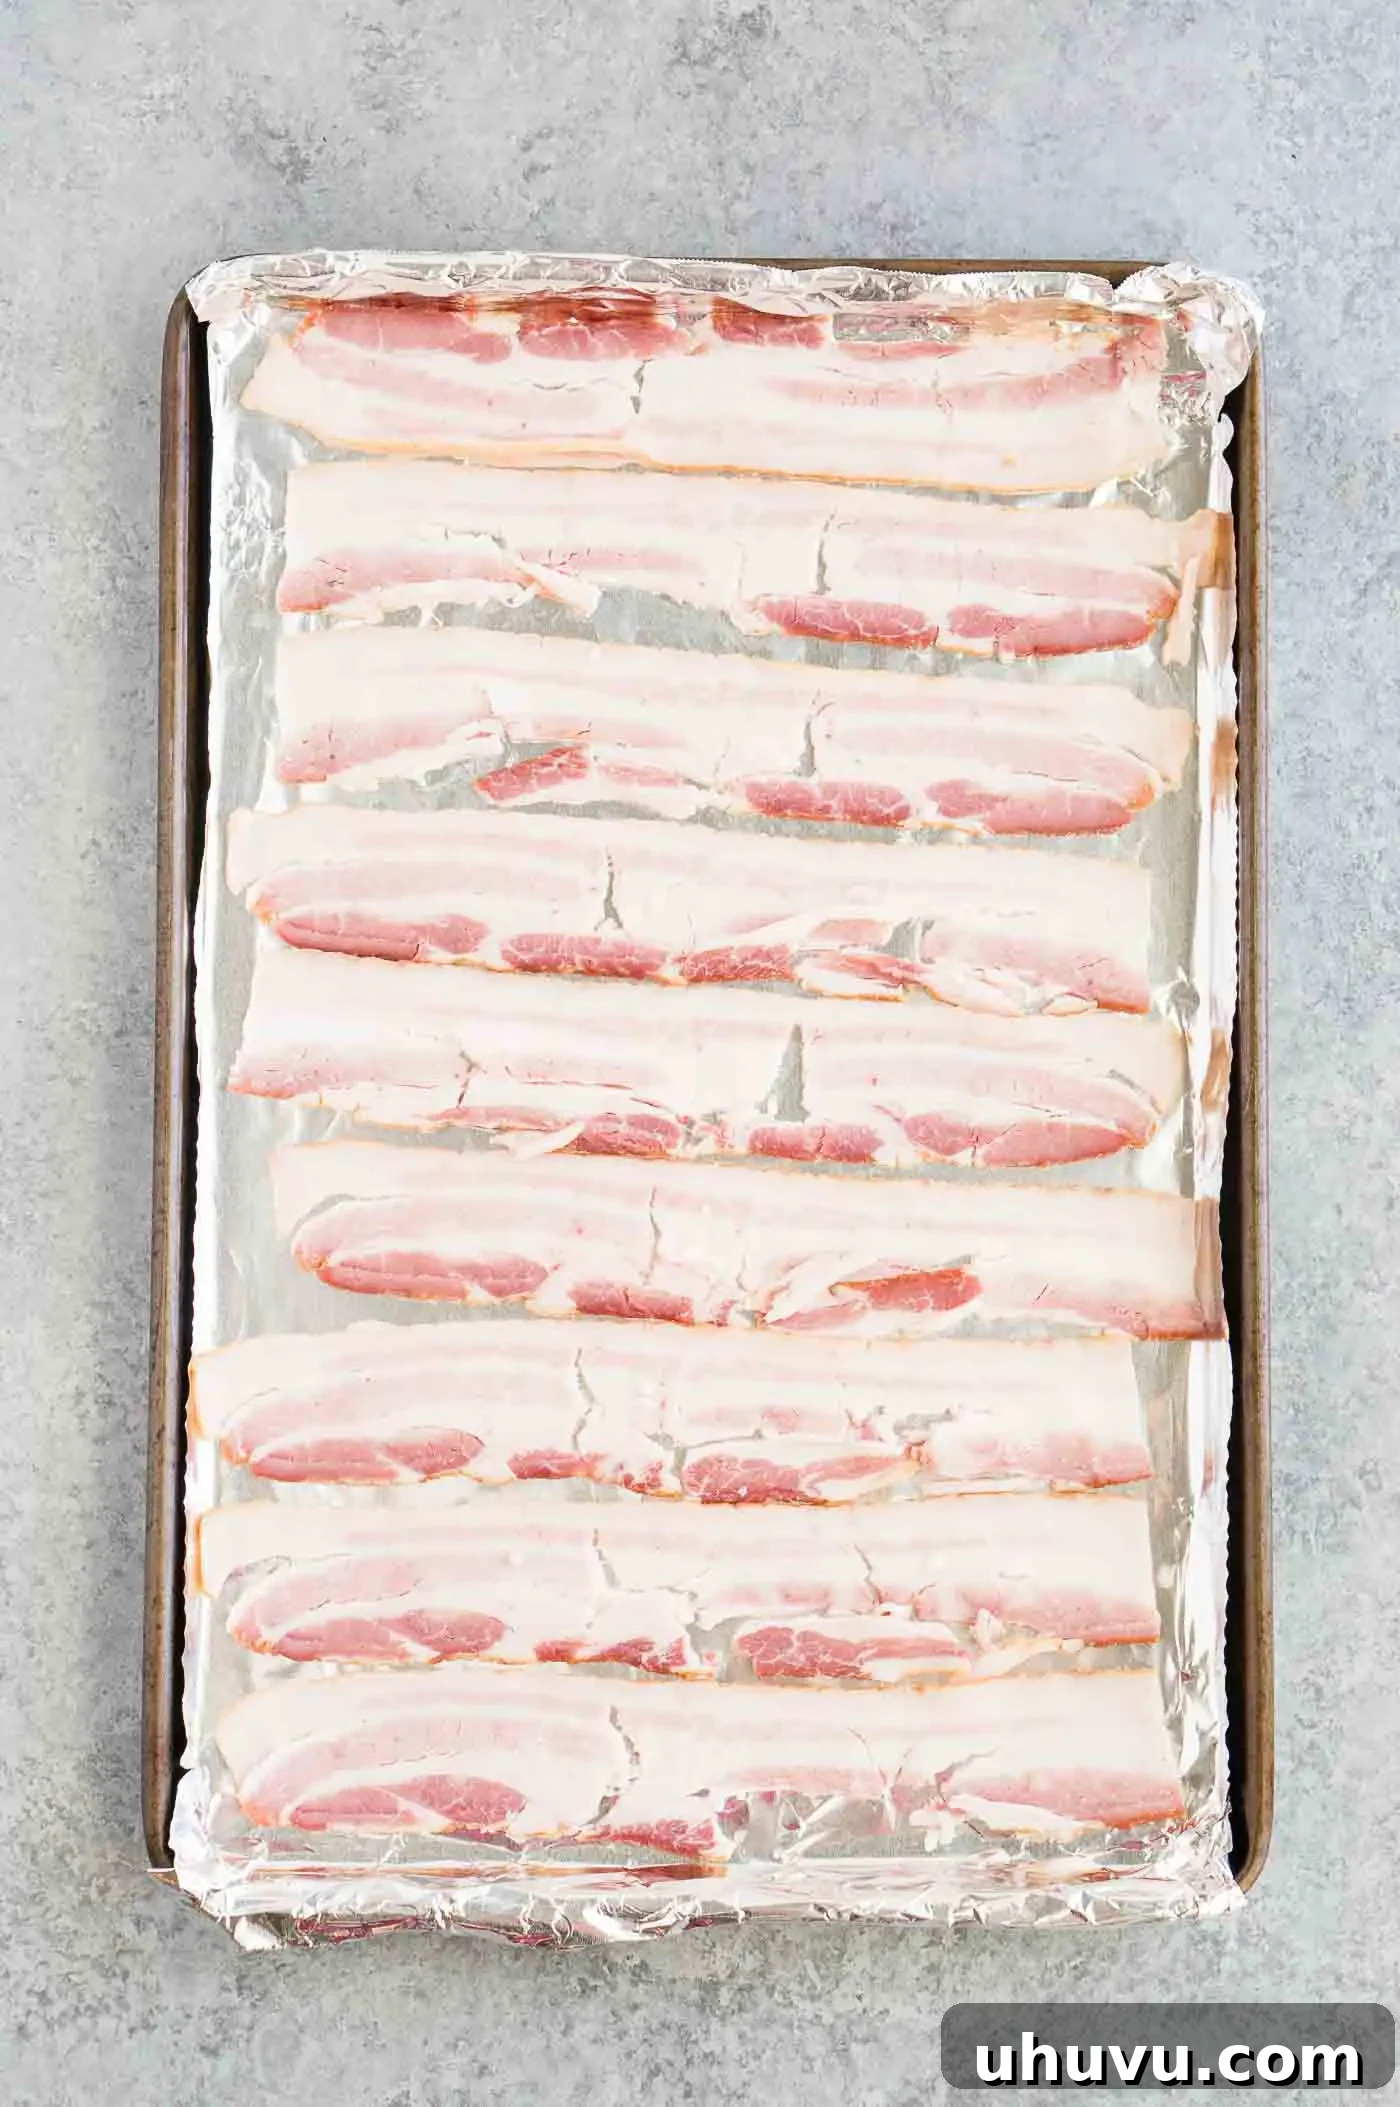
- Prepare Your Oven and Pan: Begin by preheating your oven to 400°F (200°C). While the oven heats up, take a large, rimmed baking sheet – the “rimmed” part is crucial as it will contain the rendered bacon fat. Line the baking sheet completely with heavy-duty aluminum foil or parchment paper, ensuring the lining extends up the sides of the pan. This step is key for easy cleanup.
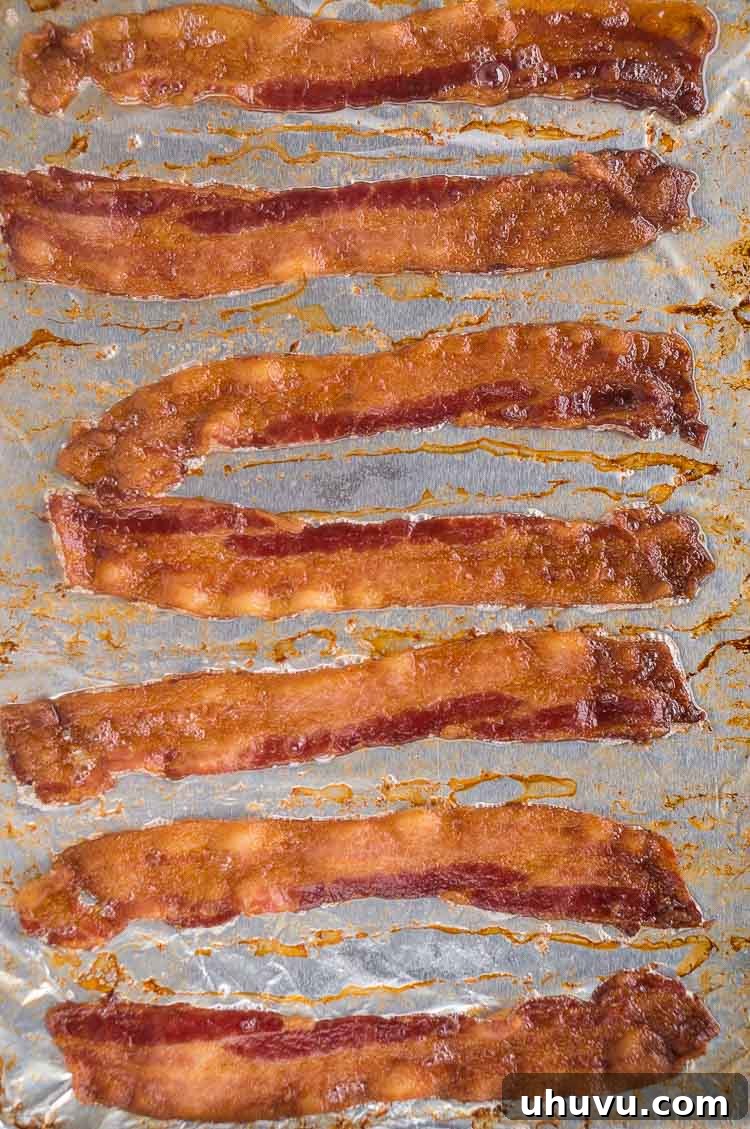
- Arrange and Bake the Bacon: Lay your bacon strips in a single layer on the prepared baking sheet. It’s okay if the strips are close together, as they will shrink significantly during cooking. However, avoid overlapping them, as this can lead to uneven cooking and less crispiness. Place the baking sheet in the preheated oven and bake until the bacon reaches your desired level of crispiness. This usually takes about 15 to 20 minutes, depending on the thickness of your bacon. Thinner cuts will cook faster, while thick-cut bacon will require closer to 20-25 minutes. Keep an eye on it, especially towards the end, as bacon can go from perfectly crisp to burnt very quickly.
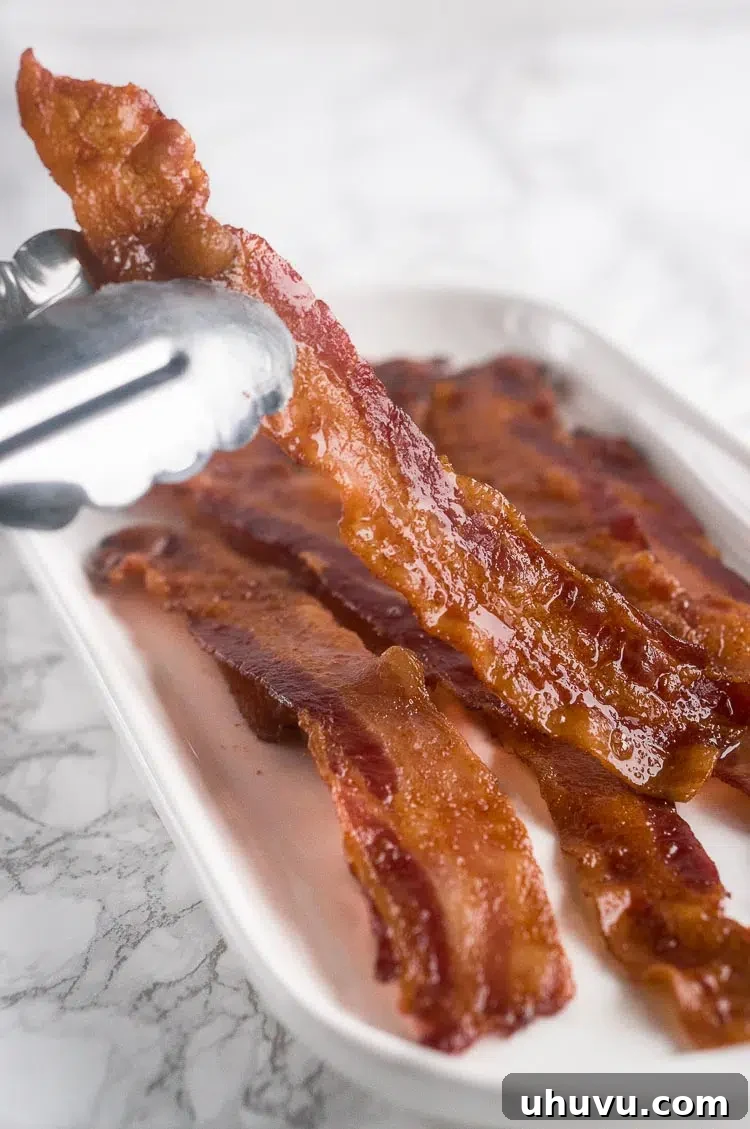
- Drain and Serve (or Store): Once the bacon is golden brown and crispy, carefully remove the baking sheet from the oven. Using tongs, transfer the cooked bacon slices to a plate lined with paper towels to drain any excess grease. This brief draining period helps ensure maximum crispness. Serve your delicious oven-baked bacon immediately, or allow it to cool completely before storing it in an airtight container in the refrigerator for up to a week, or in a freezer-safe ziplock bag for longer-term storage.
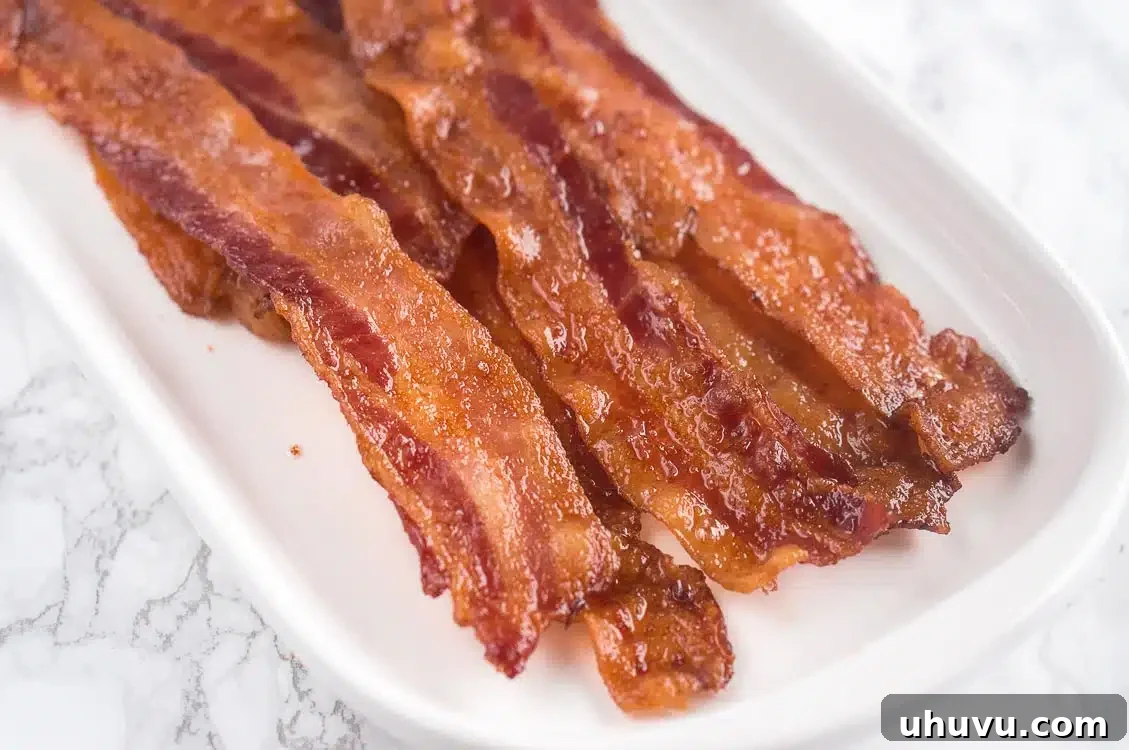
TIPS FROM NELI’S KITCHEN
Expert Tips for Perfectly Oven-Cooked Bacon
- Choose the Right Baking Sheet: Always use a large, rimmed baking sheet. The rim is crucial for containing the bacon fat as it renders, preventing it from overflowing and making a mess in your oven. A larger sheet also allows for proper spacing of bacon strips.
- Don’t Skip the Foil Lining: Lining your baking sheet with heavy-duty aluminum foil is the ultimate hack for effortless cleanup. Ensure the foil extends up the sides of the pan to create a basin for the grease. This simple step turns cleanup from a chore into a quick task.
- Stick to 400°F for Optimal Crispness: While some recipes suggest lower temperatures, I’ve found that 400°F (200°C) is the sweet spot for achieving consistently crispy bacon without burning. This temperature allows the fat to render gradually, resulting in beautifully golden and crisp slices. Cooking times will vary between 15 and 25 minutes based on bacon thickness.
- No Rack? No Problem!: Contrary to popular belief, a wire baking rack isn’t necessary for crispy oven bacon. I’ve experimented extensively, cooking bacon both with and without a rack, and found no significant difference in crispiness. In fact, using a rack can prolong cooking time and make cleanup more cumbersome. Save yourself the extra dishwashing!
- The Ultimate Hands-Off Method: One of the greatest advantages of oven-baking is the complete lack of fuss. There’s no need to flip the bacon or constantly monitor it. Simply place the baking sheet in the oven, set your timer, and let the heat do its magic. This truly is a “set it and forget it” recipe.
- Achieving Desired Crispiness: Bacon thickness is the primary determinant of cooking time. Thin-cut bacon typically takes 15-18 minutes, medium-cut around 18-22 minutes, and thick-cut bacon can require 22-25 minutes or slightly longer. Always adjust based on your preference – cook a minute or two longer for extra crispy results, or a minute less for slightly chewier bacon.
- Pre-cooked for Convenience: For an even quicker process, consider purchasing pre-cooked bacon. While not as fresh, it can be heated in the oven for a few minutes to regain crispness, perfect for emergency cravings or last-minute additions to dishes.
Creative Ways to Enjoy Your Oven-Baked Bacon
Crispy oven-baked bacon isn’t just for breakfast alongside fried eggs and avocado. Its savory crunch and rich flavor make it a versatile ingredient that can elevate a wide array of dishes. Here are some of my favorite ways to incorporate cooked bacon:
- Broccoli Salad: Crumbled bacon adds a smoky, salty contrast to this refreshing salad.
- Cobb Salad: An essential component, bacon provides texture and depth to this classic hearty salad.
- BLT Sandwich: The star of the show, perfectly crispy bacon is crucial for a truly satisfying BLT.
- Instant Pot Zuppa Toscana: Stir crumbled bacon into this Italian sausage and potato soup for an extra layer of flavor.
- Loaded Cauliflower Bake: Top creamy cauliflower with cheese and crispy bacon for a delicious, low-carb side dish.
- Loaded Broccoli and Potato Soup: Garnish this comforting soup with bacon bits for added crunch and savory goodness.
- Breakfast Burritos & Tacos: Dice cooked bacon and add it to your morning wraps.
- Burgers & Hot Dogs: Elevate your backyard barbecue by topping your burgers and hot dogs with perfectly crisp bacon.
- Baked Potatoes: Classic topping alongside cheese and sour cream.
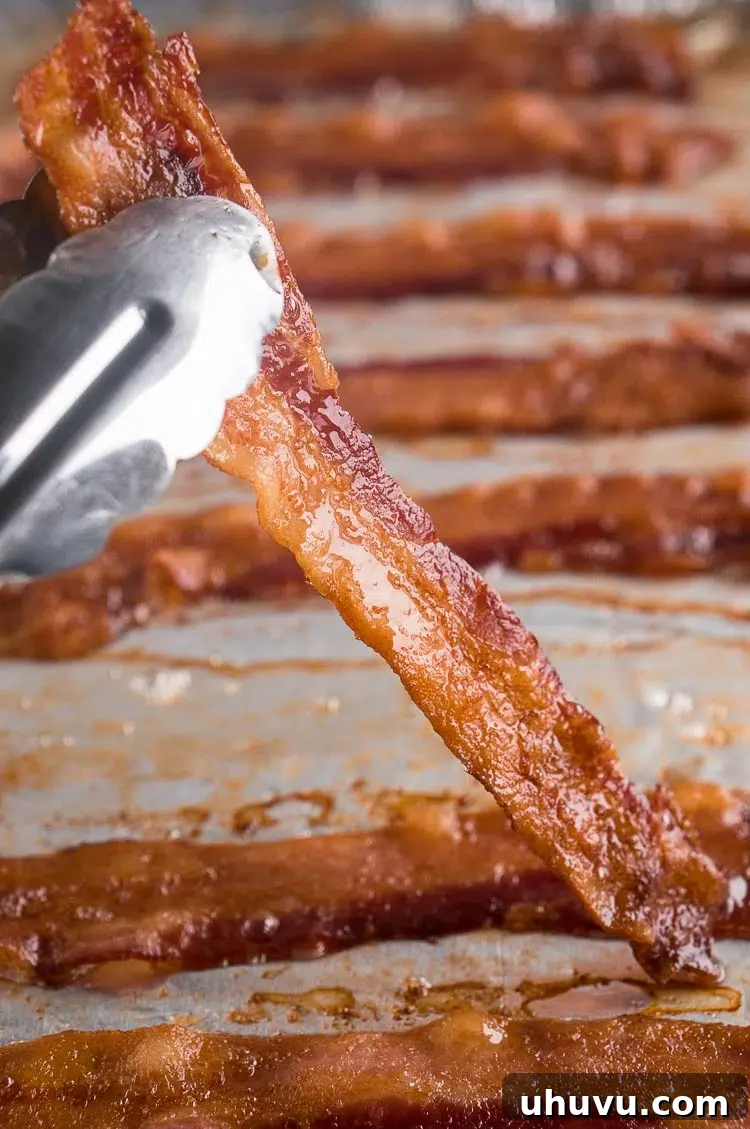
Storing Your Cooked Bacon
Proper storage ensures your delicious oven-baked bacon stays fresh and ready for your next meal or snack.
In the Refrigerator
Once cooled to room temperature, cooked leftover bacon can be stored in an airtight container or a zip-top bag in the refrigerator for approximately 7-10 days. Always ensure the container is sealed tightly to prevent any odors from permeating other foods. If you notice any changes in color (such as a greenish tint) or an off-smell, it’s always safest to discard the bacon.
In the Freezer
For longer storage, cooked and cooled bacon freezes beautifully for up to 6 months. I often take advantage of bacon sales to batch-cook a large quantity, then freeze it for quick additions to future meals. To freeze, arrange cooled bacon in a single layer on a parchment-lined baking sheet and flash freeze for about 30 minutes until solid. Then, transfer the frozen strips to a gallon-size freezer ziplock bag or airtight container, removing as much air as possible. When you need it, simply reheat a few slices in the microwave, toaster oven, or even a conventional oven for a few seconds until warmed through and crispy again.
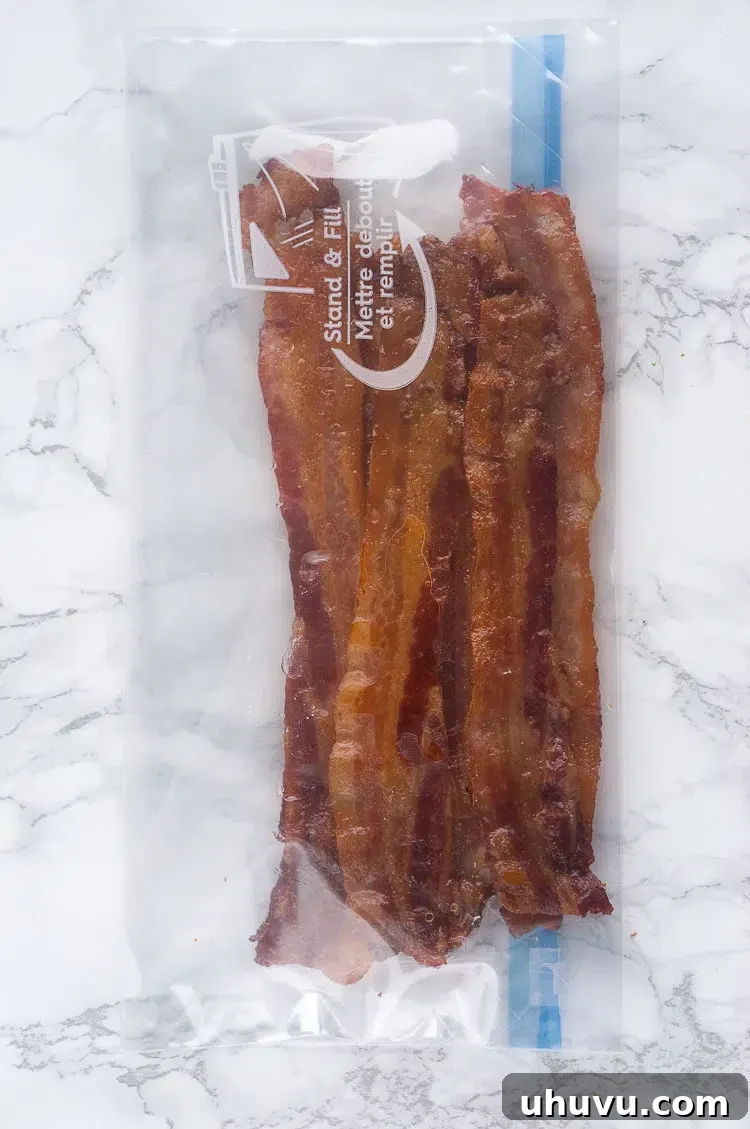
Don’t Waste It: Save That Flavorful Bacon Fat!
One of the hidden gems of cooking bacon is the rendered fat. Bacon fat is a culinary secret weapon, adding an incredible depth of rich, savory flavor to a multitude of dishes. It’s excellent for roasting vegetables, enhancing soups and stews, frying eggs, or searing meats. Think of it as liquid gold for your kitchen!
Once you’ve removed your cooked bacon to a paper towel-lined plate, allow the hot bacon grease on the baking sheet to cool slightly but still remain liquid. Carefully pour the warm fat through a fine-mesh sieve (to remove any browned bits) into a clean, heat-safe glass jar or container. Always remember to use oven mitts when handling the hot baking sheet. Cover the jar and store it in the refrigerator. As the fat solidifies, you can continue to add more drippings from future bacon-cooking sessions. Stored properly, bacon fat can last for several weeks, even months, in the fridge, ready to infuse your cooking with irresistible flavor.
Frequently Asked Questions About Oven-Baked Bacon
For achieving the perfect crispy oven bacon, I highly recommend preheating your oven to 400°F (200°C) and keeping the rack in the middle position. This temperature ensures the bacon cooks through, rendering the fat efficiently for maximum crispiness without drying it out or burning the edges. Baking at 375°F (190°C) often results in chewier bacon that requires longer cooking, while 425°F (220°C) increases the risk of burning before the bacon is fully crisp. Stick with 400°F for consistently excellent results.
The cooking time for bacon in the oven can vary based on its thickness and the accuracy of your oven, but generally, a full baking pan of bacon will take between 15 and 25 minutes at 400°F (200°C). Thin-cut bacon typically bakes for about 15-18 minutes, medium-thick bacon for around 18-22 minutes, and thick-cut bacon will require approximately 22-25 minutes. Always cook to your desired level of crispiness, keeping a close watch as the bacon approaches the end of its cooking time.
Several factors could prevent your bacon from achieving that desirable crispiness in the oven. Common culprits include a low oven temperature, insufficient cooking time, overcrowding the baking sheet, and the quality or thickness of the bacon itself. To ensure crispy oven bacon every time, always preheat your oven to the recommended 400°F (200°C), cook for the appropriate duration (15-25 minutes, depending on thickness), arrange the slices in a single layer without overlapping to allow for even rendering, and use high-quality bacon. These steps promote consistent heat distribution and proper fat rendering for ultimate crispness.
Absolutely not! One of the greatest advantages of oven-baked bacon is that there’s no need for flipping. Simply place your bacon strips on a foil-lined baking sheet, slide it into the preheated oven, and set a timer. The circulating heat within the oven cooks the bacon evenly on both sides, transforming it into a beautifully crispy, golden-brown delight without any manual intervention or messy splatters. Enjoy the hands-free convenience!
Yes, you can absolutely use parchment paper instead of aluminum foil to line your baking sheet. Both materials are excellent for preventing sticking and making cleanup a breeze. Parchment paper is often preferred by those who wish to avoid aluminum, or if you’re cooking at very high temperatures where aluminum foil might subtly react with certain foods. Just make sure the parchment paper is rated for the 400°F (200°C) oven temperature.
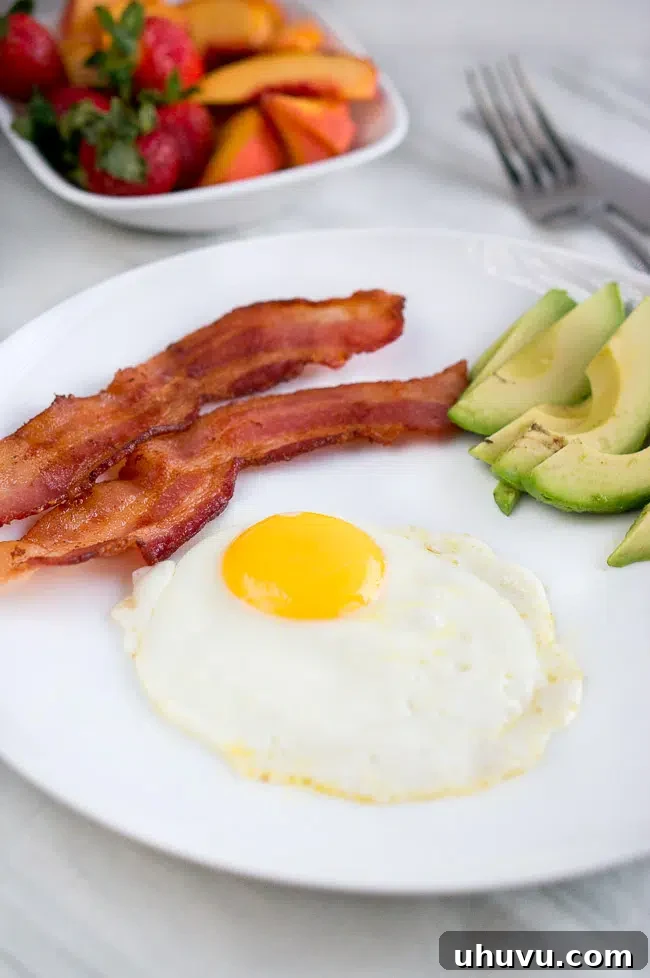
If you enjoyed this Oven Baked Bacon recipe or any other recipe on my blog, please consider leaving a ⭐ star rating and sharing your thoughts in the 📝 comments below. Your feedback means the world! Thanks for visiting and happy cooking!
Pin this now to find it later!
Pin It
Oven Cooked Bacon Recipe
By: Neli Howard
Learn how to cook crispy, mess-free bacon in the oven with this simple step-by-step guide. Perfect results every time—no flipping, no splatter!
Pin Recipe
Ingredients
- 12 slices bacon (1 package), thin or thick-cut bacon
Instructions
- Preheat oven to 400 F (200°C). Line a rimmed baking sheet with aluminum foil, extending up the sides of the pan.
- Lay bacon strips in a single layer on the baking sheet. They can be placed close together, but do not overlap them. Bake until the bacon is crispy, about 15 – 20 minutes depending on its thickness.
- Remove from oven and transfer the bacon slices to a paper towel-lined plate to drain excess grease. Serve immediately, or allow to cool before storing in the fridge or freezing.
Notes
- Use a large rimmed baking sheet to effectively contain bacon fat drippings and ensure even cooking.
- Line the baking sheet with foil or parchment paper for a super easy and mess-free cleanup. Heavy-duty foil works best.
- Cook at 400 F (200°C) for the crispiest bacon. Cooking time will range from 15-25 minutes, adjusted for bacon thickness.
- An oven baking rack is not necessary. Bacon cooks equally crisp directly on the foil-lined pan, and it makes cleanup much easier.
- No flipping is required. This hands-off method frees you up to prepare other elements of your meal.
Nutrition Facts (Estimated Per Serving)
Calories: 43kcal |
Protein: 3g |
Fat: 3.3g |
Saturated Fat: 1.1g |
Cholesterol: 9mg |
Sodium: 137mg |
Potassium: 45mg |
Vitamin A: 10IU |
Calcium: 1mg |
Iron: 0.1mg
Nutrition Disclaimer: Nutritional values provided are estimates and may vary based on specific ingredients, brands, and portion sizes. For the most accurate information, please use your preferred nutrition calculator.