
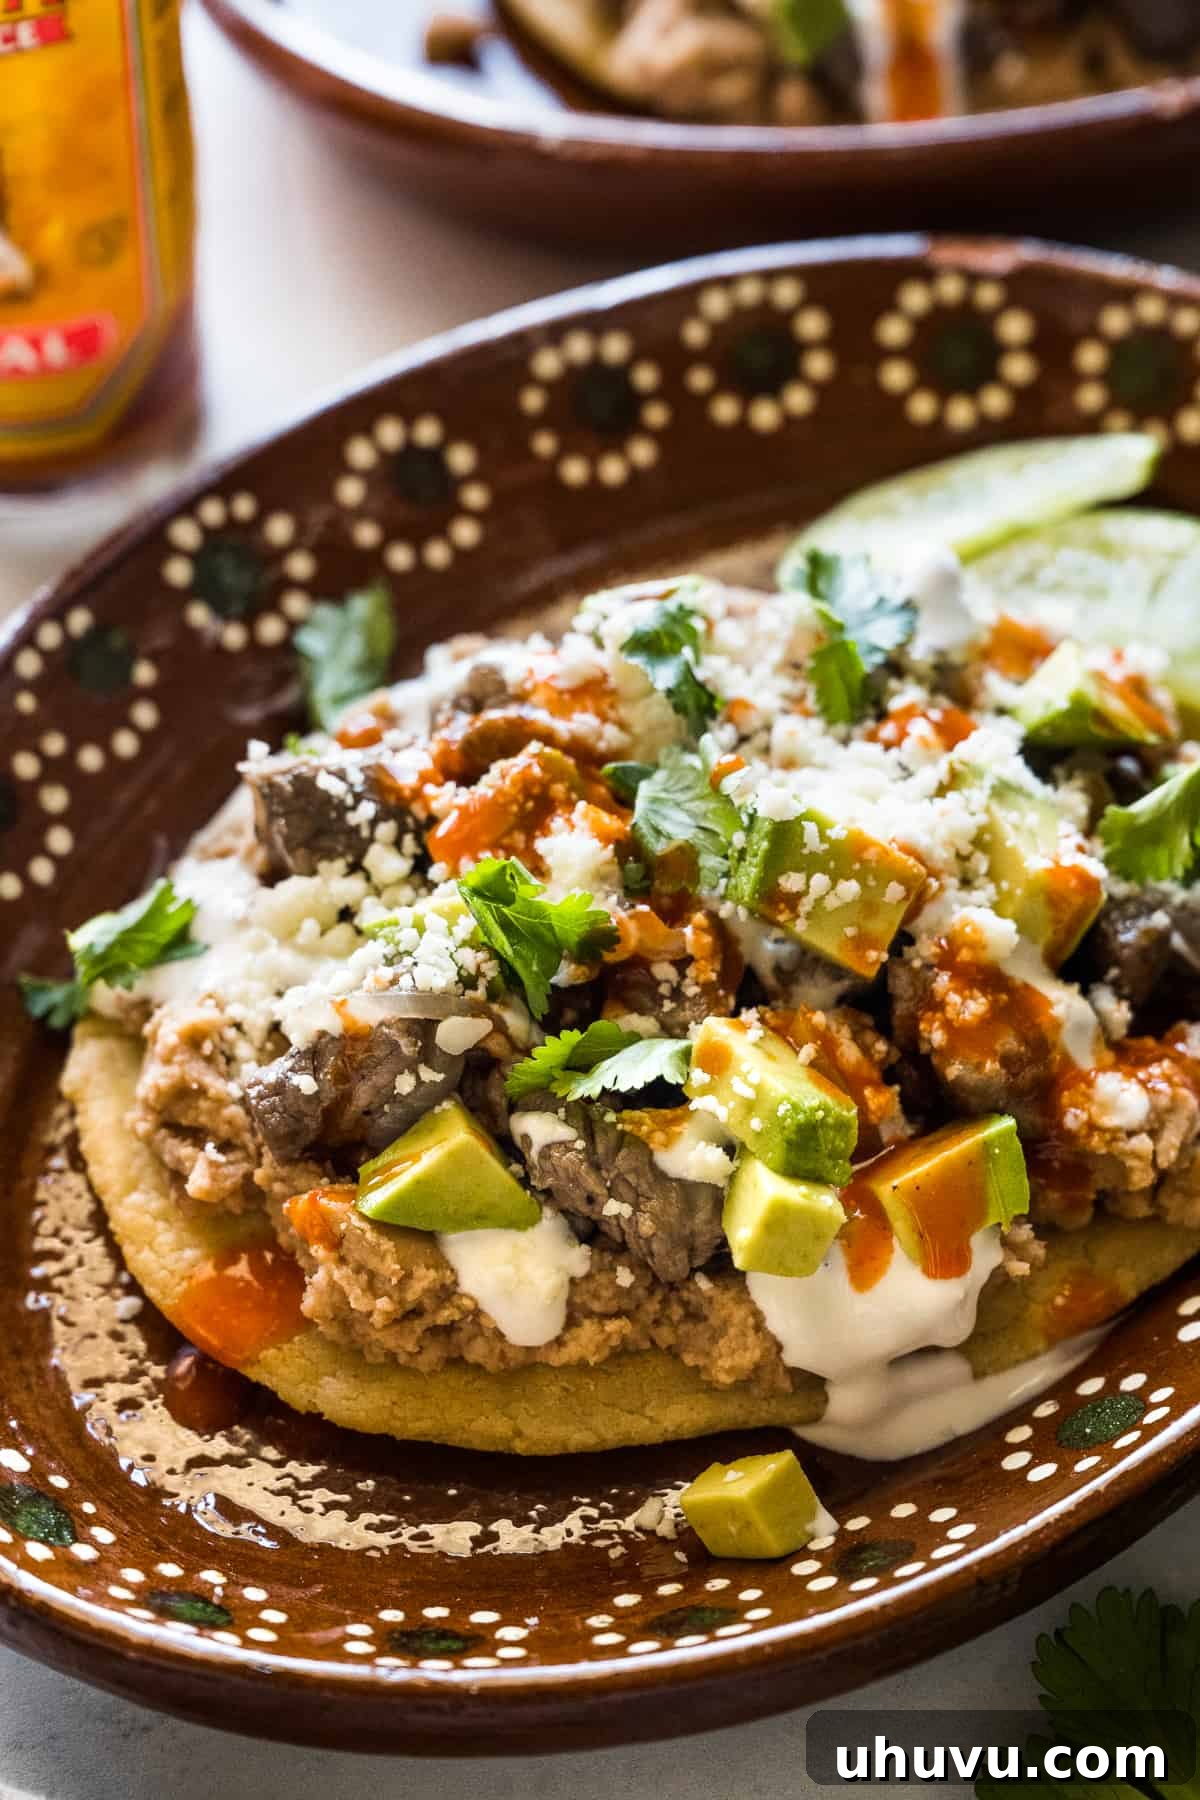
Huaraches are a beloved traditional Mexican street food that captivates with its unique oblong shape, hearty masa base, and an exciting array of vibrant toppings. Resembling the sole of a traditional Mexican sandal, these savory corn cakes offer a delightful culinary experience, perfect for any meal of the day. They are surprisingly quick to prepare, often ready in under an hour, making them an excellent choice for a flavorful lunch or a satisfying dinner.
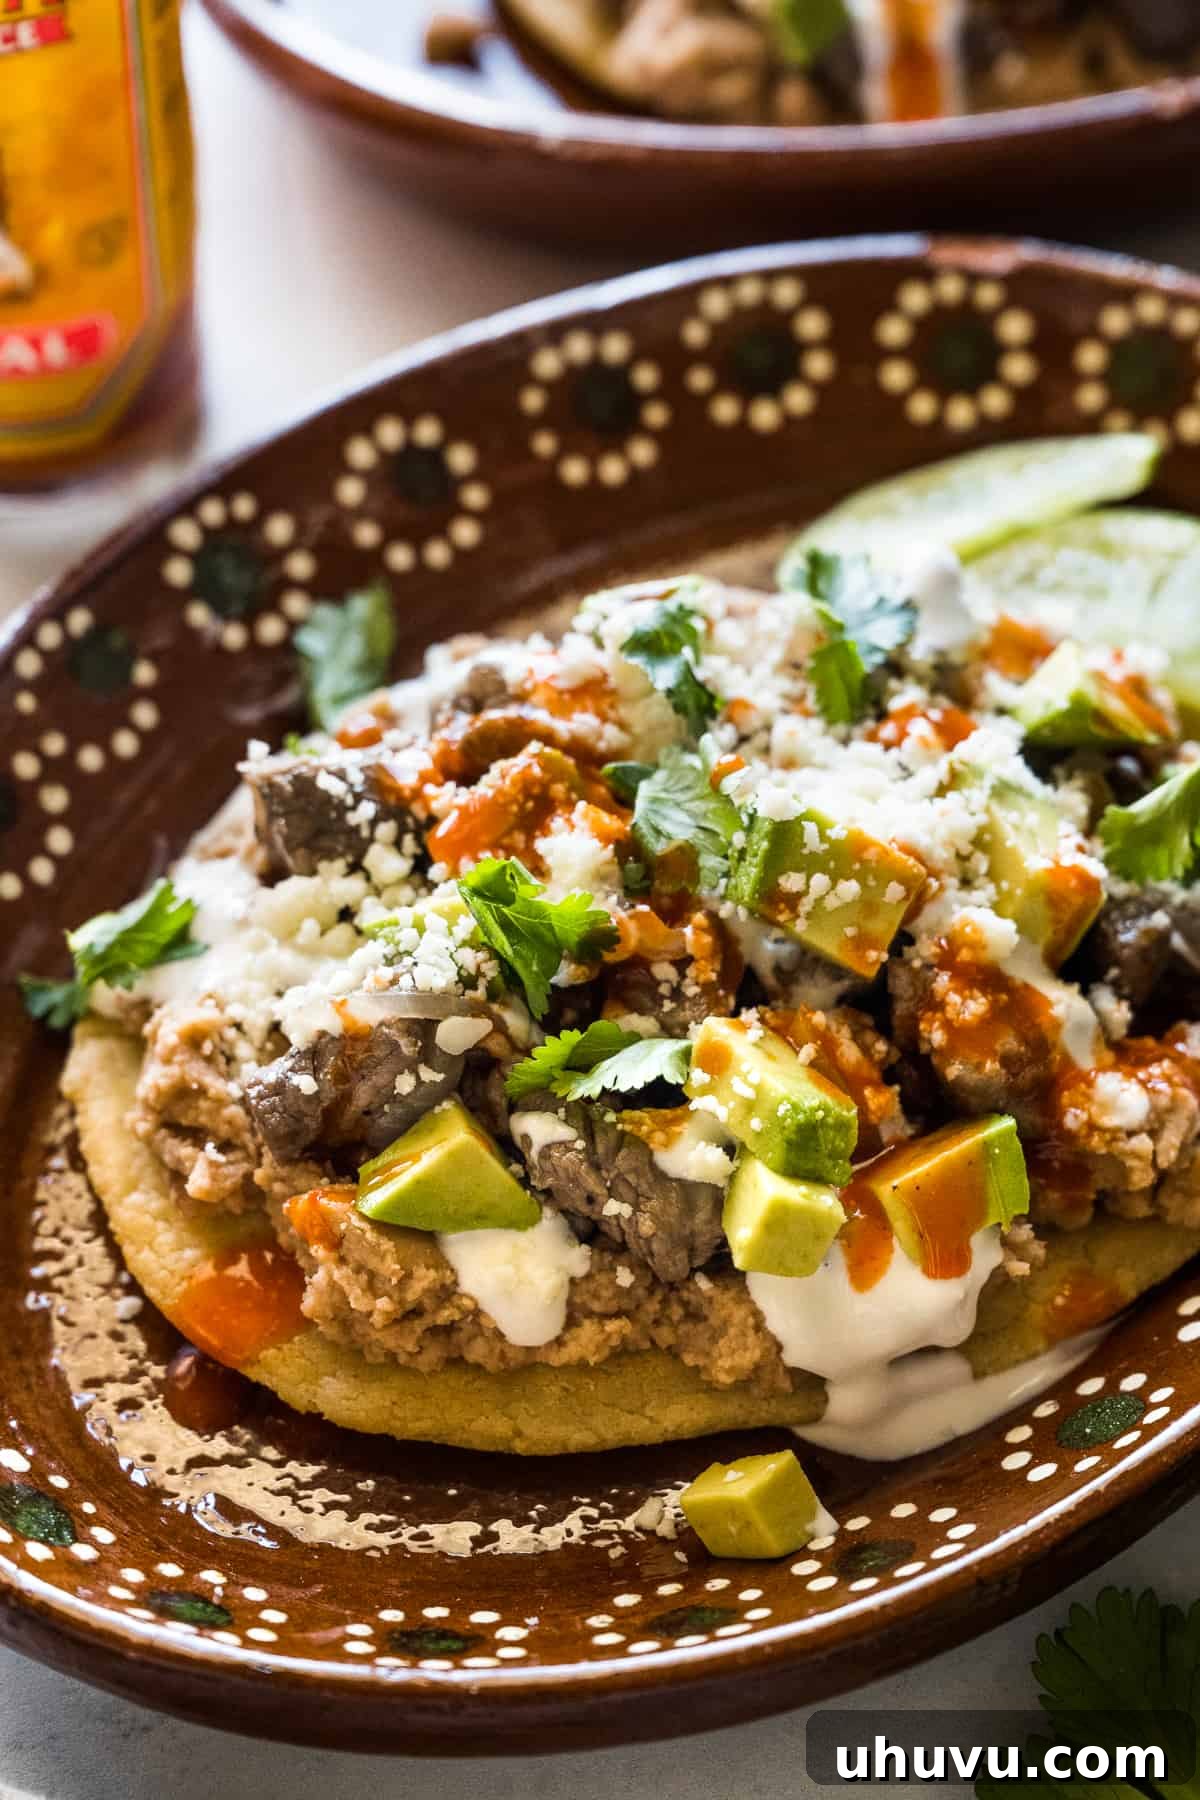
If you’ve yet to experience the authentic taste of a huarache, prepare your palate for a truly savory treat! This popular street food shares similarities with other Mexican antojitos (little cravings) like sopes, tlacoyos, and tostadas, all known for their delicious ingredients piled high. What sets huaraches apart is their distinctly thicker and larger masa base, which not only provides a satisfying texture but also makes them incredibly easy to hold and enjoy on the go.
What Exactly are Mexican Huaraches?
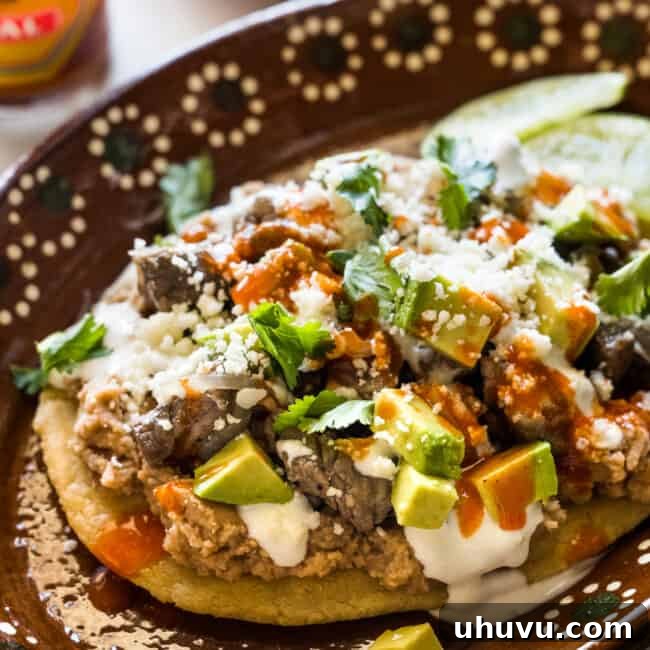
Huaraches are a quintessential traditional Mexican dish, celebrated for its robust flavors and comforting textures. At its heart is an oblong-shaped masa (corn dough) base, typically cooked on a comal (a flat griddle), skillet, or even grilled or lightly fried to perfection. The magic truly happens with the toppings, which showcase the incredible diversity of Mexican regional cuisine. While variations abound, huaraches are most commonly loaded with creamy refried beans, tender meat (such as beef, chicken, or pork), fresh onions, rich cheese, and a generous drizzle of spicy salsa.
The masa base of a huarache is intentionally crafted to be thicker and larger than that of a standard corn tortilla. This substantial foundation is usually hand-formed into its signature elongated shape, allowing it to hold a generous amount of toppings without falling apart. This distinctive form is not accidental; the dish is famously named after the traditional Mexican sandal, also called a “huarache,” due to its striking resemblance to the shoe’s elongated sole. This connection speaks to the rustic, down-to-earth origins of this beloved street food, making it a truly authentic piece of Mexican culinary heritage.
Beyond being a delicious meal, huaraches represent a piece of Mexican culture, often enjoyed at bustling markets, food stalls, and family gatherings. They embody the essence of Mexican street food: fresh, flavorful, and made with love. The process of making huaraches, from preparing the masa to carefully shaping each one, is a culinary art form passed down through generations, ensuring each bite delivers a taste of tradition.
Huaraches vs. Sopes: Unpacking the Differences
While huaraches and sopes are both cherished Mexican antojitos with a similar masa-based foundation, they possess distinct characteristics that set them apart. Both dishes begin with a fresh masa dough, which is then shaped, toasted on a comal, and often lightly fried to achieve a delightful texture. The primary difference, however, lies in their shape and how that shape influences their role as a vessel for toppings.
- Sopes: These are typically round, thick corn cakes with distinct crimped edges. These raised borders ingeniously create a shallow “bowl” or cup, perfect for containing a generous amount of toppings and preventing them from spilling. Sopes often feature a lighter, fluffier texture, making them a wonderful base for ingredients that might be saucier or more delicate.
- Huaraches: In contrast, huaraches are flat and distinctly oval or oblong-shaped, mirroring the traditional sandal from which they get their name. Their surface is usually flat, providing a broader canvas for spreading ingredients like refried beans and layering various meats, cheeses, and salsas. The thicker and larger base of a huarache tends to be sturdier, offering a more substantial bite and making it ideal for heartier toppings. This robust structure ensures that even when piled high, the huarache remains easy to handle and eat, whether at a street food stall or a sit-down meal.
Both dishes offer incredible versatility, allowing for endless customization with different fillings and garnishes. However, understanding their subtle differences in shape and texture can help you appreciate the unique experience each one provides and even guide your choice when ordering at a Mexican restaurant or preparing them at home.
The Art of Making Huaraches: A Step-by-Step Guide
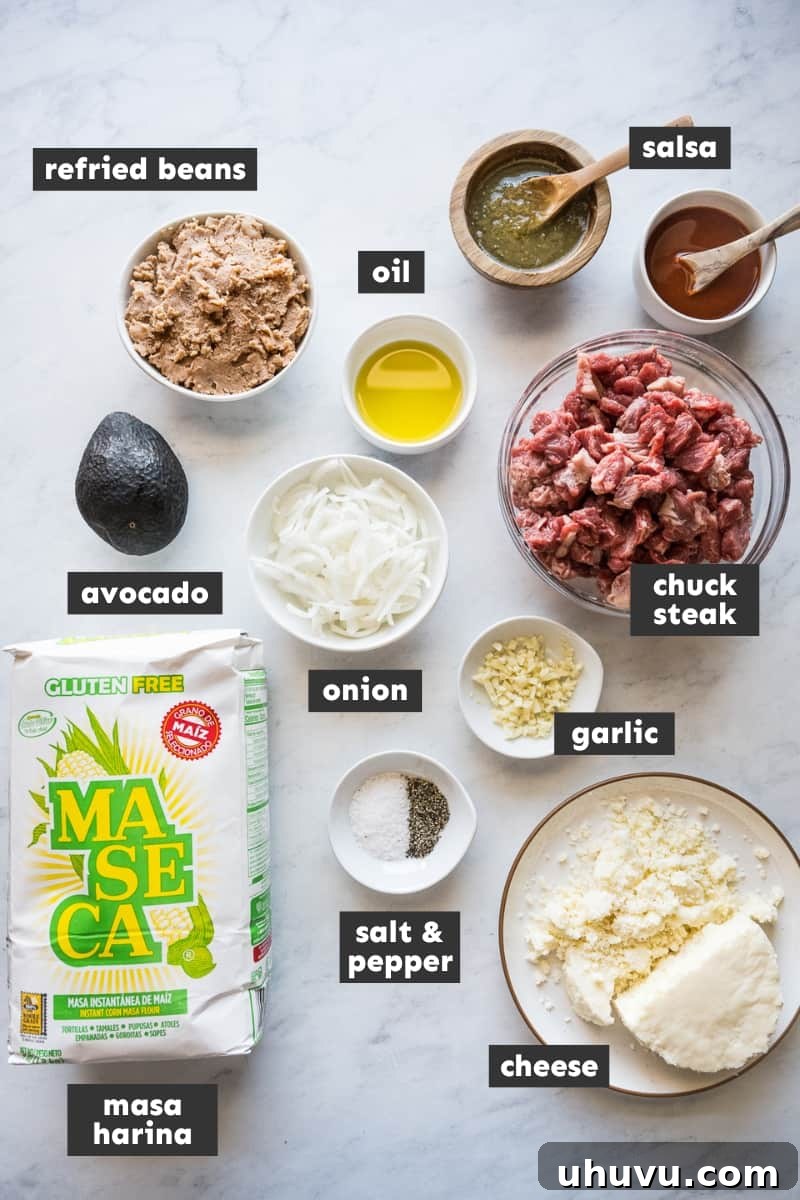
Creating authentic Mexican huaraches from scratch is a rewarding experience that brings the vibrant flavors of Mexico right into your kitchen. The process, while appearing intricate, is surprisingly straightforward and can be mastered with a little practice. Follow these detailed steps to craft your own delicious huaraches:
1. Prepare the Masa Dough: The Foundation of Your Huarache
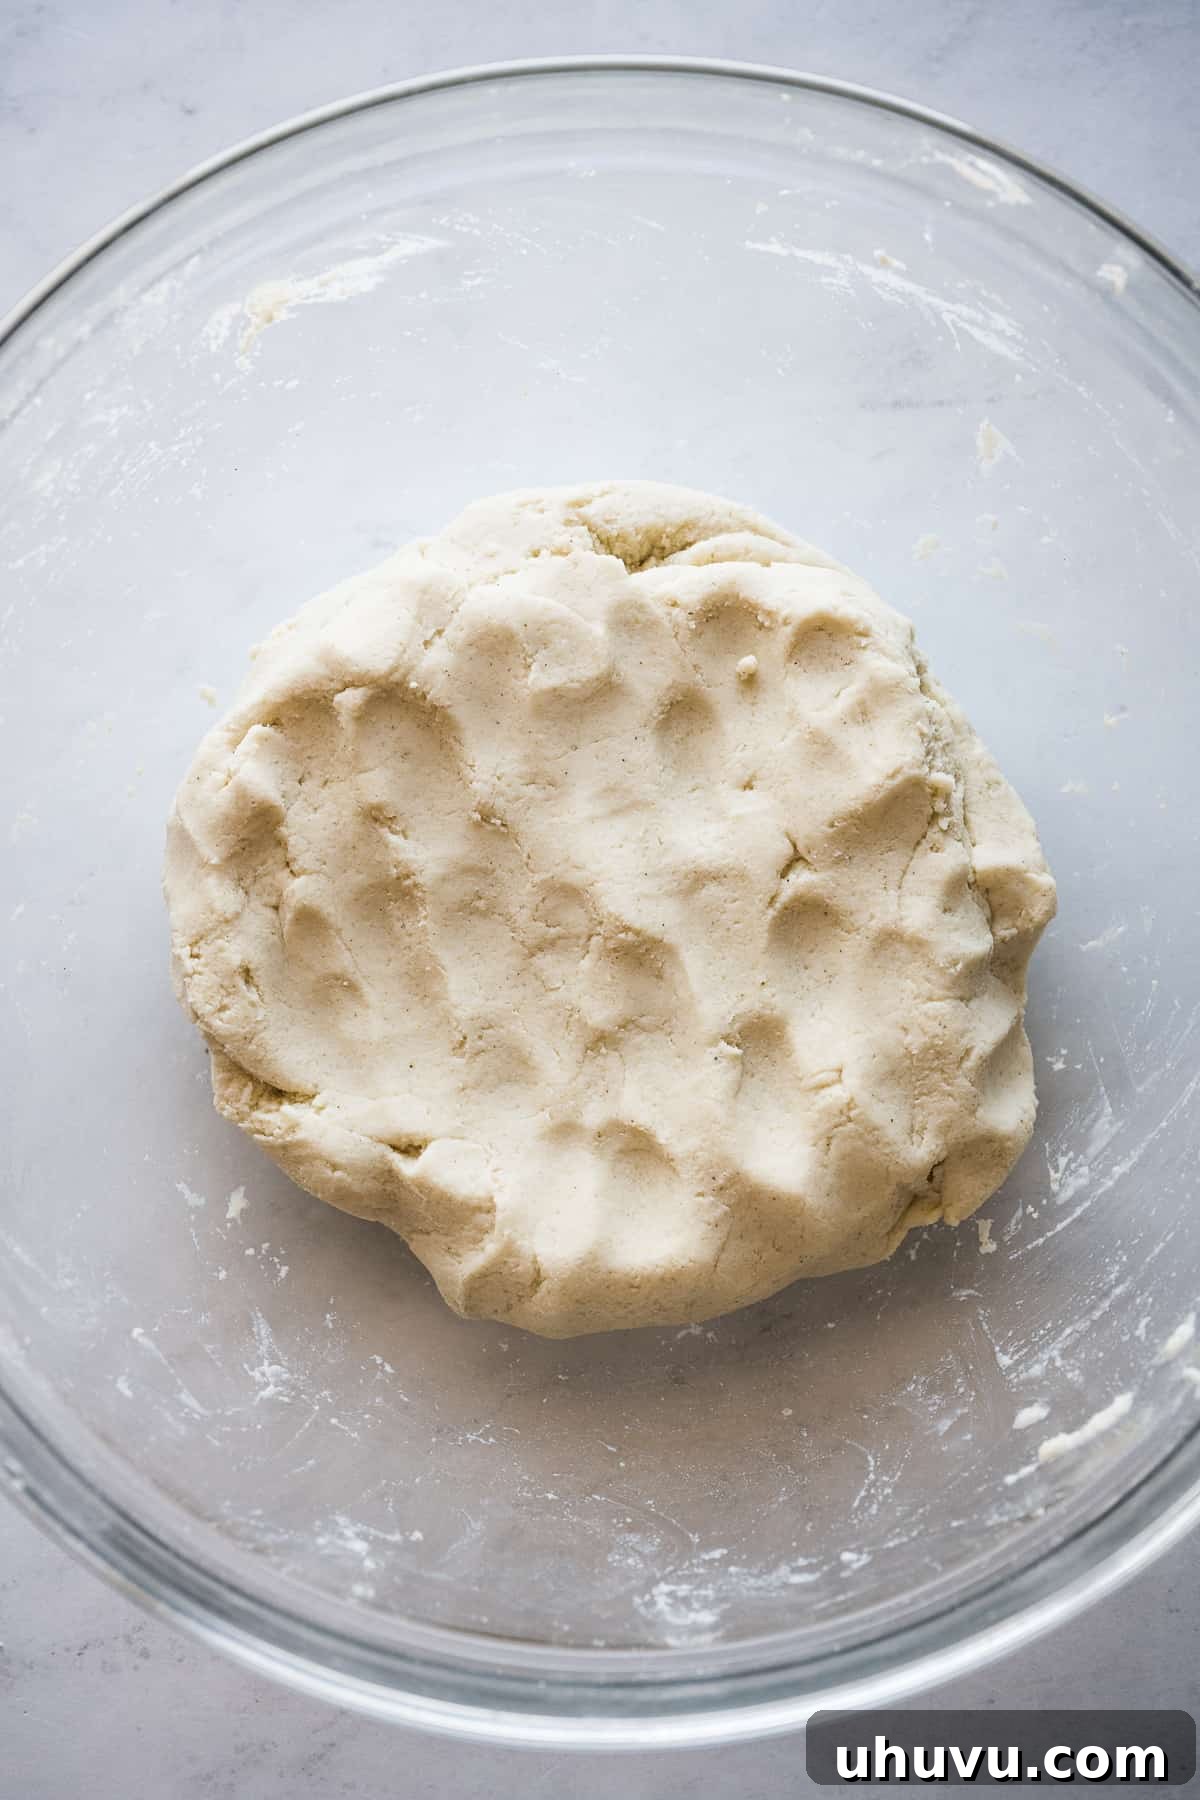
The journey to perfect huaraches begins with the masa dough. In a large mixing bowl, combine the masa harina (a special corn flour used for tortillas and other corn-based dishes) with a pinch of salt. Gradually stir in warm water, adding it little by little until a cohesive dough begins to form. Once the ingredients are roughly combined, it’s time to get your hands in there! Knead the dough thoroughly with your hands until it comes together smoothly and all the water is fully absorbed. The dough should feel pliable and soft, not sticky or crumbly. A good test for readiness is to press your finger into a small ball of dough; if the edges crack, it’s too dry, and a bit more water is needed. If it sticks excessively to your skin, add a little more masa harina until it reaches the ideal consistency.
2. Divide and Preserve the Masa
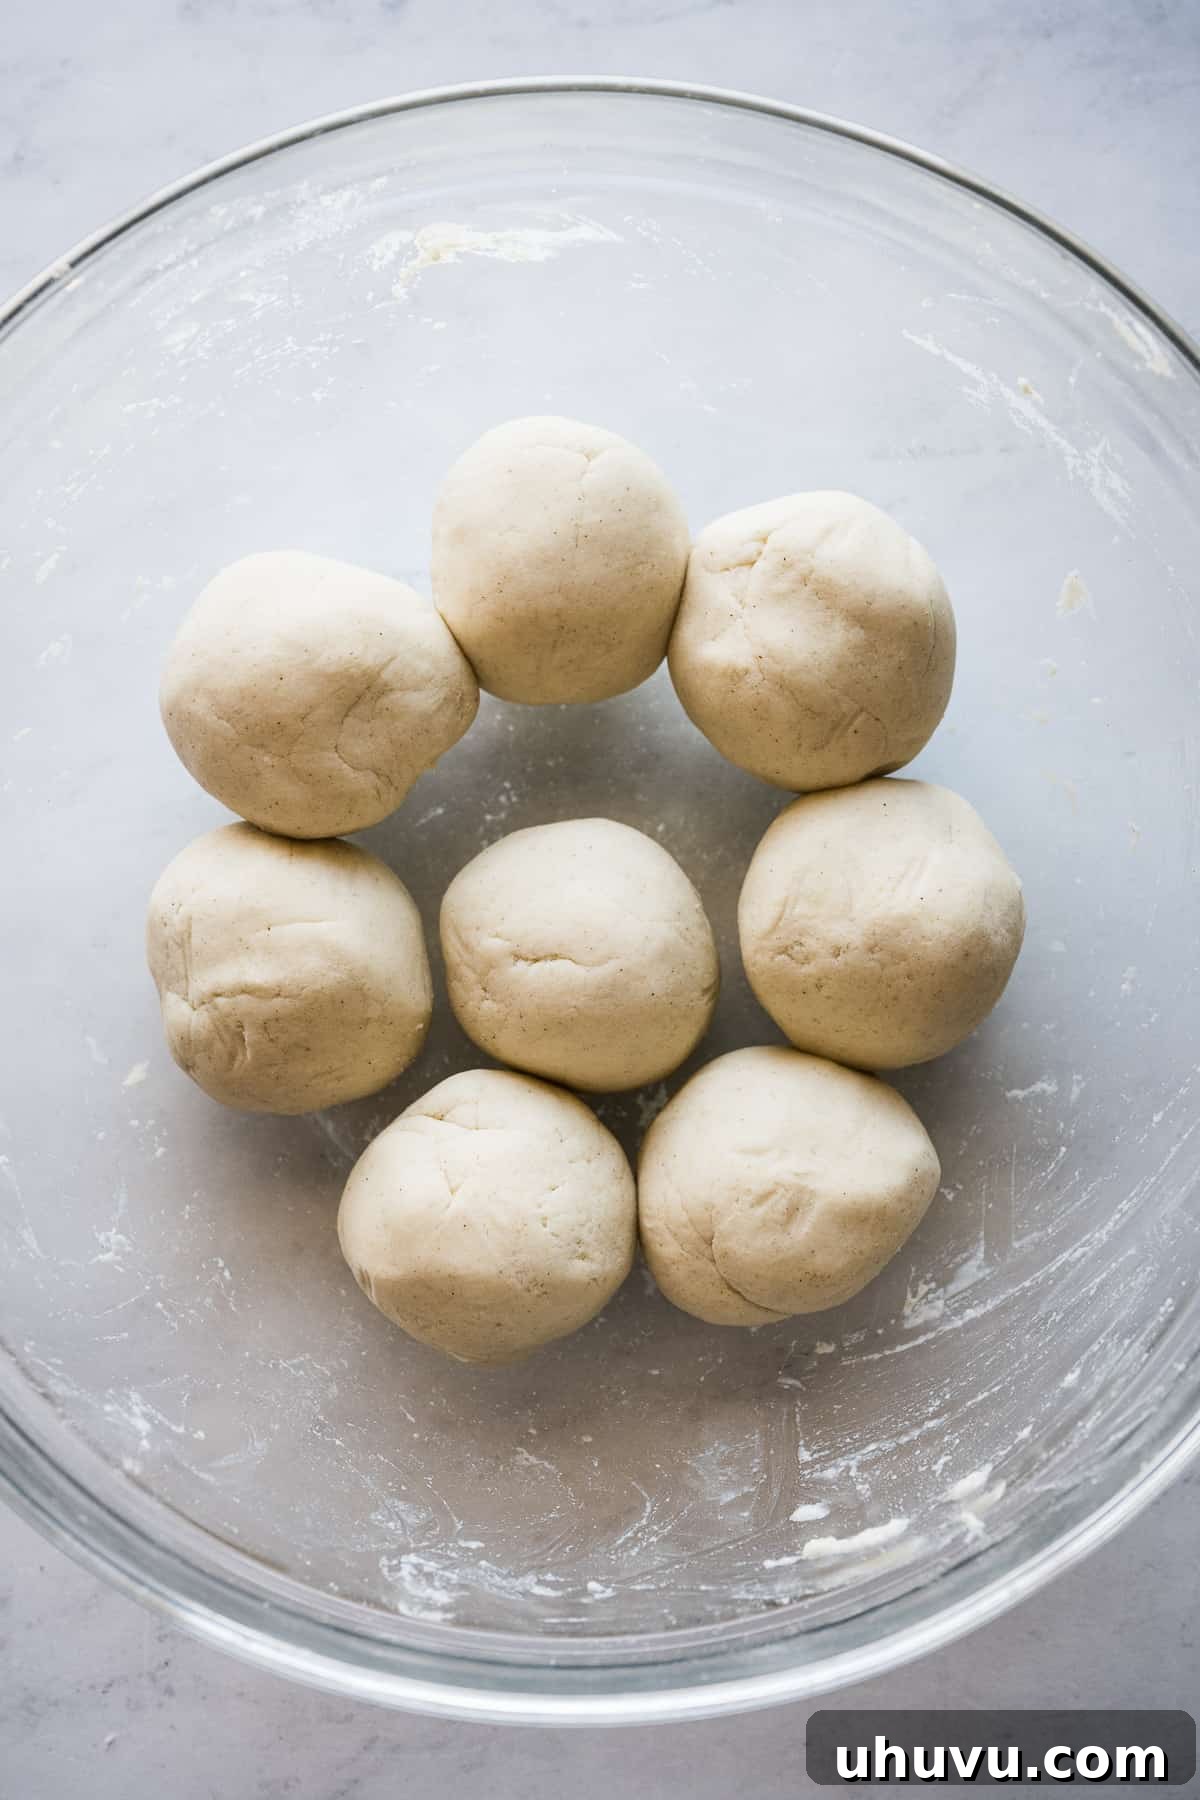
Once your masa dough is perfectly kneaded, divide it into 8 equal portions. Roll each portion into a smooth ball. This ensures uniform huaraches. To prevent the dough from drying out, which is crucial for easy shaping and cooking, immediately cover the masa balls with a clean, damp cloth or plastic wrap while you work on pressing and cooking the huaraches one by one.
3. Shape the Distinctive Huaraches
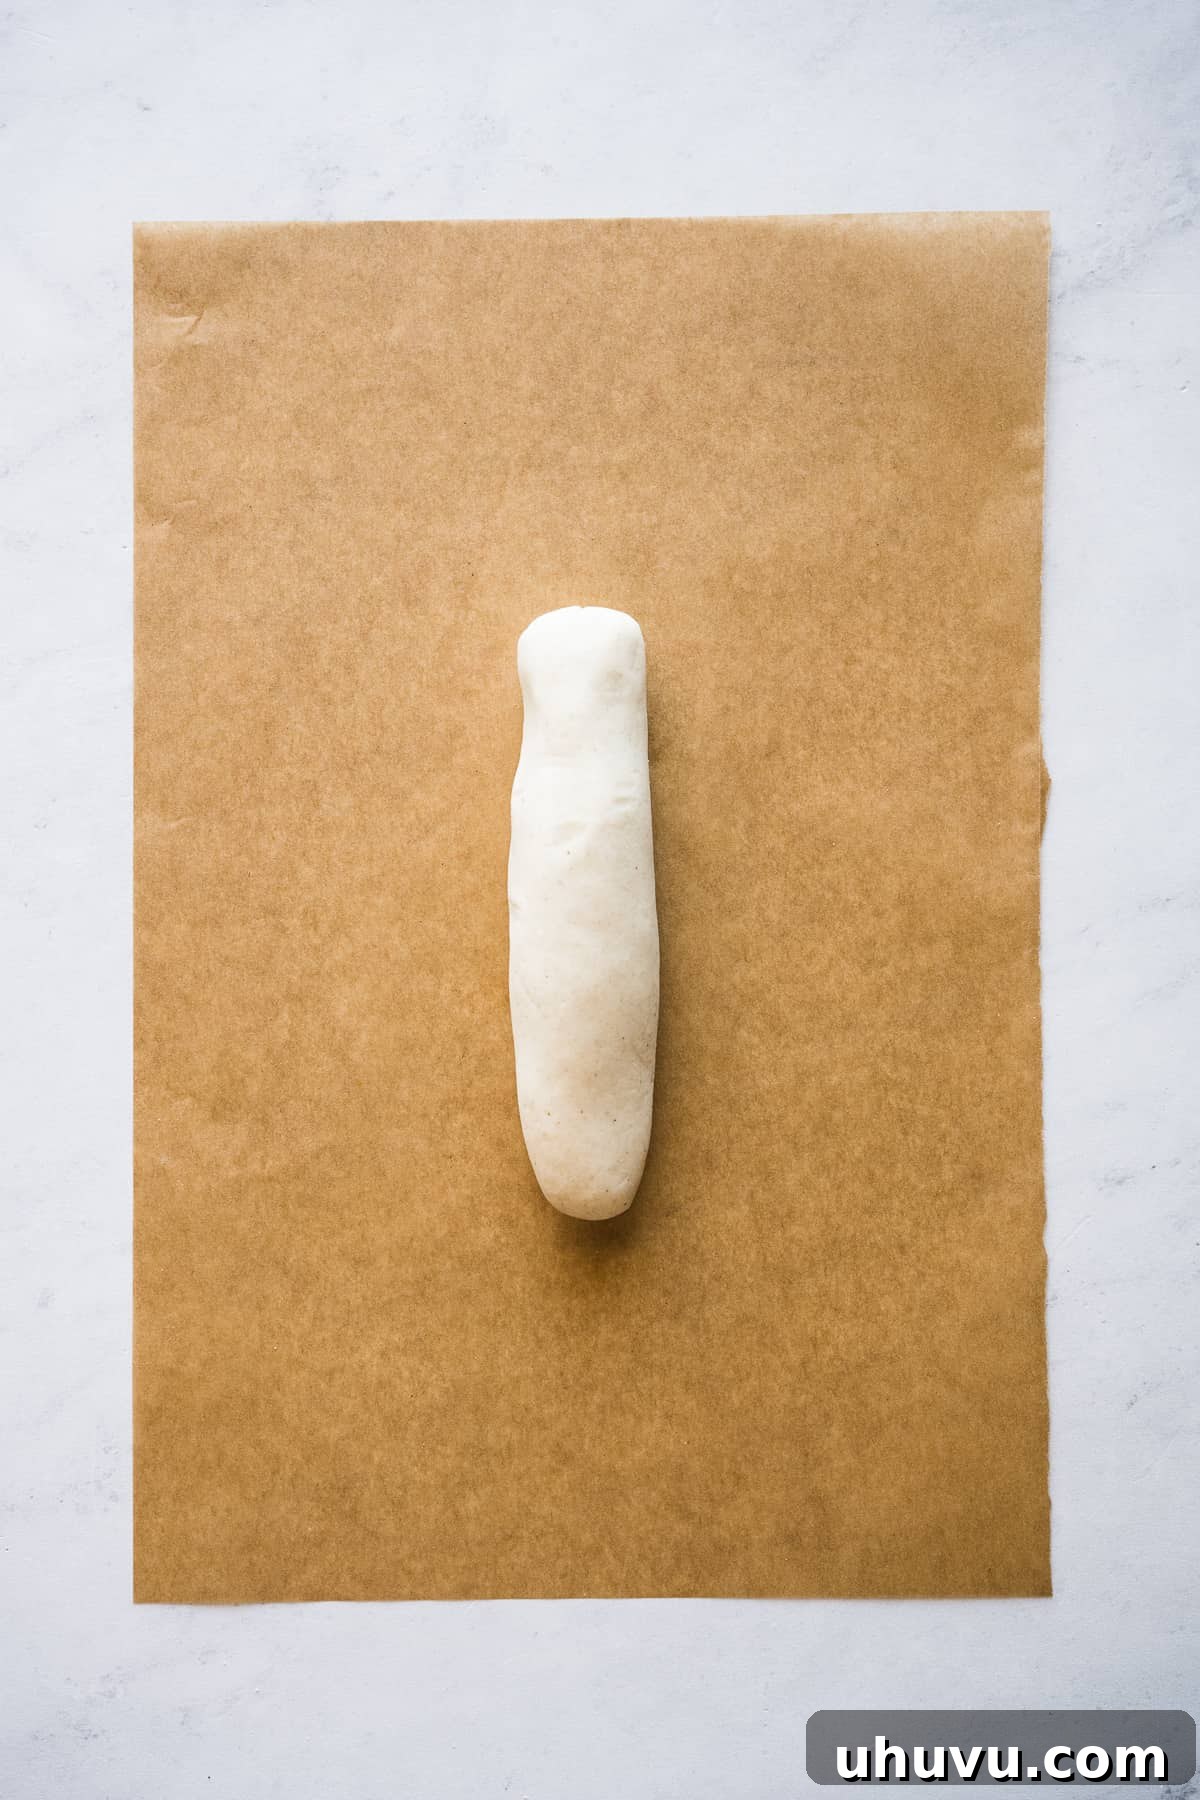
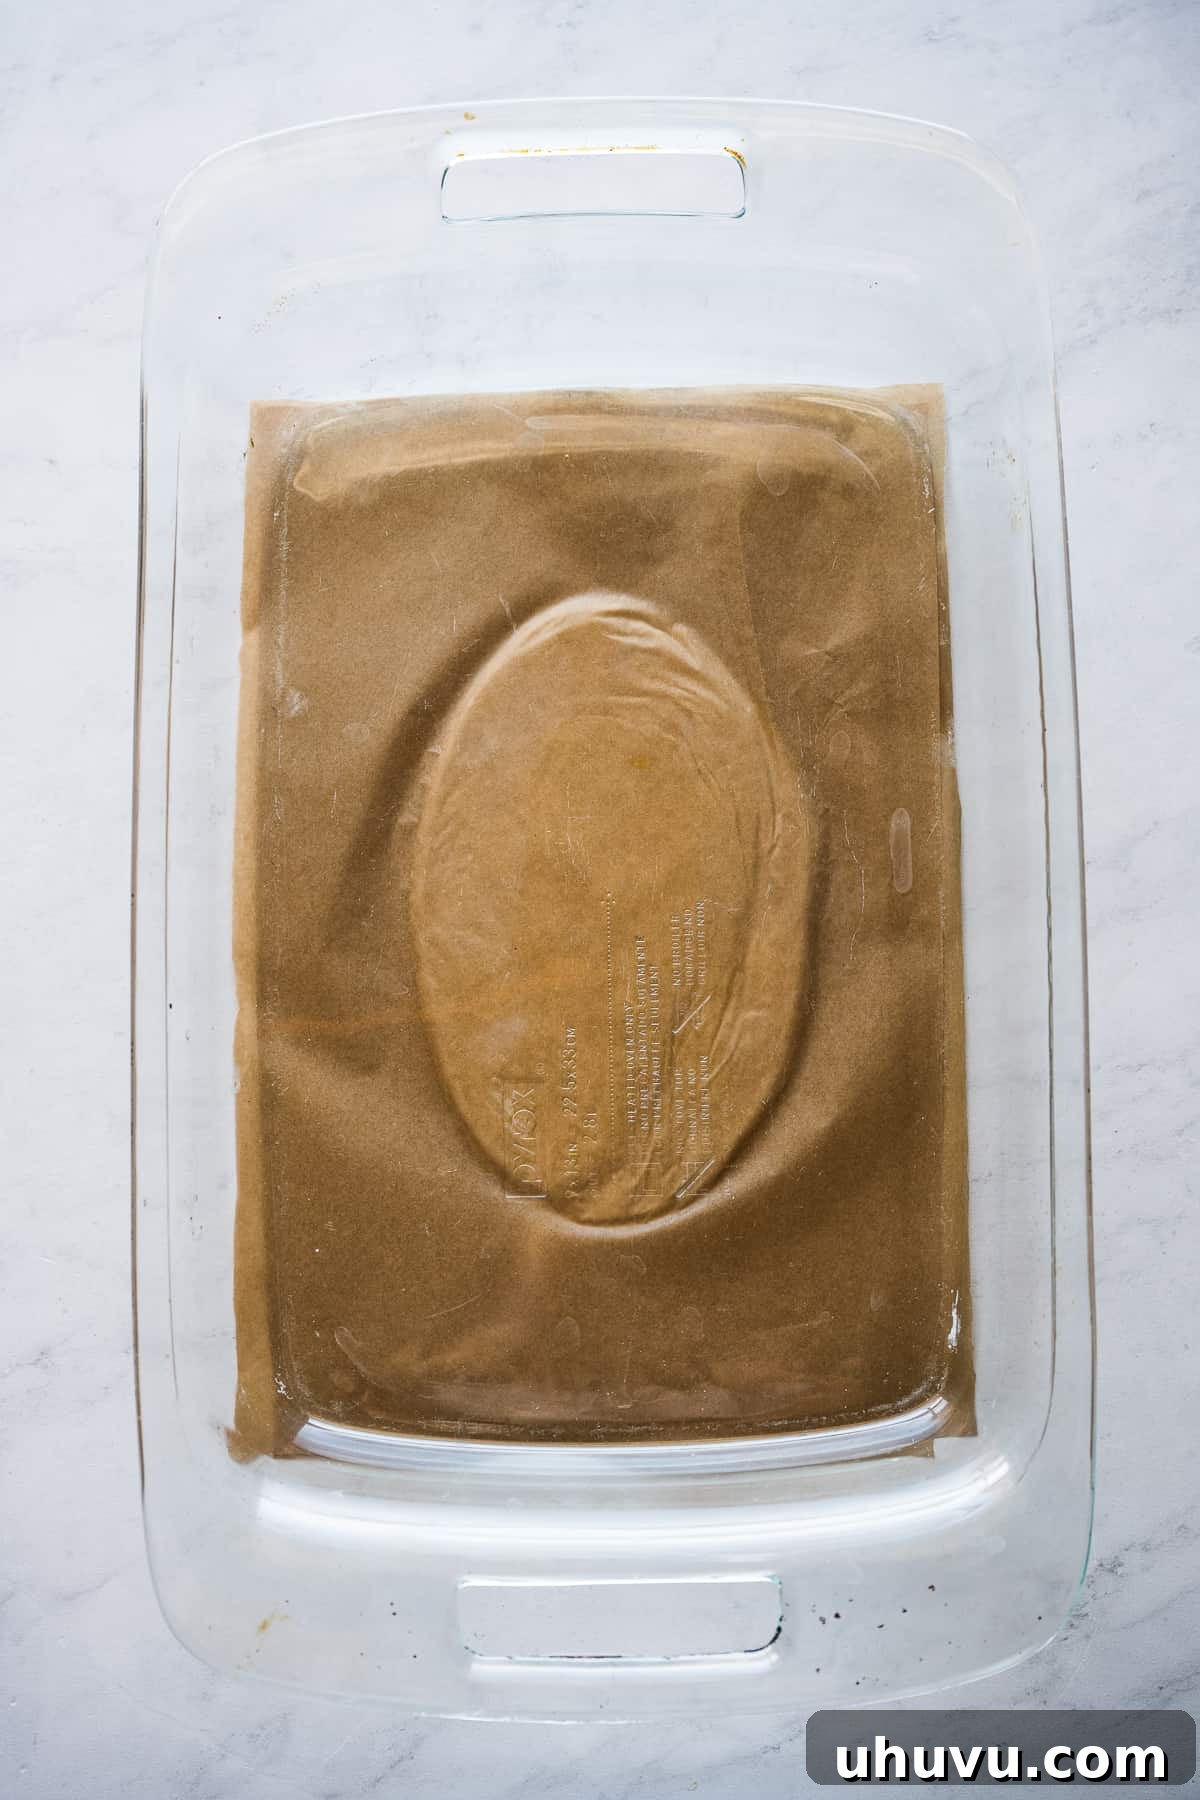
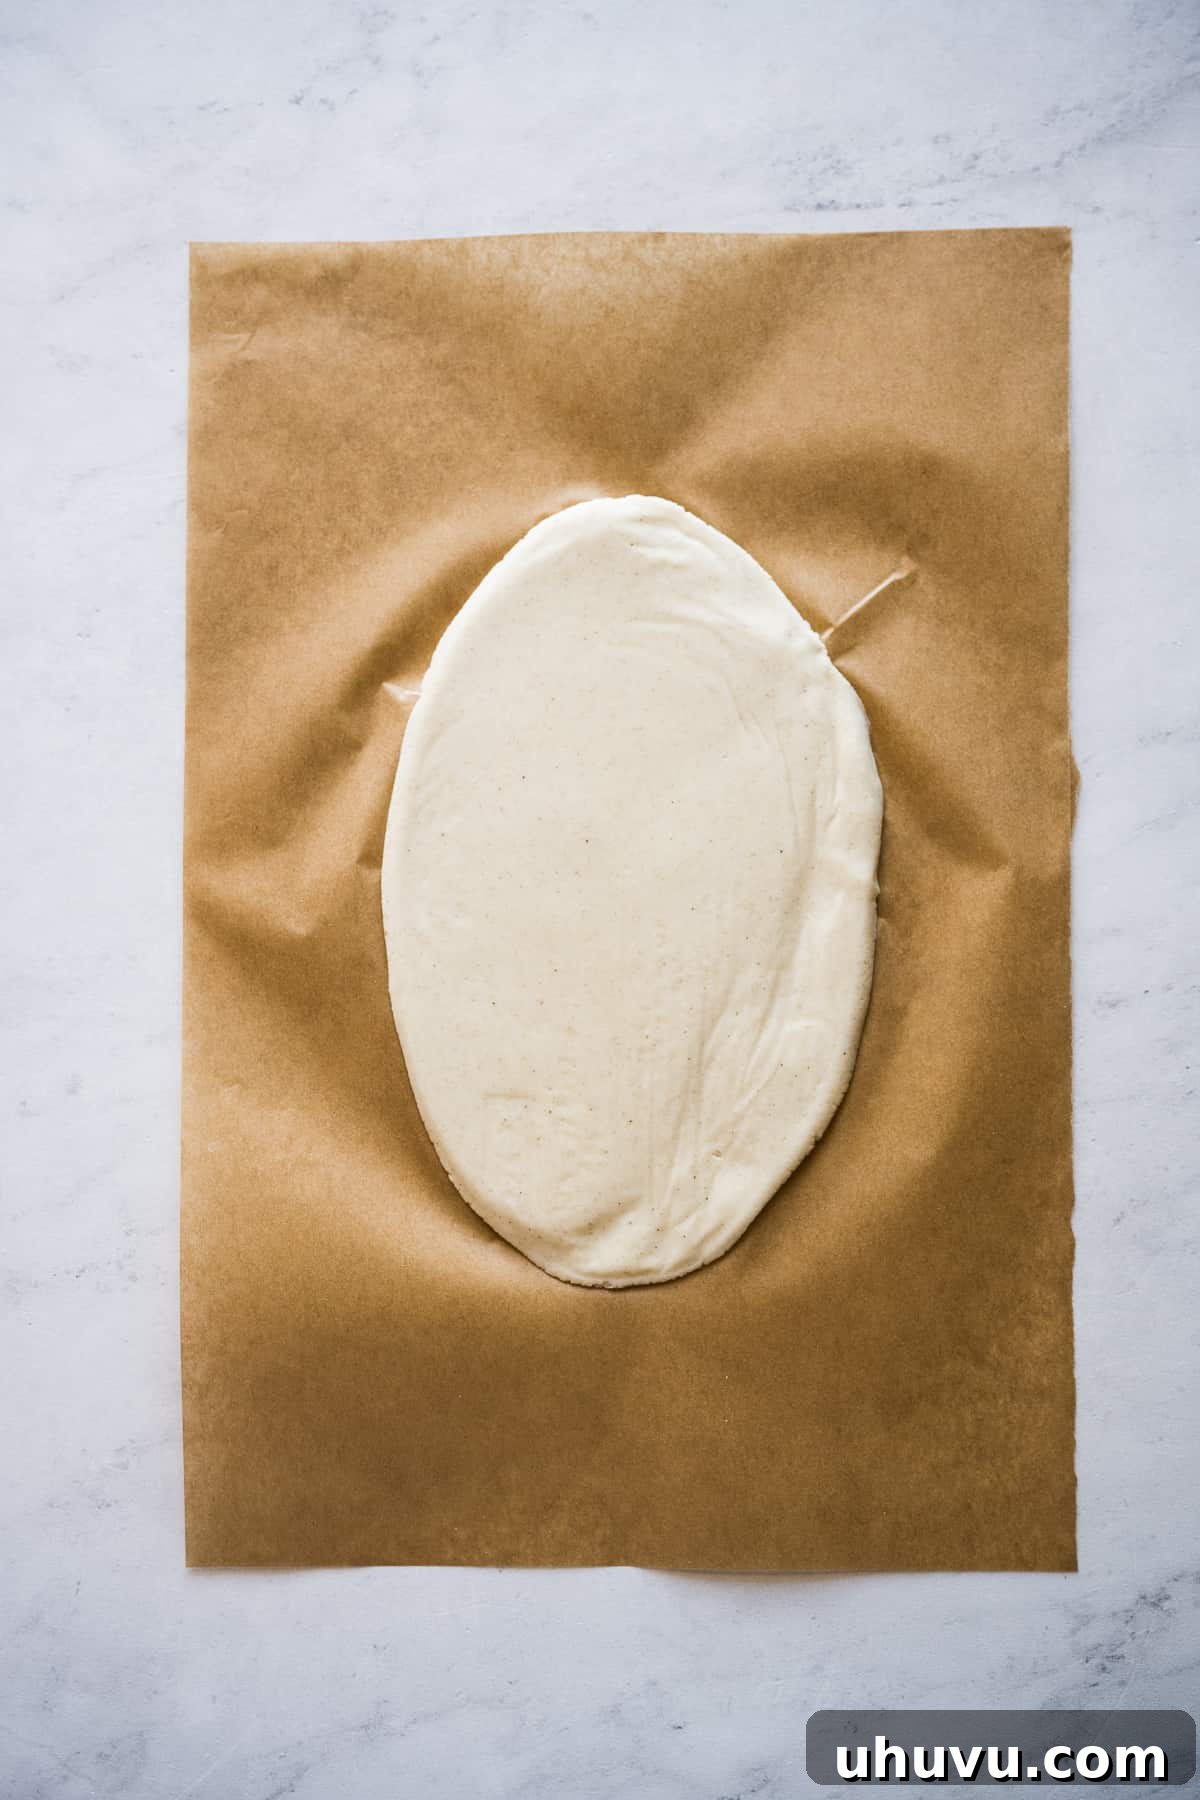
This step gives huaraches their signature look. Take one masa ball and, using your hands, roll it into a log approximately 5 to 6 inches long. Working with one log at a time, place it between two sheets of parchment paper or plastic wrap. Gently flatten the dough. You can use a tortilla press for a quick and even press, or if you don’t have one, a heavy glass baking dish or even the palm of your hand will work effectively. Flatten it until it’s about ¼-inch thick. Then, with your hands, carefully shape the flattened dough into an oblong form that resembles the outline of a sandal. This distinctive shape is what gives the huarache its name and character. Once shaped, carefully peel back the parchment paper or plastic wrap and gently transfer the huarache to your hand, ready for cooking.
4. Cook the Huaraches: Griddle to Perfection
Heat a comal or a large, heavy skillet over medium-high heat until it’s hot but not smoking. Working with 1 or 2 huaraches at a time (depending on the size of your cooking surface), carefully place them onto the hot griddle. Cook for approximately 1 minute, or until you notice light brown spots beginning to appear on the bottom. This indicates the masa is cooking through and developing flavor. Flip the huarache and cook the other side for an additional minute. At this stage, your huaraches are cooked and can be eaten as is, offering a soft, pliable base similar to a thick tortilla. However, for an even crispier, more flavorful, and sturdier base that truly elevates the dish, you can proceed to the optional frying step.
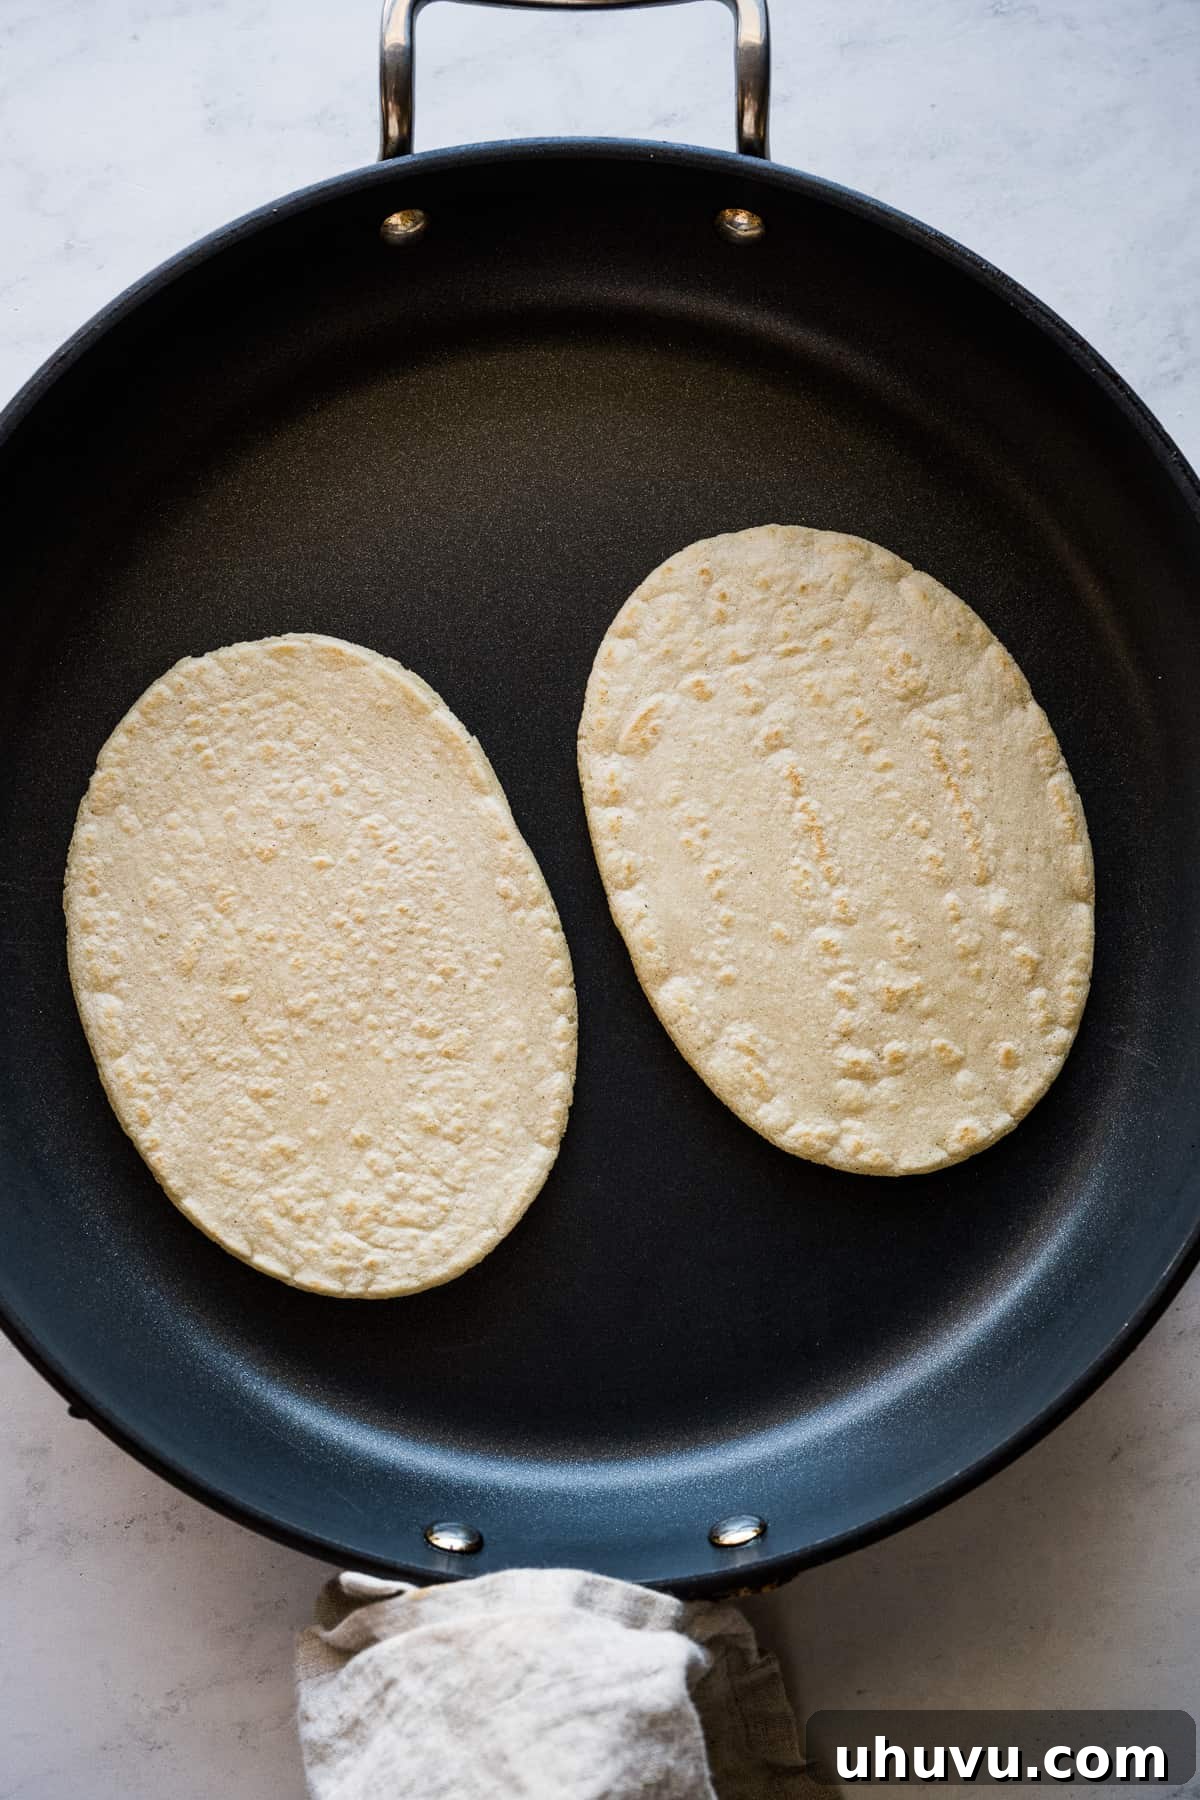
5. Fry the Huaraches (Optional, but Highly Recommended)
To achieve that signature crispy exterior and deeply savory flavor, frying is a game-changer. Fill a large sauté pan or deep skillet with about 1 inch of vegetable oil (or your preferred frying oil) and heat it over medium-high heat until it reaches approximately 350°F (175°C). You can test the oil’s temperature by dropping a tiny piece of masa dough into it; if it sizzles vigorously, it’s ready. Carefully add 1 or 2 huaraches at a time into the hot frying oil. Fry for about 1 minute per side, or until they turn a beautiful golden brown and develop a slight crispness. Be careful not to overcrowd the pan, as this can lower the oil temperature and result in greasy huaraches.
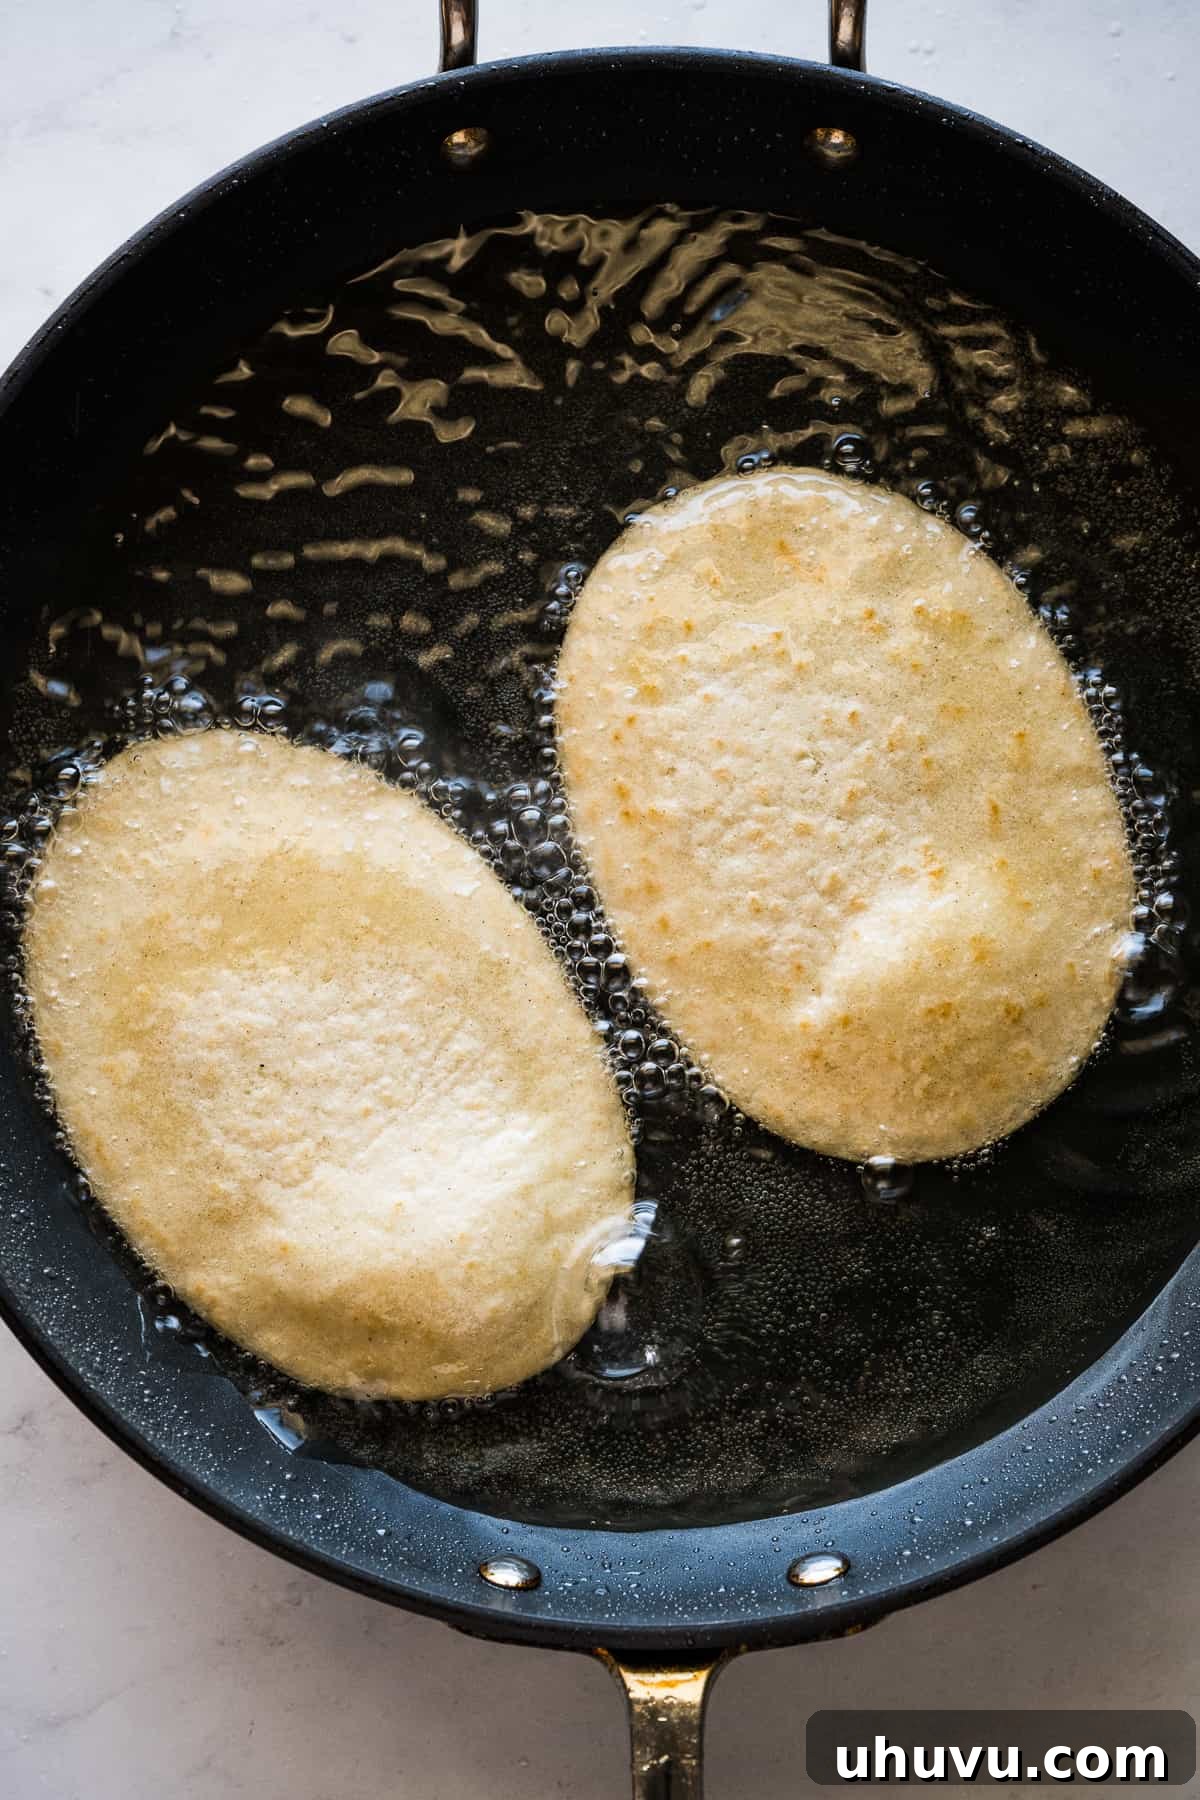
6. Drain Excess Oil
Once fried, it’s crucial to remove any excess oil. Transfer the golden-brown huaraches to a large baking sheet lined with paper towels or onto a wire baking rack set over paper towels. This allows gravity and absorption to wick away extra oil, ensuring your huaraches are crispy and delicious, not greasy.
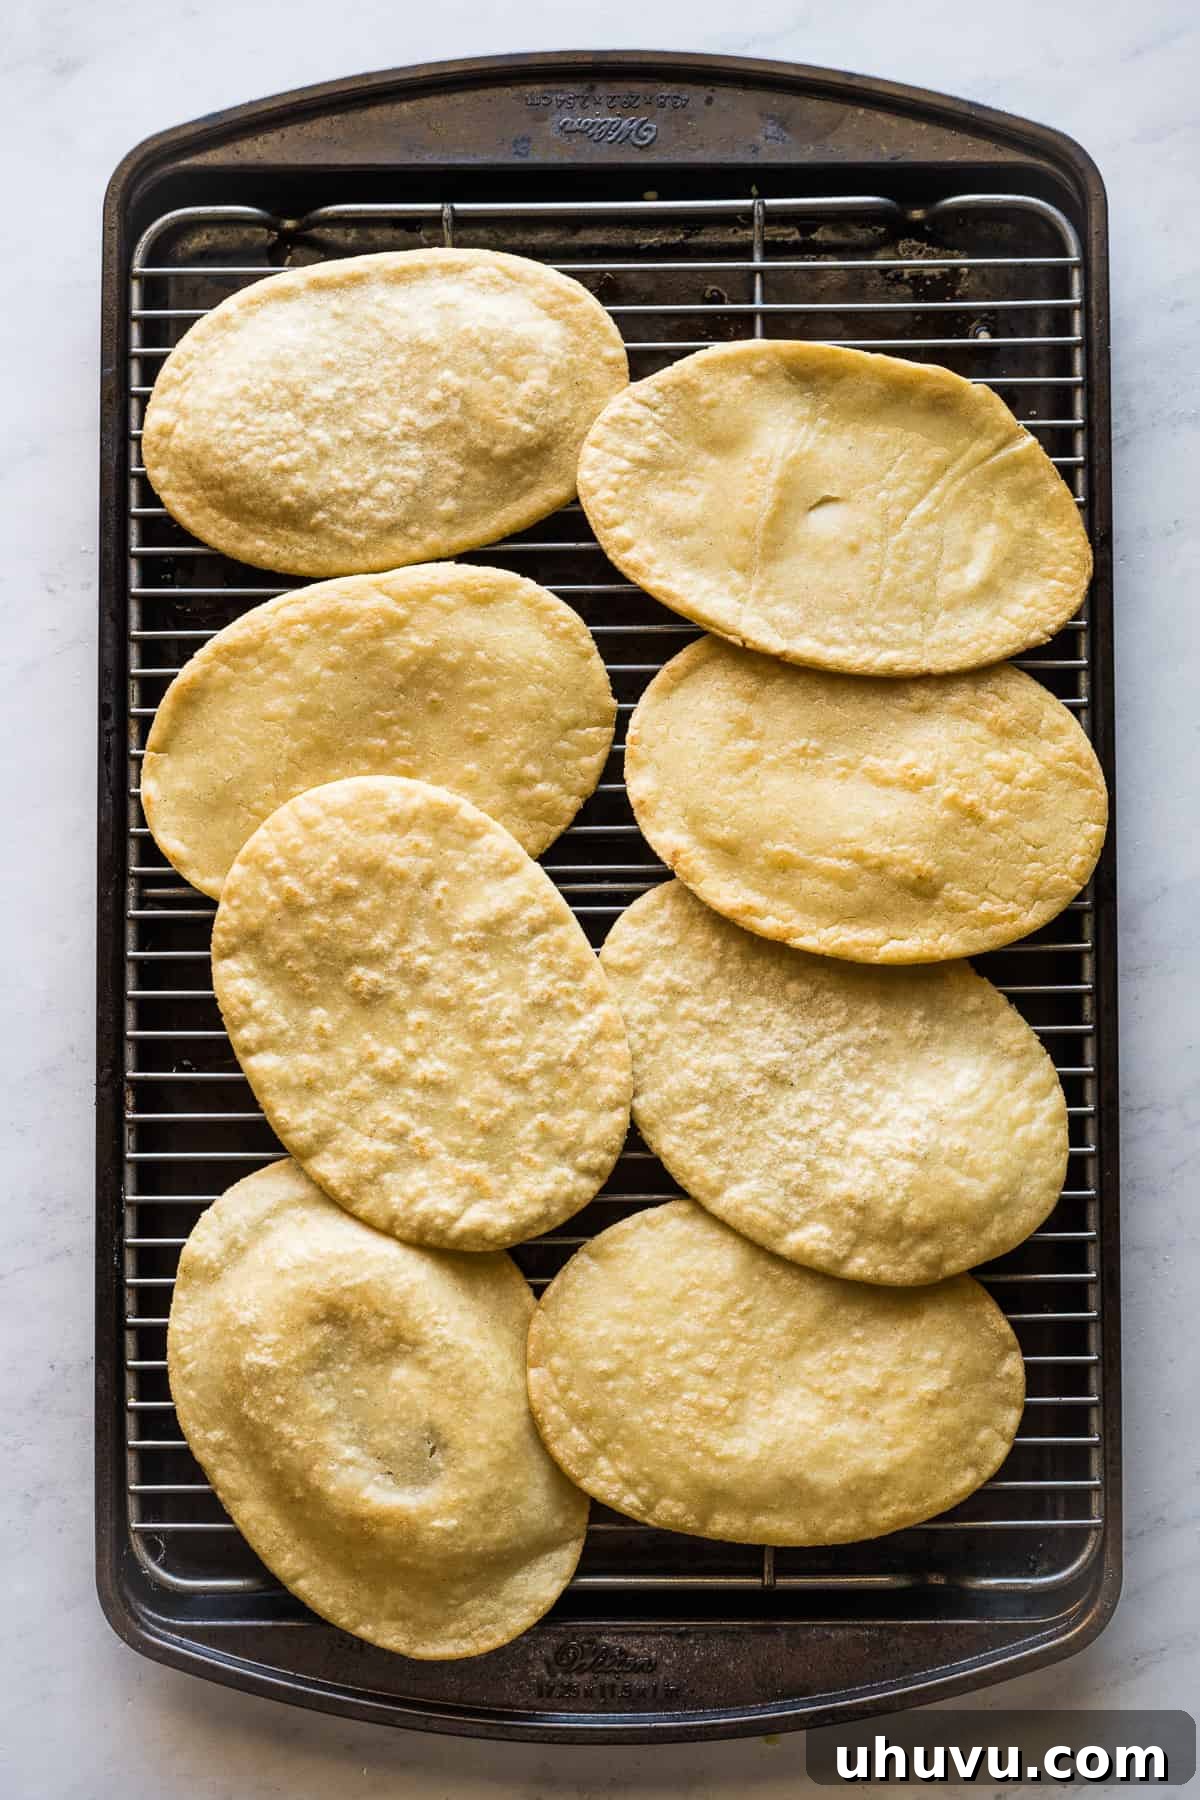
7. Assemble and Serve Your Flavorful Huaraches
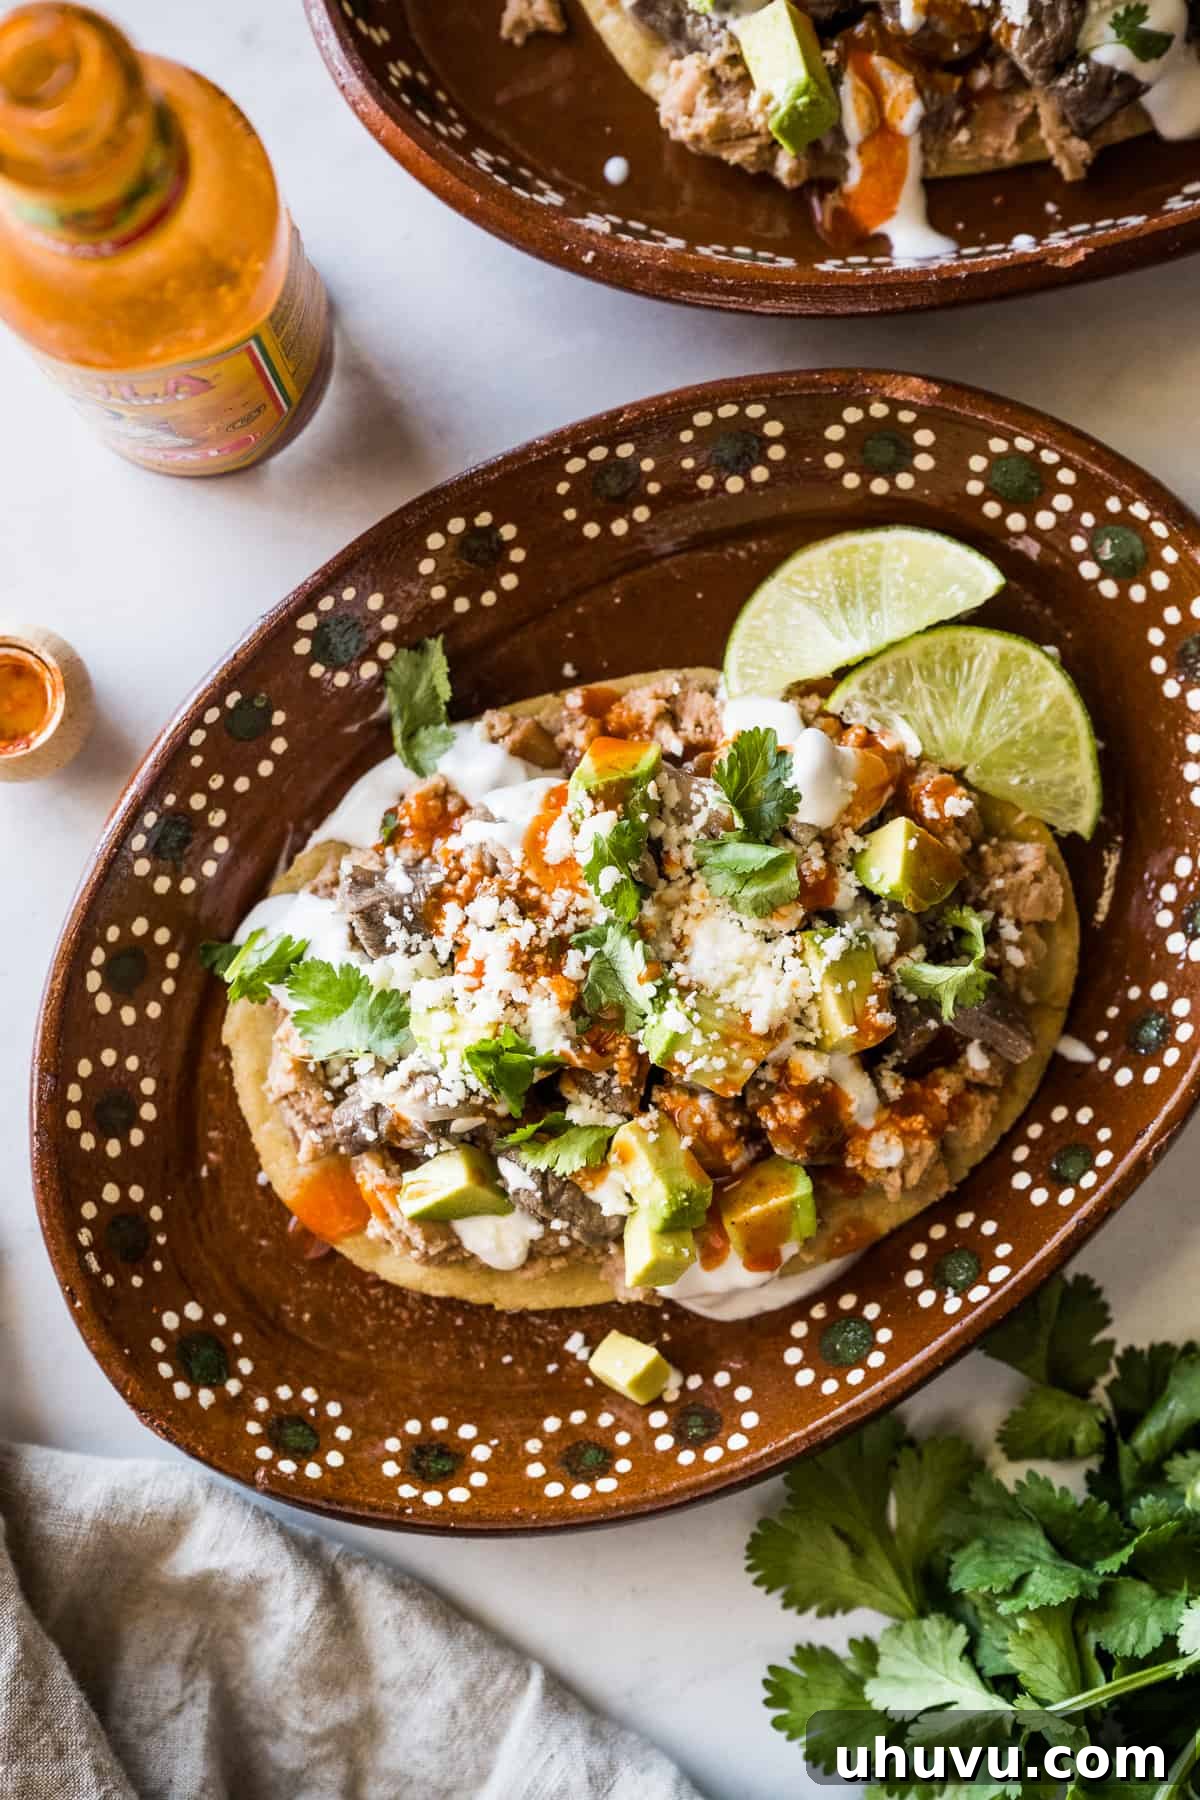
The final and most exciting step is assembly! While the huaraches are still warm, spread a generous spoonful of warm, creamy refried beans evenly over each masa base. Next, pile on your cooked meat of choice (a recipe for a delicious beef topping is typically found in a full recipe card). Then, comes the vibrant array of garnishes: drizzle with your favorite salsa roja or a spicy hot sauce, add a dollop of fresh salsa verde or creamy guacamole salsa, sprinkle with diced avocados for freshness, and finish with crumbled cotija cheese or mild queso fresco. Serve immediately and enjoy the explosion of authentic Mexican flavors and textures!
Essential Recipe Tips for Huarache Success
- Achieving Perfect Masa Dough: The key to great huaraches starts with well-hydrated masa. As you knead, press down on a small piece of dough with your finger. If the edges crack, the dough is too dry, and you’ll need to add a tiny bit more water, a teaspoon at a time. Conversely, if the dough sticks excessively to your skin, it’s too wet, and a sprinkle of masa harina will help. Aim for a soft, pliable, and smooth consistency that doesn’t stick.
- The Magic of Frying: While cooking on a griddle is essential for the initial masa base, frying the huaraches after griddling truly transforms them. This step not only imparts an incredibly delicious, rich flavor but also makes them wonderfully crispy and significantly sturdier. This added structural integrity is crucial for holding a generous amount of savory toppings without becoming soggy or falling apart, making for a much easier and more enjoyable eating experience.
- Griddled Huaraches (No Frying Option): If you prefer to skip the frying step for a lighter version, don’t worry! You can certainly serve the huaraches straight off the comal after they’ve been cooked through. For a slightly crisper, yet still oil-free, alternative, lightly spray the griddled huaraches with a bit of cooking spray and bake them in an oven preheated to 400°F (200°C) for 5-8 minutes. This will help crisp them up beautifully without deep-frying.
- Keep Dough Moist: Always keep your masa dough covered with a damp cloth or plastic wrap when not actively working with it. Masa dries out quickly, and dry dough is much harder to shape and can result in cracked huaraches.
- Don’t Overload the Griddle/Pan: Whether griddling or frying, work in batches. Overcrowding the cooking surface can lower the temperature, leading to huaraches that steam rather than crisp, or absorb too much oil.
Unleash Your Creativity: Topping Ideas for Huaraches
Huaraches are truly the perfect canvas for a wide variety of flavors, making them an excellent vessel for showcasing your favorite foods or even reinventing delicious leftovers. Their sturdy base can hold a multitude of ingredients, allowing for endless culinary creativity. Here are some mouth-watering suggestions to inspire your next huarache creation:
Savory Meats and Protein Options:
- Carnitas: Tender, slow-cooked pork that’s crispy on the outside and juicy within.
- Birria: Rich, flavorful stewed beef or goat, often served with its consommé for dipping.
- Barbacoa: Succulent, slow-cooked beef (or lamb) that’s incredibly tender and aromatic.
- Picadillo: A savory ground meat hash, often seasoned with spices and vegetables.
- Chicken Tinga: Shredded chicken cooked in a smoky, spicy chipotle sauce.
- Carne Asada: Grilled, marinated steak, thinly sliced for a delightful bite.
- Al Pastor: Marinated pork cooked on a vertical spit, often with pineapple.
Vegetarian & Bean-Based Delights:
- Refried Beans: A classic and essential topping, providing a creamy, savory layer.
- Calabacitas: A vibrant and flavorful squash medley, often with corn and peppers.
- Papas con Chorizo: Hearty potatoes cooked with spicy Mexican chorizo, a filling and flavorful option.
- Roasted Vegetables: Bell peppers, onions, zucchini, and mushrooms, seasoned and roasted to perfection.
- Frijoles de la Olla: Simple, flavorful whole beans for a rustic touch.
Fresh Garnishes & Salsas:
- Salsa Roja: A classic red salsa, ranging from mild to fiery.
- Salsa Verde: Tangy green salsa made from tomatillos.
- Guacamole Salsa: A creamy blend of avocado and salsa for a rich, fresh kick.
- Diced Avocados or Guacamole: Adds a creamy, cool counterpoint.
- Crumbled Cotija Cheese or Queso Fresco: Salty, crumbly, or mild, fresh cheese to balance flavors.
- Fresh Cilantro and Diced Onions: Essential fresh elements for texture and brightness.
- Crema Mexicana or Sour Cream: A cooling, creamy drizzle.
Feel free to mix and match these options, creating a huarache that perfectly suits your taste buds. The beauty of huaraches lies in their adaptability, allowing you to transform them into a gourmet meal or a simple, comforting snack.
Storing and Reheating Huaraches: Keeping Them Fresh
To enjoy your delicious huaraches even longer, proper storage and reheating are key to maintaining their flavor and texture. Follow these guidelines:
- To Store: Once cooled, place the cooked huarache bases in an airtight container or a resealable plastic bag. They can be refrigerated for up to 4 days. If you have leftover meat and other toppings, it’s best to store them in separate airtight containers in the fridge for up to 5 days. Assembled huaraches tend to get soggy, so always store components separately.
- To Reheat Huarache Bases: For a soft base, reheat the huaraches on a dry skillet or comal over medium-high heat for a few minutes per side until warmed through. If you fried your huaraches initially and want to restore their crispiness, you have a couple of excellent options:
- Air Fryer: Place them in an air fryer at 350°F (175°C) for 2-4 minutes, or until crisp.
- Oven: Alternatively, reheat them in a preheated oven at 375°F (190°C) for 5-8 minutes, or until they regain their desired crisp texture.
Reheat meat toppings in a skillet or microwave until hot. Once everything is warmed, assemble your huaraches fresh for the best experience.
- Freezing Huarache Bases (Unfried): You can prepare the masa bases, cook them on the griddle (without frying), let them cool completely, and then freeze them. Wrap them individually in plastic wrap, then place them in a freezer-safe bag or container. They can be frozen for up to 2-3 months. To cook from frozen, thaw in the refrigerator overnight, then proceed with the frying (or baking) and topping steps as usual.
Explore More Authentic Mexican Recipes
If you’ve enjoyed making and eating huaraches, you’ll love exploring other traditional Mexican antojitos and main courses. Dive into these equally delicious recipes to expand your culinary repertoire:
- Sopes: Thick, round corn cakes with crimped edges, perfect for holding a variety of savory toppings.
- Flautas: Crispy, rolled tacos filled with meat or cheese, often deep-fried until golden.
- Tetelas: Triangular corn tortillas traditionally filled with black bean paste, a pre-Hispanic delicacy.
- Homemade Corn Tortillas: Master the basics of Mexican cuisine by making fresh, authentic corn tortillas from scratch.
- Gorditas: “Little fat ones” – thick, puffy corn masa cakes often split and stuffed with savory fillings.
- Pork Tamales: Steamed masa dough wrapped in corn husks, filled with flavorful pork and rich sauce.
- Quesadillas: Classic cheese-filled tortillas, often enhanced with other ingredients.
- Enchiladas: Corn tortillas rolled around fillings and covered with a savory chili sauce.
Each of these dishes offers a unique glimpse into the rich culinary landscape of Mexico, promising an adventure for your taste buds.
Print Recipe
Authentic Mexican Huaraches Recipe
Ingredients
For the meat
- 2 tablespoons olive oil
- 1 ½ pound beef chuck steak, diced into small bite-sized cubes
- ¼ onion, thinly sliced (white or yellow)
- 2 cloves garlic, minced
- 1 teaspoon kosher salt, plus more as needed
- ½ teaspoon freshly ground black pepper
For the huaraches
- 2 cups masa harina, plus more as needed
- 1 teaspoon fine salt
- 1 ½ cups water, plus more as needed
- Vegetable oil, for frying (optional)
For serving
- Refried beans, warmed
- Salsa roja or your favorite hot sauce
- Salsa verde or guacamole salsa
- Diced avocados
- Crumbled cotija cheese or queso fresco
Instructions
-
1. Make the meat: Heat the olive oil in a large skillet over medium-high heat. Add the steak, onion, garlic, salt, and black pepper and cook for 5 to 6 minutes, stirring occasionally, until the meat is no longer pink and browned. Remove from heat and cover to keep warm until ready to serve.
-
2. Prep the huarache dough: In a large bowl, combine the masa harina and salt. Gradually stir in the water until a dough forms.
-
3. Knead the dough: Using your hands, knead the dough until it fully comes together and all the water is absorbed, becoming smooth and pliable. To check for readiness, grab a small piece and roll it into a ball, then press down with a finger. If the edges of the dough crack, it’s too dry; add more water, a teaspoon at a time. If the dough sticks to your skin, it’s too wet; add more masa harina, a tablespoon at a time, until the ideal consistency is reached.
-
4. Divide the dough: Divide the dough into 8 equal portions. Roll each portion into a smooth ball and cover them immediately with a clean, damp cloth or plastic wrap to keep the dough moist while you press and cook the huaraches.
-
5. Prep a griddle or skillet: Heat a comal or large, heavy skillet over medium-high heat until hot.
-
6. Shape the huarache dough: Roll each dough portion into a 5 to 6-inch log. Working one at a time, place the dough between two sheets of parchment paper or plastic wrap and flatten gently with a tortilla press, a heavy glass baking dish, or the palm of your hand until it’s about ¼-inch thick. Using your hands, gently shape the flattened dough into an oblong form resembling the outline of a sandal. Carefully peel the plastic wrap or parchment paper back and transfer the huarache to your hand.
-
7. Cook on griddle: Cooking 1 or 2 huaraches at a time, place them on the hot griddle and cook for 1 minute, or until light brown spots appear on the bottom. Flip and cook the other side for 1 more minute. At this point, you can eat the huaraches as is, or for a crispier and more delicious dish, proceed to the optional frying step.
-
8. Fry (optional): Fill a large sauté pan or deep skillet with about 1 inch of vegetable oil and heat over medium-high heat until the temperature reaches 350°F (175°C). (To test, drop a small piece of dough in the oil. If it sizzles vigorously, it’s ready.) Cooking in batches, carefully add 1 or 2 huaraches into the hot frying oil and fry for about 1 minute per side until golden brown and crispy. Transfer them to a large plate or baking sheet lined with paper towels to soak up any excess oil.
-
9. Assemble and serve: Spread a generous spoonful of warm refried beans onto each huarache, then top with the cooked meat. Drizzle with salsa roja or your favorite hot sauce, salsa verde or guacamole salsa, diced avocados, and crumbled cotija cheese or queso fresco. Serve immediately.
Nutrition
Nutrition information is automatically calculated, so should only be used as an approximation.