
Effortless Indoor Seed Starting: Your Beginner’s Guide to Peat Pellets
As spring officially arrives, bringing with it the promise of longer days and renewed growth, many of us are eager to get our hands dirty. Even if Mother Nature plays coy with late-season snowflakes or chilly temperatures, there’s no reason to delay your gardening dreams. Starting your vegetable and herb seedlings indoors is a fantastic way to get a head start on the growing season, ensuring robust, healthy plants when it’s time to transplant them outdoors. For those new to gardening, or anyone seeking a clean and straightforward method, peat pellets offer an incredibly effective solution.
Unlock Your Garden’s Potential with Peat Pellets
Peat pellets are a game-changer for indoor seed starting. These ingenious little disks are made from compressed, dehydrated peat (often mixed with coco coir or other growing mediums) and held together by a fine, biodegradable mesh netting. Their magic lies in their simplicity: just add water, and watch them expand into perfectly proportioned, self-contained pots, ready for your seeds. They are a brilliant space-saving alternative to traditional seedling trays and pots, making the entire process enjoyable and incredibly efficient. For many, the visual transformation of a small disk into a fertile growing medium brings back childhood wonder, similar to those expanding water toys!
Why Choose Peat Pellets for Your Indoor Seed Starting?
There are numerous benefits to incorporating peat pellets into your gardening routine, especially if you’re a beginner:
- Unmatched Convenience: Peat pellets eliminate the need for purchasing bags of potting mix, filling trays, and cleaning up soil spills. They come pre-portioned and ready to use, streamlining the entire seed-starting process.
- Reduced Transplant Shock: Since seedlings are transplanted directly in their peat pellet, their delicate root systems remain undisturbed. This significantly reduces transplant shock, leading to stronger, healthier plants.
- Space-Saving Design: Their compact nature before expansion means you can store many pellets in a small space. Once expanded, they still fit snugly into specialized trays, maximizing your indoor growing area.
- Clean and Mess-Free: Say goodbye to scattered soil. Peat pellets contain the growing medium neatly within their mesh, keeping your indoor environment much cleaner.
- Sterile Medium: The compressed peat offers a sterile environment, reducing the risk of common seedling diseases like “damping off” that can plague less controlled soil conditions.
- Excellent Drainage and Aeration: The structure of the peat and mesh ensures optimal air circulation around the roots and proper drainage, preventing waterlogging while retaining essential moisture.
Getting Started: Your Essential Peat Pellet Kit
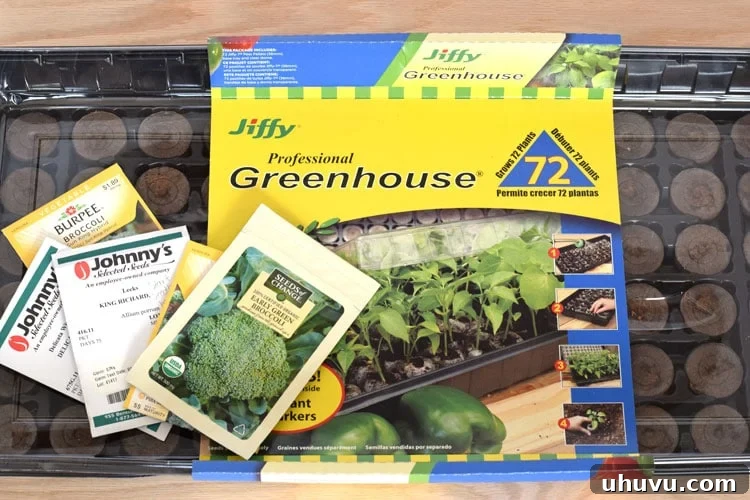
The easiest way to embark on your indoor seed-starting journey with peat pellets is by investing in a comprehensive starter kit. These kits typically include the peat pellets themselves, a sturdy holding tray, a clear plastic lid to create a miniature greenhouse effect, and often some labels to keep track of your plantings. All you’ll need to supply are your chosen seeds and a little water.
Many reputable brands offer these kits. For instance, the Jiffy Professional Greenhouse Starter Kit is a popular choice, available in various sizes from 72-plant capacities for ambitious gardeners to smaller 25-plant or 50-plant options perfect for trying out new varieties or starting a modest herb garden. When selecting your seeds, consider what grows well in your region and what you love to eat! Many gardeners enjoy starting vigorous plants like Organic Early Green Broccoli, robust King Richard Leeks, unique Delicata Squash, high-yielding Sun King Hybrid Broccoli, and nutrient-dense Dwarf Blue Curled Kale indoors for an early harvest.
Ready to transform tiny seeds into thriving plants? Let’s walk through the simple steps.
Step-by-Step Guide to Starting Seeds Indoors with Peat Pellets
Step 1: Arrange Your Peat Pellets
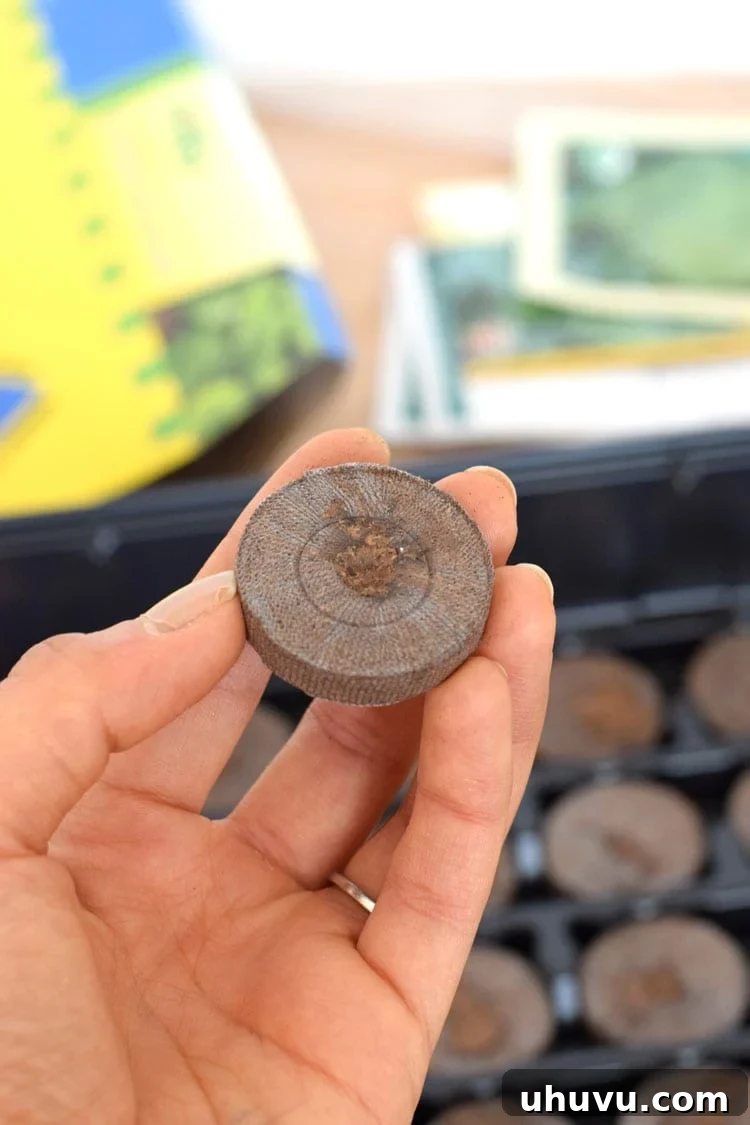
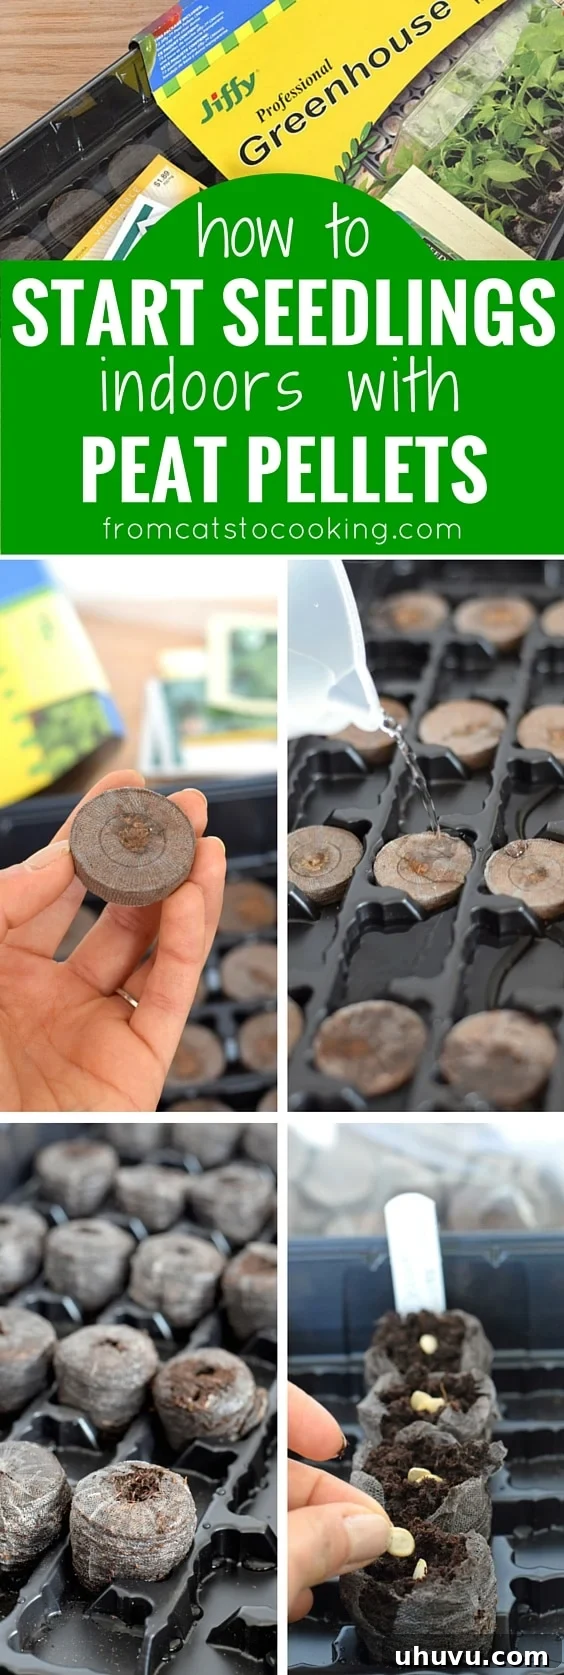
First, determine how many seedlings you wish to start. It’s always a good practice to prepare one or two extra pellets per plant you intend to grow, as not all seeds may germinate. Place the desired number of dehydrated peat pellets into your seed starting tray. Any unused pellets can be stored in an airtight plastic bag for future use. If all your seeds sprout and thrive, you can either thin out the weaker seedlings, transplant the extras, or share the love by gifting them to fellow gardening enthusiasts.
Step 2: Hydrate Your Pellets
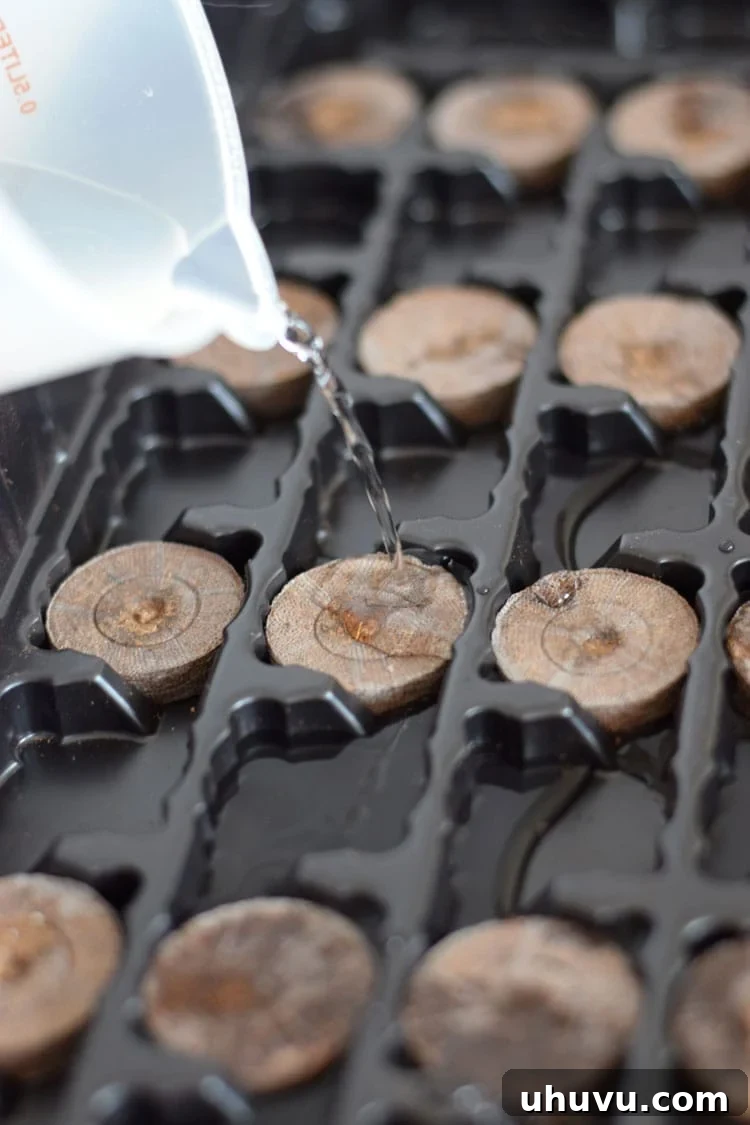
Carefully pour lukewarm water into the tray, ensuring it covers approximately half the height of the peat pellets. The exact amount of water will depend on the number of pellets you’re hydrating. Lukewarm water encourages faster and more efficient absorption by the peat, speeding up the expansion process.
Step 3: Allow for Full Expansion
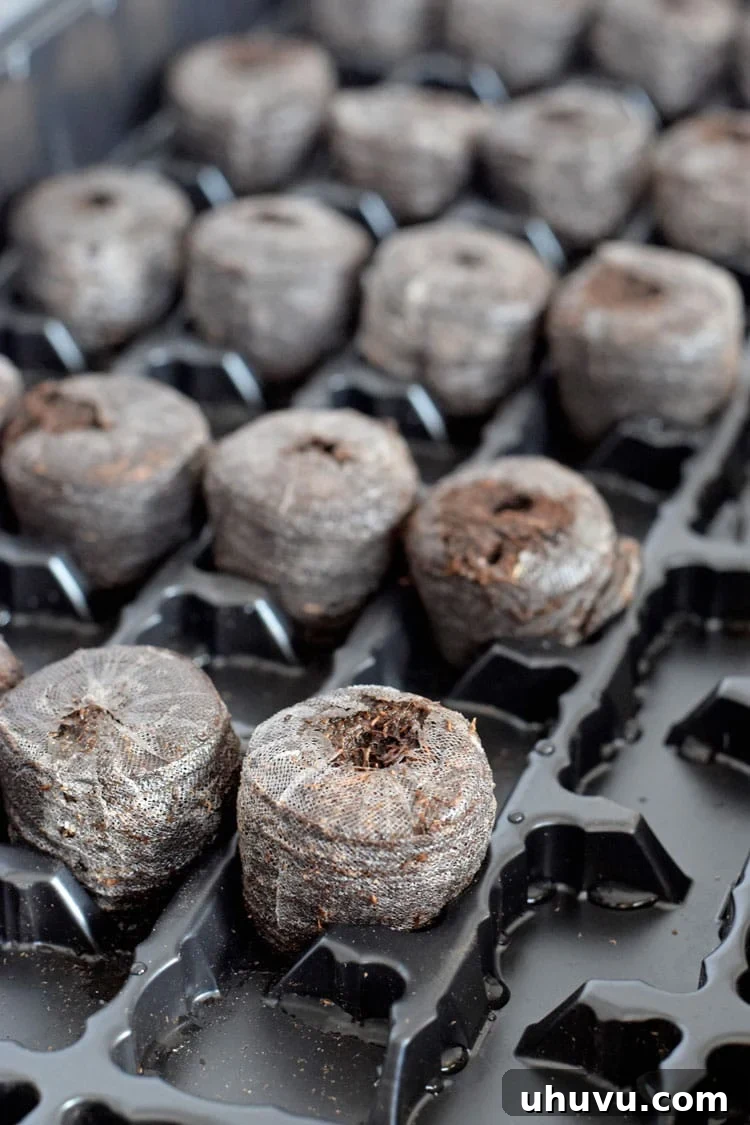
Patience is key here! Allow 5 to 10 minutes for the pellets to fully expand, absorbing all the water and transforming into miniature pots. You’ll notice them significantly increasing in height and diameter, revealing a fine mesh structure holding the growing medium together. If, after this time, some pellets still appear dry or only partially expanded, add a little more water. Once all pellets have fully expanded and are moist, carefully drain any excess water from the tray into a sink to prevent waterlogging.
Step 4: Prepare for Planting
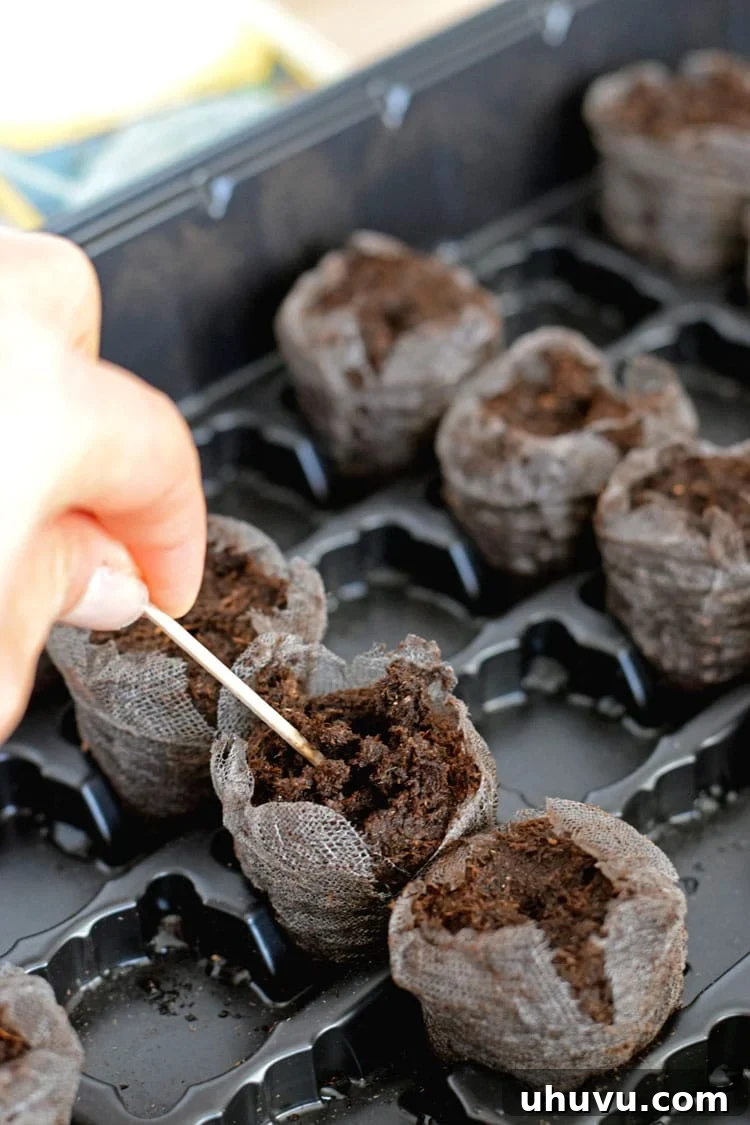
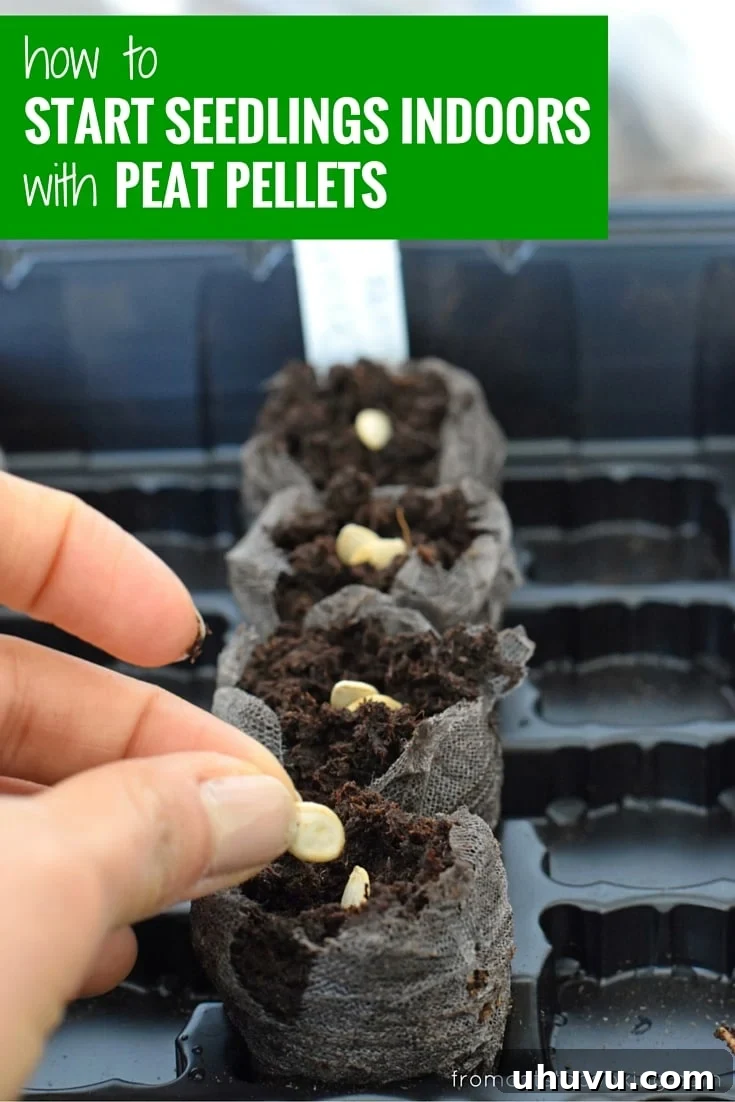
Before planting, gently tear a small section of the netting at the top of each expanded peat pellet. This slight opening allows for better aeration and makes it easier for the seedling’s roots to grow through. Next, using a toothpick, a pencil tip, or even your finger, create a small, shallow well in the center of the peat. This will be the perfect spot for your precious seeds.
Step 5: Plant Your Seeds
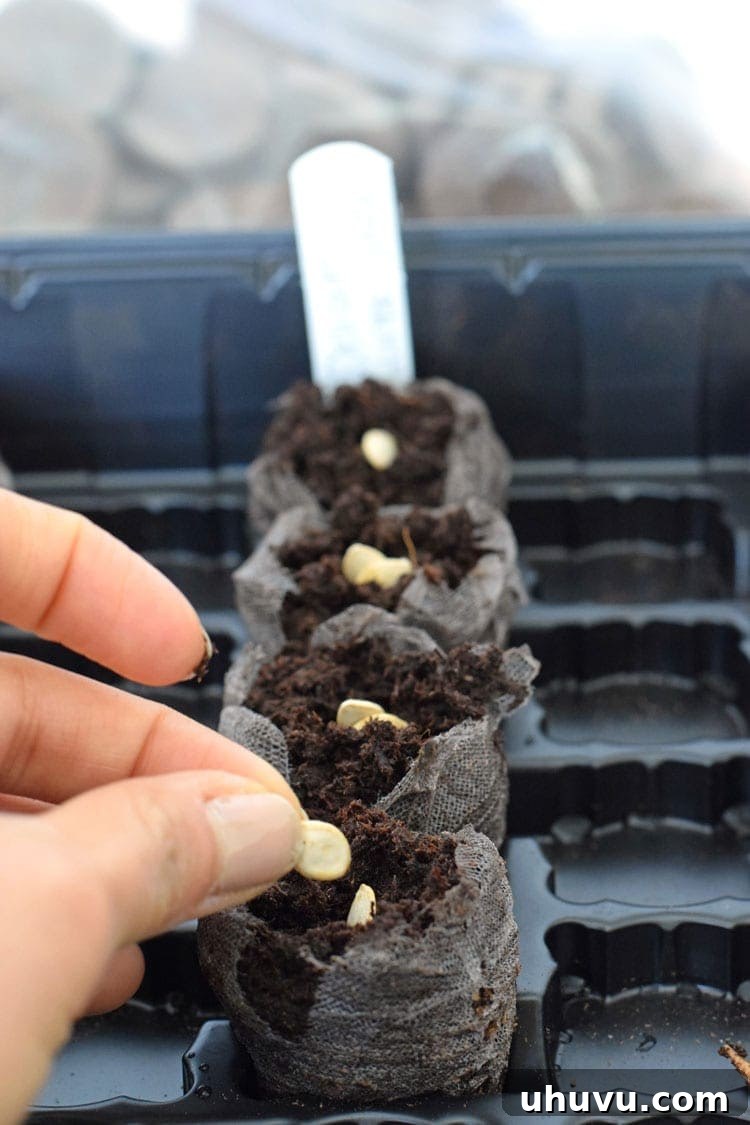
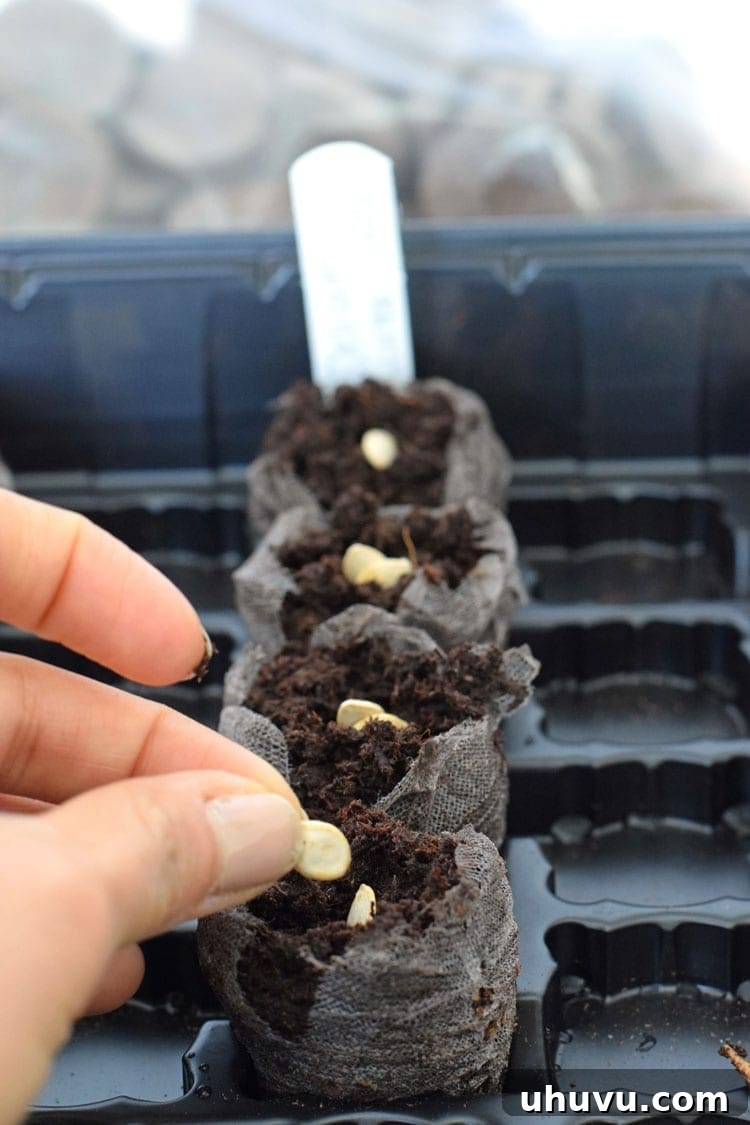
Now for the exciting part! Carefully place one or two seeds into each well. Planting two seeds per pellet is a common strategy to ensure at least one strong seedling emerges, accounting for potential germination failures. Refer to your seed packet for specific planting depth recommendations, but generally, most seeds should be covered lightly with the peat moss you displaced when making the well. Gently pat the peat over the seeds to ensure good seed-to-soil contact and moisture retention.
Step 6: Create a Mini Greenhouse for Germination
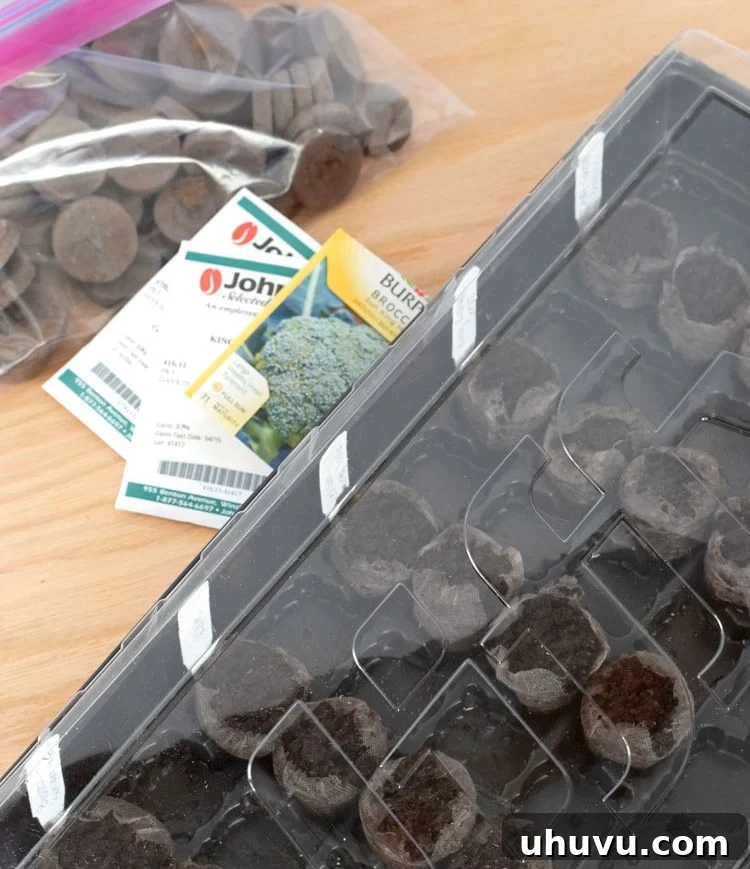
Once planted, label each pellet clearly so you can remember what you’ve sown. Then, cover the tray with the plastic lid provided in your kit. This lid creates a humid, greenhouse-like environment crucial for germination. Place the covered tray in a warm spot, away from direct sunlight. Ideal locations include the top of a refrigerator or a warm shelf, where temperatures are consistently cozy. Check your tray daily for signs of sprouts. Some fast-growing seeds can emerge within a couple of days! During this germination phase, only water the pellets if the peat appears significantly dry; a slightly damp feel is ideal. Overwatering can lead to issues like “damping off.”
Step 7: Light, Thinning, and Transplanting
Once your seeds have sprouted and you see the first tiny leaves emerge, it’s time to adjust their environment. Remove the plastic lid and move the tray to a bright location. A sunny windowsill is often sufficient, but for stronger, less leggy seedlings, consider placing them under dedicated grow lights. Grow lights provide consistent, intense light essential for healthy development. If more than one seedling has sprouted in a single pellet, gently pinch off the weaker seedling at the soil line, leaving only one healthy plant to grow. This “thinning” ensures the strongest plant receives all the necessary nutrients and space.
It’s important to note that only sprouted pellets should be exposed to direct light. If some pellets in your tray haven’t sprouted yet, keep them covered in their warm, dark spot until they show signs of life. You may need to transfer the sprouted seedlings to a different open tray while the others continue to germinate.
The timing for transplanting your seedlings will vary by plant type, but a clear indicator is when you start to see roots emerging through the mesh netting of the peat pellet. When it’s time to transplant, simply place the entire peat pellet directly into a larger pot or into your garden soil and cover it. While the mesh is biodegradable and designed to break down in soil, some gardeners prefer to gently remove the netting before transplanting to ensure unrestricted root growth. If you choose this route, proceed with extreme caution to avoid disturbing the delicate root ball. Before transplanting outdoors, remember to “harden off” your seedlings by gradually exposing them to outdoor conditions over a week or two, preparing them for the transition.
Embrace Your Green Thumb
Gardening is a journey of continuous learning and experimentation, and starting with peat pellets is an accessible and rewarding way to cultivate your green thumb. This method simplifies many of the common hurdles for beginners, making indoor seed starting a joyous and successful endeavor. Have you tried peat pellets before, or are you starting your seedlings this year? Share your experiences and tips in the comments below!
This page contains affiliate links. If you make a purchase on Amazon after clicking one of my links, I may receive a small commission. The price of the item stays the same, and any money I make helps support this blog. I only endorse products and services that I fully believe in.