
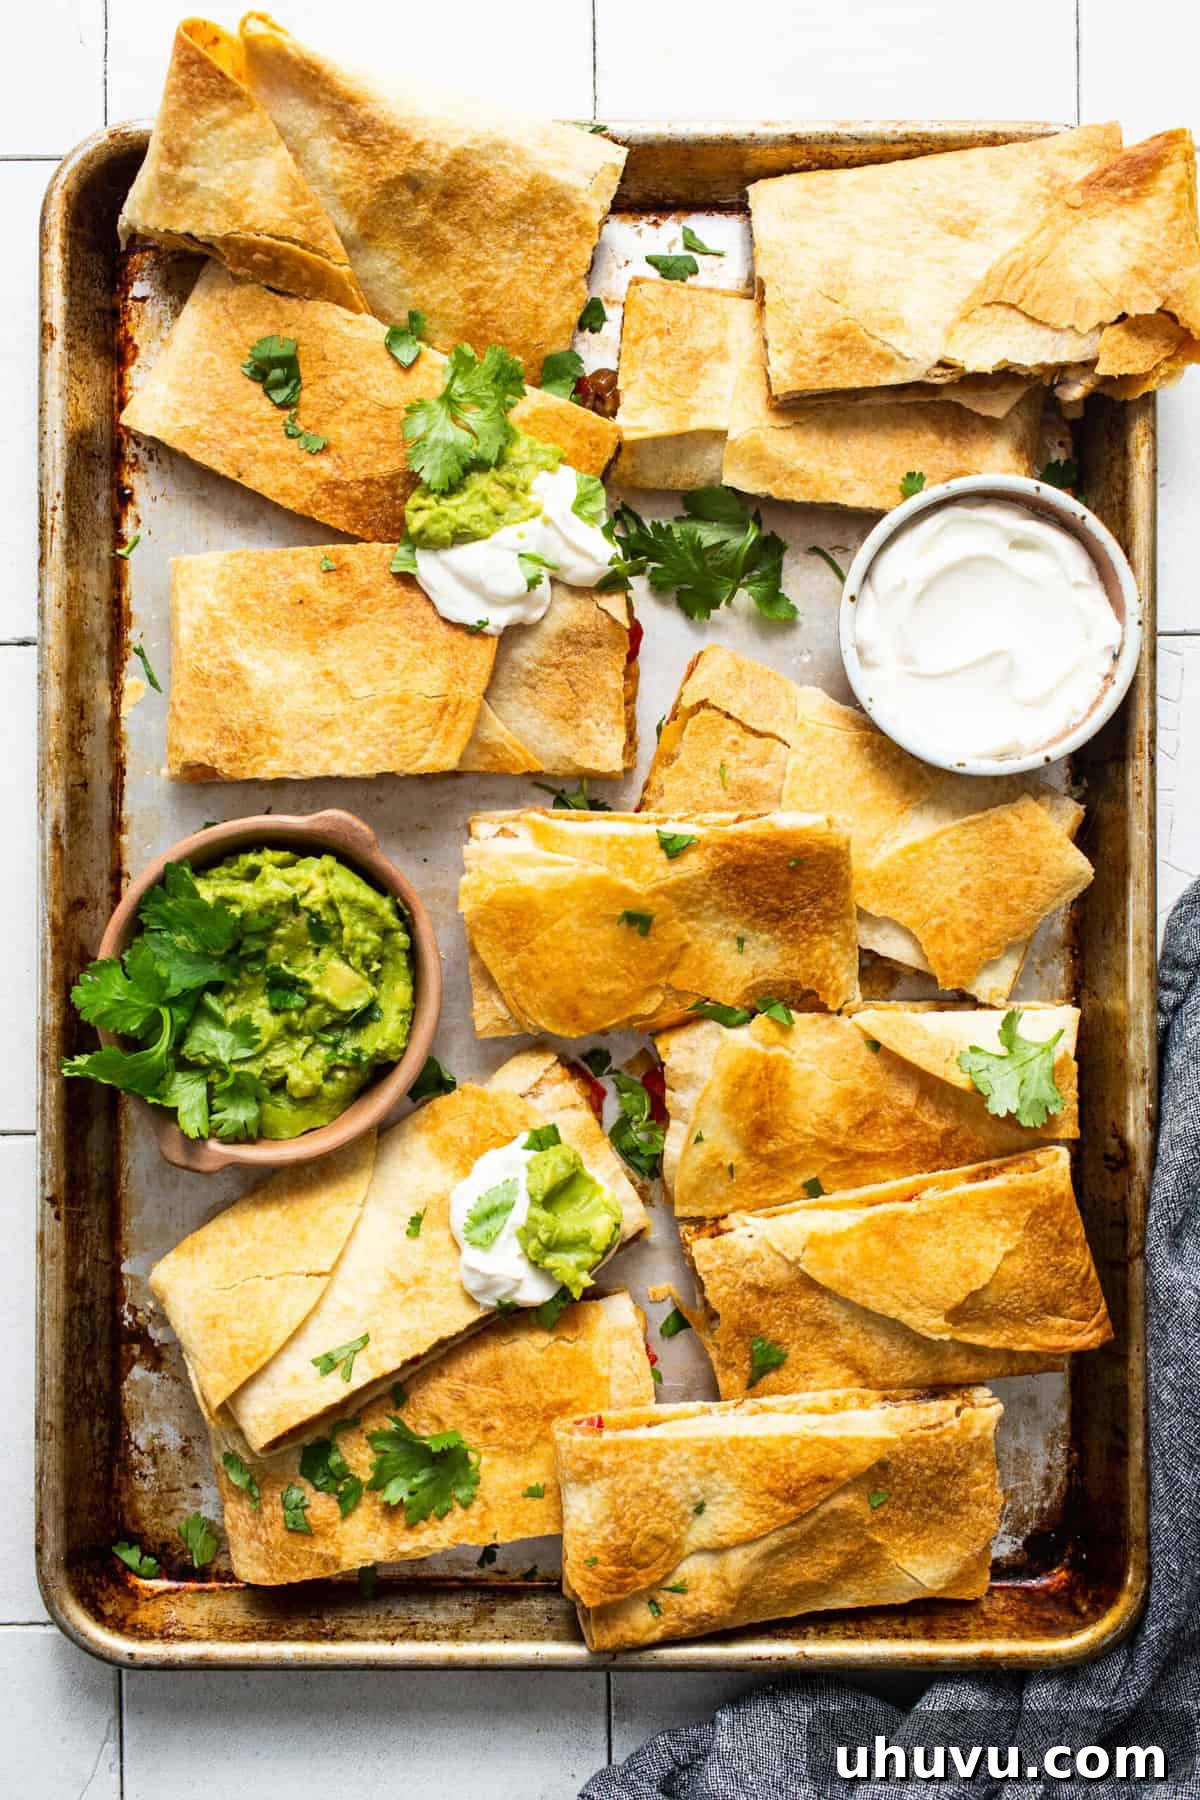
Are you ready to revolutionize your weeknight dinner routine and simplify meal prep? Look no further than these incredible **Sheet Pan Quesadillas**! Forget the days of flipping individual quesadillas over a hot skillet. This brilliant and **easy sheet pan quesadilla recipe** brings together tender, seasoned chicken, melty cheese, and vibrant vegetables, all baked to crispy perfection on a single sheet pan. It’s a truly **delicious one-pan meal** that’s perfect for **busy family dinners**, feeding a crowd, or efficient **meal prepping** for the week ahead.
Imagine golden-brown tortillas, generously filled with a savory blend of flavorful shredded chicken, sweet bell peppers, and caramelized onions, enveloped in a gooey layer of your favorite cheese. Each bite offers a satisfying crunch followed by a burst of warm, comforting flavors. This isn’t just a recipe; it’s a game-changer for anyone who loves the taste of homemade quesadillas but craves a simpler, less time-consuming method.
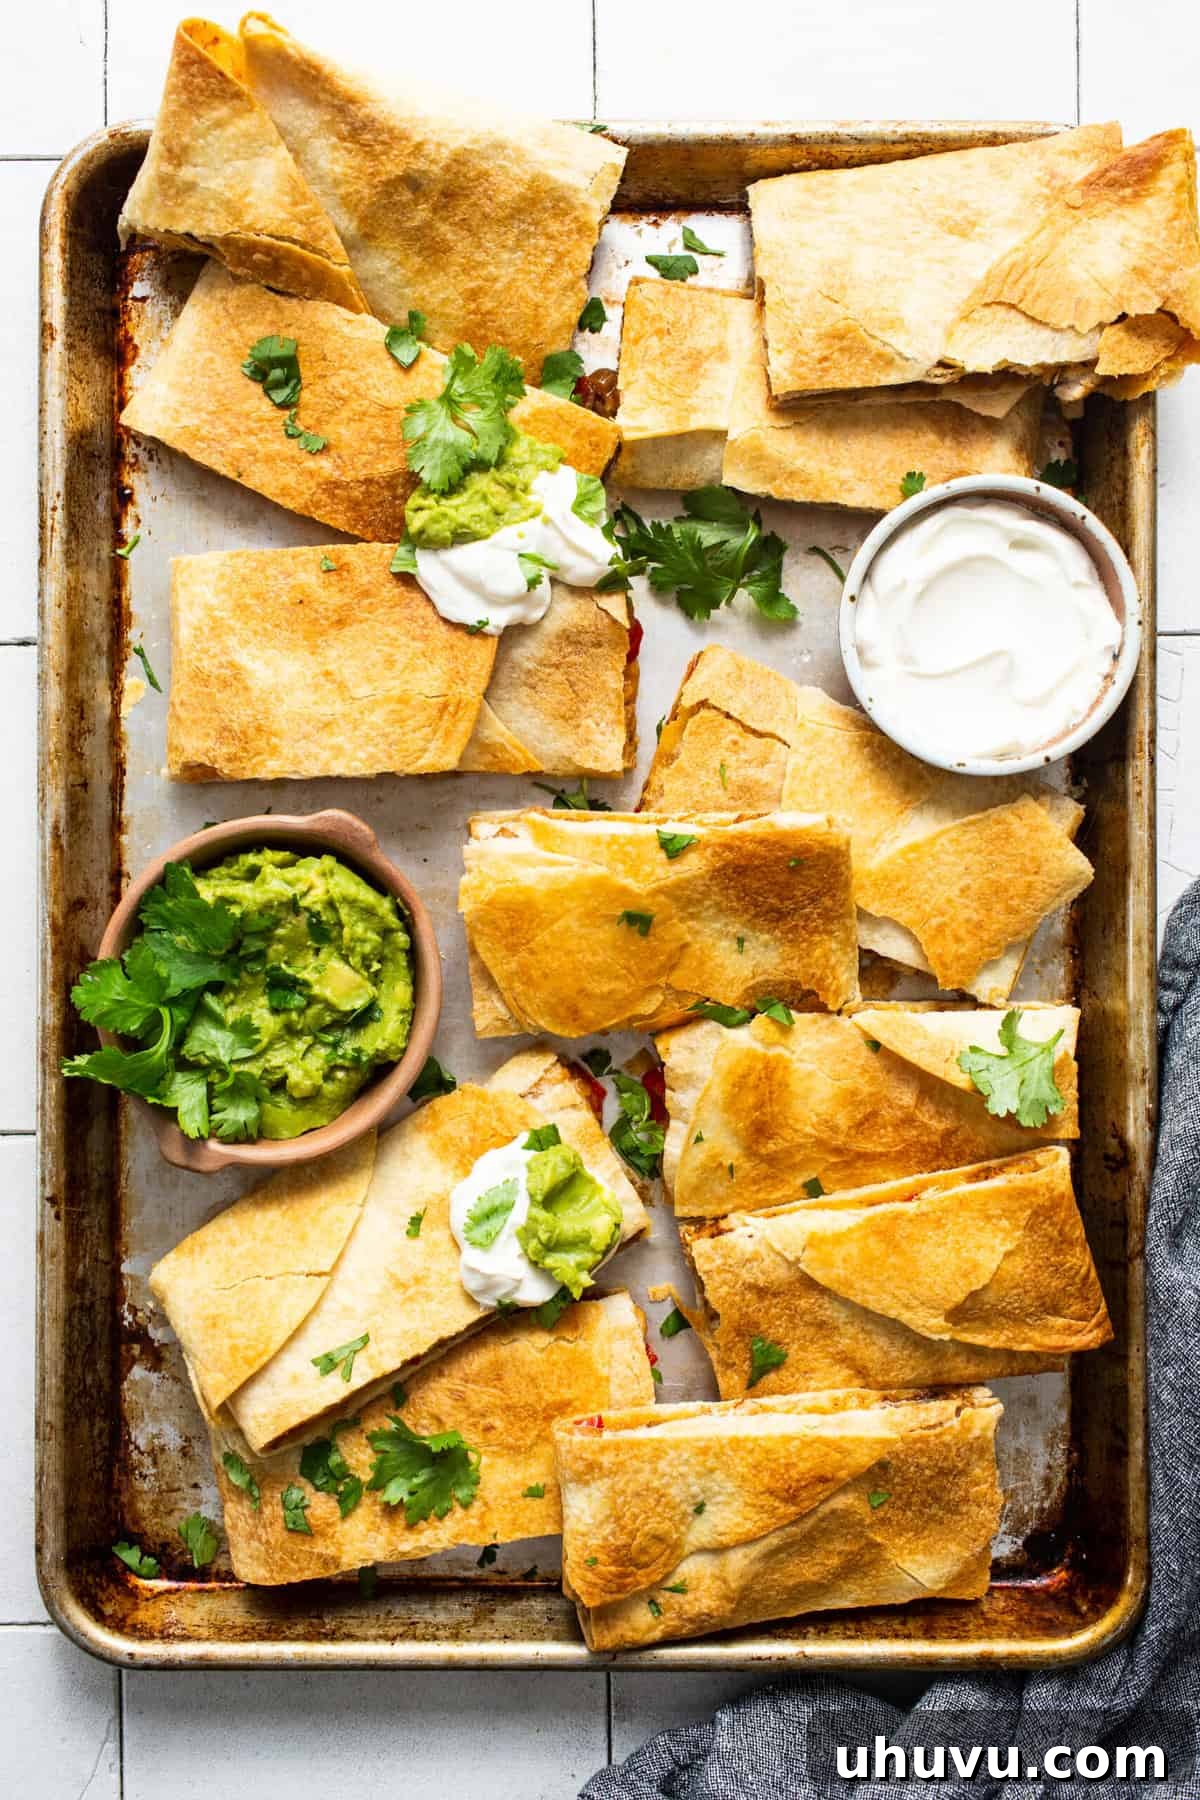
These **easy chicken quesadillas** are a staple in my home. When time is short, but the desire for a deeply satisfying and flavorful meal is high, this recipe consistently delivers. It’s the ultimate solution for preparing multiple servings at once, ensuring everyone gets a hot, perfectly cooked quesadilla without the endless flipping and waiting. My husband adores it, my kid devours it, and I absolutely love how effortless and adaptable it is. It’s a guaranteed hit with everyone!
Why Sheet Pan Quesadillas Are a Game-Changer
The concept of baking quesadillas on a sheet pan isn’t just a clever hack; it’s a culinary revelation. Here’s why this method will transform the way you make quesadillas forever:
- Effortless Preparation: No more standing over the stove, meticulously cooking one quesadilla at a time. With a sheet pan, you assemble everything once and let your oven do the hard work. This makes it a perfect **quick weeknight dinner**.
- Feeds a Crowd: Easily prepare a large batch of quesadillas simultaneously, making it ideal for family gatherings, parties, or simply ensuring plenty of leftovers for **meal prep**.
- Consistent Crispy Texture: The oven’s radiant heat, especially when paired with a second sheet pan to press down, ensures an even crispness across all the tortillas, achieving that perfect golden-brown finish without uneven cooking. Say goodbye to soggy spots!
- Minimal Mess: By containing the cooking to one pan, cleanup is significantly reduced. Less splatter, fewer dishes – a win-win for any home cook looking for **easy clean-up recipes**.
- Infinitely Customizable: While our recipe features chicken and classic veggies, the sheet pan method is incredibly forgiving. You can swap proteins, add different vegetables, or even make it vegetarian with ease, catering to various dietary preferences.
- Perfect for Meal Prep: Make a big batch at the beginning of the week, slice them, and have delicious, ready-to-reheat quesadilla portions for lunches or quick dinners, saving valuable time during busy schedules.
This approach simplifies the process, making homemade quesadillas accessible even on the busiest evenings, proving that convenience doesn’t have to mean compromising on flavor or quality. It truly is a **one-pan wonder** that delivers maximum taste with minimum effort.
Essential Ingredients for Perfect Sheet Pan Quesadillas
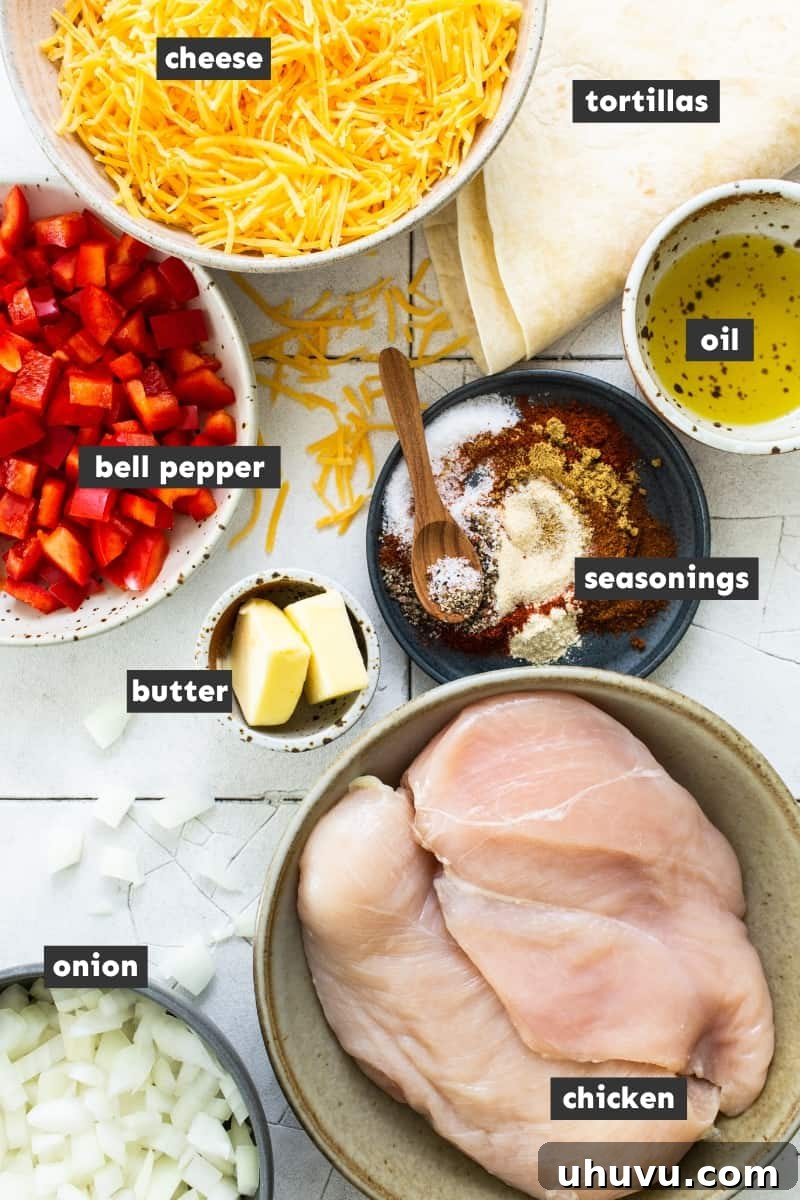
Crafting the perfect **sheet pan quesadilla** begins with fresh, high-quality ingredients. This recipe is designed to be flexible, allowing you to adapt it to your preferences and what you have on hand. Here’s a detailed look at what you’ll need:
- Chicken: For this recipe, I opt for boneless, skinless chicken breasts, sliced lengthwise to ensure even cooking and easier dicing. They provide a lean protein base that absorbs the seasonings beautifully. However, don’t hesitate to use boneless, skinless chicken thighs for a juicier, richer flavor profile. To make this an even quicker **weeknight dinner**, a store-bought rotisserie chicken is an excellent shortcut. Simply shred the meat and incorporate it into the filling, saving you a significant amount of prep time.
- Tortillas: The foundation of any great quesadilla! You’ll need large, 10-inch flour tortillas, often labeled as “burrito size.” These larger tortillas are crucial for effectively overlapping and covering the surface of a standard baking sheet, creating a seamless, large quesadilla that can be easily cut into individual servings. Using smaller tortillas would result in too many gaps and a less cohesive structure, making them harder to assemble and bake evenly.
- Cheese: The soul of a quesadilla is its gooey, melted cheese. My go-to is shredded cheddar cheese for its classic flavor and excellent melting properties, ensuring a perfect cheese pull in every slice. But feel free to experiment with other varieties. Monterey Jack offers a mild, creamy melt, mozzarella provides incredible stretchiness, and a pre-shredded Mexican-blend cheese is convenient and perfectly balanced for flavor. For an extra kick, consider adding a sprinkle of pepper jack cheese.
- Veggies: A colorful medley of cooked bell peppers (red, yellow, or green) and onions forms the aromatic base of our filling. These vegetables soften and sweeten as they cook, adding depth and a pleasant texture that complements the savory chicken. For added flavor and nutrients, consider incorporating other vegetables like corn (fresh, frozen, or canned), black beans (rinsed and drained), diced zucchini, or even finely chopped mushrooms. This is where you can truly make the recipe your own based on seasonal availability or what needs to be used up in your fridge.
- Seasonings: The robust flavor of the chicken comes from a carefully selected blend of spices. My signature mix includes chili powder (both regular and ancho chili powder for a smoky, earthy note), kosher salt, onion powder, garlic powder, ground cumin, paprika, and freshly ground black pepper. This combination creates a rich, authentic Tex-Mex flavor profile that permeates every bite. If you’re looking for an even quicker option, 2 tablespoons of your favorite store-bought taco seasoning blend can be used in place of the individual spices. Just be mindful of the salt content in pre-made blends and adjust accordingly.
- Cooking Fats:
- Cooking Spray: Essential for greasing your sheet pan, ensuring the tortillas don’t stick and achieve a lovely crispy bottom crust when baked.
- Olive Oil: Used for sautéing the chicken and vegetables. It helps them cook evenly, develop rich flavors through caramelization, and prevents sticking in the skillet.
- Melted Butter: A key secret to achieving that irresistible golden-brown crispness on the top layer of your tortillas. Brushing generously with melted butter before baking creates a beautifully toasted exterior, adding a rich, savory note to the finished quesadilla.
Gathering these ingredients is the first step towards a truly memorable **one-pan quesadilla** experience!
Expert Tips for Sheet Pan Quesadilla Success
Achieving perfectly crispy, flavorful **sheet pan quesadillas** is easy with a few simple tricks. Keep these tips in mind to elevate your quesadilla game and ensure a delicious outcome every time:
- Prep Ahead for Speed: To streamline your cooking process, prepare the chicken and vegetable filling in advance. You can cook the chicken, dice it, and sauté the vegetables hours or even a day before. Store the mixture in an airtight container in the refrigerator, and when it’s time to assemble, you’ll be halfway there! This makes it an even faster **easy weeknight dinner** solution.
- Rotisserie Chicken is Your Friend: Don’t underestimate the power of a store-bought rotisserie chicken. Shredding it saves a significant amount of cooking time and adds wonderful flavor. It’s a fantastic hack for those extra busy evenings, especially when time is of the essence.
- Use Burrito-Sized Tortillas: This is crucial for proper coverage of your sheet pan. Large 10-inch flour tortillas (often labeled “burrito size”) allow for sufficient overlap, ensuring your entire quesadilla bakes into a cohesive unit that can be easily sliced. Smaller tortillas will leave too many gaps and may not hold together as well.
- Don’t Overfill: While it’s tempting to load up on fillings, an overstuffed quesadilla can be difficult to fold and may result in soggy tortillas or fillings spilling out. Aim for a generous but manageable layer that allows the tortillas to seal properly.
- The Butter Brush Method: Generously brushing the tops of the tortillas with melted butter is key to achieving that desirable golden-brown and extra-crispy exterior. The butter not only adds flavor but also promotes browning. Don’t skip this step!
- The Second Sheet Pan Press: Using a second, empty sheet pan to weigh down the quesadilla during the initial baking phase is a game-changer. It helps compress the fillings, ensures even heat distribution, and guarantees a wonderfully crispy bottom crust. It effectively mimics the pressing action of a traditional quesadilla maker, but on a much larger scale.
- Preheat Your Oven Properly: Ensure your oven is fully preheated to 425°F (220°C) before baking. A hot oven is essential for quick cooking and achieving maximum crispness on the tortillas.
- Allow to Rest: Just like a steak, letting your quesadilla cool slightly after baking (about 5-10 minutes) allows the cheese to set and the fillings to meld together. This makes for cleaner slices and prevents everything from oozing out when you cut into it.
How to Make Sheet Pan Quesadillas
Making these **oven-baked quesadillas** is incredibly straightforward and perfect for feeding a crowd. Follow these detailed steps for a perfect, crowd-pleasing meal every time:
- Prepare Your Oven and Pan: Begin by preheating your oven to a hot 425°F (220°C). While the oven heats, lightly grease a large baking sheet (a standard half-sheet pan works best) with cooking spray. This crucial step prevents sticking and helps achieve a deliciously crispy bottom crust for your quesadilla.
- Season and Cook the Chicken: In a small bowl, whisk together all your chosen seasonings: chili powder, ancho chili powder, salt, onion powder, garlic powder, ground cumin, paprika, and black pepper. Sprinkle this savory blend generously over both sides of your boneless, skinless chicken breasts, ensuring they are fully coated. Heat 1 tablespoon of olive oil in a large skillet over medium-high heat. Add the seasoned chicken to the skillet and cook for 5 to 6 minutes per side until it’s fully cooked through and an internal temperature of 165°F (74°C) is reached. Transfer the cooked chicken to a cutting board to rest, allowing the juices to redistribute for maximum tenderness.
- Sauté the Veggies: While the chicken rests, add the remaining 1 tablespoon of olive oil to the same skillet. Add the diced yellow onion and red bell pepper. Sauté for 3 to 4 minutes, stirring occasionally, until they begin to soften and become slightly translucent. This step enhances their natural sweetness and prepares them for the filling. Remove the skillet from the heat.
- Combine Filling: Once the chicken has rested, chop it into small, uniform bite-sized pieces. Add the diced chicken to the skillet with the softened peppers and onions. Stir everything together thoroughly to ensure the flavors are well combined and the filling is evenly distributed.
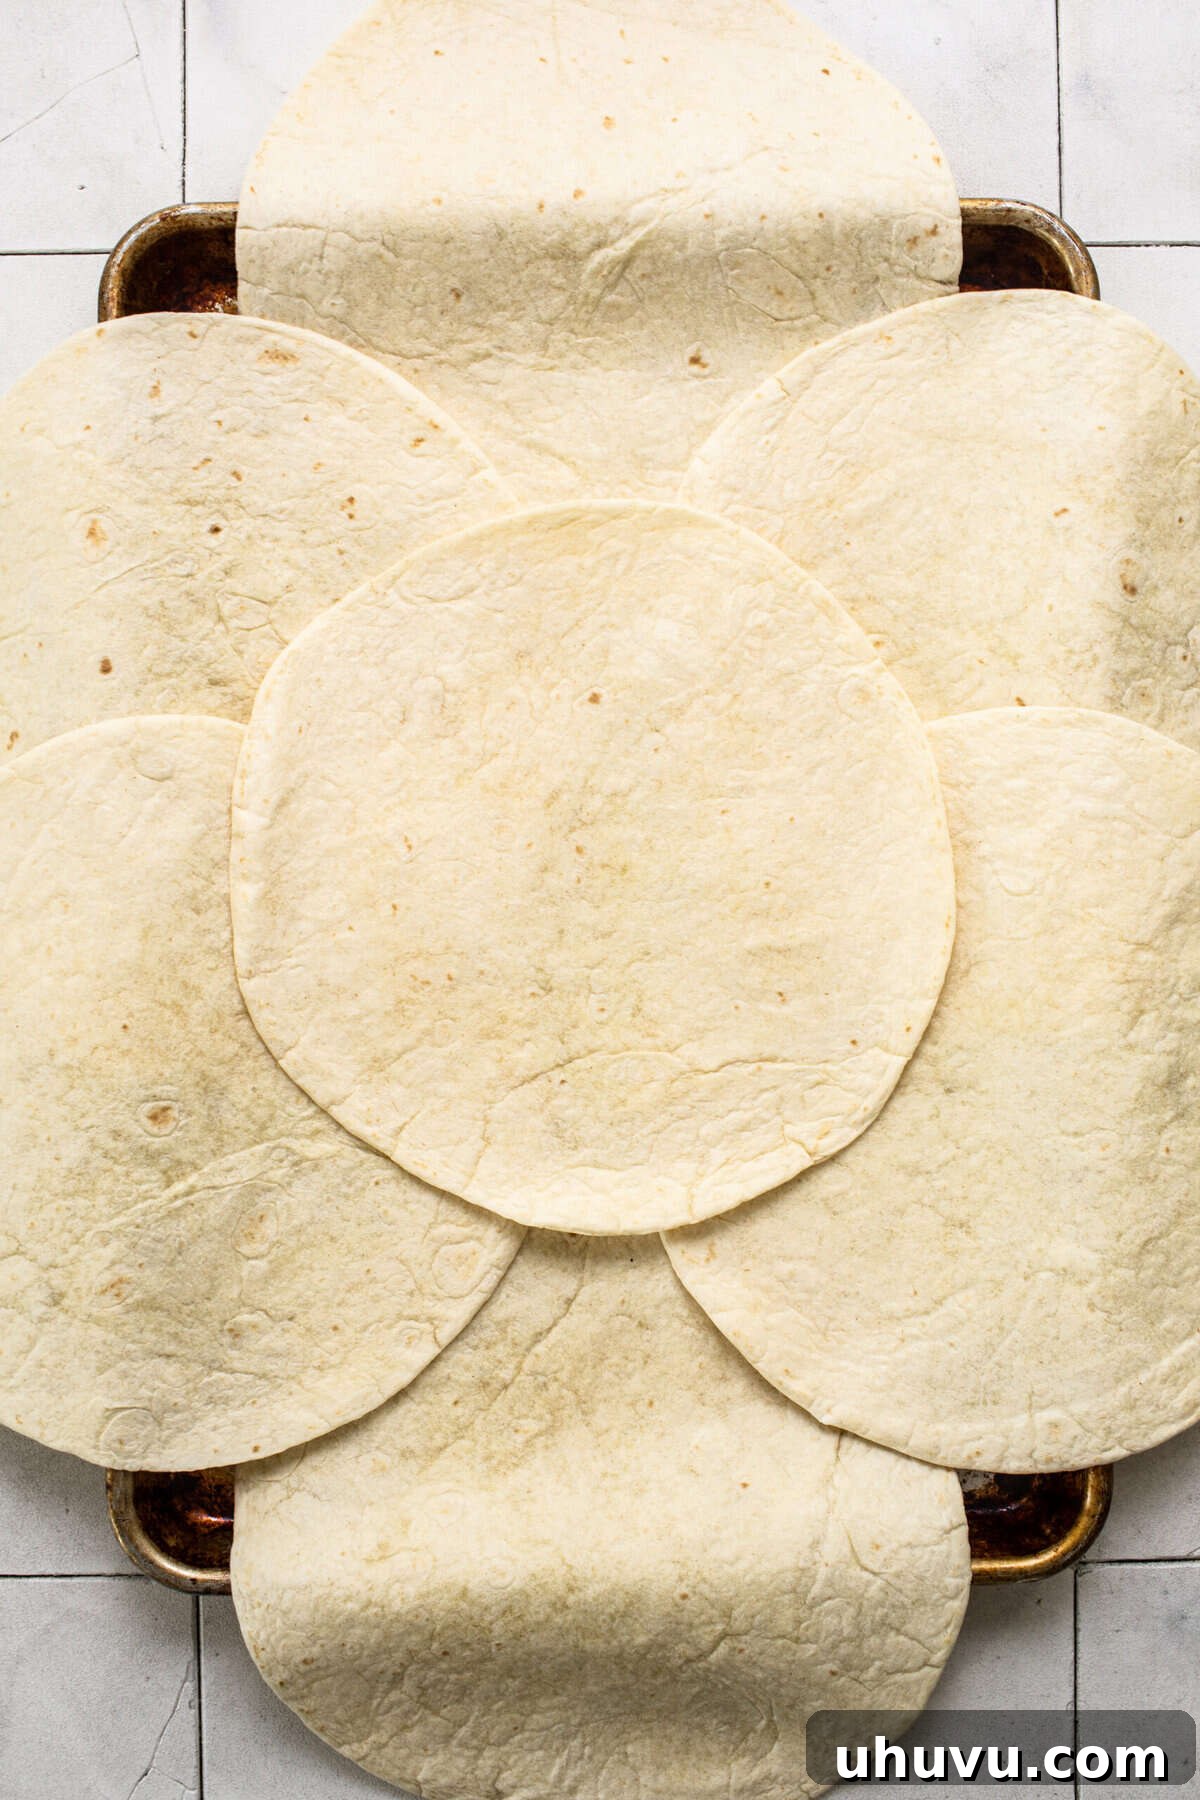
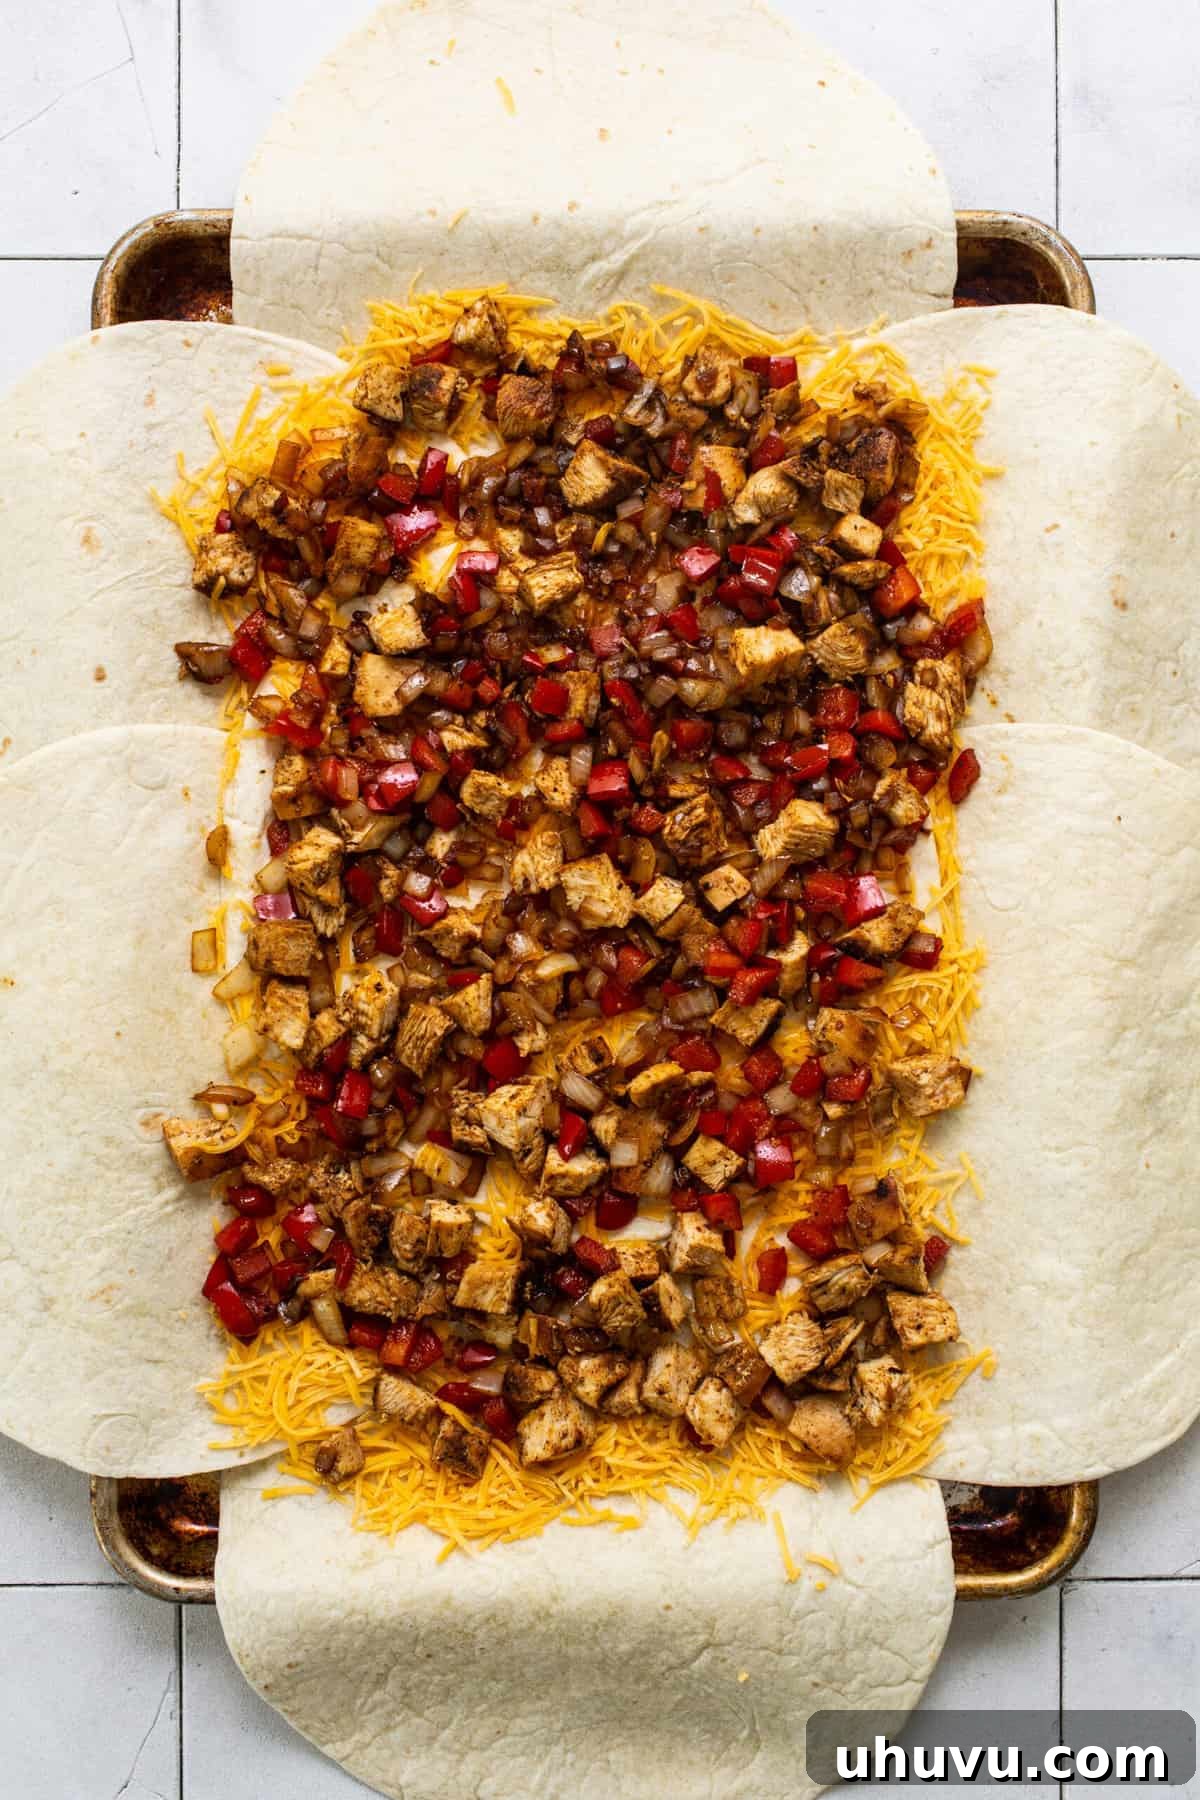
- Assemble the Tortilla Base: This is where the magic of the sheet pan truly shines! Arrange 6 large flour tortillas (burrito size) around the edges of your prepared sheet pan. Position them so they hang halfway over the edge of the pan, creating an overlap. There will be a gap in the center; place one additional flour tortilla snugly into this central gap. This clever arrangement forms a continuous, adaptable base for your giant quesadilla.
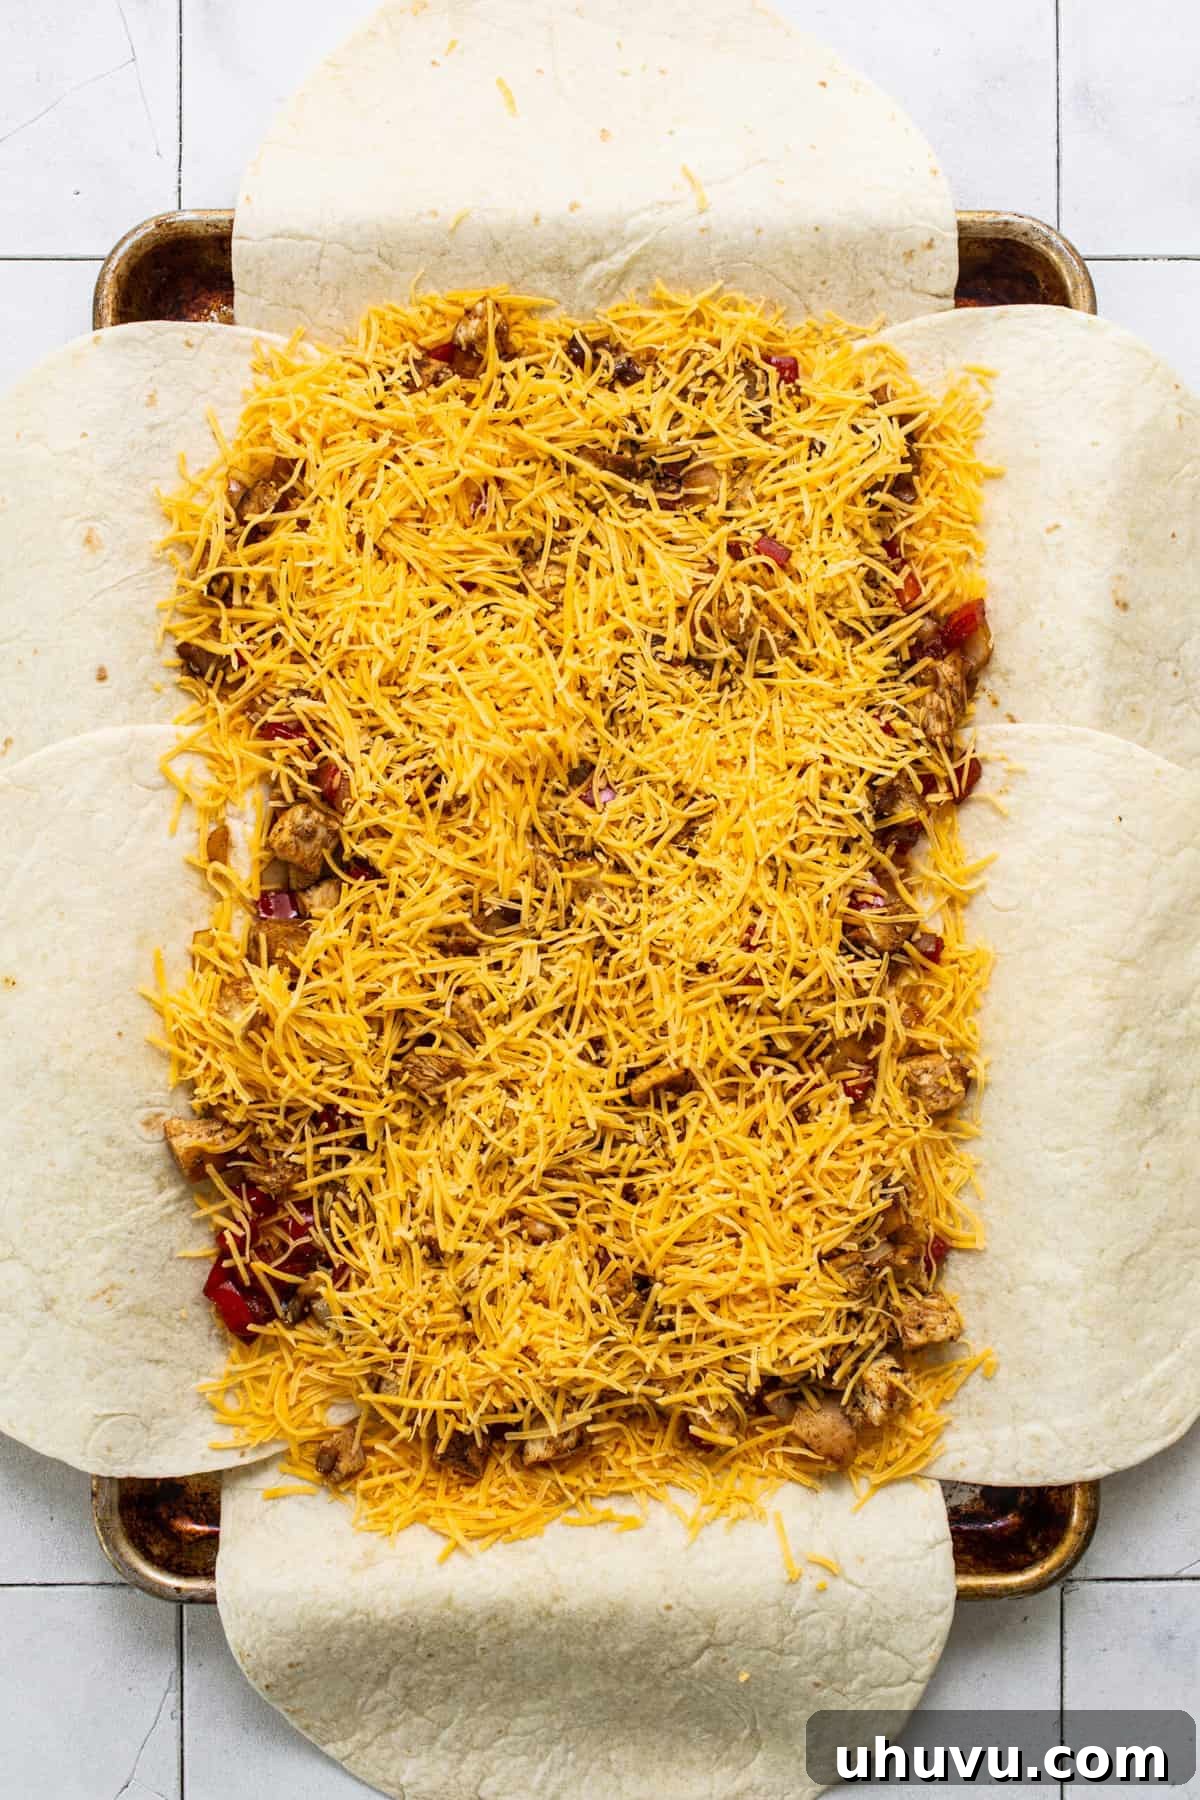
- Layer the Fillings: Evenly spread 1 cup of your shredded cheddar cheese over the tortilla base. This initial layer acts as a delicious barrier, preventing the tortillas from getting soggy and contributing to that classic gooey texture. Next, spoon and spread the chicken and veggie mixture in an even layer over the first layer of cheese. Finish with a generous second layer of the remaining 2 cups of shredded cheese. This ensures maximum cheesiness and helps bind the filling together.
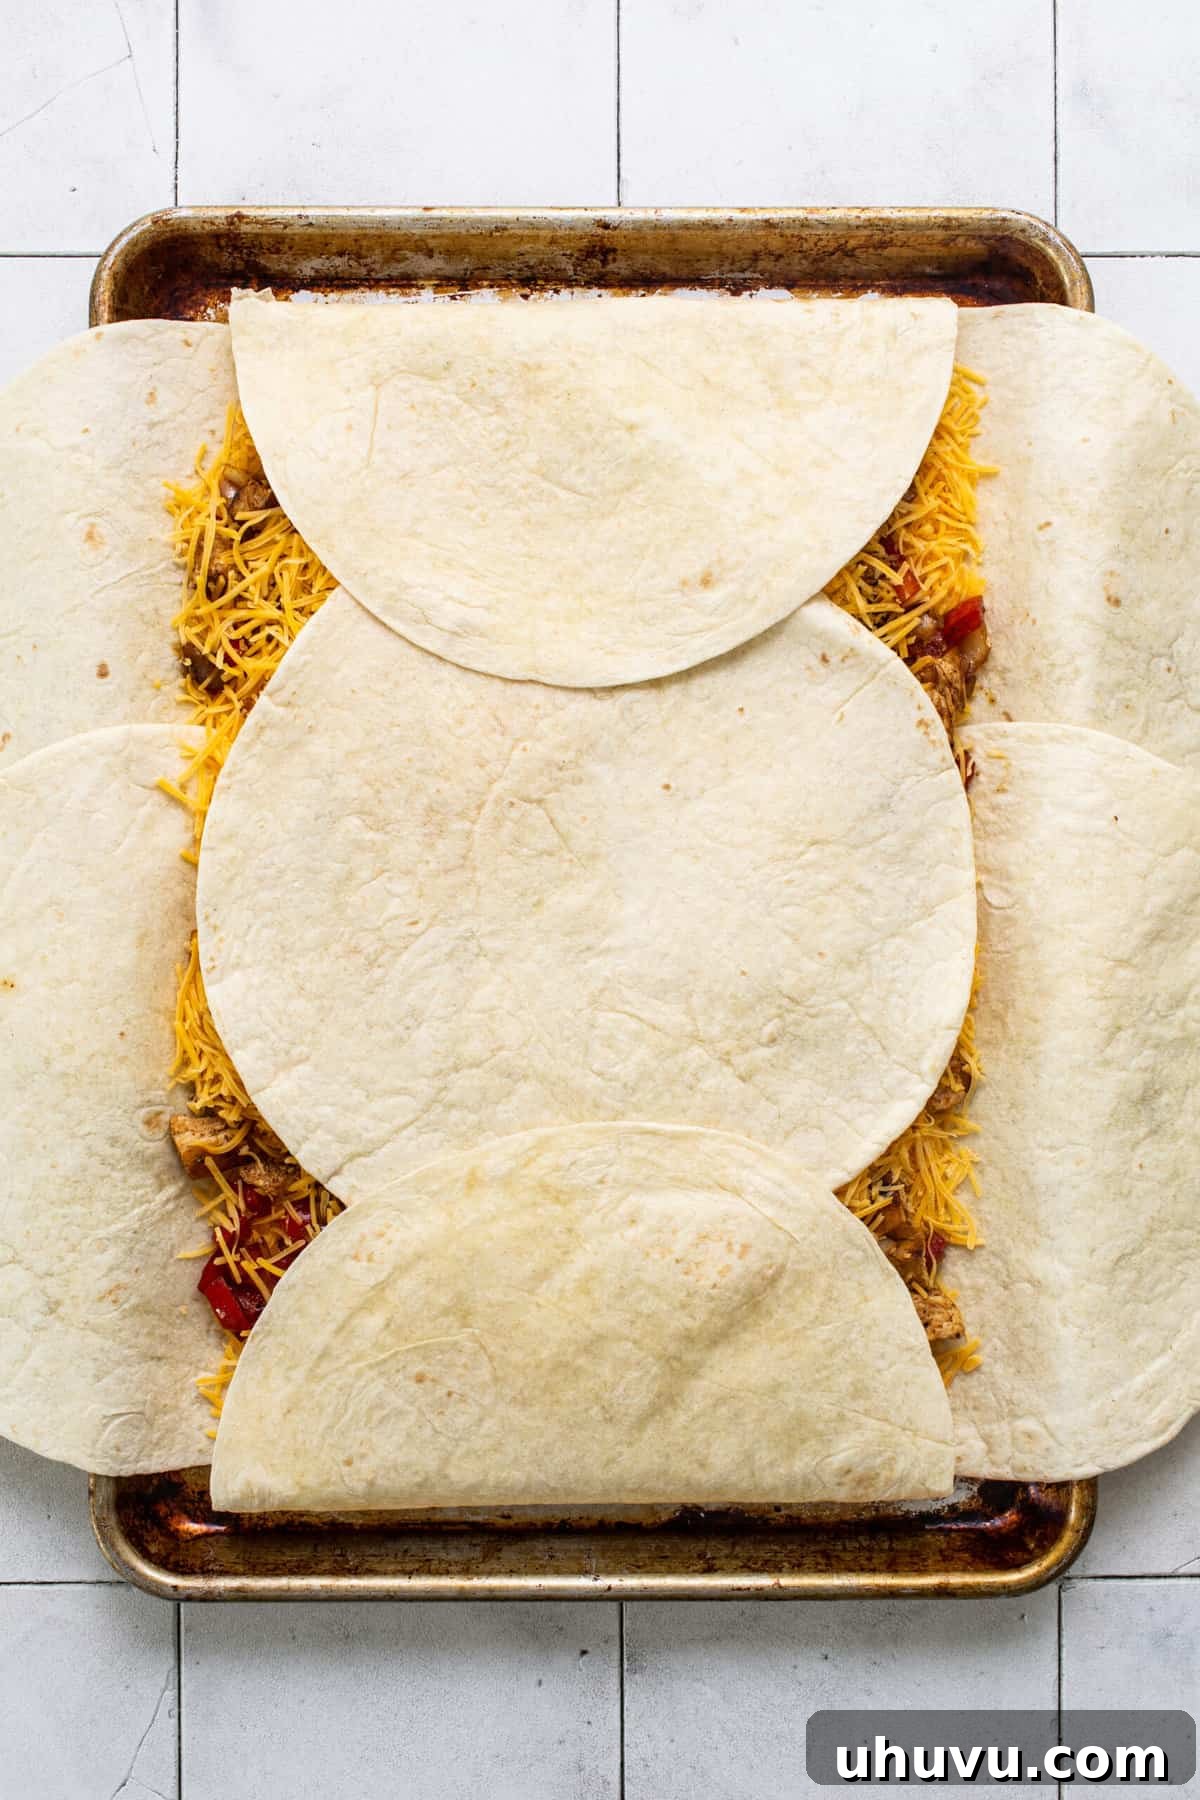
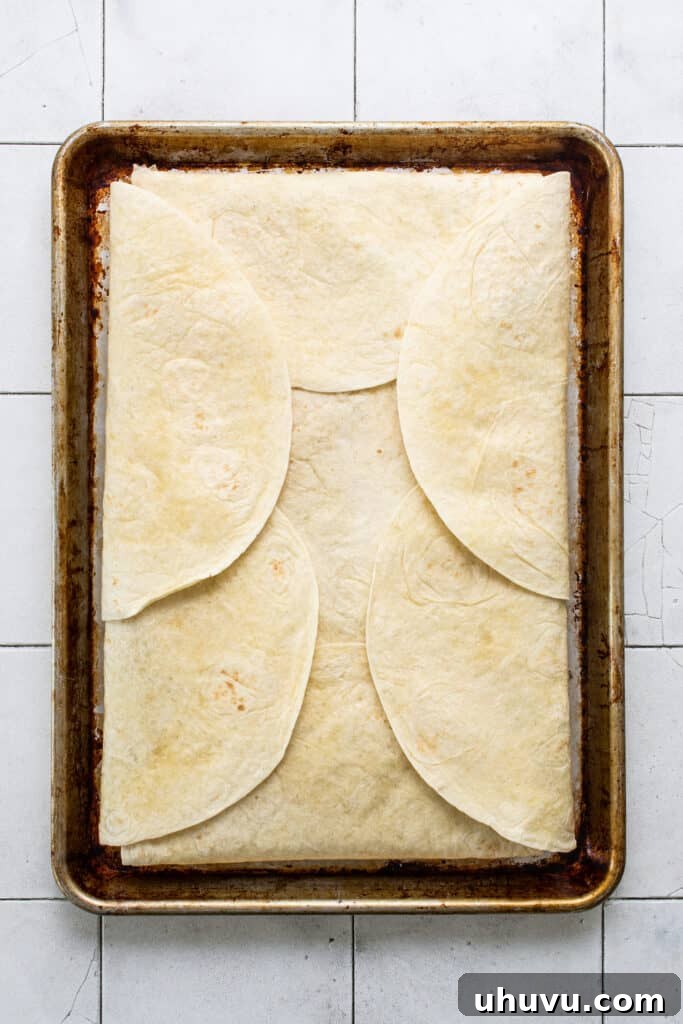
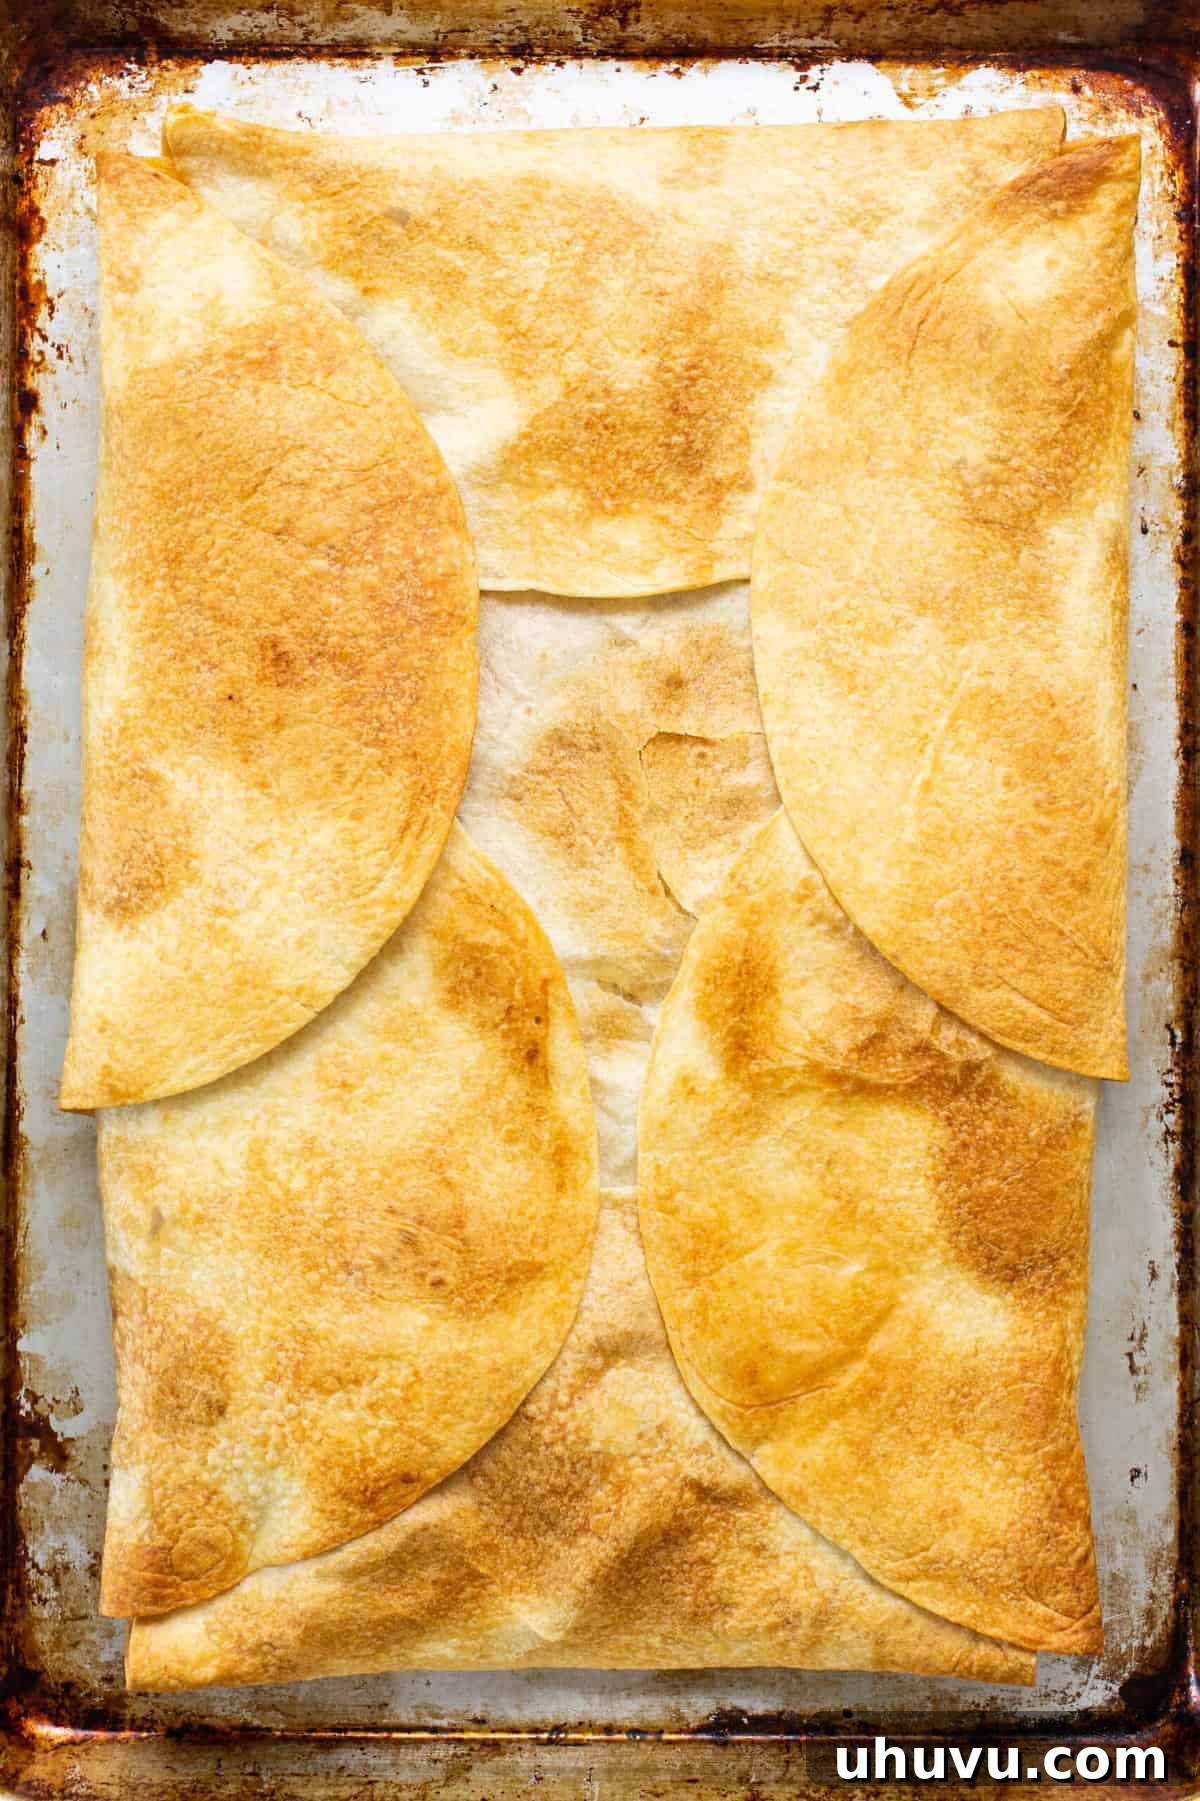
- Fold and Butter: Place the eighth and final tortilla directly in the center of the filling mixture. Then, carefully begin folding the tortillas that are hanging over the edge of the pan towards the middle, overlapping them to completely enclose the delicious filling. Once folded, generously brush the melted butter all over the top surface of the tortillas. This step is essential for developing that coveted golden, crispy crust and adds an extra layer of rich flavor.
- Bake to Perfection: Place a second, empty sheet pan directly on top of the folded quesadilla. Gently press down a bit to help compact the tortillas and fillings. This “pressing” technique is vital for achieving an even, crispy texture on both sides. Transfer the stacked baking sheets to the preheated oven and bake for 20 minutes. After 20 minutes, carefully remove the top sheet pan. Continue baking for an additional 5 to 10 minutes, or until the top of the quesadilla is beautifully golden brown and irresistibly crispy.
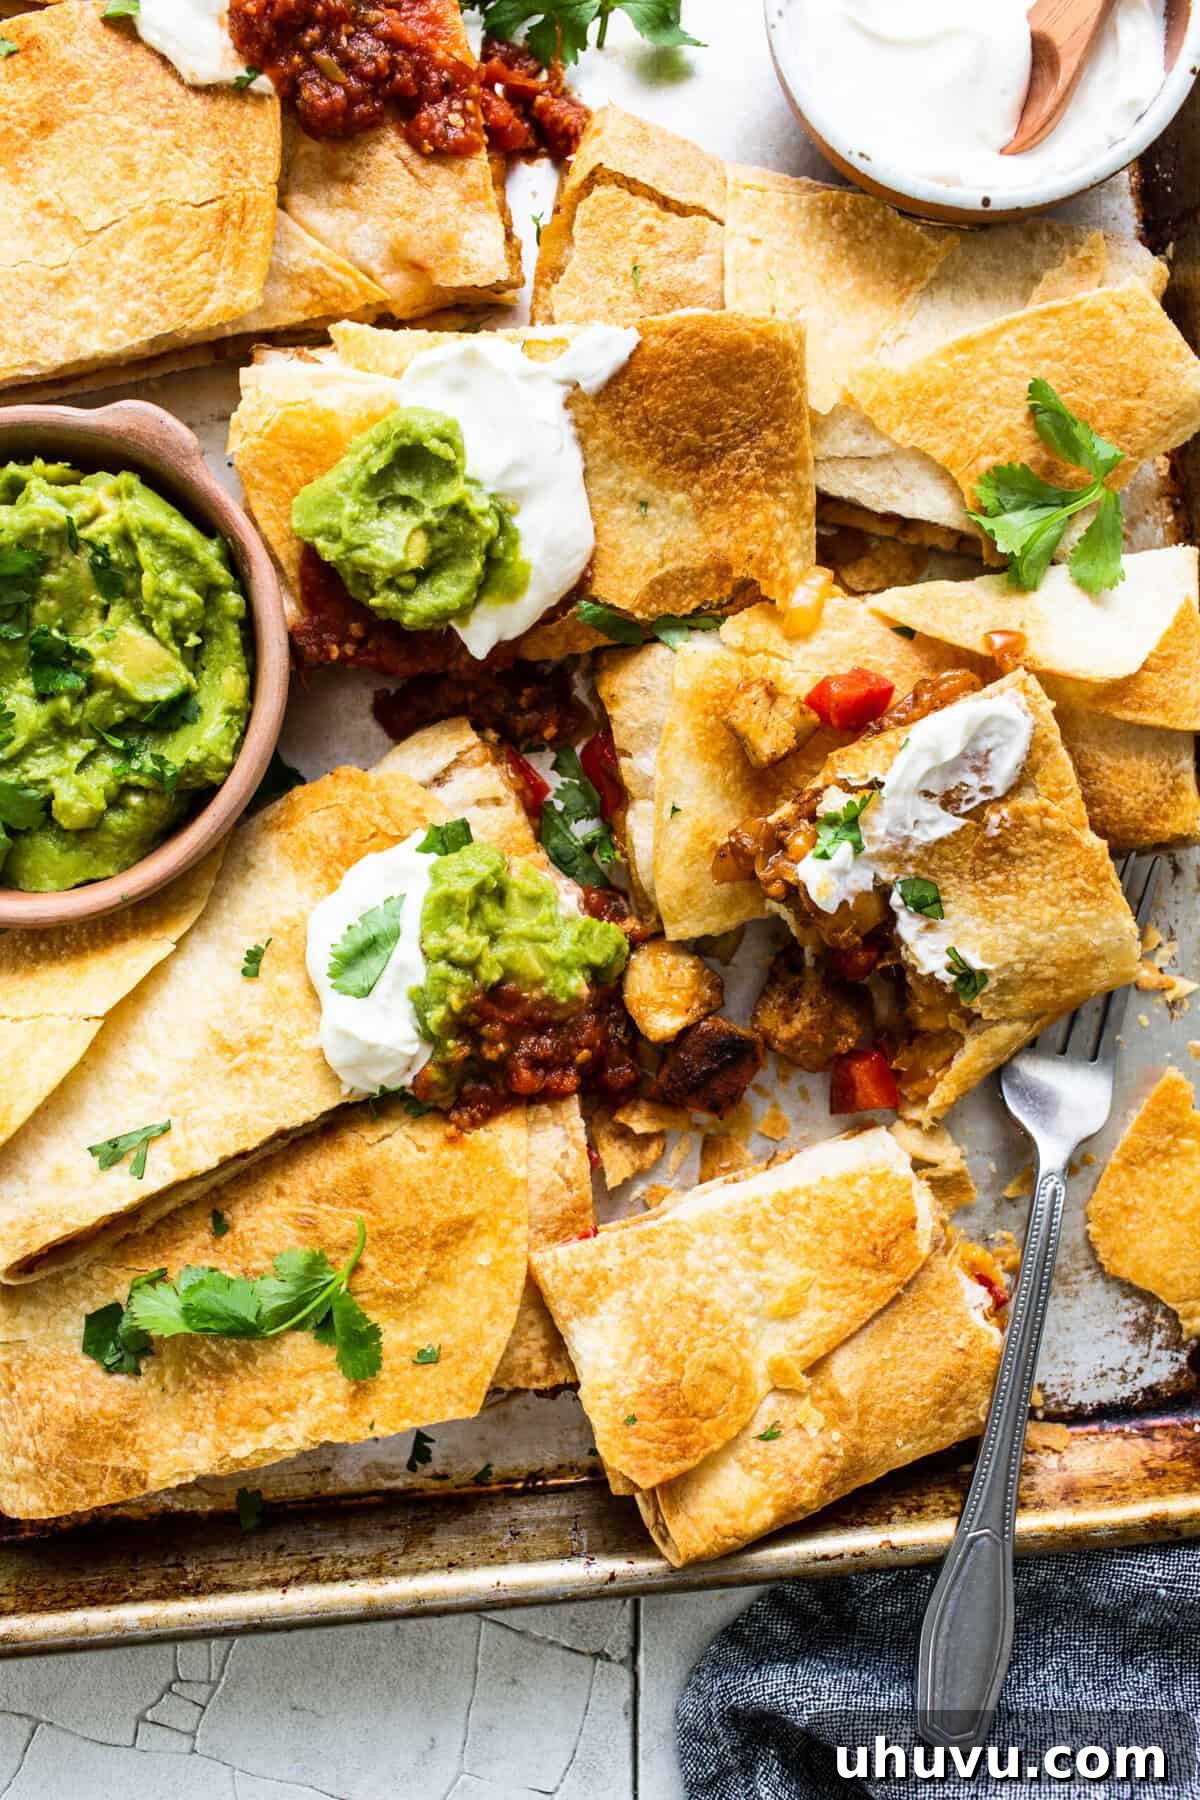
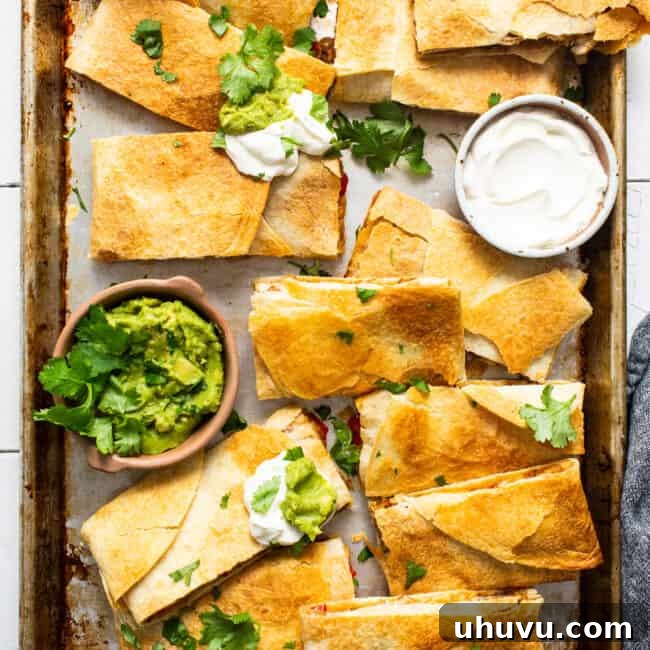
- Cool, Slice, and Serve: Once baked, remove the quesadilla from the oven. Let it cool slightly for about 5 to 10 minutes before slicing. This essential resting period allows the cheese to firm up and the fillings to meld, making it much easier to cut into clean, individual servings (typically 12 portions). Serve your magnificent **sheet pan quesadillas** warm with your favorite toppings like sour cream, fresh homemade guacamole, vibrant salsa, or zesty pico de gallo for an unforgettable meal!
Customization: Endless Variations for Your Sheet Pan Quesadillas
One of the best aspects of this **sheet pan quesadilla recipe** is its incredible versatility. Feel free to get creative and adapt the fillings to your taste or what you have available. Here are some inspiring variations to spark your culinary imagination:
- Protein Swaps: Not a chicken fan, or simply looking for something different? This recipe works beautifully with other proteins. Try ground beef or turkey seasoned with taco spices for a hearty filling, or use leftover shredded pork carnitas for an authentic Mexican twist. Shredded steak, seasoned and cooked, can also be a fantastic option. For a lighter touch, sautéed shrimp or even crumbled, seasoned firm tofu can be delicious alternatives.
- Vegetable Boost: Enhance the nutritional value and flavor by adding more vegetables to the filling. Sautéed mushrooms, finely diced poblano peppers for a mild smoky heat, or jalapeño peppers for a spicier kick are excellent additions. Corn (canned, frozen, or fresh) and black beans (rinsed and drained) are classic quesadilla staples that blend seamlessly with the other ingredients, adding texture and substance. Other ideas include finely chopped spinach, bell peppers of different colors, or even roasted sweet potato cubes.
- Make it Vegetarian: Easily transform this into a delicious vegetarian meal. Simply omit the chicken and instead use two cans of black beans (rinsed and drained) and one can of corn (drained). You can also add sautéed zucchini, fresh spinach, or roasted sweet potatoes for more substance and flavor, ensuring a fulfilling vegetarian **one-pan meal**.
- Spice it Up: If you love heat, mix in some finely chopped serrano peppers, a dash of cayenne pepper, or a pinch of chipotle powder to the chicken seasoning for an extra fiery kick. Serving with a side of your favorite hot sauce allows for individual customization of spice levels.
- Cheese Combinations: While cheddar is wonderfully classic, don’t be afraid to mix and match cheeses! A blend of Monterey Jack for creaminess, Oaxaca cheese for authentic Mexican flavor, and a sharp cheddar for a pungent bite can elevate the overall taste and melt. Pepper jack is another great choice if you prefer a little spice within the cheese itself.
What to Serve with Your Golden Sheet Pan Quesadillas
No **quesadilla** is truly complete without its perfect accompaniments! These **crispy baked quesadillas** pair wonderfully with a variety of fresh and zesty toppings that cut through the richness and add a burst of flavor, transforming a simple meal into a festive feast:
- Classic Creams: A generous dollop of cool, tangy sour cream or authentic Mexican crema provides a creamy contrast that helps balance the savory fillings.
- Fresh Guacamole: Indulge in creamy, rich, homemade guacamole, bursting with ripe avocado, fresh lime juice, cilantro, and a hint of onion. It’s an absolute must-have for any Mexican-inspired dish and truly elevates the **chicken quesadillas**.
- Salsas Galore: A variety of salsas can add endless flavor dimensions:
- Pico de Gallo: The fresh, vibrant flavors of diced tomatoes, onions, cilantro, and a touch of jalapeño add a refreshing crunch and bright acidity.
- Salsa Verde: Tangy and slightly spicy, a good tomatillo salsa verde brightens up the entire dish with its unique herbaceous notes.
- Roasted Tomato Salsa: For a deeper, smoky, and richer flavor profile, a homemade roasted tomato salsa is exceptional and complements the chicken beautifully.
- Corn Salsa: A sweet and savory corn salsa, perhaps with black beans and red onion, adds another layer of texture and a burst of seasonal flavor.
- Other Toppings: Consider fresh cilantro for garnish, thinly sliced radishes for a peppery crunch, or a squeeze of fresh lime juice over the top to brighten every single bite.
Storing and Reheating Leftover Sheet Pan Quesadillas
These **sheet pan quesadillas** are fantastic for leftovers, making them ideal for **meal prep** for busy individuals or families. To ensure they remain delicious and maintain their quality, follow these storage and reheating guidelines:
- Storage: Once the quesadilla has completely cooled to room temperature, slice it into individual portions. Store these portions in an airtight container in the refrigerator for up to 3 days. For longer storage, you can individually wrap slices in plastic wrap and then place them in a freezer-safe bag or container for up to 1 month. Thaw in the refrigerator overnight before reheating.
- Reheating for Crispness: The key to reheating quesadillas is to restore their crispy tortilla texture. Avoid the microwave if crispness is a priority.
- Oven: For the absolute best results, reheat individual slices in a preheated oven at 350°F (175°C) for 10-15 minutes, or until warmed through and the tortillas are crispy again. Placing them directly on a baking sheet (or a wire rack on a baking sheet) will help achieve this even crispness.
- Air Fryer: An air fryer is another excellent option for quick and efficient crisping. Reheat at 350°F (175°C) for 3-5 minutes, checking frequently to prevent burning. The circulating hot air works wonders on the tortillas.
- Skillet: You can also reheat them in a dry, hot skillet over medium heat for a few minutes per side until warmed through and crispy. This method is great for smaller batches.
- Microwave (least recommended): While convenient for speed, the microwave will make the tortillas soft and less appealing. Only use this method if time is of the essence and crispness isn’t a priority.
More Delightful Quesadilla and Sheet Pan Recipes
If you’ve fallen in love with the ease and flavor of these **sheet pan quesadillas**, you’ll be thrilled to explore more culinary adventures. Here are some additional recipes that celebrate the versatility of quesadillas and the convenience of sheet pan cooking, perfect for expanding your repertoire of **easy family meals**:
Quesadilla Favorites:
- Hearty Steak Quesadillas
- Classic Cheese Quesadillas
- Zesty Buffalo Chicken Quesadillas
- Crispy Fried Quesadillas
- Easy Breakfast Quesadillas
- Quesadillas de Nopales en Chile Rojo (Cactus Quesadillas in Red Chile)
- Flavorful Chicken Fajita Quesadilla
More One-Pan Wonders:
- Effortless Sheet Pan Chicken Fajitas
- Cheesy Sheet Pan Nachos
- Simple Sheet Pan Steak Fajitas
- Sheet Pan Eggs and Breakfast Hash
Sheet Pan Quesadilla
By: Isabel Orozco-Moore
An easy sheet pan quesadilla recipe made from juicy chicken, cheese, and veggies, all baked together in one pan for a delicious meal.
Prep Time: 13 minutes
Cook Time: 37 minutes
Total Time: 50 minutes
Servings: 12 servings
Ingredients
- Cooking spray
- 2 tablespoons olive oil, divided
- 1 teaspoon chili powder
- 1 teaspoon ancho chili powder
- 1 teaspoon kosher salt
- ½ teaspoon onion powder
- ½ teaspoon garlic powder
- ¼ teaspoon ground cumin
- ¼ teaspoon paprika
- ¼ teaspoon freshly ground black pepper
- 1 pound boneless skinless chicken breast, sliced in half lengthwise
- 1 small yellow onion, diced
- 1 medium red bell pepper, diced
- 8 large flour tortillas (burrito size)
- 3 cups shredded cheddar cheese
- 2 tablespoons melted butter
- For serving: Sour cream, guacamole, salsa, pico de gallo
Instructions
- Preheat the oven to 425°F (220°C). Spray a large baking sheet with cooking spray and set aside.
- In a small bowl, combine the chili powder, ancho chili powder, salt, onion powder, garlic powder, ground cumin, paprika, and black pepper.
- Sprinkle the seasoning blend all over the chicken breast.
- Heat 1 tablespoon of olive oil in a large skillet over medium-high heat. Add the seasoned chicken breast to the skillet and cook for 5 to 6 minutes per side until the chicken is fully cooked through and the internal temperature reads 165°F (74°C) on a thermometer. Transfer the chicken to a cutting board to rest.
- While the chicken is resting, add the remaining 1 tablespoon of olive oil to the same skillet. Stir in the onion and bell pepper, and cook for 3 to 4 minutes until the vegetables begin to soften. Remove the skillet from the heat.
- Chop the cooked chicken breast into small bite-sized pieces, then stir them into the skillet with the peppers and onions.
- Assemble the quesadilla by placing 6 of the flour tortillas around the edges of the sheet pan, with the tortillas hanging halfway over the edge of the pan, leaving a gap in the center. Place 1 flour tortilla in the center gap.
- Evenly spread 1 cup of the shredded cheese over the tortillas, followed by a layer of the chicken and veggies, and another layer of the remaining 2 cups of shredded cheese.
- Place the last tortilla in the center of the mixture. Carefully begin folding the tortillas that are hanging over the edge of the pan, towards the middle. Generously brush the melted butter all over the top of the tortillas.
- Place a second sheet pan on top of the folded tortillas and press down a bit to hold the tortillas in place. Transfer the stacked baking sheets to the oven and bake for 20 minutes.
- Remove the top sheet pan and bake for an additional 5 to 10 minutes until the top is golden brown.
- Remove it from the oven and allow the quesadilla to cool slightly before cutting it into 12 servings. Serve with sour cream, salsa, pico de gallo, or guacamole if desired.
Notes
- Chicken: Boneless skinless chicken thighs also work in this recipe. To save some time, you could use a store-bought rotisserie chicken and shred it at home.
- Vegetarian option: Replace the chicken with 1 can of black beans and 1 can of yellow corn for a vegetarian version.
- Storing: Store this quesadilla in an airtight container in the fridge for up to 3 days. Reheat on the stove, in the oven, or air fryer to crisp up the tortillas.
Nutrition
Serving: 1 serving | Calories: 264kcal | Carbohydrates: 12g | Protein: 16g | Fat: 17g | Saturated Fat: 8g | Polyunsaturated Fat: 1g | Monounsaturated Fat: 5g | Trans Fat: 0.1g | Cholesterol: 57mg | Sodium: 591mg | Potassium: 224mg | Fiber: 1g | Sugar: 2g | Vitamin A: 763IU | Vitamin C: 14mg | Calcium: 235mg | Iron: 1mg
Nutrition information is automatically calculated, so should only be used as an approximation.
Photography by Ashley McLaughlin.